Table of Contents
Advertisement
Advertisement
Table of Contents

Related Manuals for M-Audio Axiom Line


Summary of Contents for M-Audio Axiom Line
- Page 1 Axiom User Guide English...
-
Page 2: Table Of Contents
Table of Contents English ................3 Introduction . - Page 3 Axiom Line User Guide English...
-
Page 4: English
Axiom Line User Guide Introduction Congratulations on the purchase of your M-Audio Axiom MIDI controller keyboard. Please register your product today to ensure full warranty coverage and receive free product updates. Register online at www.m-audio.com/register Your new keyboard provides extensive control of virtual instruments, DAWs, hardware synthesizers, samplers and any other MIDI- compatible device. -
Page 5: Section 1: Getting Started
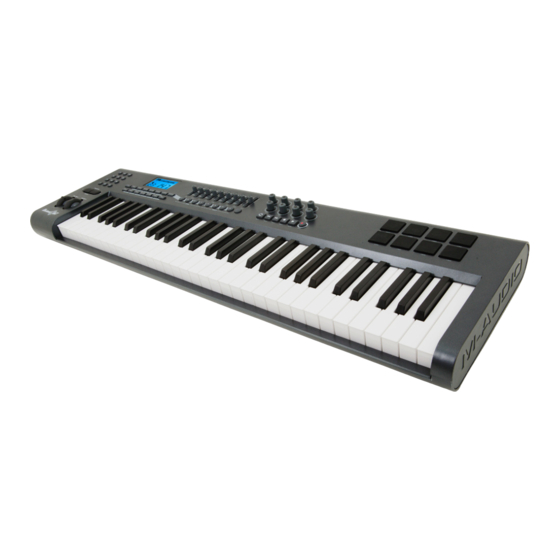
Axiom Line User Guide Section 1: Getting Started 1.1 Axiom Keyboards Overview 1.1.1 Top Panel Overview 1.1.2 Back Panel Overview 1.1.3 Control Definitions These controls are referred by name throughout this manual. LCD display Octave buttons DC power socket Sliders (Axiom 49/61 only) -
Page 6: Setup
(Windows 98, Me, NT or 2000 not supported) M-Audio suggests you also check the minimum system requirements for your software, as they may be greater than the above. USB hubs are not supported. M-Audio suggests that you connect directly to one of your computer’s built in USB ports. -
Page 7: Power Supply
Axiom Line User Guide 1.5 Power Supply If you are using your Axiom with a computer via its USB port, there is no need for an external power supply. Your Axiom will draw its power from the computer. However, if you are intending to use your Axiom without connecting to a computer’s USB port, then you will need to use an external power supply. - Page 8 Axiom Line User Guide Advanced A number of advanced functions on the Axiom 25 are accessed from the keyboard itself. These functions are listed above the keys on the front panel of the unit. To use any one of these functions, first press the Advanced button. The button will light indicating that the keyboard is now in Advanced Function mode.
-
Page 9: The Keyboard
Axiom Line User Guide 2.1 The Keyboard When you play the keyboard, MIDI note messages are sent. These messages are read by your computer software or external MIDI gear and used to generate sound accordingly. 2.1.1 Velocity Curve Every time you press a key, a MIDI note message is sent with a velocity value between 0 and 127; this value specifies how hard you pressed the key. - Page 10 Axiom Line User Guide To change the velocity curve: 49- and 61-note versions: Locate the label Vel Curve. Press the two buttons above this label. < The LCD will show the currently selected velocity curve, preceded by a ‘C’ if a curve is selected, or ‘F’ if a fixed <...
-
Page 11: Midi Channel
Axiom Line User Guide 2.2 MIDI Channel MIDI messages can be sent on any of 16 channels. If you are connected to a computer, the MIDI software will be receiving on all channels in most cases. However, when you are connected to external MIDI synthesizers, sound modules and some virtual instruments, you need to match the transmit channel of your keyboard with the receiving channel of the MIDI device for the connection to work properly. -
Page 12: Midi Controller Messages
Axiom Line User Guide Press the Advanced button. < Press the Program button. < Enter the program change in the range of 0-127 on the numeric data entry keys. < Press the Enter key to confirm the entered value <... - Page 13 Axiom Line User Guide 2.4.1 Extra Messages – 128 To 131 You may have noticed that although we have stated there are 128 MIDI controller messages (0 – 127), Appendix C shows 132 assignable controller messages. This is because messages 128 – 131 are a different type of MIDI message, defined in the General MIDI Specification as RPN messages.
- Page 14 -/+ buttons as you power up the keyboard. Important Note: When you perform this reset, all of the factory presets are lost. To restore the factory presets, please use the Enigma software, available as a free download at www.m-audio.com. English...
-
Page 15: Section 3: Advanced Features
Axiom Line User Guide Section 3: Advanced Features In section 2 we saw how to use the keyboard, send program and bank changes, and assign MIDI controllers to the various controls on your Axiom. These basic skills allow you to perform with many software applications, sound modules and synthesizers. However, the Axiom has some more advanced features that allow you to take your performances even further. -
Page 16: Recollection And Storage Of Your Control Setups
Axiom Line User Guide 3.1.2 Drawbar Mode Drawbar mode is a quick method of reversing the direction of the nine sliders on your Axiom 49 or 61. If you are controlling an instrument that makes use of drawbars rather than faders—the MB-3 electric organ on Key Rig for example—then you should use drawbar mode. - Page 17 Axiom Line User Guide To recall any memory you have stored: 49- and 61-note versions: Press the Recall button. < Enter the number of the memory location (1 to 20) using the numeric keypad. < 25-note version: Press the Advanced button.
- Page 18 Memory Dump feature which sends a MIDI SysEx dump to the connected device. You can record the SysEx data to a MIDI track on a sequencer, or we recommend using M-Audio’s Enigma software to store and manage you Axiom controller presets.
-
Page 19: How To Avoid Jumping Parameters
Axiom Line User Guide 3.3 How To Avoid Jumping Parameters A common problem with MIDI controllers occurs when you move a physical controller and the receiving parameter on your external MIDI gear or software jumps from its present setting to the position of the knob or fader that you are using. The result can be a volume spike, a vibrato effect suddenly engaging or a pan position jumping from one side to another. - Page 20 Axiom Line User Guide In order to program one of these methods to the rotary encoders on your Axiom, you should assign the MIDI controllers given below: MIDI CC Endless Data Method Increment Decrement Program Change Increment/Decrement — — 2’s Complement from 64 / Relative (Binary Offset)
-
Page 21: Pressure Pads
Axiom Line User Guide 3.4.1 Acceleration Curves There are three acceleration curves (C1-3) which define the relationship between how fast you turn the endless encoder and the value increment/decrement that is sent out. It is also possible to turn the acceleration curve OFF so that regardless of how quickly or slowly you turn the dial, the value will only increment/decrement by 1 per step. - Page 22 Axiom Line User Guide 25-note version: Select the pad as described in section 2. < Press the Advanced button. < Press the Ctrl Assign key. < The LCD display will flash the currently assigned controller for the pad. < Enter 147 for Note on/off (press/release), or 148 for note on/off toggle <...
- Page 23 Axiom Line User Guide 3.5.3 Sample/Loop Triggers with MIDI Controller Messages In some cases,you may wish to send standard MIDI controller messages to trigger samples or loops. To make this work, you need to first assign a MIDI controller to the pad and then set the pad to send just ON and OFF values. This is done as follows: 49- and 61-note versions: Select the pad as described in section 2.
- Page 24 Axiom Line User Guide 3.5.4 Pressure Control Using the pressure control, the pads give you a different type of performance option on your Axiom. You can control parameters on your software in a way that would not be possible on a standard dial or slider. The pressure pads can be used to make some very interesting effects.
-
Page 25: Controlling Several Devices At The Same Time
Axiom Line User Guide *It is also possible to send fixed velocities each time you press a pad This is useful when composing drum parts, or simple synthesizer tracks. The fixed velocities are selected by assigning Pad Curve 10 to 12 as follows:... - Page 26 Axiom Line User Guide 3.6.2 Activating/Deactivating Zones There are four zones assignable on the 49- and 61-note versions and three zones assignable on the 25-note version. To activate/ deactivate zones, first press the Zone/Group button which will light. To enable/disable any zone: Press the Zone/Group button.
- Page 27 Axiom Line User Guide 3.6.4 Zone Range The Zone Range defines the upper and lower limits of the keys contained in a zone. To set the range of a zone: Press the Zone Range button. The LED in the Zone/Group button lights to indicate that Zone/Group mode is automatically <...
- Page 28 Axiom Line User Guide 3.6.7 Individual Channel Assignments of Controls Every physical controller on your Axiom can be assigned to its own individual channel, allowing you to control several instruments at the same time. It is also possible to tie a physical controller to a zone or to the Global Channel.
-
Page 29: Group A Controls
Axiom Line User Guide 3.7 Group A Controls Note: For information on Group A memory recall, please review section 3.2.1. The term “Group A controls” refers to the pitch bend wheel, modulation wheel, aftertouch, sustain pedal and expression pedal. Each of these controls differs from other controls on your Axiom because these can be programmed to be active or inactive in each zone independently. -
Page 30: Example Of Control Functionality
Axiom Line User Guide 3.8 Example of Control Functionality 3.8.1 Setting Toggle Values for the Buttons The assignable buttons and the pedals can each be assigned to toggle between two MIDI controller message values. You may for example want to send out value 15 when you first press the button followed by value 74 when you press the button for a second time. - Page 31 Axiom Line User Guide 3.8.2 Assigning MMC Messages to a Button MIDI Machine Control messages are used by some devices and software to control transport functions such as Stop, Play and Record. The Transport controls on your Axiom keyboard can be setup to send MMC messages, however it is important to note, that not all MIDI devices or software applications respond to MMC messages.
- Page 32 Axiom Line User Guide 3.8.3 Assigning RPN/NRPN Messages to a Fader or Encoder Many of today’s synthesizers and music applications can receive and process RPN and NRPN MIDI messages to allow control of an array of useful settings and features. However, RPN/NRPN messages are different from most other MIDI data as they consist of two or more MIDI messages that have to be sent in sequence.
-
Page 33: Section 4: Usage Examples
Axiom Line User Guide Section 4: Usage Examples 4.1 MIDI Out from USB Function MIDI Out from USB can be used to switch the source of the MIDI data seen at the MIDI Out port of your Axiom. On initial power up, MIDI Out from USB mode is off. This means that as you play your Axiom, MIDI data will be sent to the MIDI Out port. -
Page 34: Recording Your Performance On A Sequencer
Axiom Line User Guide To control MIDI out from USB mode: 49- and 61-note versions: Press Data 2 and Data 3 together to change the MIDI Out setting to MIDI Out from USB. < You will see a MIDI plug symbol appear on the LCD display. -
Page 35: Controlling A Sound Module From The Computer
Axiom Line User Guide 4.3 Controlling a Sound Module from the Computer By turning on MIDI Out from USB mode (section 4.1), the data coming into the Axiom from the computer will go directly out of the MIDI Out port and trigger the sounds in the external sound module. This means that your Axiom is effectively acting as a USB to MIDI interface. -
Page 36: Rpn/Nrpns Explained
If you are still having trouble with any of the features on the Axiom, please consult the following Troubleshooting Guide, which answers some frequently asked questions. If you are still not able to find the answer you are looking for, please feel free to contact M-Audio technical support for further assistance. -
Page 37: Section 6: Troubleshooting
ASIO driver if available. For more information on latency reduction please consult the knowledgebase at http://www.m-audio.com. < If you feel that you may need to upgrade your soundcard, please visit http://www.m-audio.com. < English... -
Page 38: Section 7: Technical Info
Section 8: Warranty Terms and Registration Warranty Terms M-Audio warrants products to be free from defects in materials and workmanship, under normal use and provided that the product is owned by the original, registered user. Visit www.m-audio.com/warranty for terms and limitations applying to your specific product. -
Page 39: Section 9: Appendices
Axiom Line User Guide Section 9: Appendices Appendix A - MIDI IMPLEMENTATION CHART Function Transmitted Recognized Remarks Basic Default 1-16 Channel Changed 1-16 Mode Default Mode 3 Messages Altered ***** Note 0-127 Number True Voice ***** Velocity Note ON Note OFF After Key’s... -
Page 40: Appendix B - Useful Midi Data Tables
Axiom Line User Guide Appendix B – Useful MIDI Data Tables B1 - General MIDI Instruments – Program Change Numbers Piano Bass Reed Synth Effects 0 Acoustic Grand Piano 32 Acoustic Bass 64 Soprano Sax 96 SFX Rain 1 Bright Acoustic Piano... - Page 41 Axiom Line User Guide B3 - Roland GS And Yamaha XG NRPN Messages NRPN NRPN Data Data CC99 CC98 CC06 CC38 08 00-7F (-64 - 0 - +63) Vibrato Rate (relative change) 09 00-7F (-64 - 0 - +63) Vibrato Depth (relative change)
-
Page 42: Appendix C - General Midi Controller Numbers (Midi Cc's)
Axiom Line User Guide Appendix C - General MIDI Controller Numbers (MIDI CC's) Bank Select Gen Purpose 2 LSB Non-Reg Param LSB Modulation Gen Purpose 3 LSB Non-Reg Param MSB Breath Control Gen Purpose 4 LSB Reg Param LSB Controller 3... -
Page 43: Appendix D - Assignable Controller Numbers To Linear Controllers
Axiom Line User Guide Appendix D – Assignable Controller Numbers to Linear Controllers This table applies to the following controls on your Axiom: Sliders < Aftertouch strip < Pitch bend wheel < Modulation wheel < Expression pedal < MIDI CC... -
Page 44: Appendix E - Assignable Controller Numbers To Non-Linear Controllers
Axiom Line User Guide Appendix E – Assignable Controller Numbers to Non-Linear Controllers This table applies to the following controls on your Axiom: Assignable buttons (Axiom 49/61 only) < Transport controls < Sustain pedal < MIDI CC Description Data 1... -
Page 45: Appendix F - Assignable Controller Numbers To Rotary Encoders
Axiom Line User Guide Appendix F – Assignable Controller Numbers to Rotary Encoders This table only applies to the Rotary encoders on your Axiom MIDI CC Description Data 1 Data 2 Data 3 0-119 Standard MIDI CC's 120-127 Channel Mode Messages... -
Page 46: Appendix G - Assignable Controller Numbers To Pressure Pads
Axiom Line User Guide Appendix G – Assignable Controller Numbers to Pressure Pads This table only applies to the pressure Pads on your Axiom. MIDI CC Description Data 1 Data 2 Data 3 0-119 Standard MIDI CC's 120-127 Channel Mode Messages... -
Page 47: Appendix H - Hexadecimal Conversion Chart
Axiom Line User Guide Appendix H - Hexadecimal Conversion Chart Hexadecimal value Decimal value Hexadecimal value Decimal value Hexadecimal value Decimal value English... -
Page 48: Appendix I - Factory Presets
Axiom Line User Guide Appendix I – Factory Presets Your M-Audio Axiom keyboard comes with 20 preset setups which allow you to use the keyboard controller with supported software right out of the box. See section 3.2 for instructions on how to load a factory preset. - Page 49 Axiom Line User Guide With some of these applications it is necessary to set up your Axiom keyboard within the software. How to use the Axiom with Ableton Live Ableton Live does not have any default MIDI controller assignments but it is possible to make your own very quickly and easily using the MIDI Learn function.
- Page 50 © 2006 Avid Technology, Inc. All rights reserved. Product features, specifications, system requirements and availability are subject to change without notice. Avid, M-Audio and Axiom are either trademarks or registered trademarks of Avid Technology, Inc. All other trademarks contained herein are the property of their respective owners.
-
Page 51: Technical Support
M-Audio USA M-Audio Germany 5795 Martin Rd., Irwindale, CA 91706 Kuhallmand 34, D-74613 Ohringen, Germany Technical Support Technical Support web: www.m-audio.com/tech e-mail: support@m-audio.de tel (pro products): (626) 633-9055 +49 (0)7941 - 9870030 tel (consumer products): (626) 633-9066 fax: +49 (0)7941 98 70070...
Need help?
Do you have a question about the Axiom Line and is the answer not in the manual?
Questions and answers