Table of Contents
Advertisement
Quick Links
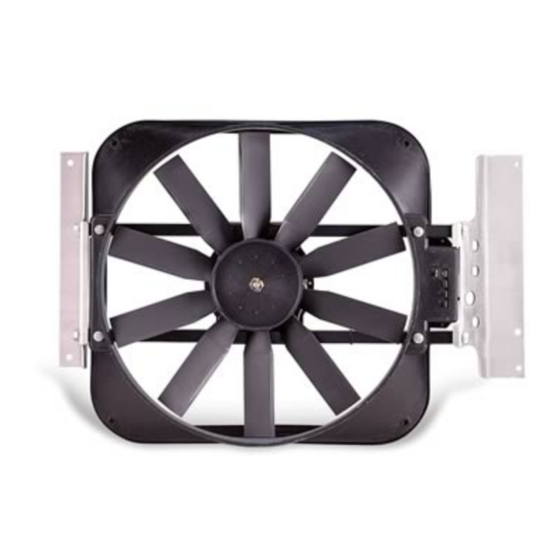
Part# 475 JEEP WRANGLER FAN II (Nylon Shroud)
INSTALLATION INSTRUCTIONS
1987-2003 4 & 6 cylinder Wranglers
NOTE: 1997 AND UP Wranglers were produced with one or more fluid tanks mounted directly to the original
fan shroud. The shroud will be discarded in this installation. 4-cylinder models will require a Reservoir Bracket
Kit, Part# 30927, 6-cylinder models will require a Tank Bracket Kit, Part# 30928, to complete your installation.
REMOVE OLD FAN & SHROUD
1. Remove rubber splash guard (if so equipped) at
bottom of fan shroud.
2. Remove 4 screws holding shroud to radiator, and
remaining screw holding power steering
reservoir. Tuck reservoir out of way temporarily.
Save all bolts. (Note: Shroud will not come out until
fan and fan clutch are unbolted.)
3. Remove four nuts holding fan and fan clutch
assembly to water pump hub. Remove fan clutch
assembly in one piece, along with old shroud. Do
NOT remove water pump pulley. Replace nuts
onto water pump hub and tighten.
Assemble new fan unit
1. Press plastic control knob onto the thermostat
shaft on Flex-a-lite fan shroud.
2. Screw left and right end brackets to fan as shown
with 3/8" bolts and flat washers supplied. Do not
tighten yet. See FIG. 1.
INSTALL NEW FAN UNIT
1. Lower Flex-a-lite electric fan unit into place. Fan will squeeze between radiator hose and power steering
reservoir. Be careful not to damage radiator core with mounting brackets during install.
2. Hold fan in place and, using original shroud bolts, fasten through new brackets and into original mounting
points on radiator flange. The power steering reservoir locates in its original
position.
3. Making sure that rubber seal contacts radiator all around, tighten 3/8" bolts holding
fan to brackets.
.
Insert the temperature probe into the radiator fins
Install temp. probe near inlet hose...
Locate the inlet hose from the engine to the radiator. Remove the black insulator cap and insert the
temp. probe through the radiator fins near the inlet hose. Reinstall the black insulator cap.
then replace the insulator cap.
rev. 06-16-06
FIG. 1
99939
Page 1 of 2
Advertisement
Table of Contents

Subscribe to Our Youtube Channel
Related Manuals for Flex-a-Lite 475


Summary of Contents for Flex-a-Lite 475
-
Page 1: Installation Instructions
See FIG. 1. INSTALL NEW FAN UNIT 1. Lower Flex-a-lite electric fan unit into place. Fan will squeeze between radiator hose and power steering reservoir. Be careful not to damage radiator core with mounting brackets during install. 2. Hold fan in place and, using original shroud bolts, fasten through new brackets and into original mounting points on radiator flange. -
Page 2: Wiring Instructions
Flex-a-lite Consolidated, 7213-45th St. Ct. E. Fife, WA 98424, Telephone No. 253-922-2700, warrants to the original purchasing user, that all Flex-a-lite products to be free of defects in material and workmanship for a period of 365 days (1 year) from date of purchase. Flex-a-lite products failing within 365 days (1 year) from date of purchase may be returned to the factory through the point of purchase, transportation charges prepaid.
Need help?
Do you have a question about the 475 and is the answer not in the manual?
Questions and answers