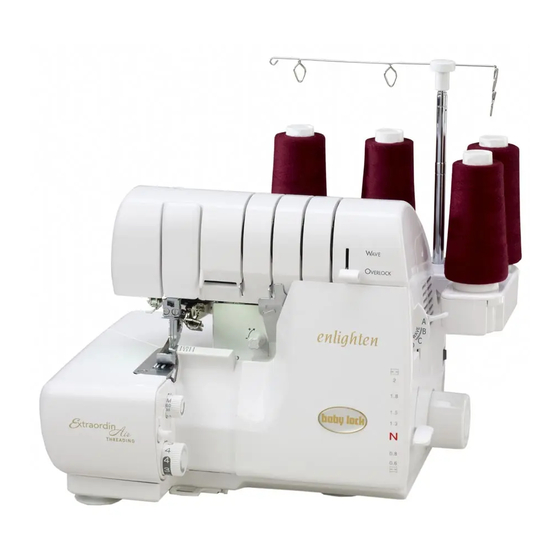
Baby Lock imagine wave BLE3ATW Instruction And Reference Manual
Hide thumbs
Also See for imagine wave BLE3ATW:
- Service manual (19 pages) ,
- Quick reference threading manual (2 pages) ,
- Service manual (22 pages)
Table of Contents
Advertisement
Quick Links
Advertisement
Table of Contents

Related Manuals for Baby Lock imagine wave BLE3ATW


Summary of Contents for Baby Lock imagine wave BLE3ATW
-
Page 2: Important Safety Instructions
"IMPORTANT SAFETY INSTRUCTIONS" When using overlock machine, basic safety precautions should always be followed, including the following. "Read all instructions before using this overlock machine." DANGER- To reduce the risk of electric shock. 1. The machine should never be left unattended when plugged in. Always unplug this machine from the electrical outlet immediately after using and before cleaning. - Page 3 You no longer need to guess at the correct tension adjustments. Your Baby Lock Imagine Wave is a high-quality, dependable machine. It gives you the ability to seam, over- cast and trim all in one operation. Fabrics and threads you previously avoided are now a joy to sew because the Baby Lock Imagine Wave handles all varieties with equal ease.
-
Page 4: Table Of Contents
Table of Contents OVERVIEW ..........................4 How Your Serger Operates ................... 4 Overview of the Imagine Wave ..................5 ACCESSORIES ........................6 Needles ......................... 7 Thread........................... 7 Optional Accessories..................... 7 SERGER SET UP ........................8 Setting Up Your Imagine Wave .................. 8/9 Threading your Imagine Wave .................. - Page 5 Table of Contents (Cont.) ROLLED EDGING ......................... 23 3-Thread Rolled Edge ....................23 Seaming Sheers......................36 Lettuce Edge ........................ 36 Belt Loops and Button Loops ..................36 Returning to Standard Serging ..................36 BASIC SERGING TECHNIQUES ..................37 Overedging........................37 Seaming ........................
-
Page 6: Overview
Serging is kind of a knitting process that loops two, three or four threads together to create a stitch. Your Baby Lock Imagine Wave operates with one or two needles and one or two "loopers," each carrying a thread, that take the place of a bobbin. -
Page 7: Overview Of The Imagine Wave
Overview of the Imagine Wave 1. Presser foot thread release lever* 17. Machine lock button 2. Thread cutter 18. Looper threading lever 3. Needle threader lever 19. Differential feed adjusting lever 4. Needle height viewing area 20. Handwheel 5. Needle clamp screw 21. -
Page 8: Accessories
Accessories Your Baby Lock Imagine Wave serger has a built-in accessory compartment. To open, swing the "lid" on the thread spoolstand to the right to reveal the tray holding some of the accessories listed below. Others may be found in the machine packing materials. -
Page 9: Needles
Needles Your Baby Lock Imagine serger is set up with 90/14 machine needles, which are suitable for most medium and heavyweight fabrics. For lightweight fabrics, change to a size 75/11 needle. The needle's semi-ball point design is suitable for knits and wovens. Some manufacturers' needles may produce better quality stitches with your Baby Lock than others. -
Page 10: Serger Set Up
Setting Up Your Imagine Wave After removing the packing materials from the box, gently lift your Baby Lock serger by gasping the handle provided on the top of the machine. Place the machine on a serger sewing table or any level surface that provides ample work area to the left. - Page 11 Setting Up Your Imagine Wave When using threads on cones or king spools place the cone or spool securely over the cone holders furnished on your machine. To avoid bending the thread stand, you may need to place one hand under the stand while positioning the cone.
-
Page 12: Threading Your Imagine Wave
Threading Your Imagine Wave Your Baby Lock Imagine Wave is equipped with an exclusive "Instant Jet-Air Threading System" for fast, easy threading of the upper and lower loopers. One push of the "Jet-Air" threading lever will automatically thread the loopers. It is no longer necessary to use tweezers for threading the thread guides. -
Page 13: Upper Looper
Upper Looper 1. With the presser foot up and machine lock button in the locked position, see fig. A, page 10, set the thread- ing port selector lever to "U" for upper looper threading. See fig. B, page 10. 2. Place the thread on the Upper Looper spool pin on the thread stand. Slip the thread into the telescopic antenna thread guide "A"... -
Page 14: Right Needle
Right Needle 1. Set the needle threader selector on "R" for right needle (fig.B page 13). Note: Be sure to push the needle threader selector all the way to R. 2. Place the thread on the second from left spindle on the thread stand (fig.A). Thread needle thread guides 1 and 2, through the groove on the face plate and through guides 3, 4, 5, 6 and 7. -
Page 15: Left Needle
Looper Thread Fine-Tuning Screw No adjustments are needed when sewing with most fabrics and threads on your Baby Lock Imagine Wave, but certain threads or fabrics may require minor fine-tuning of the looper delivery system to perfect your stitches. Increase or decrease the delivery of the looper threads with the upper and lower looper thread fine-tuning screw. -
Page 16: Serging With Fabric
Serging with fabric With the needle and upper looper threads under the foot and to the back, lower the presser foot. While holding the threads in your left hand, press down on the foot controller gently to begin a thread chain before serging fabric (fig.A). -
Page 17: Thread Delivery System
Thread Delivery System The Baby Lock Imagine Wave revolutionizes the way a serger works with its Thread Delivery System. You no longer have to manually adjust the tension settings for the type of stitch you are serging. Select the type of stitch you wish to serge, the Imagine Wave will automatically feed the correct amount of thread through the loopers and thread guides to form a perfect stitch every time. -
Page 18: Machine Settings
Stitch Length/Rolled Hem The stitch length / rolled hem adjusting dial is conveniently located just to the left of the front cover, near the base plate (fig. A). The dial shows two stitch-length ranges, each numbered from 1, for the shortest stitch, to 4 for the longest. -
Page 19: Differential Feed
Differential Feed Your Baby Lock serger is equipped with differential feed.The set of feed dogs work independently in order to ensure smooth sewing on all fabrics (fig. A) When the differential feed adjusting lever, located at the machine's right, front edge is set on "N" for normal feeding, the feed dogs move the same distance. -
Page 20: Disengaging The Upper Cutting Blade
Disengaging the Upper Cutting Blade When no trimming is desired, as when stitching on a fold, flip the cutting blade lock switch clockwise to the LOCK position. The cutting blade no longer moves up and down, but remains in its lowered position. -
Page 21: 4-Thread Overlock
4-Thread Overlock With the Imagine Wave Thread Delivery System, the upper and lower looper threads lock together evenly over the cut fabric edge(s) to form a flat, non-rolling pattern of overlocking stitches on both sides of the fab- ric. The left needle thread interlocks with both looper threads at the stitching line to create the seam. The right needle thread, visible on the top side of the stitch, interlocks with both the loopers to add durability. -
Page 22: 3-Thread Overlock
3-Thread Overlock-Wide The 3-thread overlock wide stitch is perfect for edge-finishing most woven fabrics and for seaming knits that do not require the extra dura- bility that a fourth thread provides. It's easy to convert your Imagine Wave to serge with 3 threads by sim- ply eliminating either needle. -
Page 23: 3-Thread Overlock-Narrow
3-Thread Overlock-Narrow It's easy to convert your Imagine Wave to serge with 3 threads by simply eliminating the left needle. To convert to narrow 3-thread overlock (3.0-5.0mm), cut the left needle thread (fig. A). Remove the left needle and left needle thread completely from the machine. -
Page 24: 3-Thread Overlock-Narrow Hemming
3-Thread Overlock-Narrow Hemming Narrow Hemming is an attractive finish for light to medium to heavy weight fabrics. Remove the left needle and needle thread completely from the machine. Clear the stitch fingers. Turn the stitch length adjusting dial clockwise to the rolled hem range. Set the length at "1" (fig. A) and the stitch width at 3.0 for a smooth decorative finish (fig. -
Page 25: Rolled Edging
Rolled Edging The rolled edge setting is used to achieve the narrowest stitch possible (1.5mm) on your Baby Lock serger. The stitch is suitable for seaming sheer and lightweight fabrics and for edging and hemming lightweight fab- rics. 3-Thread Rolled Edge With the stitch selector set on "D", a narrow hem will become a rolled edge. -
Page 26: 3-Thread Flatlock
3-Thread Flatlock Flatlock seams are most suited to fabrics which do not ravel such as interlock knits, tricot, sweatshirt fleece and synthetic suede. The needle thread is carried below the fabric and to the cut edge of the fabric. The lower looper thread rides along the cut edge of the fab- ric for stability. -
Page 27: 2-Thread Overlock
2-Thread Overlock The 2-thread function provides an economical and less bulky means of overedging all fabrics. The stan- dard 2-thread overlock is the same as a 2-thread flatlock stitch. When sewn with specialty threads, 2-thread sewing makes decorative seams and edges for activewear, children's clothing , ruffles, and hemlines. -
Page 28: Flatlock Seams
2-Thread Flatlock - Wide Sew 2-thread flatlock seams in the same way as 3-thread flatlock seams, then pull the two fabric layers apart until the seam lies flat (fig. A). Because the threads show on the outside as well as the inside of the garment or project, the 2-thread flatlock seam is often considered a decorative application (fig. -
Page 29: Flatlock Seams
2-Thread Flatlock - Narrow Sew a 2-thread flatlock seam then pull the two fabric layers apart until the seam lies flat (fig. A). Because the threads show on the outside as well as the inside of the garment or project, the flatlock seam is often considered a decorative application (fig. -
Page 30: Flatlock "Topstitching
Flatlock "Topstitching" The flatlock stitch need not be limited at seamlines. When sewn on a fold, flatlocking can create attractive dec- orative effects within the body of a garment or project. Either follow placement lines on your pattern or design your own special effects by stitching the fabric before laying out pattern pieces. -
Page 31: Blind Hemming
Blind Hemming You Baby Lock Imagine Wave can create a sturdy, nearly invisible blindhem. 1. Set the machine for 2-Thread Overlock with the right needle threaded. Set the stitch width at 5.0 and the stitch length at 4.0 in the standard range. -
Page 32: Blanket Stitch
Blanket Stitch - Decorative Stitch NOTE: The threading path for the needle thread is different in this technique. Please refer to the thread reference guide chart or the illustration below. 1. Set up the machine for 2 Thread Flatlock - Wide. (See threading illustration below) 2. -
Page 33: Ladder Stitch
Ladder Stitch - Decorative Stitch NOTE: The threading path for the needle thread is different in Ladder Right this technique. Please refer to the thread reference guide Side chart or the illustration below. Right 1. Set up the machine for 2 Thread Flatlock - Wide. (See Side Wrong threading illustration below) -
Page 34: Returning To 3 Or 4-Thread Overlock
Returning to 3 or 4-Thread Overlock 1. Open the front cover and rotate the handwheel forward to bring the upper looper to its lowest position. 2. With your index finger or tweezers, release the subsidiary looper from the eye of the upper looper. Rotate it further to the right until it snaps back into place and out of the way. -
Page 35: Wave Stitch
Wave Stitch The Wave Stitch provides a decorative "wavy" edging on fabric. (This is not to be confused with "Lettuce Edge" on page 36). The upper looper thread and the lower looper thread gradually appear every 25 stitches to create a stitch that looks like a "Wave". When using different color specialty threads (see pages 46 &... -
Page 36: 3-Thread Wave Stitch
3-thread Wave Stitch 1. Turn the Wave Selector dial from "O" to "W". 2. Cut the threads from the thread cones and remove from the thread paths. 3. Lock the machine for threading the loopers. (see page 10) 4. Place the right needle thread cone on the far left spool pin. 5. -
Page 37: 3-Thread Rolled Wave Stitch
3-Thread Rolled Wave Stitch 1. Turn the Wave Selector dial from "O" to "W". 2. Cut the threads from the thread cones and remove from the thread paths. 3. Lock the machine for threading the loopers. (see page 10) 4. Place the right needle thread cone on the far left spool pin. 5. -
Page 38: Seaming Sheers
Rolled Edging To convert "ROLLED EDGE", please refer to page 23 to change the settings and threading. Seaming Sheers Use the 3-thread rolled hem setting when sewing sheer fabrics that otherwise would require French seams. Set the stitch length at 2.5. Then simply sew the seams, aligning the fabric edges with the serger seam guide, trimming away the excess seam allowance. -
Page 39: Basic Serging Techniques
Overedging Overedging to finish facings, hems and seams before construction, is one of the most basic uses of a serger, such as making a gar- ment or project with 5/8 inch (16mm) pressed open seams (fig. A). To overedge, place the single layer of fabric in front of the presser foot, aligning the cut edge with upper cutting blade. -
Page 40: Securing End
Securing Ends The serger stitch will not unravel readily, and in most cases serged seams are secured by an intersecting seam. If that's not the case, these are several options for securing seam (fig. A). 1. Leave a 3 inch (7.5cm) chain, separate the threads and tie a knot. 2. - Page 41 Securing Ends (Cont.) To lock the end of the seam: 1. Take one stitch off the end of the seam (fig. A). 2. Raise the presser foot and bring the needle(s) to the highet position. Pull back gently on the fabric to clear the stitch fingers.
-
Page 42: Turning Outside Corners
Turning Outside Corners 1. Stitch along one edge until you reach the corner. Take one stitch off the edge of the fabric (fig. A). (As you approach the edge, you may want to stop and manually turn the handwheel towards you.) 2. -
Page 43: Serging Curves
Serging Curves To serge around inside or outside curves, guide the fabric into the cutting blade, not the needle(s). Remember, cutting takes place before the fabric reaches the needle. Because the long serger presser foot holds the fabric more securely, you may need to raise and lower the presser foot several times to mane uver around very tight curves. -
Page 44: Using Specialty Threads
Using Specialty Threads Beautiful stitches can be formed by serging with specialty threads, cords and ribbons. These heavier or shinier threads can be used to enhance appearance, add strength or elasticity, or create special effects, depending on the thread you choose. Some specialty threads work well through the needle and loopers. -
Page 45: Threading Mediumweight Thread
Threading Mediumweight Thread Mediumweight threads, including topstitching thread, Decor rayon and stretch nylon thread, are too bulky to form a knot that would fit through the thrading port, but they can slip through the hole with the aid of a thread "cradle"... -
Page 46: Looper Threading Tool
Looper Threading Tool 1. Open the front cover and raise the presser foot. 2. At the threading port, cut the looper thread that is to be replaced. Remove thread from under the foot and the upper thread guides. Replace cone of thread with specialty thread. 3. -
Page 47: Bypassing The Threading Port
Bypassing the Threading Port Heavyweight threads can be used through your regular looper thread paths. Specific techniques may require that the thread bypass the thread port for the thread pull to be loosened. Start with the machine threaded with regular serger thread. 1. -
Page 48: Specialty Thread Guide Chart
Specialty Thread Guide Chart Woolly Nylon Topstitching Machine Embroidery Thread Buttonhole Twist Metallic Threads Decorative edges for Edging or flatlock Soft stretchy seams on clothing, gift items, seaming for sportswear lingerie, swimwear, home d é cor, etc. and home d é cor items. active wear, and for APPLICATION rolled edge stitch. - Page 49 Specialty Thread Guide Chart Designer 6 Machine Embroidery Clear Nylon Pearl Crown Rayon Threads: Rayon and Monofilament Polyester, 30, 40, 50 Candlelight weight. Jeans Stitch Lingerie Thread Ribbon Thread Decorative edging, Lingerie and lightweight Techniques APPLICATION flatlocking, rolled hem, fabrics, edging of fine requiring the thread wave stitch, rolled wave fabrics, delicate rolled...
-
Page 50: Maintenance
If for some reason your machine does not cut or perform as it should, please take your machine to your nearest Baby Lock retailer. It is possible that the result of poor cutting may indicate other problems. -
Page 51: Cleaning
Cleaning Your Baby Lock will operate at best performance if it is kept clean at all times. The serger's cutting action creates much more lint than you will find on conventional sewing machine. Your serger's major moving parts are well protected and do not need to be oiled. -
Page 52: Troubleshooting
Troubleshooting Before taking your machine in for service, check the following: Machine fails to start: 1. Are electrical plugs properly connected? 2. Is the power switch on? 3. Check household circuit breaker or fuse. 4. Is the lock button release lever in the unlocked position? Thread breaks: 1. - Page 53 Troubleshooting Continued Needle threading difficulties: 1. Is the needle threader selector at the appropriate setting?("R" for right needle, "L" for left needle.) Looper threading difficulties: 1. Is the looper threader selector at the appropriate setting?(Left threading port for "U" upper looper, right threading port for "L"...
-
Page 54: Technical Data
Technical Data Stitch Types: 2 needles, 2 loopers: 4-Thread Overlock 1 needle (left or right), 2 loopers 3-Thread Overlock (wide, narrow, and narrow hem) 3-Thread Flatlock (wide and narrow) right needle only 3-Thread Rolled Edge 3-Thread Wave 3-Thread Rolled Wave 1 needle (left or right), 1 looper 2-Thread Flatlock (wide and narrow) 2-Thread Blanket Stitch... -
Page 55: Chart For Stitch Selection Settings
Chart for Stitch Selection Settings Stitch Stitch Stitch Wave Differential Page Needle Stitch Type Selector Length Selector Width Feed 4-Thread Left 2.5-3.5 Overlock 6.0-7.5 Right Left 4-Thread 6.0-7.5 Gatherring Right 3-Thread Overlock Left Wide Narrow 2.5-3.5 Right 3-Thread N-0.6 Narrow 1-1.5R 3.0-4.0 Right... - Page 56 EI-31-E BLE3ATW-TA...
Need help?
Do you have a question about the imagine wave BLE3ATW and is the answer not in the manual?
Questions and answers