LG LST3510A - HDTV Receiver / Hi-Format DVD Player Owner's Manual
Hd receiver / dvd player
Hide thumbs
Also See for LST3510A - HDTV Receiver / Hi-Format DVD Player:
- Owner's manual (64 pages) ,
- Specifications (2 pages)

Related Manuals for LG LST3510A - HDTV Receiver / Hi-Format DVD Player


Summary of Contents for LG LST3510A - HDTV Receiver / Hi-Format DVD Player
-
Page 1: Dvd Player
HD Receiver / DVD Player OWNER’S MANUAL MODEL : LST-3510A Before connecting, operating or adjusting this product, please read this instruction manual carefully and completely. -
Page 2: Safety Precautions
Safety Precautions NOTE TO CABLE/TV INSTALLER CAUTION This reminder is provided to call the cable TV system installer’s RISK OF ELECTRIC SHOCK attention to Article 820-40 of the National Electric Code DO NOT OPEN (U.S.A.). The code provides guidelines for proper grounding and, in particular, specifies that the cable ground shall be con- CAUTION: TO REDUCE THE RISK nected to the grounding system of the building, as close to the... -
Page 3: Important Safety Instructions
IMPORTANT SAFETY INSTRUCTIONS CAUTION: PLEASE READ AND OBSERVE ALL WARNINGS AND INSTRUCTIONS IN THIS INSTALLATION AND OPERATING GUIDE AND THOSE MARKED ON THE UNIT. RETAIN THIS GUIDE FOR FUTURE REFERENCE. This set has been designed and manufactured to assure personal safety. Improper use can result in electric shock or fire hazard. -
Page 4: Table Of Contents
Table of Contents INTRODUCTION DTV OPERATION Safety Precautions ......2 Program and Station Guide....39 IMPORTANT SAFETY INSTRUCTIONS . -
Page 5: Pre-Operation Overview
The main film content, accompanying feature content, additional feature content, or music album. Each title is assigned a title reference number enabling As an E ® Partner, LG you to locate it easily. NERGY has determined that this prod- uct or product models meets... -
Page 6: Precautions
Pre-operation Overview (Continued) Precautions Cleaning discs Fingerprints and dust on the disc can cause poor picture Handling the unit quality and sound distortion. Before playing, clean the disc with a clean cloth. Wipe the disc from the center out. When shipping the unit The original shipping carton and packing materials come in handy. -
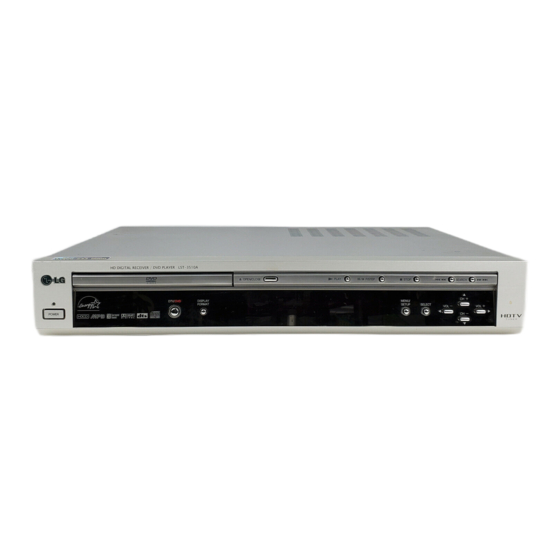
Page 7: Front Panel Controls
Front Panel Controls Forward Skip/Scan ( > > / M Go to NEXT chapter/track. Press and hold for two seconds for a fast forward search. Reverse Skip/Scan ( m m / . Go to beginning of current chapter/track or to PREVIOUS chapter/track. Press and hold for two seconds for a fast reverse search. -
Page 8: Display Window
Display Window DVD Indicates this unit’s operational mode is set to DVD. DTV Indicates this unit’s operational mode is set to DTV. CD Audio CD inserted VCD Video CD inserted SVCD SVCD inserted ANGLE available MP3 MP3 or WMA disc inserted HD CD HDCD disc inserted PROG. -
Page 9: Remote Control Key Functions
Remote Control Key Functions DTV/DVD (TV/INPUT) Mode Indicator Select one of your output sources to Indicates the remote control view on the TV screen between DTV operational mode. and DVD. To select the TV’s source MODE (Tuner or AUX A/V input). Selects operational mode of remote RATIO control. -
Page 10: Unpacking Dvd/Hdtv Receiver And Accessories/Connection Overview
Unpacking DVD/HDTV Receiver and Accessories/Connection Overview Make sure you have received all the accessories listed below with the High Definition Television Receiver. HDTV Receiver / DVD Player The DVD/HDTV Receiver is capable of receiving signals from cable and/or over-the-air anten- na sources and sending the signals to your TV. -
Page 11: Connection Panel Overview
Connection Panel Overview ANT IN Connect to HDTV signal source; external/internal antenna. VIDEO OUT Connect to a TV with video inputs. COMPONENT VIDEO OUT Connect to a TV with YPbPr inputs. DIGITAL AUDIO OUT (COAXIAL) Connect to digital (coaxial) audio equipment. AUTHORIZED SERVICE ONLY Is used only for authorized service purposes. -
Page 12: Connections
Connections Antenna Connections Connect the “Antenna” to the “ANT IN” jack on the DVD/HDTV Receiver using a coaxial RF cable. There might be some areas where the signal strength could be too high. If so, you may need to connect the antenna to the optional attenuator and screw the attenuator onto the “ANT IN”... -
Page 13: Analog Monitor Connections
Connections (Continued) Display Formats Overview The HDTV Tuner offers various display formats and multiple video outputs. When the HDTV Tuner is connected to • A/V systems, the HDTV Tuner can provide video signal formats 1080i, 720p, 480p, and 480i. 1080i, 720p, 480p, and 480i modes are available for component video (YPbPr) outputs. •... -
Page 14: Hd Monitor Component (Ypbpr) Connections
Connections (Continued) HD Monitor Component (YPbPr) Connections Antenna HD Ready TV Connection Panel Cable TV ANTENNA VIDEO Wall Jack Panel AUDIO INPUT COMPONENT VIDEO INPUT INPUT INPUT DVD/HDTV Receiver Connection Panel Connect the “Antenna/Cable” to the “ANT IN” jack on the DVD/HDTV Receiver using a coaxial RF cable. There might be some areas where the signal strength could be too high. -
Page 15: Hd Monitor Rgb Connections
Connections (Continued) HD Monitor RGB Connections Antenna Cable TV Wall Jack Panel HD Ready TV Connection Panel ANTENNA S-VIDEO VIDEO AUDIO INPUT RGB INPUT INPUT INPUT INPUT DVD/HDTV Receiver Connection Panel Connect the “Antenna/Cable” to the “ANT IN” jack on the DVD/HDTV Receiver using a coaxial RF cable. There might be some areas where the signal strength could be too high. -
Page 16: Hd Monitor Dvi-Hdtv Connections
Connections (Continued) HD Monitor DVI-HDTV Connections Antenna Cable TV Wall Jack Panel HD Ready TV Connection Panel ANTENNA S-VIDEO VIDEO AUDIO INPUT DVI-HDTV INPUT INPUT INPUT INPUT DVD/HDTV Receiver Connection Panel Connect the “Antenna/Cable” to the “ANT IN” jack on the DVD/HDTV Receiver using a coaxial RF cable. There might be some areas where the signal strength could be too high. -
Page 17: Vcr Connections
Connections (Continued) VCR Connections VCR Connection Panel VIDEO AUDIO INPUT INPUT DVD/HDTV Receiver Connection Panel Connect the L/R “AUDIO OUT” jacks and “VIDEO OUT” jack on the DVD/HDTV Receiver to the “A/V in” jacks on your VCR using RCA-type cables. (If your VCR is equipped with an S-Video jack, use the “S-Video” jack.) Caution If 480i display format is selected, the VCR will record an onscreen display onto the tape during recording if: the channel is changed with CH (+/–) -
Page 18: Amplifier (Receiver) Connections
Connections (Continued) Amplifier (Receiver) Connections Amplifier (Receiver) Connection Panel COAXIAL OPTICAL AUDIO INPUT DIGITAL INPUT DVD/HDTV Receiver Connection Panel Connecting to an amplifier equipped with two channel analog stereo or Dolby Surround Connect the Left and Right AUDIO OUT jacks on the DVD/HDTV Receiver to the audio left and right in jacks on your amplifier, receiver, or stereo system, using the supplied audio cables. -
Page 19: Display Format Setup
Setting the Display Format The DVD/HDTV Receiver provides several display formats. The DISPLAY FORMAT button on the front panel changes the output connector and resolution. The output resolution may be converted from the original broadcast format. Display Format Setup. Press DISPLAY FORMAT once on the front panel. The current output signal appears in the display window. -
Page 20: Pre-Operation Setup
Pre-operation Setup In this menu system, there are several ways to customize the settings provid- ed. Most menus consist of three levels to set up the options, but some require greater depth for the variety of settings. If you press the MENU but- ton, only the first and second level of the menu system will appear on the TV screen. -
Page 21: Setup Menu Options
Setup Menu Options EZ Scan (Channel Search) Automatically finds all channels (digital) available using the ‘Ant In’ source, and stores all the active channels found on the channel list. Inactive or weak channels may not appear on the list. In that case, add missing channels manually with the Ch. -
Page 22: Ch. Edit (Channel Edit)
Setup Menu Options (Continued) Ch. Edit (Channel Edit) This feature allows you to add or erase channels from memory manually and create your own surf list, with up to 10 favorite channels. Press SURF on the remote control when a channel is highlighted. Press MENU to display the on-screen menu. -
Page 23: Ez Demo
Setup Menu Options (Continued) EZ Demo Shows you how to navigate through the on-screen menus available on the DVD/HDTV Receiver. Press MENU to display the on-screen menu. Select the SETUP menu using v v / V V then press (SELECT) or B B to move to the second level. -
Page 24: Option Menu Features
Option Menu Features Clock Enables the user to adjust the time zone. Normally, your clock is set using signals transmitted by DTV stations. Choosing your time zone sets the cur- rent time automatically. Press MENU to display the on-screen menu. Select the OPTION menu using v v / V V then press (SELECT) or B B . -
Page 25: Aspect Ratio
Option Menu Features (Continued) Aspect Ratio Lets you choose the picture proportion. Press MENU. The main menu appears. Use v v / V V to select the OPTION menu then press B B or (SELECT) to move to the second level. Options to view a picture with a Use v v / V V to select the Aspect Ratio option. -
Page 26: Choosing The Aspect Ratio
Option Menu Features (Continued) Aspect Ratio Overview Modes for viewing high definition content (16:9) when output format is 480i or 480p Mode: Set by program The aspect ratio will be set to Letter Box. Letter Box Use for a picture with an original 16:9 aspect ratio (in a wide format). Letterbox mode will shrink the picture to fill the screen, with black/gray (or blank) bars appearing at the top and bottom of the screen. -
Page 27: Digital Audio Output
Option Menu Features (Continued) Digital Audio Output Sets the DVD/HDTV Receiver’s Digital Audio Output according to the type of audio system you use. Press MENU to display the on-screen menu. Select the OPTION menu using v v / V V then press (SELECT) or B B . -
Page 28: Caption Menu
Caption Menu Options Caption (DTV) Selects a default Caption language. The caption language options are English, French, and Spanish. Use the menu to select a language. If the selected language is not available on the current program, the caption for the program is not displayed. Options are: Off: DTV Caption is not displayed. -
Page 29: Caption Style (Dtv)
Caption Menu Options (Continued) (DTV) Caption Style Selects DTV Captions appearance menu options. Style Use caption feature defaults as provided by the program or customize captions appearance with the Custom menu options. Set By Program: Default text provided by a broadcaster is shown when captions appear. -
Page 30: Caption (Analog)
Caption Menu Options (Continued) (Analog) Captions Selects a mode for displaying Analog Captions. In the Analog Caption Service (if available on program), Captions 1-4 display program’s dialog, and Text 1-4 display data service information. • Analog Captions will appear if they are provided by the broadcaster. •... -
Page 31: Lock (Parental Control) Menu Options
Lock (Parental Control) Menu Options Lock System Allows you to restrict program viewing using blocking schemes. Also allows you to activate or disable all of the lock schemes previously set up. A pass- word is required to gain access to the LOCK menus. When the Lock System is set to Off, the Channel and Program Rating restrictions set are not active. -
Page 32: Block Ch. (Channel)
Lock (Parental Control) Menu Options (Continued) Block Ch. (Channel) Blocks any channel that you do not want to view or that you do not want your kids to watch. If you tune in a blocked channel, a black screen with a pop-up box will appear. -
Page 33: Movie Rating
Lock (Parental Control) Menu Options (Continued) Movie Rating Blocks movies according to the movie ratings so children cannot view restricted movies. You can set the ratings to block out all the movies with rat- ings above a specified level. Keep in mind that the movie ratings apply only to movies shown on TV, not TV programs such as soap operas. -
Page 34: Tv Rating-Children
Lock (Parental Control) Menu Options (Continued) TV Rating-Children Keeps children from watching certain children’s TV programs according to the ratings limit set. This rating applies only to TV programs for children. Unless you block TV programs intended for mature audiences in the TV Rating – General menu, your children could view those programs. -
Page 35: Tv Rating-General
Lock (Parental Control) Menu Options (Continued) TV Rating-General Blocks TV programs that you or your family may not wish to watch, based on the rating scheme set. Follow Steps 1-2 as shown for the Lock System on page 31. Use v v / V V to select the TV Rating-General option. Press B B or (SELECT) to move to the third level. -
Page 36: Guide Options
GUIDE Menu Options Program Guide The Program Guide contains schedule and program information for all channels. It also provides local over-the-air channels information including conventional digital channels. Use the Program Guide to find programs easily and conveniently and view schedule and descriptive program information by Time and General classifi- cations. -
Page 37: Information Displays
Information Displays Channel Banner Display a b c The Channel Banner appears whenever you tune to a new channel or press (SELECT) button on the remote control while viewing a program. Press (SELECT) while watching a program The Channel Banner appears on the TV screen (Channel number, audio, station name, and current time appear). -
Page 38: Program Information Display
Information Displays (Continued) Program Information Display c d e Program Information appears whenever you press the INFO button on the remote control while viewing a program. Press INFO while watching a program Program Information appears on the TV screen. a) Program title Shows title of current program. -
Page 39: Program And Station Guide
Program and Station Guides The Program and Station Guides contain schedule and program information for all channels. They also provide local over-the-air channels information including conventional digital channels. Use the Program and Station Guides to find programs easily and conveniently and view schedule and descriptive program information for the channels. -
Page 40: Normal Operation
Normal Operation – (dash) Channel Selection Numbers button See instructions below to select channels. FLASHBK Number and – (dash) buttons (on the remote control) Use Number (0-9) and – (dash) buttons to select a channel directly. SURF FLASHBK button (on the remote control) Press to return to the previous channel you viewed. -
Page 41: Dvd On-Screen Display
DVD On-screen Display Overview Playback Status/Restrictions This manual gives basic instructions for operating the Repeat Title TITLE DVD/HDTV Receiver. Some DVDs require specific oper- Repeat Chapter CHAPT ation or allow only limited operation during playback. Repeat Track (non-PBC Video CDs only) TRACK When this occurs, the symbol appears on the TV... -
Page 42: Initial Settings
Before Operation (Continued) Pre-operation Setup Menu Language Select a language for the Setup menu. This is the menu You can set your own personal preferences on the you see when you press SETUP. DVD/HDTV Receiver’s DVD part. Disc Audio Disc Subtitle DVD Player Operation Disc Menu Rating... -
Page 43: Sound
Before Operation (Continued) Sound Others Digital Audio Output PBC Setup PBC can be turned on or off using (SELECT). Each DVD disc has a variety of audio output options. Set the DVD/HDTV Receiver’s Digital Audio Output Disc Audio according to the type of audio system you use. Disc Subtitle Disc Menu DOLBY DIGITAL/PCM: Select “DOLBY DIGITAL/PCM”... -
Page 44: Parental Control
Before Operation (Continued) Parental Control Country Code Enter the code of a country/area whose standards were Rating used to rate the DVD video disc, referring to the list Movies on DVDs may contain scenes not suitable for (See “Country Code List”, page 59.). children. -
Page 45: Dvd And Video Cd Operation
DVD and Video CD Operation Playing a DVD or Video CD General Features Playback Setup VCD2.0 VCD1.1 Unless stated otherwise, all operations described use Turn on the TV and select the video input source con- the remote control. Some features may also be nected to the DVD/HDTV Receiver. -
Page 46: Changing The Audio Channel
DVD and Video CD Operation General Features (continued) The Repeat Title icon appears on the TV screen. 3. To exit Repeat mode, press REPEAT a third time. Slow Motion The Repeat Off icon appears on the TV screen. VCD2.0 VCD1.1 Video CDs - Repeat Track/All/Off 1. -
Page 47: General Features
DVD and Video CD Operation (Continued) General Features (continued) To Clear a Marked Scene 1. During disc playback, press SEARCH. 3D Surround VCD2.0 VCD1.1 The MARKER SEARCH menu will appear on the screen. 2. Use b/B to select the Marker number that you want NORM. -
Page 48: Audio Cd And Mp3/Wma Disc Operation
Audio CD and MP3/WMA Disc Operation Playing an Audio CD or Notes on MP3/WMA Recordings MP3/WMA Disc About MP3 A MP3 file is audio data compressed by using the The DVD/HDTV Receiver can play audio CDs. Also, the MPEG1 audio layer-3 file-coding scheme. Files that DVD/HDTV Receiver can play MP3/WMA formatted have the “.mp3”... -
Page 49: General Features
Audio CD and MP3/WMA Disc Operation (Continued) General Features Repeat A-B To repeat a sequence. Pause 1. During disc playback, press A-B at your chosen start point. 1. Press PAUSE/STEP during playback. The Repeat icon and “ A * ” appear on the menu screen. 2. -
Page 50: Jpeg File Operation
Operation with JPEG Disc Changing Files Viewing a JPEG Disc JPEG While viewing a picture, press SCAN/SKIP . or > This DVD/HDTV Receiver can play discs with JPEG once to advance to the next file or return to the previous files and Kodak picture CDs. -
Page 51: Programmed Playback
Programmed Playback VCD2.0 VCD1.1 Programmed Playback for Audio CDs, Video CD Programmed Playback MP3, WMA, and JPEG Files The Program function can be used you to store your On a Video CD with PBC, you must set PBC to Off on the favorite tracks from any playable disc in the DVD/HDTV Setup menu to use the Program function. -
Page 52: Dvd Additional Information
DVD Additional Information Last Condition Memory HDCD Playback This DVD/HDTV Receiver memorizes the last condition HDCD is a process that increases the fidelity of both for the last disc played. Settings remain in memory even specially encoded HDCD discs and standard Audio if you remove the disc from the DVD/HDTV Receiver or CDs. -
Page 53: Programming The Remote Control To Operate Other Devices
Programming the Remote Control to Operate Other Devices The DVD/HDTV Receiver remote control is a multi-brand or universal remote control that can be programmed to operate most IR remote-controllable devices from other manufacturers. The remote control may not be able to control all models of other brands. Test your remote control. -
Page 54: Remote Control Codes For Other Devices
Remote Control Codes for Other Devices TV Codes Brands Codes Brands Codes MAGNAVOX 003 004 006 022 059 TATUNG 056 062 Brands Codes 060 061 063 064 127 TECHNICS 034 080 084 A MARK 112 143 143 160 164 TECHWOOD ADMIRAL 072 081 161 MARANTZ... -
Page 55: Remote Control Codes For Other Devices
Remote Control Codes for Other Devices (Continued) VCR Codes Brands Codes Brands Codes JERROLD 002 003 004 008 009 Brands Codes TOSHIBA 008 013 042 047 059 010 052 069 074 LLOYD 082 112 131 001 106 101 005 003 009 013 014 017 TOTEVISION 040 101 M-NET... -
Page 56: Dtv Troubleshooting
DTV Troubleshooting Check the following guide for the possible cause of a problem before contacting service. Symptom Solution(s) DVD/HDTV Receiver Plug the power cord into a wall power outlet securely. does not turn on. Fragmented picture and Check your antenna input, location, and signal strength. unclear sound. -
Page 57: Dvd Troubleshooting
DVD Troubleshooting Check the following troubleshooting chart for the possible cause of a problem before contacting service. Possible Cause Solution Problem No power. The power cord is disconnected. Plug the power cord into the wall power outlet securely. No disc is inserted. Insert a disc. -
Page 58: Language Code List
Language Code List Enter the appropriate code number for the initial settings “Disc Audio”, “Disc Subtitle” and/or “Disc Menu” (See page 42). Code Language Code Language Code Language Code Language 6566 Abkhazian 7074 Fiji 7678 Lingala 8373 Singhalese 6565 Afar 7073 Finnish 7684... -
Page 59: Country Code List
Country Code List Enter the appropriate code number for the initial setting “Country Code” (See page 44). Code Country Code Country Code Country Code Country Andorra Eritrea Saint Lucia Seychelles United Arab Emirates Spain Liechtenstein Sudan Afghanistan Ethiopia Sri Lanka Sweden Antigua and Barbuda Finland... -
Page 60: Specifications
Specifications Television System DTV standard (1080i, 720p, 480p, 480i) Channel Coverage Terrestrial: 2-69, Cable: 1-135 Laser Semiconductor laser, wavelength 650 nm Frequency response DVD (PCM 96 kHz): 8 Hz to 44 kHz DVD (PCM 48 kHz): 8 Hz to 22 kHz CD: 8 Hz to 20 kHz Signal-to-noise ratio More than 100dB (ANALOG OUT connectors only) -
Page 61: Notes
Notes... - Page 62 Notes...
- Page 63 Notes...
-
Page 64: Warranty
HD RECEIVER / DVD PLAYER LST-3510A Limited Warranty - USA This LG Electronics product, marketed by Zenith, will be repaired or replaced, at LG’s option, if it proves to be defective in material or workmanship, under normal use, during the warranty period (“Warranty Period”) listed below, effective from the date (“Date of Purchase”) of original consumer purchase of the product.
Need help?
Do you have a question about the LST3510A - HDTV Receiver / Hi-Format DVD Player and is the answer not in the manual?
Questions and answers