Table of Contents
Advertisement
Advertisement
Table of Contents

Subscribe to Our Youtube Channel
Related Manuals for AEG U25493 B 8139-4-m


Summary of Contents for AEG U25493 B 8139-4-m
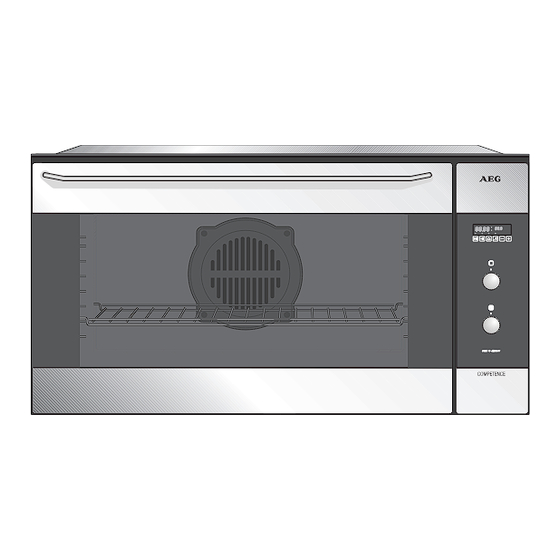
- Page 1 COMPETENCE B 8139-4-m Built-in single oven User Instructions...
-
Page 2: Dear Customer
Dear customer, Before using your new appliance, please read these operating instruc- tions through carefully. They will enable you to make use of all the technical benefits of your new appliance. The instructions contain important information on safe use, installation and care. Please keep the operating instructions for later reference. -
Page 3: Table Of Contents
CONTENTS CONTENTS OPERATING INSTRUCTIONS ..... 5 Safety Instructions ........5 General Safety . - Page 4 CONTENTS Cleaning and Care ........47 The Exterior of the Appliance .
-
Page 5: Operating Instructions
OPERATING INSTRUCTIONS Safety Instructions This appliance is only to be installed by an approved installer. Please observe this instruction, otherwise the warranty will not cover any damage that may occur. The safety features of AEG electrical appliances comply with accepted technical standards and the German Appliance Safety Law. -
Page 6: How To Avoid Damage To Your Appliance
OPERATING INSTRUCTIONS Intended Use • This oven is intended for domestic cooking only. It is not designed for commercial or industrial purposes. • Only use the appliance to prepare food. • Do not use the oven to heat the room. How To Avoid Damage to Your Appliance •... -
Page 7: Disposal
Disposal Disposing of the packaging materials All materials used can be fully recycled. Wood is used for the outer packaging. The plastics are marked as follows: • >PE< for polyethylene, e.g. as used for the outer wrapping and the bags inside. •... -
Page 8: The Key Features Of Your Appliance
OPERATING INSTRUCTIONS The Key Features of Your Appliance • Control Knobs: The oven functions and temperature are each selected using the control knobs. To release the control knob press and release it so it pops out. Press the knob again to return it into the control panel. -
Page 9: Description Of The Appliance
Description of the Appliance Control Panel OPERATING INSTRUCTIONS 1 Electronic Timer With indication of the time of day, interval timer, meat probe display, automatic switching on and off. 2 Oven Power Indicator Illuminates when the oven function is switched on. 3 Oven Function Control Knob For selecting the required oven functions. -
Page 10: Oven Features
OPERATING INSTRUCTIONS Oven Features Shelf Positions There are side rails on both sides of the oven, with 7 shelf positions for sliding in acces- sories. Please note that the shelf posi- tions are counted from bot- tom to top. The bottom shelf position is position 1. -
Page 11: Oven Functions
Oven Functions The oven has various types of cooking functions that you can use: Ventitherm (Fan cooking) Ventitherm is particularly well suited to baking, roasting and slow cooking on several shelves at once, and for defrosting. Oven temperatures are generally 20 to 40 °C lower than for top/bottom heat. - Page 12 OPERATING INSTRUCTIONS Rotitherm (Hot Air Grilling) Rotitherm is particularly suited to grilling or roasting larger pieces of meat or game on one shelf. This function is also suited to browning. The grill heater element and fan are used simultaneously. Pizza function The pizza function is suitable for baking bread, pizza, moist cakes, and for preserving.
-
Page 13: Before First Use
Before first use Initial Cleaning Before you use the oven for the first time, you should clean it thor- oughly. You can switch on the oven lighting to make cleaning easier. 1. Turn the oven function switch to oven lighting 2. -
Page 14: Operating The Oven
OPERATING INSTRUCTIONS Operating the Oven Switching the Oven On and Off 1. To use, press the "Oven Functions" and "Temperature Selection" control knobs to release them. The control knobs then protrude. 2. Using the "Oven Functions" control knob, set the required function. 3. -
Page 15: Fast Warm Up
Fast Warm Up Using the pizza function atively short time. Important! Only place the food to be roasted or cooked in the oven when fast warm up is complete and the oven is set to the required function. 1. Set the "Oven Functions" control knob to pizza function 2. -
Page 16: The Electronic Timer
OPERATING INSTRUCTIONS The electronic timer Tip: Page 22 details how to use the meat probe function. As well as providing a minute minder, the electronic timer controls the oven in several other ways. You can use it to set the cooking time, the end time and the core temperature (using the meat probe). -
Page 17: Setting And Changing The Clock
Setting and changing the clock 1. Simultaneously push “7” and “8”, until the time in the display flashes. 2. Adjust as required using “+” or “-”. 3. Wait for the display to stop flashing. The time will then be accepted, and the dot in the centre of the hour and the minutes will flash every second. -
Page 18: How To Set The Electronic Timer
OPERATING INSTRUCTIONS How to set the electronic timer Selecting the timer operation: Press the selector button for the operation you wish to use. The lamp above the button you have pressed will start to flash and a number will appear in the display. Amending the operation: Adjust the value shown, using Starting the operation:... -
Page 19: When The Cooking Time Is Finished
When the cooking time is finished the oven will switch off and “End” will appear in the display. A warning signal will sound. Both of the lamps next to the display will stop flashing. 1. Press any selector button to stop the alarm buzzer. The display will show the normal clock again. -
Page 20: Setting The Finish Time (Switch-Off Function)
OPERATING INSTRUCTIONS Setting the finish time 8 (switch-off function) Use this function if you want the oven to switch off automatically after a certain time. 1. Press “8”: the lamp will flash and the display shows the normal clock. 2. Use “ ”/“... -
Page 21: Automatic Switch-On And Switch-Off
Automatic switch-on and switch-off If you wish use the oven’s time-delay feature, you may pre-select both cooking time and finish time. The automatic start time itself cannot be specified, but this is derived from both settings. Tip: It is impossible to set a finish time before the start time: you will hear a buzzer and the value in the display will not change. -
Page 22: Setting The Meat Probe, Core Temperature Function
OPERATING INSTRUCTIONS 4. Use “ ” to set the finish time. After approx. 3 secs. the lamps will stay on continuously. The display will show “Auto” until the oven switches on. 5. Set the temperature and mode. The oven will automatically switch on at the specified time and both lights next to the display will flash alternately. - Page 23 3. Set the temperature and function. While roasting the display on the right shows the current core temperature inside the roast. When the actual core temperature reaches the value you have set, the oven will switch itself off and “End” will appear in the display.
-
Page 24: Meat Probe, Function With Delayed Start
OPERATING INSTRUCTIONS Meat Probe, function with delayed start This allows you to delay the start of cooking when using the meat probe. As no fixed cooking time is set, it is not possible to set a finish time. Tip: This function will only work when the meat probe is inserted. The right display shows you the current core temperature inside the roast and “70 °C”... - Page 25 until the oven switches on. The display on the right shows you the cur- rent core temperature inside the roast. 5. Set the temperature and function. The oven automatically switches on at the at the beginning of the cooking time. Both lamps will flash alternately. When the actual core temperature reaches the value you have set, the oven will switch itself off and “End”...
-
Page 26: Usage, Tables And Tips
OPERATING INSTRUCTIONS Usage, Tables and Tips Baking For baking use the Ventitherm oven function. Suitable Bakeware • Tins made of dark metal and coated tins are suitable for conventional heat • Light metal tins are also suitable for Ventitherm Shelf Positions The shelf positions are counted from bottom to top. -
Page 27: Notes On Baking
Notes on Baking General notes • Please note that the shelf positions are counted from bottom to top and that the bottom shelf position is position 1. • Insert baking sheets with the bevelled edge to the front. • Slide the baking sheet to the rear wall. Always place cakes in tins in the middle of the shelf. - Page 28 OPERATING INSTRUCTIONS Notes on the Baking Tables In the tables you will find information on temperatures, cooking times and shelf positions for a selection of dishes. • Ranges are often given for the temperatures and cooking times since these are dependent on the mixture, quantity and baking tin used. •...
- Page 29 Baking Pizza with the pizza function Example: Basic Pizza Recipe 375 g flour, 20 g yeast, 125 ml lukewarm water, 3 dessertspoon oil, salt 1. Make a dough out of the ingredients given. 2. Allow the dough to prove until it has doubled in volume (approx.
-
Page 30: Baking Tables
OPERATING INSTRUCTIONS Baking Tables Baking with Ventitherm The information given in bold shows you the best oven function to use in each case. Type of Cake or Pastry Cakes in Cake Tins Ring-Shaped Cakes Madeira Cake/King Cake Sponge Cake Shortcrust Pastry Flan Base Sponge Flan Base Covered Apple Flan... - Page 31 Type of Cake Ventitherm or Pastry Shelf Pos. from Bottom Butter Cake/Sugar Cake Fruit Flans (dough/sponge base) Fruit Flan (shortcrust pastry) Flat Cakes with Delicate Topping (curd cheese, cream) Unleavened Bread pre-heat Biscuits Shortcrust Biscuits Small Piped Biscuits Sponge Fingers Meringues Macaroons Small Pastries made...
- Page 32 OPERATING INSTRUCTIONS Baking with Pizza Function Cakes and Pastries Cakes in Cake Tins Covered Apple Flan Savoury Flan (e. g. Quiche Lorraine) Cheesecake Cakes and Pastries on Baking Sheets Rye Bread: pre-heat: 10 min. at 230 Fruit Flan (on yeast dough/ sponge base) Fruit Flan (on shortcrust pastry)
-
Page 33: Tips On Baking
Tips on Baking This is how to tell if your cake is cooked through The cake collapses (is sticky, not properly cooked through, water marks) The cake is too light Cake with moist topping/ cake, is not cooked through, is unevenly browned OPERATING INSTRUCTIONS Push a wooden skewer into the highest point of the cake. -
Page 34: Frozen Ready Meals Table
OPERATING INSTRUCTIONS Bakes and Gratins Table The information given in bold shows you the best oven function to use in each case. Dish Pasta Bake Lasagne Vegetable Gratin Browned Baguettes Sweet Puddings Fish Pies Stuffed Vegetables Potato Bake Frozen Ready Meals Table Food to be Cooked Frozen Pizza pre-heat 250 °C... -
Page 35: Roasting
Roasting For roasting, use the Ventitherm oven function. Ovenware for Roasting • Any heat-resistant dish is suitable for roasting. • If the dish has plastic handles, ensure that the handles are heat-resis- tant. • Large roasts can be roasted directly on the fat tray or on the shelf with the fat tray underneath (e. - Page 36 OPERATING INSTRUCTIONS Notes on the Roasting Tables Information is given in the tables on suitable oven functions, tempera- ture settings, cooking times and shelf positions for various types of meat. The cooking times are only for guidance. • We recommend roasting meat and fish in the oven from a weight of 1kg.
-
Page 37: Roasting Tables
Roasting Tables Roasting with conventional Heat The information given in bold shows you the best oven function to use in each case. Type of Meat Quantity Conventional Heat Weight Beef Pot Roast 1- 1.5 kg Roast Beef or Fillet per cm height - red inside - pink inside... - Page 38 OPERATING INSTRUCTIONS Type of Meat Game Saddle of Venison Leg of Venison Poultry Poultry Pieces 4 – 6 pieces Chicken Halves 4 – 6 pieces Chicken, Duck Goose Turkey Fish (steaming) Whole Fish Quantity Conventional Heat Weight Shelf Temp. Pos. in °C from Bottom...
- Page 39 Roasting with Rotitherm The information given in bold shows you the best oven function to use in each case Type of Meat Quantity Beef Roast Beef or Fillet - red inside - pink inside - cooked through Pork Shoulder, 1- 1.5 kg Neck, Joint of Ham Chop,...
- Page 40 OPERATING INSTRUCTIONS Type of Meat Chicken Halves 4 – 6 pieces Chicken, Duck Goose Fish (steaming) Whole Fish Quantity Rotitherm Weight Shelf Pos. from Bottom per 400 – 500 g per 1 – 1.5 kg per 1.5 – 2 kg per 3.5 –...
-
Page 41: Roasting With The Meat Probe
Roasting with the Meat Probe Notes on the Use of the Meat Probe The meat probe measures the temperature inside the meat being cooked. When the meat probe is used, the oven is automatically switched off when the pre-defined core temperature is reached, inde- pendent of the weight of the meat. -
Page 42: Temperature Table For Meat Probe
OPERATING INSTRUCTIONS Temperature Table for Meat Probe Food to be Cooked Beef Roast Beef/Fillet of Beef Roast Beef Pork Loin of Pork Roast Pork/Ham Neck, Knuckle Chop, Saddle Chop without Bone Meat Loaf Veal Roast Veal Loin of Veal with Kidneys Knuckle of Veal Game Game, Meat... -
Page 43: Grilling
Grilling • Use the grill • For grilling larger quantities, select the large area grill tion. • Set the temperature selection switch in each case to Important! Always pre-heat the empty oven for 5 minutes using the grill function! Ovenware for Grilling •... -
Page 44: Grilling Table
OPERATING INSTRUCTIONS Grilling Table Food for Grilling Pork Chop/ Escalope of Pork Fillet of Pork Grilled Sausages Shashlik Rissoles Beef Fillet Steaks Slices of Liver Veal Cutlet Veal Steaks Lamb Cutlet Half Chicken Fillet of Fish Trout Bread for Toasting Toast with Topping Shelf Grill... -
Page 45: Defrosting
Defrosting For defrosting use the Ventitherm Ovenware for Defrosting • Place food on a plate and put the plate on the shelf. • Only use grease-proof paper or foil for covering. Do not use plates or bowls otherwise the defrosting time will increase considerably. Shelf Positions •... -
Page 46: Preserving
OPERATING INSTRUCTIONS Preserving For preserving use the pizza Preserving Jars • Only use commercially available preserving jars (preserving jars with a rubber ring and glass lid) for preserving. • Jars with screw or bayonet tops are unsuitable, as are metal tins. Shelf Positions •... -
Page 47: Cleaning And Care
Cleaning and Care The Exterior of the Appliance Wipe the front of the appliance with a soft cloth and warm water with washing up liquid. • Do not use scourers, caustic cleaners or abrasive items. • You may use commercially available stainless steel cleaners. These also provide a protective film against finger marks. -
Page 48: Side Rails
OPERATING INSTRUCTIONS Side Rails The side rails on the left and right hand sides of the oven can be removed for cleaning the side walls. Removing and Fitting the Side Rails 1. Using a screwdriver, undo the side rail retaining screws. -
Page 49: Oven Light Bulb
Oven Light Bulb Warning! There is a risk of electric shock! Before changing the light bulb in the oven: • Switch off the oven! • Isolate the oven from the power supply. Replacing the Light Bulb in the Oven/Cleaning the Glass 1. -
Page 50: Combination Grill Element
OPERATING INSTRUCTIONS Combination Grill Element To make the cleaning of the oven roof easier, the combination grill ele- ment (top heat and grill) can be folded down. Warning! Only fold down the combination grill element when the oven is switched off and the oven is cold. Folding Down the Combination Grill Element 1. -
Page 51: Oven Door
Oven Door You can remove the oven door from your appliance for cleaning. Removing the Oven Door 1. Open the oven door com- pletely. 2. Fold up the links on the door hinges. 3. Take hold of the oven door at the sides with both hands and close slowly. -
Page 52: What To Do, If
OPERATING INSTRUCTIONS What to do, if … … the oven does not heat up? Check whether – the appliance is switched on, – all the necessary settings have been made, – a house fuse is defective. If you do not find any of these malfunctions, call an approved electri- cian or contact your local Service Force Centre. -
Page 53: Service And Spare Parts
Service Force, please visit the website at www.serviceforce.co.uk For Customer Services in the Republic of Ireland please contact us at the address below: Electrolux Group (Irl) Ltd Long Mile Road Dublin 12 Republic of Ireland When you contact the Service Centre they will need the following information: 1. -
Page 54: Customer Service
CUSTOMER SERVICE CUSTOMER SERVICE Customer Care For general enquiries concerrning your AEG appliance or for further information on AEG products please contact our Customer Care Department by letter or telephone at the adress below or visit our web- site at www.aeg.co.uk Customer Care Department AEG Domestic Appliances... -
Page 55: Warrenty Conditions
Warrenty Conditions Standard guarantee conditions We, AEG, undertake that if within 12 months of the date of the purchase this AEG appliance or any part thereof is proved to be defective by reason only of faulty work- manship or materials, we will, at our discretion repair or replace the same FREE OF CHARGE for labour, materials or carriage on condition that: •... -
Page 56: Installation Instructions
INSTALLATION INSTRUCTIONS INSTALLATION INSTRUCTIONS Important! Any electrical installation work must be carried out by a qualified electrician/competent person. The oven must be installed according to the instructions supplied. Technical Data Oven Exterior Dimensions Height x Width x Depth Oven Interior Dimensions Height x Width x Depth Capacity Nominal Power Consumption... -
Page 57: Safety Instructions For The Installer
Safety Instructions for the Installer • Legal regulations and the local electricity board’s requirements for making connections must be observed in full. • When connecting, repairing and replacing the oven light bulb, isolate the appliance from the electricity supply. Installation instructions •... -
Page 58: Electrical Connection
INSTALLATION INSTRUCTIONS Electrical Connection Warning! This appliance must be earthed! Important! Electrical requirements (for UK and Republic of Ireland only): • Check that the voltage stamped on the rating plate corresponds with your house electricity supply, which must be AC (alternating current). •... -
Page 59: Installation
INSTALLATION Drawing with Dimensions Installation in a Kitchen Unit 1. Fix retaining plates to both sides of the interior of the unit: • Fit the retaining plates 280 mm from the bottom edge of the unit with the embossing facing the unit and mark the rear holes. -
Page 60: Fitting The Oven
INSTALLATION INSTRUCTIONS 2. Fix the clips to both side walls on the appliance. Fitting the oven Warning! UK and Repub- lic of Ireland: Connect to an oven power point! It is necessary that you install a double pole switch between the oven and the electricity supply (mains), with a minimum gap of 3 mm between the... -
Page 61: Removing The Oven
INSTALLATION INSTRUCTIONS Removing the oven 1. Carefully pull the appliance out of the niche in the unit. 2. Disconnect the appliance from the mains supply. -
Page 62: Index
INDEX INDEX ....27 Baking Bakes and Gratins Table Frozen Ready Meals Table ... .26 Shelf Positions Table with Figures for . - Page 63 Notes Notes...
- Page 64 COMPETENCE B 6139-m Der umschaltbare Einbau-Backofen Benutzerinformation AEG Hausgeräte GmbH Postfach 1036 D-90327 Nürnberg http://www.aeg.hausgeraete.de Copyright by AEG 822947225...
Need help?
Do you have a question about the U25493 B 8139-4-m and is the answer not in the manual?
Questions and answers