Table of Contents
Advertisement
Quick Links
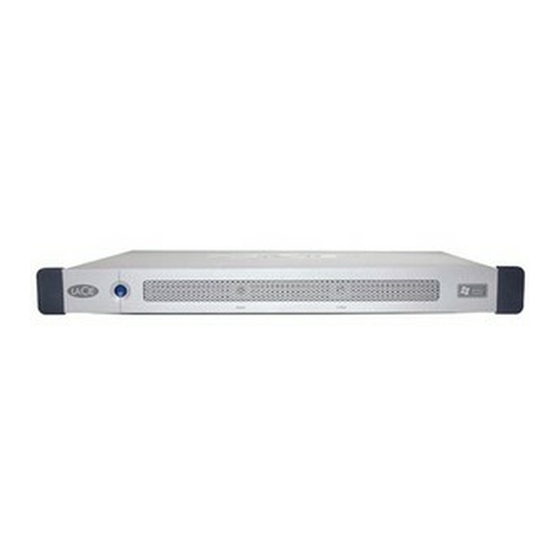
LaCie Ethernet Disk
User Manual
Table of Contents
1. Introduction ........................................................................................................... 6
2. Your LaCie Ethernet Disk ....................................................................................... 7
2.1. Minimum System Requirements .................................................................................................. 7
2.2. Box Content ............................................................................................................................. 8
2.3. Front Panel .............................................................................................................................. 9
2.4. Rear Panel ............................................................................................................................. 10
3. Setting Up Your LaCie Ethernet Disk .................................................................... 11
3.1. Stand-alone Installation .......................................................................................................... 11
3.2. Rack Installation ..................................................................................................................... 11
4. Installing Your LaCie Ethernet Disk ...................................................................... 12
4.1. Connecting the LaCie Ethernet Disk to Your Network................................................................. 12
4.2. Turning On Your LaCie Ethernet Disk ....................................................................................... 12
5. Configuring Your LaCie Ethernet Disk ................................................................. 13
5.1. Connecting Using LaCie Network Assistant ............................................................................... 13
5.2. Configuring the LaCie Ethernet Disk on a Network Without a DHCP Server ................................. 15
5.3. Using Ethernet Disk with Apple's Time Machine™...................................................................... 16
6. Accessing Your Ethernet Disk Over the Network .................................................. 17
6.1. Accessing Shared Folders ........................................................................................................ 17
6.1.1. Other Connection Methods .......................................................................................... 18
6.2. Connecting Via HTTP or FTP ................................................................................................... 20
6.3. Connecting with an FTP Client ................................................................................................. 20
7. Using the Web Administration Page .................................................................... 21
7.1. Accessing the Web Administration Page ................................................................................... 21
7.2. Wizard Mode and Advanced Mode ......................................................................................... 22
7.3. Using the Wizard Mode .......................................................................................................... 22
7.3.2. Username ................................................................................................................... 23
7.3.3. Confirmation ............................................................................................................... 23
7.3.4. Set-up Complete.......................................................................................................... 24
7.4. Using the Advanced Mode ...................................................................................................... 24
7.4.1. Changing the Name and Location of the LaCie Ethernet Disk .......................................... 24
7.4.2. Setting the Date and Time ............................................................................................ 25
7.4.3. Sharing Your LaCie Ethernet Disk in Advanced Mode ...................................................... 26
7.5. Shutting Down the Ethernet Disk .............................................................................................. 28
8. Advanced Management of Users, Groups and Shares ......................................... 29
8.1. Listing Local Users .................................................................................................................. 29
8.1.1. Creating a User ........................................................................................................... 29
8.1.2. Editing a User .............................................................................................................. 29
8.1.3. Deleting a User ........................................................................................................... 29
8.2. Listing Local Groups ............................................................................................................... 30
8.2.1. Creating a Group ........................................................................................................ 30
8.2.2. Editing a Group ........................................................................................................... 30
8.2.3. Deleting a Group ........................................................................................................ 30
Table of Contents
page 1
Advertisement
Table of Contents

Related Manuals for LaCie 301300U - Ethernet Disk NAS Server


Summary of Contents for LaCie 301300U - Ethernet Disk NAS Server
-
Page 1: Table Of Contents
5. Configuring Your LaCie Ethernet Disk ..............13 5.1. Connecting Using LaCie Network Assistant ................13 5.2. Configuring the LaCie Ethernet Disk on a Network Without a DHCP Server ......... 15 5.3. Using Ethernet Disk with Apple’s Time Machine™..............16 6. - Page 2 11. Using the LaCie Shell ................... 44 11.1. Accessing the LaCie Shell Using Remote Desktop (Windows)............ 45 11.2. Accessing the LaCie Shell Using Remote Desktop for Mac OS X ..........46 11.3. Firewall ..........................47 11.4. Back Up the LaCie Ethernet Disk onto other NAS Devices ............47 11.5.
- Page 3 Forward User Manual page 3 Copyrights FCC Statement rized by LaCie could void the FCC & Industry Canada regulations and negate Copyright © 2011 LaCie. All rights re- your authority to operate the product. LaCie Ethernet Disk served. No part of this publication may...
- Page 4 LaCie Ethernet Disk Forward User Manual page 4 Your LaCie Ethernet Disk contains ✦ Do not place the LaCie Ethernet CAUTION: Modifications not autho- no user-serviceable parts. If it ap- Disk near sources of magnetic rized by the manufacturer may void the...
- Page 5 IMPORTANT INFO: Any loss, cor- ruption or destruction of data while using a LaCie drive is the sole respon- sibility of the user, and under no cir- cumstances will LaCie be held liable for the recovery or restoration of this data.
-
Page 6: Introduction
1. Introduction Share information across diverse platforms, over a network or over the Web. The LaCie Ethernet Disk is the first hard drive that can be connected to a network, without any technical exper- tise. You’ll be able to easily communicate by sharing content with others over a network to collaborate on multiple projects for greater workgroup productivity. -
Page 7: Your Lacie Ethernet Disk
LaCie Ethernet Disk Your LaCie Ethernet Disk User Manual page 7 2. Your LaCie Ethernet Disk 2.1. Minimum System Requirements Client’s Minimum Requirements: • TCP/IP enabled network • Microsoft Windows 95, 98, Me, NT, 2000, XP • Mac OS 9.x, 10.x •... -
Page 8: Box Content
User Manual page 8 2.2. Box Content LaCie Ethernet Disk Ethernet cable Power cable LaCie Ethernet Disk Utilities CD-ROM READY H DISK Quick Install Guide IMPORTANT INFO: Please save your packaging. In the event that the drive should need to be repaired or serviced, it must be... -
Page 9: Front Panel
Disk). You can also shutdown the Ethernet Disk by pressing the Ethernet Disk for detailed steps.) the power button on the front of the drive once the LaCie Ethernet Disk will shutdown shortly afterwards. In an emer- gency you can force the LaCie Ethernet Disk to shutdown by pressing and holding in the power button for five seconds;... -
Page 10: Rear Panel
LaCie Ethernet Disk’s serial number. Write down the serial number and keep it in a safe place, because you will need to provide the number in the event you have to call LaCie Technical Support for any reason in regard to the drive’s performance. -
Page 11: Setting Up Your Lacie Ethernet Disk
Your LaCie Ethernet Disk was designed to allow quick and easy installation. 3.1. Stand-alone Installation If you do not want to install the LaCie Ethernet Disk into a rack, you can place it on a tabletop as you would a desktop or work- station (Fig. -
Page 12: Installing Your Lacie Ethernet Disk
Ethernet Disk Press the power button on the front of the drive and wait for the LaCie Ethernet Disk to start up. Once the Ready light is on and stays lit, the LaCie Ethernet Disk will be ready to use. -
Page 13: Configuring Your Lacie Ethernet Disk
User Manual page 13 5. Configuring Your LaCie Ethernet Disk Before your users can access and use the LaCie Ethernet Disk, you have to make sure the correct IP address and network set- tings are assigned to the unit. 5.1. Connecting Using LaCie... - Page 14 An Network Assistant icon will appear in the menu bar and the Assistant will automatically detect your LaCie Ethernet Disk and any other LaCie storage devices on your network. Click on the icon in the menu bar and select Configuration Win- dow..
-
Page 15: Configuring The Lacie Ethernet Disk On A Network Without A Dhcp Server
IP address to all devices on the network to allow devices to find each other. If your network does not have DHCP server, you may need to manually assign your LaCie Eth- ernet Disk an IP address and other network information. -
Page 16: Using Ethernet Disk With Apple's Time Machine
Time Machine, refer to Apple’s documentation. Follow these steps to use make the Ethernet Disk’s share’s avail- able for use with Time Machine: Make sure that you have installed and are running the LaCie Network Assistant. See section 5.1. Connecting Using LaCie Network Assistant for details. -
Page 17: Accessing Your Ethernet Disk Over The Network
LaCie Network Assistant will help you quickly connect to the shared folder(s) on your LaCie Ethernet Disk. To access shared folders (all users): Fig. 15 Run the LaCie Network Assistant (LNA). Click on the LNA icon in the system tray (Windows users, Fig. 15) or menu bar (Mac users Fig. -
Page 18: Other Connection Methods
(This user name and password is the factory default; if you have already created a user, input your user name and password.) The LaCie Ethernet Disk will appear as a drive with one share folder on the network. Windows Me/2000 For Windows Me and Windows 2000 users, if you cannot find Fig. - Page 19 Your server should appear in the list with the default name “La- Cie-XXXXXXXXX”. Select it and press OK. Linux Users Under KDE, open konqueror and type in the IP address of the LaCie Ethernet Disk into the address field: For FTP access – ftp://[Ethernet Disk IP address] For HTTP access –...
-
Page 20: Connecting Via Http Or Ftp
You can also connect directly to the FTP share by opening a browser at ftp://[Ethernet Disk IP address]/[sharename]. 6.3. Connecting with an FTP Client You can use any FTP client to connect to the LaCie Ethernet Disk. Clients like LeechFTP (Fig. 19), CuteFTP, etc., will work normally. -
Page 21: Using The Web Administration Page
Disk IP address] (“Ethernet Explorer 5.0 or higher as your browser. Disk IP address” stands for the IP address assigned to your LaCie Ethernet Disk by the LaCie Network Assistant). You should see a Web page showing the available shares on your LaCie Ethernet Disk. -
Page 22: Wizard Mode And Advanced Mode
If you will be using your LaCie Ethernet Disk with Mac OS 9.x, the file and folder length is limited to 27 char- acters. If you will be using your LaCie Ethernet Disk in a network environment with Mac OS 9.x and Mac OS 10.x or Windows, the same limitation applies. -
Page 23: Username
The share that you are about to create is public – this means that anyone who has an account on the LaCie Ethernet Disk will be able to access it. To limit access, you have to create users. If you... -
Page 24: Set-Up Complete
7.4.1. Changing the Name and Location of the LaCie Ethernet Disk Changing the Name The server name is the one that is used to identify your LaCie Ethernet Disk on the network. By default, it is set as LACIE- XXXXXXXXX. -
Page 25: Setting The Date And Time
Please ask your system administrator for more information. Fig. 27 7.4.2. Setting the Date and Time You can set the date and time of your LaCie Ethernet Disk in the Web Administration Page, under the Server section (Fig. 28). -
Page 26: Sharing Your Lacie Ethernet Disk In Advanced Mode
7.4.3. Sharing Your LaCie Ethernet Disk in Advanced Mode Your LaCie Ethernet Disk works like a typical file sharing system: you create users and/or groups that have access to use and share data, then create a share and assign the users and/or groups rights to that share. - Page 27 If you will be using your LaCie Ethernet Disk with Mac OS 9.x, the file and folder length is limited to 27 char- acters. If you will be using your LaCie Ethernet Disk in a network environment with Mac OS 9.x and Mac OS 10.x or Windows, the same limitation applies.
-
Page 28: Shutting Down The Ethernet Disk
When you create a share, the Windows (CIFS/SMB) sharing is activated by default. In the current version of the LaCie Ethernet Disk (version 1.2 and later), you can set share permissions under Windows and the Mac OS. Use the arrow buttons to add or remove permissions. -
Page 29: Advanced Management Of Users, Groups And Shares
La- Cie Ethernet Disk to which (s)he is allowed. In the Web Administration Page, click on Users to have access to the list of the local users on your LaCie Ethernet Disk (Fig. 34). -
Page 30: Listing Local Groups
In the Web Administration Page, click on the Groups tab to have access to the list of local groups on your LaCie Ethernet Disk (Fig. 35). -
Page 31: Listing Local Shares
Cie Ethernet Disk, or when you connect a mass storage device From the list of local groups, click on the button next to the share to your LaCie Ethernet Disk, you will be able to choose the drive name to edit that share. Refer to 7.4.3. -
Page 32: Managing Your Lacie Ethernet Disk
32 9. Managing Your LaCie Ethernet Disk 9.1. Checking Your Server Configuration From the Web Administration Page, click on the Server tab to find out the configuration of your LaCie Ethernet Disk (Fig. 37). You should see: • Machine name •... -
Page 33: Changing The Administrator's Password
LaCie Ethernet Disk Managing Your LaCie Ethernet Disk User Manual page 33 9.2. Changing the Administrator’s Password By default, the administrator’s password is admin. You should change this password as soon as possible, for security reasons. In the Web Administration Page, click on the Users tab. -
Page 34: Rebooting Your Server
LaCie Ethernet Disk Managing Your LaCie Ethernet Disk User Manual page 34 9.4. Rebooting Your Server In the Web Administration Page, click on the Server tab. At the bottom of the page, click on the Reboot button (Fig. 40). The server will start to reboot. It will take a little time before it reboots. -
Page 35: Changing Your Network Configuration
Page, you will not get the Reboot your machine page, because your LaCie Ethernet Disk will have changed to another subnet and it will appear as though you cannot access the LaCie Ethernet Disk. You will then need to use a machine on the same subnet to access the Web Administration Page of your LaCie Ethernet Disk. -
Page 36: Formatting Disks
User Manual page 36 9.7. Formatting Disks The LaCie Ethernet Disk allows you to format a disk. To format a disk, use the formatting tool: In the Web Administration Page, click on the Disk tab. Check format for the drive that you want to format (Fig. -
Page 37: Defragmenting Disks
Check defragment for the drive that you want to defragment (Fig. 44). There should only be one drive, unless you have attached an external hard disk drive to your LaCie Ethernet Disk. Answer the following questions, then click on the Defrag- Fig. -
Page 38: Backing Up Lacie Ethernet Disk Using The Built-In Backup Engine
Backup Engine IMPORTANT INFO: This backup program is only available if your LaCie Ethernet Disk has a direct attached hard drive. For information on backing up the Ethernet Disk onto another NAS (network-attached storage) device, refer to section 11.4. Back Up the LaCie Ethernet Disk onto other NAS Devices. -
Page 39: Recovering Files Using The Built-In Backup Engine
LaCie Ethernet Disk Managing Your LaCie Ethernet Disk User Manual page 39 Press the Run or schedule backup job button to start the backup process. TECHNICAL NOTE: Backup time is dependent upon the speed of the drive that you are using, the port that you are using (internal You can stop the backup process while it is running by clicking drives are limited to 133Mb/s, Hi-Speed USB 2.0 is limited to... - Page 40 LaCie Ethernet Disk Managing Your LaCie Ethernet Disk User Manual page 40 Select the file(s) or folder(s) you want to restore (Fig. 49). Click the Next button. Fig. 49 Click the Finish button (Fig. 50). The restore progress dialog will appear.
-
Page 41: Backing Up Disks Using Third-Party Software Programs
LaCie Ethernet Disk over the network to a Tape Drive. Since your LaCie Ethernet Disk can be seen on the local area network (LAN), and because you can map the shares, you can backup all the data on your LaCie Ethernet Disk over the net- work, using the program of your choice. -
Page 42: Restoring Your Lacie Ethernet Disk
Disk CAUTION: This is an emergency procedure only! Do not at- tempt to restore your LaCie Ethernet Disk if your system is func- tioning properly. If you want to restore your system to its initial version, open a browser to http://server_ip/nas.restore... -
Page 43: Adding Additional Storage Space
Disk by connecting an external hard drive using a Hi-Speed USB 2.0 port. Connect the hard drive to the LaCie Ethernet Disk using one of the Hi-Speed USB 2.0 ports. In the Web Administration Page, click on the Disk tab (Fig. -
Page 44: Using The Lacie Shell
User Manual page 44 11. Using the LaCie Shell The LaCie Shell provides you with a simplified interface to the major functions of the Ethernet Disk. Remote Desktop (for Windows and Macintosh) allows you to access the LaCie Shell from your computer without having to connect a monitor, keyboard, or mouse directly to the Ethernet Disk. -
Page 45: Accessing The Lacie Shell Using Remote Desktop (Windows)
Click on Start, point to Programs, point to Accessories, point to Communications and then click Remote Desktop Con- nection. In the Remote Desktop Connection dialog Computer field en- ter the IP address of the LaCie Ethernet Disk, and click Con- nect (Fig. 55). -
Page 46: Accessing The Lacie Shell Using Remote Desktop For Mac Os X
Desktop Connection icon (Fig. 58). In the Remote Desktop Connection dialog Computer field en- ter the IP address of the LaCie Ethernet Disk, and click Con- nect (Fig. 59). In the LaCie Log On dialog Type in the Administrator user- name and password, and click OK (Fig. -
Page 47: Firewall
11.3. Firewall To configure the firewall of the Ethernet Disk Click on the Firewall button. In the LaCie Ethernet Disk Firewall dialog that appears select the desired settings in each section of the dialog. Click Apply Settings, then Fig. 62 Click Quit. - Page 48 LaCie Ethernet Disk Using the LaCie Shell User Manual page 48 In the dialogue window that opens, click on Browse and nav- igate to the target volume on which to backup your Ethernet Disk and click Open (Fig. 66). Fig. 66 Type a name for the backup and click Next (Fig.
-
Page 49: Diagnostics
Click on the System Log button to display system messages and errors. If you are unfamiliar with Windows error messages, or have any questions about errors you see here, contact LaCie Technical support. There are three types of messages: errors, warnings, and infor- mation. - Page 50 9.10. Backing Up Disks Using Third-party Software Programs. Please contact LaCie Technical Support before attempting any restore of the Ethernet Disk, they will advise you whether to use this Wizard, or the one of the methods described in section 9.12.
-
Page 51: Logging Off The System Via Remote Desktop (Windows And Macintosh)
LaCie Ethernet Disk Using the LaCie Shell User Manual page 51 11.6. Logging Off the System via Remote Desktop (Windows and Macintosh) If you click the Close button of the Remote Desktop window, you’ll be prompted to disconnect from the remote system (Fig. -
Page 52: Troubleshooting
Use the LaCie Network Assistant. You will see all of the related information about your LaCie Ethernet Disk address of the LaCie on the right panel of the Assistant: when you open the LaCie Network Assistant, you will see a list of all of Ethernet Disk while the (LaCie only) NAS servers running on your network. - Page 53 If this is the case, and the device is not plugged others, on the same in, the share names will still be in the registry of your LaCie Ethernet Disk. In this instance, you will need to network? delete the “broken share”...
-
Page 54: Contacting Customer Support
If you have asked yourself all of the pertinent questions in the troubleshooting checklist, and you still can’t get your LaCie drive to work properly, contact us via the provided Web link. Before contacting us, make sure that you are in front of your computer and that you have the following information on hand: ✦... -
Page 55: Lacie Technical Support Contacts
LaCie Ethernet Disk Contacting Customer Support User Manual page 55 13.1. LaCie Technical Support Contacts LaCie Asia, Singapore, and Hong Kong LaCie Australia Contact us at: Contact us at: http://www.lacie.com/asia/contact/ http://www.lacie.com/au/contact/ LaCie Belgium LaCie Canada Contact us at: Contact us at: http://www.lacie.com/be/contact/... -
Page 56: Restoring Your Ethernet Disk Using The Lacie Restore Cd
User Manual page 56 14. Restoring Your Ethernet Disk Using the LaCie Restore CD In the event that LaCie Technical Support asks you to restore your Ethernet Disk from CD please use the steps outlined below. IMPORTANT INFO: Restoring will erase all data from the Eth- ernet Disk;... - Page 57 Fig. 75 When the Ready Light on the front of the Ethernet Disk comes on, the restore process is complete. Use the LaCie Network Assistant to configure your Ethernet Disk. Using a Web browser access the Ethernet Disk and apply any LaCie Ethernet Disk software updates needed to restore the Ethernet Disk software up to the latest version.
-
Page 58: Warranty
✦ The tamper seal on the drive casing is broken. AUSTRALIA. LaCie and its suppliers accept no liability for any loss of data during the use of this device, or for any of the problems caused Phone: 02 8063 3711 as a result. -
Page 59: Glossary
LaCie Ethernet Disk Glossary User Manual page 59 16. Glossary a ribbon cable inside the PC. An external controller is an Backup – (1) The act of creating at least one additional copy expansion card which fills one of the free slots inside your PC... - Page 60 LaCie Ethernet Disk Glossary User Manual page 60 mable read-only memory or an electronically-erasable, pro- Internet – A collection of networks whose users communicate grammable read-only memory chip. Used for controlling the with one another. Each communication carries the address operation of the computer or tape drive.
- Page 61 LaCie Ethernet Disk Glossary User Manual page 61 Network – A series of points or nodes interconnected by the average of a large number of random samplings all over communication paths. Networks can interconnect with other the disk. Seek time is CPU independent, meaning that seek networks and contain subnetworks.
- Page 62 LaCie Ethernet Disk Glossary User Manual page 62 uses the Internet Protocol (IP). UDP uses the IP to get a data unit (a datagram) from one computer to another, but does not sequence the packets that the data arrives in. UDP also...
Need help?
Do you have a question about the 301300U - Ethernet Disk NAS Server and is the answer not in the manual?
Questions and answers