
Subscribe to Our Youtube Channel
Related Manuals for Akura ABLDVD2202W-HDIDUC


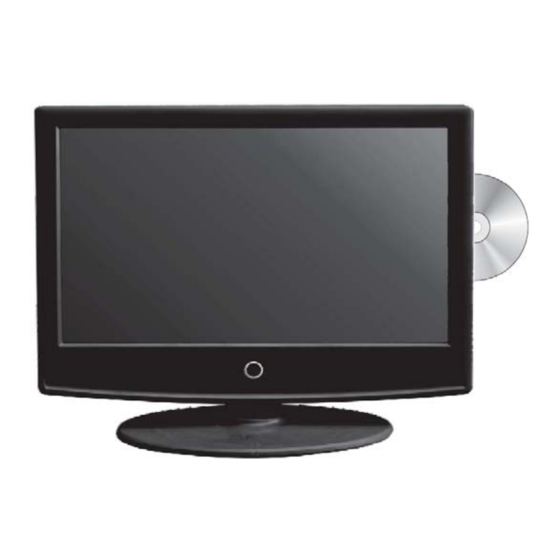
Summary of Contents for Akura ABLDVD2202W-HDIDUC
- Page 1 Model : ABLDVD2202-HDIDUC 22” Digital LCD TV with DVD DVBt “Freeview” HDMI USB SD card reader...
-
Page 2: Table Of Contents
MAINS LEAD connection ANTENNA (aerial) connection SCART connection Y.Pb,Pr connection S-VIDEO connection VGA (PC) connection HDMI connection CAM (conditional access module) USB and SD CARD ports SERVICE PORT Remote Control TV mode Remote Control DTV mode Remote Control Teletext mode Remote Control DVD mode Remote Control Setup Tuning Menu... - Page 3 Basic Operation Digital Audio / J PEG Playback Function settings System Setup Screen Saver Password Rating Language Setup Audio Setup USB and SD Card Reader...
- Page 6 Remote Control User Manual LCD TV Set...
-
Page 7: Service Port
4 : Front Controls and Rear Connections Front View Eject. Press to eject DVD disc. USB Port Play/Pause. Press once to play, press again to pause. SD Card port Stop. Press to stop DVD playing. Vol + / Vol - Adjusts volume level and adjusts levels in Menu mode. - Page 8 Press the “POWER” button on the side of the TV and it will come out of standby, the led will turn green. The AKURA Logo wil be displayed and then the TV screen will go black for approx 10 seconds, this is normal. After the delay the TV will operate normally.
- Page 9 Connect a SCART lead (not supplied) from the DVD/VCR and to the SCART connector on the TV. Select SCART using the SOURCE button of the TV. Connect the Y PbPr output of the DVD, VCR or other item to the Y PbPr input on the TV. (lead not supplied).
- Page 10 Connect the S_VIDEO output of the DVD, VCR or other item, to the S-VIDEO input on the TV. The picture quality will be improved compared with SCART or AV input. Connect the Audio output of the DVD, VCR or other item to the Audio input sockets on the TV using a stereo RCA cable (not supplied). Select S-VIDEO using the SOURCE button on the remote control or TV.
- Page 11 Connect HDMI output from DVD/VCR or X box or similar to the TV and use the “SOURCE” button to select HDMI 1. (Lead not supplied)
-
Page 13: Remote Control
6. REMOTE CONTROL Turns Tv on and back to Standby Press to display SOURCE Menu. Press ▼/▲ to select the required source and press ENTER. Selects NICAM or Mono if transmitted Press to select time TV will switch off to standby Press 0 –... - Page 14 Selects TV or Radio modes Selects screen display ratio...
- Page 15 Press to displays subtitles, press again to turn off Press to magnify text size...
- Page 16 DVD SETUP. Enters the DVD player setup menu. Selects picture magnification...
- Page 17 Open the battery cover Fit two “AAA” batteries (Not supplied). Ensure the battery polarities are correct i.e + to + and – to -. Replace the battery cover To prevent injury, do NOT break open or throw exhausted batteries in a fire. Do not place in the domestic waste, consult your local waste disposal company.
-
Page 18: Auto Tuning
7. MENU OPERATION Press ▲/▼ to select the item required and ► or OK to confirm Press MENU to return to a previous menu Press EXIT to exit the menu’s Press ◄/► to select the country, then OK to confirm. When it is Auto Tuning, press MENU to skip the current tuning (ATV or DTV), or EXIT to return to the previous menu. - Page 19 UHF CH “I” 600.00 Press ▲/▼ to select. Press ◄/► to adjust as required. See details in the following sub–option. Select SAVE and press ENTER/OK...
- Page 20 To Store. Press ◄/►to select the channel number you want to save to. System. Press ◄/►to select the sound system. In the UK it is “I”, Western Europe “B/G”, Eastern Europe “D/K”. Parts of France “L” or “LL”. Current Channel. Press ◄/►to select the current channel number.
-
Page 21: Picture Menu
Rename. Press ▲/▼ to select the channel you want to rename. Press (Green) “Rename” to mark the selected channel. Press ◄/►to select the position in the word, then press ▲/▼ to select the letter or number required. To exit, press EXIT or wait for the menu to “time out”. Move. - Page 22 Noise Reduction. Press ◄► to turn On or Off the Noise Reduction Screen. ( only available in PC mode). Auto Adjust. Select “Auto Adjust” and press ►, the unit will automatically adjust all settings to achieve the best effect. “the picture will “jitter” for a few seconds). H-Position.
-
Page 23: Sound Menu
Press MENU to display the main menu, press the ◄► to select the SOUND menu, press ▼ to enter the sub menu. Press MENU to return to the main menu. Sound Mode. Press ◄► to select the sound mode, Music, Movie, Sport, User and Standard. Press OK to confirm and return to the previous menu. -
Page 24: Option Menu
Clock. Press ► to select Date, Month, Year, Hour and Minutes, press ▲▼◄► to set the time. (note :- this is set automatically in DTV mode). Off time. Press ► to select On or one of the features listed in the menu, press ▲▼◄► to set the time the TV is to be turned Off. - Page 25 Press MENU to display the main menu, press ►◄ to select LOCK. Press ▼ and a request to enter the PIN number “ 0000” will be shown. Enter the PIN number and the Lock Sub menu will be displayed. Use the ▲▼ buttons to select the item required.
-
Page 26: Input Source
Press the List button to enter into the Channel list directly. Press SOURCE to display the INPUT SOURCE list. Press ▲▼ to select the input required and press OK to confirm. -
Page 30: Password
Select “ON” and the disc will resume paying from where it was stopped. Select “OFF” the disc will start playing from the start. NOTE : This can only be set if the password is locked. It will not reset the Password or Rating settings. - Page 34 This TV has the added feature of USB and SD Card inputs. This allows the user to play music files, photographs and any other digital data stored on either a USB memory stick or SD memory card. The inputs are situated adjacent to the manual DVD control buttons on the right side of the TV.
- Page 35 Should the TV stop working or work abnormally. Please consult the guide below, before calling the customer help line. Symptom Possible cause Remedy Check DC connection to TV Dead. No led lit Power not connected to TV Check connection to mains supply an that the supply is turned on.
- Page 36 10. DISC CARE...
-
Page 37: Wall Mounting
Tv. Mount the bracket using the manufacturers instructions. Do NOT use mounting screws longer than 16mm. Fit the wall bracket securely following the manufacturers instructions. Akura or it agents accept no responsibility for damage caused by faulty bracket installation. 12. Useful Information. -
Page 38: Specifications
13. Specifications Screen size. 21.5” (54.6cm) Display type TFT LCD Resolution (Pixels) 1366 x 768 Aspect Ratio 16 X 9 Mains supply 100-240V AC 50.60Hz 0.25A (59W Max) TV System PAL / SECAM TV antenna input 75 Ohms Audio Output L/R 2 x 3W Tuning Range (Analog) Ch2 –...
Need help?
Do you have a question about the ABLDVD2202W-HDIDUC and is the answer not in the manual?
Questions and answers