Whirlpool WD 142 IX Instructions For Use Manual
Built-in plate-warmer drawer wd 142 ix
Hide thumbs
Also See for WD 142 IX:
- Instructions for use manual (109 pages) ,
- Instructions for use manual (28 pages)
Table of Contents
Advertisement
Available languages
Available languages
Quick Links
Gebrauchsanweisung
Brugsanvisning
Instructions for use
Bruksanvisning
Mode d'emploi
Käyttöohje
Gebruiksaanwijzing
Manual de utilização
Istruzioni per l'uso
Instrucciones para el uso
Návod k použití
Instrukcje użytkowania
Návod na použitie
Használati utasítás
Instruc∑iuni de utilizare
Инструкци
за употреба
Инструкции по эксплуатации
Я
Advertisement
Table of Contents

Related Manuals for Whirlpool WD 142 IX


Summary of Contents for Whirlpool WD 142 IX
- Page 1 Gebrauchsanweisung Brugsanvisning Instructions for use Bruksanvisning Mode d’emploi Käyttöohje Gebruiksaanwijzing Manual de utilização Istruzioni per l’uso Instrucciones para el uso Návod k použití Instrukcje użytkowania Návod na použitie Használati utasítás Instruc∑iuni de utilizare Инструкци за употреба Инструкции по эксплуатации Я...
- Page 2 DEUTSCH Gebrauchsanweisung Seite 3 ENGLISH Instructions for use Page 11 FRANÇAIS Mode d’emploi Page 20 NEDERLANDS Gebruiksaanwijzing Pagina 28 ITALIANO Istruzioni per l’uso Pagina 36 ‰ χρήοη Σ ‰α 44...
-
Page 3: Informationen Zum Umweltschutz
INFORMATIONEN ZUM UMWELTSCHUTZ Entsorgung von Verpackungsmaterialien • Das Verpackungsmaterial ist zu 100 % wieder verwertbar und durch das Recyclingsymbol gekennzeichnet. • Werfen Sie das Verpackungsmaterial deshalb nicht einfach fort, sondern entsorgen Sie es so, wie es die verantwortlichen Stellen vorschlagen. Das Symbol auf dem Gerät bzw. -
Page 4: Wichtige Hinweise
WICHTIGE HINWEISE Achtung: • Ziehen Sie Töpfe und Pfannen nicht über den • Die Wärmeschublade darf ohne Aufsicht weder Boden der Wärmeschublade, um Kratzer zu von Kindern noch von Personen benutzt vermeiden. werden, die hierzu nicht in der Lage sind. •... - Page 5 VOR DER ERSTEN INBETRIEBNAHME DER WÄRMESCHUBLADE Drücken Sie zum Öffnen und Schließen der Wärmeschublade wie auf der Abbildung dargestellt auf die Mitte des Paneels. Reinigen Sie das Gerät vor der ersten Benutzung wie folgt: - Reinigen Sie die Vorderseite mit einem feuchten Tuch und trocknen Sie sie anschließend ab.
-
Page 6: Einbau Des Geräts
EINBAU DES GERÄTS Sicherheitshinweise für den Einbau der Wärmeschublade WICHTIG: Die Wärmeschublade muss unter Beachtung der folgenden Anweisungen sofort am Einbauschrank befestigt werden. Mit der Installation des zusammen mit der Wärmeschublade betriebenen Küchengerätes kann erst nach der Befestigung der Wärmeschublade am Einbauschrank begonnen werden. - Page 7 Einbaumaße Die Einbaumaße erhält man aus der Summe der Maße der Wärmeschublade und des damit kombinierten Gerätes. Alle Maße werden in Millimetern angegeben.
-
Page 8: Elektrischer Anschluss
ELEKTRISCHER ANSCHLUSS Lassen Sie den elektrischen Anschluss des Alle Reparatur- und Wartungseingriffe dürfen Gerätes von einer Fachkraft ausführen. während der Garantiezeit ausschließlich durch qualifiziertes Fachpersonal durchgeführt werden, Achtung: Vergewissern Sie sich vor dem Anschluss andernfalls erlischt der Garantieanspruch. an das Stromnetz, dass das Netzkabel der Einbau, Reparatur und Reinigung dürfen erst nach Wärmeschublade korrekt verlegt und NICHT unter Trennung des Gerätes vom Stromnetz durchgeführt... -
Page 9: Wartung Und Reinigung
WARTUNG UND REINIGUNG Wichtig: Verwenden Sie keine Wasserdruck- oder Rutschfeste Basis der Wärmeschublade Wasserdampfreinigungsgeräte. • Die rutschfeste Basis kann herausgenommen Vermeiden Sie auch den Gebrauch von soda-, werden, um den Boden der Wärmeschublade säure- oder chloridhaltigen Reinigern, zu reinigen. Die Basis kann von Hand mit Scheuermitteln (in Pulverform oder flüssig), warmem Wasser und mildem Reiniger Scheuerschwämmen (z. -
Page 10: Störung - Was Tun
STÖRUNG - WAS TUN? Falls das Geschirr oder die Speisen nicht heiß Die Vor-/Aufwärmzeit wird von verschiedenen genug werden, vergewissern Sie sich, dass: Faktoren wie z. B. • das Gerät eingeschaltet ist, - dem Material, der Stärke, der Menge und •... -
Page 11: Safeguarding The Environment
SAFEGUARDING THE ENVIRONMENT Disposal of packing material • The packing material is 100% recyclable and is marked with the recycle symbol • The various parts of the packing must be disposed of in compliance with local regulations; do not disperse in the environment. The symbol on the product or on the accompanying documentation indicates that it should not be treated as domestic waste but must be taken to an appropriate collection centre for the recycling of... -
Page 12: Important Notes
IMPORTANT NOTES Important: • Residual condensation could eventually damage • The warming drawer must not be used by the warming drawer and surrounding cabinets. young children or the infirm without It is advisable to: supervision. - cover food; • Make sure children do not play with the - wipe the drawer dry after the drawer has appliance. -
Page 13: Before Using The Warming Drawer
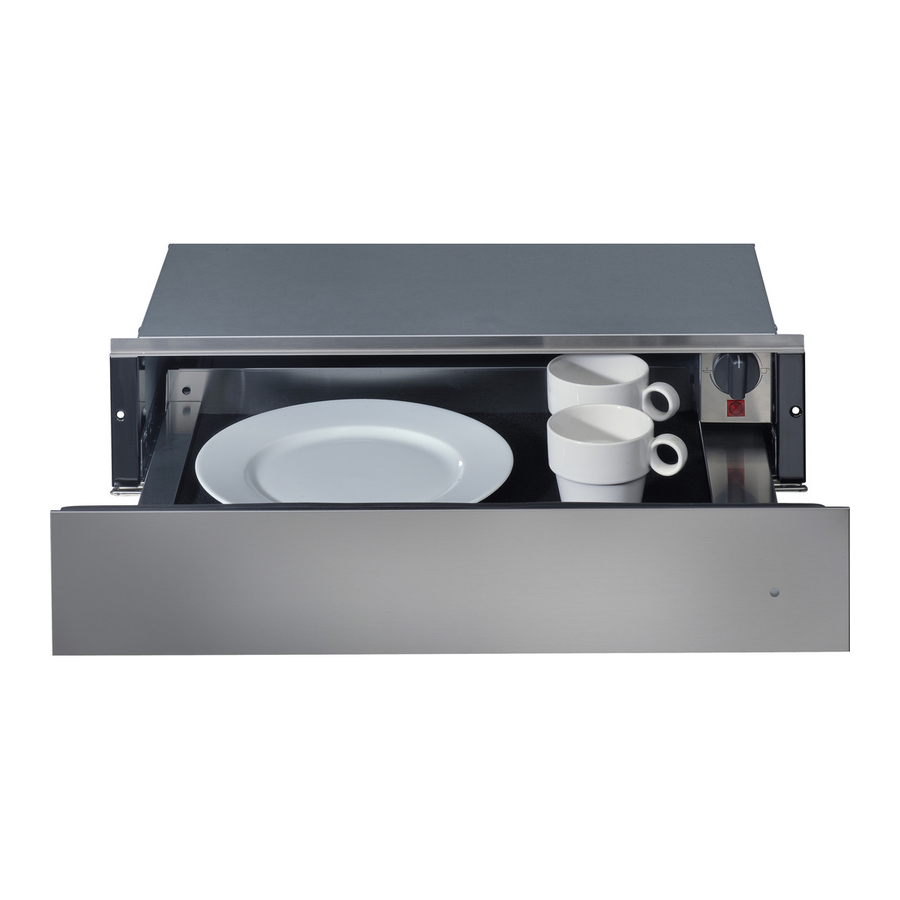
BEFORE USING THE WARMING DRAWER To open and close the drawer push the centre of the panel as shown in the figure. When using the appliance for the first time, clean it as follows: - clean the surface with a damp cloth, then dry. - Preheat the empty drawer for at least 2 hours: turn the temperature knob to the max. -
Page 14: Fitting The Appliance
FITTING THE APPLIANCE Safety instructions for drawer installation IMPORTANT: The drawer ( applicable for both models) must be installed into cabinetry, complying with the following instructions. Do not connect the appliances to the electrical supply until they have been correctly installed into cabinetry. - Page 15 Recess measurements The dimensions of the recess are obtained from the size of the dish warmer plus the size of the appliance combined with it. All measurements are given in mm.
-
Page 16: Electrical Connection
ELECTRICAL CONNECTION Contact a qualified technician to carry out the Installation, repair and cleaning operations must only appliance electrical connection. be carried out after ensuring that the appliance is disconnected from the power supply. Important: Before connecting the drawer to the domestic power supply to check its operation, The appliance is disconnected from the power always make sure the drawer power cable is... -
Page 17: Care And Cleaning
CARE AND CLEANING Important: Never use high pressure water or Vitroceramic drawer base steam cleaners. It is advisable to clean the bottom of the drawer Also, do not use: detergents containing soda, after every use, making sure to allow it to cool. In acids or chlorides, abrasive detergents (in powder this way grime will not accumulate and cleaning is or lotion), abrasive sponges (e.g. -
Page 18: Troubleshooting Guide
TROUBLESHOOTING GUIDE If the dishes or food are not warm enough, Different factors affect the warming time, e.g.: make sure: - the material and thickness of the dishes, the • the appliance is on load amount and its arrangement, temperature •... -
Page 19: Electrical Connection For Great Britain And Ireland Only
ELECTRICAL CONNECTION FOR GREAT BRITAIN AND IRELAND ONLY Warning - this appliance must be earthed Fuse replacement If the mains lead of this appliance is fitted with a BS 1363A 13amp fused plug, to change a fuse in this type of plug use an A.S.T.A. - Page 20 CONSEIL POUR LA PROTECTION DE L'ENVIRONNEMENT Élimination des emballages • Les matériaux d'emballage sont entièrement recyclables comme l'indique le symbole de recyclage • Par conséquent, ne les jetez jamais dans la nature mais conformez-vous aux réglementations locales en vigueur en matière d'élimination des déchets. Le symbole apposé...
- Page 21 RECOMMANDATIONS Attention • Évitez absolument de chauffer des aliments et • Le tiroir chauffant ne doit pas être utilisé par des boissons en les posant à même le des enfants ou des personnes infirmes sans revêtement vitrocéramique. Utilisez pour ce surveillance.
- Page 22 AVANT D'UTILISER LE TIROIR CHAUFFANT Pour ouvrir et fermer le tiroir, pousser au centre du panneau comme le montre la figure. Lors de la première utilisation, nettoyez l'appareil de la façon suivante : - nettoyez la surface à l'aide d'un chiffon humide, puis essuyez soigneusement.
-
Page 23: Encastrement De L'appareil
ENCASTREMENT DE L'APPAREIL Consignes de sécurité relatives au montage du tiroir IMPORTANT : le tiroir doit être fixé immédiatement au meuble en suivant les instructions suivantes. L'installation de l'appareil électroménager prévue en association avec le tiroir chauffant ne peut se faire tant que le tiroir n'a pas d'abord été... - Page 24 Dimensions de l'encastrement Vous obtiendrez les dimensions de la niche en sommant les dimensions du chauffe-vaisselle et celles de l'appareil qui y est associé. Toutes les mesures sont indiquées en millimètres.
-
Page 25: Branchement Électrique
BRANCHEMENT ÉLECTRIQUE Le branchement électrique de l'appareil doit Le fabricant décline toute responsabilité en cas de dommages matériels ou corporels qui en impérativement être réalisé par un technicien qualifié. résulteraient. Au cours de la période de validité de la garantie, les Attention Avant de raccorder le tiroir chauffant au réparations peuvent être réalisées exclusivement réseau d'alimentation de votre habitation, vérifiez... -
Page 26: Entretien Et Nettoyage
ENTRETIEN ET NETTOYAGE Important : pour nettoyer votre appareil, Base antidérapante du tiroir n'utilisez en aucun cas un jet d'eau sous haute • La base antidérapante du tiroir peut être pression ni d'appareil de nettoyage à la vapeur. extraite pour nettoyer le fond du tiroir. La base Évitez absolument d'utiliser : des détergents à... -
Page 27: Diagnostic Des Pannes
DIAGNOSTIC DES PANNES Si la vaisselle ou les aliments ne sont pas Différents facteurs influent sur la durée de suffisamment chauds, contrôlez : chauffage, par exemple : • que l'appareil est allumé - le matériau et l'épaisseur de la vaisselle, la •... - Page 28 MILIEUTIPS Verwerking van de verpakking • De verpakking kan volledig gerecycled worden, zoals door het recyclingsymbool wordt aangegeven. • De diverse onderdelen van de verpakking mogen daarom niet met het gewone huisvuil worden weggegooid maar moeten worden afgevoerd overeenkomstig de plaatselijke voorschriften. Het symbool op het product, of op de bijbehorende documentatie geeft aan dat dit product niet als huishoudelijk afval mag worden behandeld, maar moet worden ingeleverd bij een geschikt inzamelpunt...
- Page 29 WAARSCHUWING Let op: • Verwarm nooit voedsel en dranken • Laat kinderen en personen met een motorische rechtstreeks op de glaskeramische bodem van handicap de verwarmingslade nooit zonder de lade. Gebruik geschikte houders of servies. toezicht gebruiken. • Als het glaskeramisch oppervlak mocht breken •...
- Page 30 VOORDAT U DE VERWARMINGSLADE IN GEBRUIK NEEMT Om de lade te openen en te sluiten op het midden van het paneel drukken zoals aangegeven op de afbeelding. Bij het eerste gebruik moet het apparaat als volgt worden schoongemaakt: - maak het oppervlak schoon met een vochtige doek, en maak het droog.
-
Page 31: Inbouw Van Het Apparaat
INBOUW VAN HET APPARAAT Veiligheidsaanwijzingen voor montage van de lade BELANGRIJK: de lade moet onmiddellijk aan het meubel worden vastgezet volgens de onderstaande instructies. Het andere elektrische huishoudelijke apparaat, dat in combinatie met de lade geplaatst zal worden, kan niet worden geïnstalleerd voordat de lade aan het meubel bevestigd is. - Page 32 Afmetingen voor inbouw De afmetingen van de nis kunt u berekenen door de maat van de bordenwarmer op te tellen bij de maat van het apparaat waarmee hij gecombineerd wordt. Alle afmetingen zijn uitgedrukt in millimeters.
-
Page 33: Elektrische Aansluiting
ELEKTRISCHE AANSLUITING Laat de elektrische aansluiting van het apparaat Als de installatie-, onderhouds- of reparatiewerkzaamheden niet correct zijn uitgevoerd, uitvoeren door een gekwalificeerd technicus. kan dat gevaar opleveren voor de gebruiker. Let op: alvorens de lade aan te sluiten op het De fabrikant kan niet aansprakelijk gesteld worden voor elektriciteitsnet in huis, moet voor de werking ervan dit soort persoonlijk letsel of materiële schade. -
Page 34: Onderhoud En Reiniging
ONDERHOUD EN REINIGING Belangrijk: gebruik nooit een hogedrukspuit of Glaskeramische basis een stoomreiniger. Wij adviseren om de lade na elk gebruik, maar pas Vermijd ook het gebruik van: nadat hij afgekoeld is, grondig schoon te maken. reinigingsmiddelen die soda, zuren of chloor Dit voorkomt het aankoeken van vuil en maakt het bevatten, schurende reinigingsmiddelen (in poeder- reinigen eenvoudiger. -
Page 35: Opsporen Van Storingen
OPSPOREN VAN STORINGEN Als het servies of het voedsel niet warm Er zijn verschillende factoren van invloed op de genoeg is, moet worden nagegaan of: verwarmingstijd, zoals bijvoorbeeld: • het apparaat aan staat - materiaal en dikte van het servies, omvang van •... -
Page 36: Consigli Per La Salvaguardia Dell'ambiente
CONSIGLI PER LA SALVAGUARDIA DELL’AMBIENTE Smaltimento imballaggio • Il materiale di imballaggio è riciclabile al 100% ed è contrassegnato dal simbolo del riciclaggio • Le diverse parti dell’imballaggio non devono quindi essere disperse nell’ambiente, ma smaltite in conformità alle norme stabilite dalle autorità locali. Il simbolo sul prodotto, o sulla documentazione di accompagnamento, indica che questo prodotto non deve essere trattato come rifiuto domestico, ma deve essere consegnato presso l’idoneo punto di... - Page 37 AVVERTENZE Attenzione: • Nel caso in cui la superficie vetroceramica si • Il cassetto riscaldante non deve essere utilizzato rompesse o si crepasse a causa di un urto da bambini o da persone inferme senza violento (oggetti che cadono ecc.), evitare di supervisione.
- Page 38 PRIMA DI USARE IL CASSETTO RISCALDANTE Per aprire e chiudere il cassetto spingere al centro del pannello come indicato in figura. Al primo impiego pulire l’apparecchio come segue: - pulire la superficie con un panno umido e infine asciugarla. - Preriscaldare il cassetto vuoto per almeno due ore: ruotare la manopola della temperatura fino alla posizione massima o selezionare la temperatura massima, allo scopo di eliminare...
- Page 39 INCASSO DELL'APPARECCHIO Indicazioni di sicurezza per il montaggio del cassetto IMPORTANTE: il cassetto deve essere subito fissato al mobile, seguendo le istruzioni che seguono. Non si può procedere con l’installazione dell’elettrodomestico previsto in accoppiamento, prima di aver fissato il cassetto al mobile. Distanziali: eseguire il fissaggio del cassetto come da figura.
- Page 40 Misure dell’incasso Le dimensioni della nicchia si ottengono dalla misura dello scaldastoviglie più la misura dell’apparecchio a esso combinato. Tutte le misure sono indicate in millimetri.
-
Page 41: Collegamento Elettrico
COLLEGAMENTO ELETTRICO Rivolgersi a un tecnico qualificato per Se i lavori di installazione, manutenzione o effettuare l’allacciamento elettrico riparazione non sono correttamente eseguiti, si dell’apparecchio. possono verificare dei pericoli per l’utente. Il produttore declina ogni responsabilità per questo Attenzione: Prima di collegare il cassetto alla rete tipo di danni a cose o persone. -
Page 42: Manutenzione E Pulizia
MANUTENZIONE E PULIZIA Importante: evitare assolutamente l’uso di Base del cassetto in vetroceramica idropulitrici ad alta pressione o pulitrici a getto di Consigliamo di pulire il fondo del cassetto dopo vapore. ogni utilizzo, avendo l’accortezza di lasciarlo Evitare anche l’utilizzo di: detergenti contenenti raffreddare. -
Page 43: Guida Ricerca Guasti
GUIDA RICERCA GUASTI Se le stoviglie o i cibi non sono Fattori differenti influenzano il tempo di sufficientemente calde, verificare che: riscaldamento, per esempio: • l’apparecchio sia acceso - materiale e spessore delle stoviglie, quantità di • sia stata impostata la temperatura giusta carico, disposizione del carico, impostazione •... - Page 52 5019 344 02006 12300135390 07/09...
Need help?
Do you have a question about the WD 142 IX and is the answer not in the manual?
Questions and answers