Table of Contents
Advertisement
Quick Links
Advertisement
Table of Contents

Related Manuals for Acer Liquid S100


Summary of Contents for Acer Liquid S100
- Page 1 Acer Liquid (S100) User Guide...
- Page 2 © 2009 All Rights Reserved Acer Liquid (S100) Smartphone User Guide First issue: 10/2009 Acer Liquid (S100) Smartphone Model number: __________________________________ Serial number: ___________________________________ Date of purchase: ________________________________ Place of purchase: ________________________________...
- Page 3 Sublicense or otherwise make the Software available to third parties, except that you may, after prior written notification to Acer, transfer the Software as a whole to a third party so long as you do not retain any copies of the Software and such third party accepts the terms of this Agreement.
- Page 4 Acer is not obligated to provide technical or other support for the Software. ACER LIVE UPDATE Certain of the software contains elements that enable the use of the Acer Live Update service, which allows for updates for such software to be automatically downloaded and installed on your phone.
- Page 5 CONNECTION WITH ANY PROVISION OF THIS AGREEMENT, EVEN IN THE EVENT OF THE FAULT, TORT (INCLUDING NEGLIGENCE), STRICT LIABILITY, BREACH OF CONTRACT OR BREACH OF WARRANTY OF ACER OR ITS SUPPLIERS OR LICENSORS, AND EVEN IF ACER AND ITS SUPPLIERS AND LICENSORS HAVE BEEN ADVISED OF THE POSSIBILITY OF SUCH DAMAGES.
-
Page 6: Privacy Policy
Third Party Services, or the services and products of Acer's licensors' or suppliers' third party licensors. Your use of the Third Party Software and Third Party Services is also subject to additional terms and conditions and policies which can be accessed through our global website. -
Page 7: Table Of Contents
Table of Contents End User Licence Agreement Getting to know your smartphone Features and functions ......9 Product registration . - Page 8 Putting your smartphone in airplane mode ..37 Acer Settings ....... 38 Adjusting connection settings .
-
Page 9: Getting To Know Your Smartphone
This will give you access to some useful benefits, such as: • Faster service from our trained representatives • Membership in the Acer community: receive promotions and participate in customer surveys • The latest news from Acer... - Page 10 How to register To register your Acer product, visit our website at registration.acer.com. Choose your country and follow the simple instructions. You can also register directly from your smartphone by tapping the Registration icon. After we receive your product registration, you will be sent a confirmation email with important data that you should keep in a safe place.
-
Page 11: Chapter 1: Setting Up
Your new smartphone comes packed in a protective box. Carefully unpack the box and remove the contents. If any of the following items is missing or damaged, contact your dealer immediately: • Acer Liquid (S100) Smartphone • Battery • Quick Guide • Companion CD •... -
Page 12: Getting To Know Your Smartphone
Getting to know your smartphone Views No. Item Description Power button Press to turn the screen on/off or enter sleep mode; press and hold to turn the smartphone off. Touchscreen 3.5-inch, 800 x 480 pixel capacitive touchscreen to display data, phone content and enter information. -
Page 13: Led Indicators
No. Item Description Microphone Internal microphone. Phone speaker Emits audio from your smartphone; suitable for holding to your ear. Volume up/down Increase or decrease the phone volume. button Camera button Activate the camera or take a picture. Press down halfway to auto-focus. Camera A 5-megapixel camera for taking high- resolution images. -
Page 14: Installing Or Removing The Battery
Charge indicator: LED state Description Normal status. Constantly on Battery is fully charged and the device is plugged in. Slow flashing Device plugged in: Battery is charging. Device unplugged: Battery is critcally low and needs to be charged urgently. Fast flashing Battery is low and should be charged. -
Page 15: Charging The Battery
Insert the tabs on the bottom of the battery cover into the slots in the phone. Carefully press the top of the cover until the clips on the side of the cover click in place. CAUTION: RISK OF EXPLOSION IF BATTERY IS REPLACED BY AN INCORRECT TYPE. -
Page 16: Installing A Sim Or Microsd Card
Installing a SIM or microSD card To take full advantage of your smartphone’s telephony capabilities, you must install a SIM card. The SIM card holder is located at the bottom of the battery bay. Additionally, you may wish to increase your smartphone’s storage by inserting a microSD card into the slot provided. -
Page 17: Turning On For The First Time
Turning on for the first time To turn on your smartphone for the first time, press and hold the power button until the system bootup screen appears. Entering your PIN When you install a SIM card for the first time, you may need to enter a PIN using the onscreen number pad. -
Page 18: Using The Touchscreen
Using the touchscreen Your smartphone uses a touchscreen for selecting items and entering information. Use your finger to tap the screen. Tap: Touch the screen once to open items and select options. Drag: Hold your finger on the screen and drag across the screen to select text and images. -
Page 19: The Home Screen
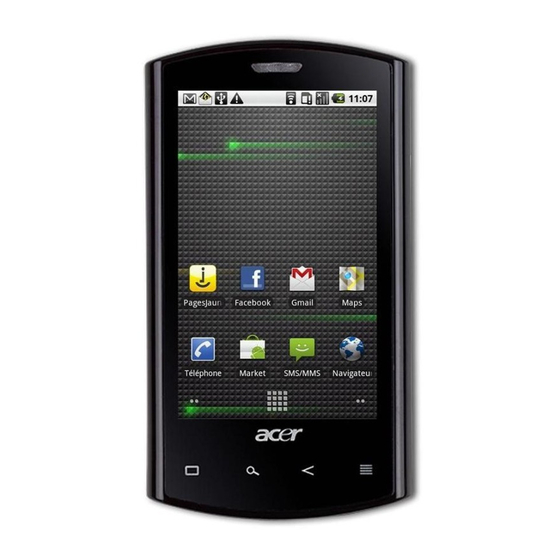
The home screen After rebooting, your smartphone will display the home screen. This screen gives you quick, icon-based access to many of the frequently-used features of your smartphone. The first time you start your smartphone, you will see some icons on the screen. At the bottom of the screen is the Applications tab which lists all the applications you have installed. - Page 20 Personalizing the home screen You may personalize your home screen by adding or removing icons, shortcuts or widgets, or changing the wallpaper. Adding or removing icons You can set icons for installed applications on the home screen. Tap and hold an icon in the Applications tab to copy it to the home screen.
- Page 21 You can also add folders to your home screen. There are some pre-defined folders available or you can add a New folder. This will be placed on your home screen and named Folder. To change the name of the folder, tap it to open then tap and hold the name bar at the top of the folder window to open a dialog box that will allow you to rename the folder.
- Page 22 Icon Description 3G connected: You may make a call. Connected to a 2G network: You may make a call. Airplane mode: Wireless connectivity disconnected. Please disable airplane mode before trying to make a call. Incoming call or active call. Charging has temporarily stopped to prevent overheating/ overcharging.
-
Page 23: Chapter 2: Making Calls
Chapter 2: Making Calls This chapter shows you how to make phone calls, and the various options available to you during your call. Before making a call Check that the phone function is on before you make a call. You can confirm the phone status from the icon on the right- hand side of the Notification area. - Page 24 Dialing a number from Call Log Your call history can be viewed by tapping the Call Log tab. It displays recent received, dialed, and missed calls. Tap a number to view the call details. To redial any number in the call history, select the number and tap Return call. You may also select Send SMS message or Add to contacts.
-
Page 25: The Voice Call Screen
Warning: International call rates can vary greatly depending on the country you are calling and your network provider. We suggest you check all call rates with your network provider, to avoid excessive phone bills. If you are using your smartphone abroad, roaming charges will apply. - Page 26 Muting a call To mute a call, tap Mute on the voice call screen to switch off the microphone. Tap Mute again to switch the microphone back on. Saving a dialed number to contacts You can save a number you have dialed to your contacts for future use.
-
Page 27: Chapter 3: Messaging
Chapter 3: Messaging This chapter shows you how to set up and use the SMS and MMS functions of your smartphone. All SMS and MMS messages are accessed via Messaging. Messaging automatically arranges received and sent messages into threads. To access Messaging tap Messaging on the home screen. Creating a new message You can use your phone to compose SMS or MMS messages. -
Page 28: Replying To A Message
Press the Menu button to see what options are available when creating a new message.The options change depending on the status of the message. Icon Description Convert the SMS to an MMS, allowing you to add a subject to the message. View all the threads currently on your phone. -
Page 29: Mms Messages
To reply to an SMS or MMS message, open the message from the message list. Enter your text in the text box labeled Type to compose. Press the Menu button to see available options. Icon Description Convert the SMS to an MMS, allowing you to add a subject to the message. - Page 30 Receiving MMS messages When a new MMS message arrives, a message icon appears at the top of the screen and a notification message is displayed. 1. Open Messaging to view a summary of the message. 2. Tap Download to download the message content. Note: Downloads can take a long time, depending on your connection quality.
-
Page 31: Setting Up Email
Setting up Email Your smartphone enables you to access your email. Most popular ISPs can be set up in two steps. Tap the Applications tab and then Email to start setting up your email access. If necessary, enter your email address and tap Manual setup to enter the parameters manually. -
Page 33: Chapter 4: Using The Camera
Chapter 4: Using the Camera Your smartphone features a 5-megapixel digital camera mounted on the rear. This section will take you through all the steps in taking photos and videos with your smartphone. Note: You need to have a microSD card inserted into the microSD slot before you can use the camera. -
Page 34: Taking A Photo
To adjust the settings, press the Menu button. The menu options are: Icon Description Switch to camcorder mode to shoot video. Set the photo resolution. Adjust the white balance. Apply an effect to the photo/video. Effects are: • Mono: Black and white. •... -
Page 35: Shooting A Video
. Alternatively, open the Applications tab and tap Gallery. From Gallery you can share the file directly via Acer Share (to Flickr or Facebook), Gmail, Messaging, Picasa, YouTube or as a Roadsync message. Note: Share options vary depending on the file type. -
Page 37: Chapter 5: Advanced Settings Putting Your Smartphone In Airplane Mode
Chapter 5: Advanced Settings Putting your smartphone in airplane mode You can enter airplane mode (also known as flight mode) to turn off telephone, Bluetooth and wireless LAN functions and use your smartphone as a handheld device during a flight. Check with your airline to make sure this is permitted onboard. -
Page 38: Acer Settings
Activating or deactivating connections Open the Applications tab and tap Settings > Wireless controls to manage your connection settings. You can choose to activate one or all connections from the Acer Settings. Each connection icon will be highlighted when turned on. Acer Settings... -
Page 39: Adjusting Connection Settings
Adjusting connection settings This section will show you how to adjust detailed settings for your phone, data, Wi-Fi and Bluetooth connections. Item Description Wi-Fi Turn the Wi-Fi function on or off. Wi-Fi settings Set up and manage your wireless access points. Bluetooth Turn the Bluetooth function on or off. -
Page 40: Selecting A Network
Item Description Audible touch Play a sound whenever a screen selection is made. tones SD card Play a sound for SD card notifications. notifications Orientation Switch screen orientation when the smartphone is rotated. Animation Animate when opening or closing windows. Brightness Adjust screen brightness. -
Page 41: Phone Settings
4. Tap Select automatically to connect to the available net- work with the strongest signal. This may lead to your phone jumping between networks when you move around. Note: Contact your service provider should you have any problems obtaining voice mail and the text message service center numbers. Adjusting Bluetooth settings You can use Bluetooth to exchange information between your smartphone and other mobile devices. -
Page 42: Managing Your Contacts
Managing your contacts Your smartphone features an address book that allows you to save contacts to either the internal memory or onto your SIM card. Tap Contacts from the home screen or the Contacts tab from the Dialer to view your contacts. If you don’t have any contacts stored on your phone, you can import your Google account... - Page 43 Adding a contact Tap New contact to add a new contact. You will be asked if you want to Create contact or Create RoadSync contact. Note: RoadSync is an application that allows you to access your Outlook-based email and contacts. For more information on this application, please refer to: www.dataviz.com/products/roadsync/android/ To create a contact, you will be...
- Page 44 Social Networking You can add social networking information for each contact. This allows you to quickly and easily view your contact’s social networking updates. When you tap Social Networking, you will be presented with a list of supported sites. Tap a site to be redirected to a page that will allow you to search for the contact’s personal pages.
- Page 45 Follow the onscreen instructions to obtain the address. Copy the email address into the text box labeled Upload email. This will allow Acer Share to upload your content directly to Flickr. For Facebook you will need to authorize your phone on your Facebook account.
- Page 46 Creating your urFooz avatar If you have not yet set up an account to urFooz, tap the Get Started button. If you have an existing urFooz account, select Sign in and login with your email and password. To start creating your avatar, select your Gender, Ethnicity, Zodiac Sign, Relationship Status and Areas of Interest.
- Page 47 Managing your avatar Now that you have created your Fooz avatar, go to Fooz World and personalize your Fooz card, or your portable profile. Select Profile/Apps to fill in your profile and other information such as bookmarks of your social network profiles and favorite websites.
-
Page 48: Connecting To A Pc
Note: Fuhu, Spinlets, Spinlet, urFooz, Fooz Avatars, Fooz Creator, Fooz Card, and Fooz World are trademarks or registered trademarks of Fuhu, Inc. in the U.S. and/or other countries. Managing contacts You may edit a contact, copy the contact to your SIM card or delete a contact. -
Page 49: Multimedia Playback
Synchronizing your calendar You can sync your calendar on your phone with your Google calendar. Tap Calendar from the Applications tab to connect to your Google calendar and sync appointments. Browsing the Internet In order to browse the Internet with your smartphone, you must be connected to a 3G network. - Page 50 Spinlets Spinlets gives you access to your favorite music, movie and television content. Get your favorite music, photos and videos from your mobile phone and share your favorite Spinlets on social networks, websites and more. Note: Some contents may not be available in some countries. Launching Spinlets To launch the Spinlets application, tap Spinlets in the applications tab.
- Page 51 Browsing genres To browse the Gallery by genre, tap the Genres button on the bottom left corner of the screen. You will see a new screen with a list of different genres. Tap on the genre you wish to view. Sort To sort through Spinlets by Name, Ratings, or Newest content, select the Sort button at the bottom of the screen.
- Page 52 To visit the artist's social networks and websites, select the icons located along the bottom of the screen. Sharing your Spinlets You can share your favorite Spinlets in two ways. To post the Spinlet you are currently viewing to your social networks, blogs, or other websites, tap Share It at the top right corner of the Spinlet.
-
Page 53: Adjusting The Volume
Digital media server Your phone can act as a Digital media server. This means that you can use it to send media content to other home entertainment devices. To set up the Digital media server, open the Applications tab and tap Digital media server. -
Page 54: Setting Alarms
your smartphone to set the date and time based on information it receives from the network. Setting alarms There are three predefined alarms on your phone by default. To edit alarm settings, tap Alarm clock in the Applications tab. You may: •... -
Page 55: Resetting Your Smartphone
Warning! You should only remove programs if you are familiar with the Android operating system. Obtaining and installing applications Your smartphone uses the open-source Android platform. To obtain and install applications for your smartphone, you can tap Market on the home screen to open the Google marketplace. - Page 56 Warning! This will erase all your personal information, any contacts stored on your phone and any programs you installed. Press and hold the Power until you feel your smartphone vibrate and/or you see the Acer logo screen. Press and hold the Volume up and Volume down buttons.
-
Page 57: Chapter 6: Accessories And Tips
Chapter 6: Accessories and Tips This chapter shows you how to use accessories with your smartphone, as well as provide useful tips for when you are using your smartphone. Using the headset Your smartphone comes packaged with a headset with built-in microphone for handsfree use when making calls. -
Page 58: Using Your Smartphone As A Modem
Connect your smartphone to a PC using the supplied USB cable. Ensure you have installed the drivers from the companion CD. Once the driver has been installed, you will see a device named Acer USB modem in the Windows Device Manager. If you are using Windows XP: 1. -
Page 59: Creating A New Access Point
or password, leave the fields blank. Click Next to finish the setup process. If you are using Windows Vista or Windows 7: 1. Open Windows Network and Sharing Center. 2. Choose Set up a new connection or network. 3. Select Set up a dial-up connection. 4. -
Page 60: Inserting A Microsd Card
Inserting a microSD card Your smartphone features a memory expansion slot that accepts a microSD card to expand memory and storage capacity. Please refer to “Installing a SIM or microSD card“ on page 16 for proper instructions on installing a microSD card. -
Page 61: Appendix
Appendix FAQ and troubleshooting This section lists frequently asked questions that may arise during the use of your smartphone, and gives easy answers and solutions to these questions. Aspect Question Answer Audio Why is there no If the headset is plugged into the sound coming device, the speaker is automatically from the device? -
Page 62: Other Sources Of Help
CD, it provides programs that can be online reference for using your installed on your smartphone smartphone. Up-to-date information www.acer.com/ regarding your smartphone Service enquiries www.acer.com/support/ Specifications Performance • Qualcomm QSD 8250, 768 MHz • System memory: •... -
Page 63: Gprs
Multimedia • CD-quality stereo output • Mono speaker 0.5 W (max) • Omni-directional microphone • Formats supported Type Formats Audio playback MP3, AAC, AMR Ringtone MP3, MIDI, DLS, iMelody, WAVE Video 3GP, MPEG-4, H.263 recording Video playback 3GP, MPEG-4, H.263, H.264 USB connector •... -
Page 64: Warnings And Precautions
Battery • High density, rechargeable 1350 mAh Lithium Polymer battery (replaceable) Note: Length of battery operation will depend on power consumption which is based on system resource use. For example, constantly using the backlight or using power-demanding applications will shorten battery life between charges. Dimensions •... -
Page 65: Battery Information
• Never push objects of any kind into this product through cabinet slots as they may touch dangerous voltage points or short-out parts that could result in a fire or electric shock. Never spill liquid of any kind onto or into the product. •... - Page 66 When the talk and standby times are noticeably shorter than normal, buy a new battery. Use only Acer approved batteries, and recharge your battery only with Acer approved chargers designated for this device. Unplug the charger from the electrical plug and the device when not in use.
-
Page 67: Replacing The Battery Pack
15 °C and 25 °C (59 °F and 77 °F). A device with a hot or cold battery may not work temporarily, even when the battery is fully charged. Battery performance is particularly limited in temperatures well below freezing. Do not dispose of batteries in a fire as they may explode. Batteries may also explode if damaged. -
Page 68: Medical Devices
meets RF exposure guidelines when used normally, and it and its antenna are positioned at least 1.5 cm (5/8") away from your body. Do not cover the antenna with metal and you should position the device at the above-stated distance from your body. - Page 69 • Always keep the device more than 15.3 cm (6") from the pacemaker. • Not carry the device near your pacemaker when the device is switched on. If you suspect interference, switch off your device, and move it. Hearing aids. Some digital wireless devices may interfere with some hearing aids.
-
Page 70: Emergency Calls
Potentially explosive environments Switch off your device when in any area with a potentially explosive atmosphere and obey all signs and instructions. Potentially explosive atmospheres include areas where you would normally be advised to turn off your vehicle engine. Sparks in such areas could cause an explosion or fire resulting in bodily injury or even death. -
Page 71: Disposal And Recycling Information
To minimize pollution and ensure utmost protection of the global environment, please recycle. For more information on the Waste from Electrical and Electronics Equipment (WEEE) regulations, visit www.acer-group.com/public/Sustainability/ sustainability01.htm Mercury advisory For projectors or electronic products containing an LCD/CRT monitor or display:... -
Page 72: Taking Care Of Your Smartphone
Taking care of your smartphone 1. DO take care not to scratch the screen of your smartphone. Keep the screen clean. When working with your smart- phone, use your finger or fingernail. Never use an actual pen or pencil or other sharp object on the screen surface. 2. -
Page 73: Safety Regulations
Safety regulations Compliant with Russian regulatory certification LCD pixel statement The LCD unit is produced with high-precision manufacturing techniques. Nevertheless, some pixels may occasionally misfire or appear as black or red dots. This has no effect on the recorded image and does not constitute a malfunction. Radio device regulatory notice Note: Regulatory information below is for models with wireless LAN and/or Bluetooth only. - Page 74 Wireless operation channels for different domains N. America 2.412-2.462 GHz Ch01 through Ch11 Japan 2.412-2.484 GHz Ch01 through Ch14 Europe ETSI 2.412-2.472 GHz Ch01 through Ch13 France: Restricted wireless frequency bands Some areas of France have a restricted frequency band. The worst case maximum authorized power indoors is: •...
- Page 75 permitted with an EIRP of less than 100 mW indoors and less than 10 mW outdoors: 01 Ain Orientales 02 Aisne 03 Allier 05 Hautes Alpes 08 Ardennes 09 Ariege 11 Aude 12 Aveyron 16 Charente 24 Dordogne 25 Doubs 26 Drome 32 Gers 36 Indre...
- Page 76 Certificate Information (SAR) This device meets the EU requirements (1999/519/EC) on the limitation of exposure of the general public to electromag- netic fields by way of health protection. The limits are part of extensive recommendations for the pro- tection of the general public. These recommendations have been developed and checked by independent scientific organi- zations through regular and thorough evaluations of scientific studies.
- Page 77 NCC warning Lithium-ion battery warning ATTENZIONE! Rischio di esplosione della batteria se sostituita in modo errato. Sostituire la batteria con un una di tipo uguale o equivalente consigliata dalla fabbrica. Non disperdere le batterie nell’ambiente. VORSICHT! Explosionsgefahr bei unsachgemäßen Austausch der Batterie.
-
Page 78: Declaration Of Conformity
Acer Incorporated Date: September 3, 2009 Declaration of Conformity We, Acer Incorporated, of 8F., No. 88, Sec. 1, Hsin Tai Wu Rd. Hsichih Taipei Hsien 221, Taiwan Declare under sole responsibility that the product: Model: S100 Description: Smart HandHeld To which this declaration relates, is in conformity with the following standards and/ or other normative documents: zEN 301 511 V9.0.2... - Page 79 .....24 battery international numbers ......15 charging ....... 64 information ......13 LED indicators Bluetooth ....... 41 connections .......29 MMS messages ......57 headset ....18 onscreen keyboard ......24 call history calls ......62 performance ......25 answering phone ....... 25 ending ....39, 40 connections ....
Need help?
Do you have a question about the Liquid S100 and is the answer not in the manual?
Questions and answers