Table of Contents
Advertisement
Quick Links
Advertisement
Table of Contents

Related Manuals for Acer liquid


Summary of Contents for Acer liquid
- Page 1 Acer Liquid E User Guide...
- Page 2 © 2010 All Rights Reserved Acer Liquid E Smartphone User Guide Second issue: 01/2010 Acer Liquid E Smartphone Model number: __________________________________ Serial number: ___________________________________ Date of purchase: ________________________________ Place of purchase: ________________________________...
-
Page 3: End User Licence Agreement
Sublicense or otherwise make the Software available to third parties, except that you may, after prior written notification to Acer, transfer the Software as a whole to a third party so long as you do not retain any copies of the Software and such third party accepts the terms of this Agreement. -
Page 4: Privacy Policy
Your use of the Third Party Software and Third Party Services is also subject to additional terms and conditions and policies which can be accessed through our global website. Privacy policy During registration you will be asked to submit some information to Acer. Please refer to Acer’s privacy policy at http:// www.acer.com or your local Acer website. -
Page 5: Table Of Contents
Table of Contents End User Licence Agreement Features and functions ......... . . 5 Product registration . - Page 6 Shooting a video ..........27 Viewing photos and videos .
-
Page 7: Features And Functions
When using your product for the first time, it is recommended that you immediately register it. This will give you access to some useful benefits, such • Faster service from our trained representatives. • Membership in the Acer community: receive promotions and participate in customer surveys. • The latest news from Acer. -
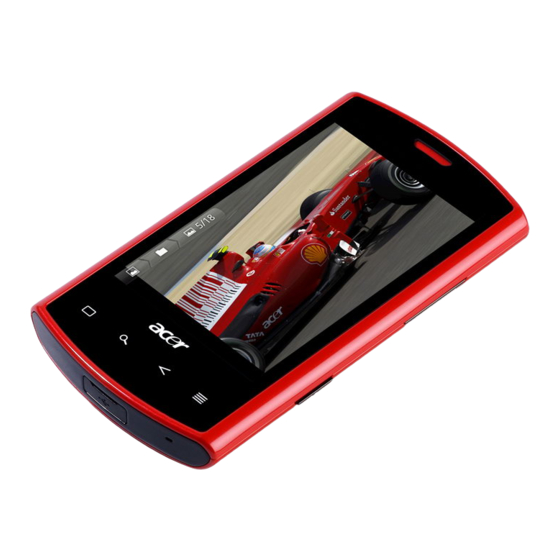
Page 8: Product View
Your new smartphone comes packed in a protective box. Carefully unpack the box and remove the contents. If any of the following items is missing or damaged, contact your dealer immediately: • Acer Liquid E Smartphone • Battery • Quick Guide •... -
Page 9: Led Indicators
Item Menu button Mini USB connector Microphone Phone speaker Volume up/down button Camera button Camera Handsfree speaker Call indicator Mail/message indicator Charge indicator 3.5 mm headphone jack LED indicators Call indicator: LED state Description No incoming or missed calls. Fast flashing Incoming call. -
Page 10: Charging The Battery
Your smartphone uses a replaceable battery to provide power. It is packed seperately from your smartphone and needs to be inserted and charged before you can use the smartphone. Installing the battery Insert your fingernail into the cutout between the battery cover and the phone. Unclip the cover and lift off the battery cover. -
Page 11: Installing A Sim Or Microsd Card
To take full advantage of your smartphone’s telephony capabilities, you must install a SIM card. The SIM card holder is located at the bottom of the battery bay. Additionally, you may wish to increase your smartphone’s storage by inserting a microSD Card into the slot provided. -
Page 12: Chapter 2: Using Your Smartphone
Turning on for the first time To turn on your smartphone for the first time, press and hold the power button until the screen turns on. You will then be asked to configure some settings before you can use your smartphone. Follow the onscreen instructions to complete setup. -
Page 13: Using The Touchscreen
To wake your smartphone, press the power button. Your smartphone will display the locked screen; drag the padlock icon to the right to enter the Home screen. For additional security, you may set an unlock pattern, a set of dots that must be tapped in the correct order to access the phone. -
Page 14: The Android Keyboard
Text assistance The standard Android keyboard has various features that assist you to enter correct text. Tap Menu > Settings > Language & keyboard > XT9 Text Input. From here you can enable or disable the following: Function Description Languages Set the languages that will be available. -
Page 15: The Home Screen
After rebooting, your smartphone will display the Home screen. This screen gives you quick, icon-based access to many of the frequently-used features of your smartphone. The first time you start your smartphone, you will see some icons on the screen. At the bottom of the screen is the Applications tab which lists all the applications you have installed. -
Page 16: Personalizing The Home Screen
(such as a new message). The icons on the right side indicate signal strength, connection, battery status and the time. Drag the Notification area down the screen, or tap the area, to view more information about new events. Icon Description Indicates that storage is running low. - Page 17 Adding or removing shortcuts or widgets To add shortcuts or widgets, tap and hold anywhere on the Home screen to open the Add to Home screen menu. Tap Shortcuts to open a list of quick links to applications and settings you can add to the Home screen.
-
Page 18: Chapter 3: Managing Contacts
Managing your contacts Your smartphone features an address book that allows you to save contacts to either the internal memory or onto your SIM card. Tap Contacts from the Home screen or the Contacts tab from the Dialer to view your contacts. If you don’t have any contacts stored on your phone, you can import your Google account contacts, add a new contact or import any SIM contacts. -
Page 19: Chapter 4: Making Calls
This chapter shows you how to make phone calls, and the various options available to you during your call. Before making a call Check that the phone function is on before you make a call. You can confirm the phone status from the icon on the right-hand side of the Notification area. Icon Description 3G connected: You may make a call. -
Page 20: The Voice Call Screen
You can save phone numbers to your Contacts from the Call Log. Please refer to “Adding a contact“ on page 16 for further details. Making a call to one of your contacts 1. Tap the Contacts tab in the dialer or Contacts from the Home screen to view your contacts. -
Page 21: Using The Speakerphone
Ending a call To end a call, press Using the speakerphone The speakerphone function allows you to make calls without having to hold your smartphone. This handsfree function is especially useful for multitasking. To activate the speakerphone, tap Speaker. Tap Speaker again to disable the speakerphone. -
Page 22: Chapter 5: Messaging
This chapter shows you how to set up and use the SMS and MMS functions of your smartphone. All SMS and MMS messages are accessed via Messaging. Messaging automatically arranges received and sent messages into threads. To access Messaging tap Messaging on the Home screen. Creating a new message You can use your phone to compose SMS or MMS messages. -
Page 23: Replying To A Message
Icon Description Send the message. Replying to a message When a new text message arrives a message icon appears in the Notification area and the message icon on the top of the phone lights up. Tap Messaging on the Home screen to view the message list or expand the Notification area to see a summary of the message. -
Page 24: Receiving Mms Messages
Receiving MMS messages When a new MMS message arrives, a message icon appears at the top of the screen and a notification message is displayed. 1. Open Messaging to view a summary of the message. 2. Tap Download to download the message content. Note: Downloads can take a long time, depending on your connection quality. -
Page 25: Chapter 6: Going Online
Browsing the Internet In order to browse the Internet with your smartphone, you must be connected to a data or wireless network. Using the browser Tap Browser on the Home screen to start browsing. To open a new website, tap the address box at the top of the page. -
Page 26: Voice Search
Online applications Your smartphone has a variety of applications installed on it from the factory. Note: Applications installed may vary according to your region. These applications may include: • Acer Sync: Sync your data between your computer and the Google servers. -
Page 27: Android Market
• Facebook: View your Facebook profile and keep up-to-date with your friends. • Maps: Get easy-to-follow directions using Google Maps. • YouTube: View the Most viewed and Most discussed video clips on TouTube. Android market Note: The Android Market may not be available in all countries and regions. Note: You need to have a Google account set up and active on your phone before you can use the Android Market. -
Page 28: Chapter 7: Using The Camera
Your smartphone features a 5-megapixel digital camera mounted on the rear. This section will take you through all the steps in taking photos and videos with your smartphone. Note: You need to have a microSD Card inserted into the microSD slot before using the camera. -
Page 29: Taking A Photo
Camera settings menu This menu has the following options: • White balance • Anti flicker • Color effect • Store location • ISO • Picture size • Picture quality • Focus mode Taking a photo 1. Ensure you have adjusted the parameters described above. 2. -
Page 30: Viewing Photos And Videos
Viewing photos and videos After you have taken your photo or video, it is automatically saved. Once you have taken a photo or video, you can view it in Gallery by tapping the thumbnail icon in the upper right corner. Alternatively, open the Applications tab and tap Gallery. -
Page 31: Chapter 8: Advanced Settings
Putting your smartphone in Airplane mode You can enter Airplane mode (also known as flight mode) to turn off telephone and Bluetooth functions and use your smartphone as a handheld device during a flight. Check with your airline to make sure this is permitted onboard. Switch your smartphone off during takeoff and landing as it may interfere with aircraft electronic systems. -
Page 32: Sound & Display
This section will show you how to adjust detailed settings for your phone, data, Wi-Fi and Bluetooth connections. Item Description Airplane mode Disable all wireless connections so you can safely use this device onboard an aircraft. Wi-Fi Turn the Wi-Fi function on or off. Wi-Fi settings Set up and manage your wireless access points. -
Page 33: Phone Settings
Selecting a network Your phone wil automatically detect your carrier/network settings when you insert a new SIM card. However, you may prefer to manually select a network. This may be a good idea when roaming. Tip: When you are traveling, manually selecting a network may help to reduce your roaming charges. -
Page 34: Urfooz
urFooz is your portable profile that lives where you live. • Fooz Creator lets you create a Fooz avatar, which is your virtual look-a-like. • Fooz World lets you edit and manage your Fooz avatar(s), create new avatars and share them on Facebook, MySpace, blogs and more. -
Page 35: Connecting To A Pc
Select Switch Avatar to change your default avatar, modify existing avatars, or create a new avatar. Sharing your Fooz card and avatar urFooz lets you share your Fooz card with friends by posting it to your social networks, blogs, and websites;... - Page 36 nemoPlayer enables you to listen to music, view video clips and pictures in the following formats. Type Formats Audio playback MP3, AMR, WMA Ringtone MP3, MIDI, iMelody, WAVE, WMA Video recording 3GP, MPEG-4, H.263 Video playback 3GP, MPEG-4, H.263, H.264, WMV Spinlets Spinlets gives you access to your favorite music, movie and television content.
-
Page 37: Media Server
Exploring Spinlets widgets When you select an album, you will see a Spinlet. To play the featured song, select the red Play button. To play selected songs, select the Music tab and choose which songs you would like to play. To view artist photos, select the Photos tab. -
Page 38: Setting The Date And Time
Adjusting the volume Adjust the volume of your phone using the volume button on the side of the phone. Alternatively, you can set the Ringer volume and Media volume by opening the Applications tab and going to Settings > Sound & display. Setting the date and time To set the date and time, open the Applications tab and tap Settings >... -
Page 39: Resetting Your Smartphone
Turn off your phone, then press and hold the Power until you feel your smartphone vibrate and/or you see the Acer logo screen. Press and hold the Volume up and Volume down buttons. Use the Volume up button to select Clean boot:YES. -
Page 40: Chapter 9: Accessories And Tips
Connect your smartphone to a PC via USB, and do the following steps: 1. Install Acer Easy Link on your PC or notebook. 2. When finished, please click Start > All Programs > Acer > Acer Easy Link > Acer Easy Link to run the application. -
Page 41: Creating A New Access Point
Note: If the connection fails, please try to restart and reconnect your smartphone to your PC, and then repeat the installation. Note: Acer Easy Link can run on the following operating systems: Windows XP/Vista (32-/64-bit) / Windows 7 (32-/64-bit). Note: Updates are available at the Acer website. Visit mobile.acer.com. -
Page 42: Appendix
When charging is complete, it will return to its normal temperature. It is also normal for the phone to heat up during long periods of use, such as watching a video or a long phone conversation. All Acer phones are factory tested before release. -
Page 43: Other Sources Of Help
Never spill liquid of any kind onto or into the product. • To avoid damage of internal components and to prevent battery leakage, do not place the product on a vibrating surface. -
Page 44: Additional Safety Information
When the talk and standby times are noticeably shorter than normal, buy a new battery. Use only Acer approved batteries, and recharge your battery only with Acer approved chargers designated for this device. -
Page 45: Medical Devices
your device when its use is prohibited or when it may cause interference or danger. Use the device only in its normal operating positions. To successfully transmit data files or messages, this device requires a good quality connection to the network. In some cases, transmission of data files or messages may be delayed until such a connection is available. -
Page 46: Emergency Calls
To minimize pollution and ensure utmost protection of the global environment, please recycle. For more information on the Waste from Electrical and Electronics Equipment (WEEE) regulations, visit www.acer-group.com/public/Sustainability/sustainability01.htm Mercury advisory For projectors or electronic products containing an LCD/CRT monitor or display: Lamp(s) inside this product contain mercury and must be recycled or disposed of according to local, state or federal laws. -
Page 47: Taking Care Of Your Smartphone
1. DO take care not to scratch the screen of your smartphone. Keep the screen clean. When working with your smartphone, use your finger or fingernail. Never use an actual pen or pencil or other sharp object on the screen surface. 2. -
Page 48: Usb Connector
Performance • Qualcomm QSD 8250, 768 MHz • System memory: • 512 MB of SDRAM • 512 MB of Flash ROM • Google Android operating system Display • 3.5” TFT-LCD capacitive touchscreen • 800 x 480 resolution • 65K colors support Multimedia •... - Page 49 Expansion • microSD memory card (up to 32 GB) Battery • High density, rechargeable 1350 mAh Lithium Polymer battery (replaceable) Note: Length of battery operation will depend on power consumption which is based on system resource use. For example, constantly using the backlight or using power- demanding applications will shorten battery life between charges.
-
Page 50: Regulatory Information
Compliant with Russian regulatory certification LCD pixel statement The LCD unit is produced with high-precision manufacturing techniques. Nevertheless, some pixels may occasionally misfire or appear as black or red dots. This has no effect on the recorded image and does not constitute a malfunction. Radio device regulatory notice Note: Regulatory information below is for models with wireless LAN and/or Bluetooth only. -
Page 51: Fcc Regulations
Note: Channels 10 through 13 inclusive operate in the band 2446.6 MHz to 2483.5 MHz. There are few possibilities for outdoor use: On private property or on the private property of public persons, use is subject to a preliminary authorization procedure by the Ministry of Defense, with maximum authorized power of 100 mW in the 2446.5 - 2483.5 MHz band. -
Page 52: Rf Exposure Warning
could void the user's authority to operate the equipment. RF exposure warning The equipment complies with FCC RF exposure limits set forth for an uncontrolled environment. The antenna(s) used for this transmitter must not be co-located or operating in conjunction with any other antenna or transmitter. RF exposure information (SAR) This mobile phone meets the government's requirements for exposure to radio waves. -
Page 53: Turning On Hearing Aid Compatibility Mode
devices are more immune than others to this interference noise, and phones also vary in the amount of interference they generate. The wireless telephone industry has developed ratings for some of their mobile phones, to assist hearing-device users in finding phones that may be compatible with their hearing devices. -
Page 54: Important Note
d'Industrie Canada. Important note IC radiation exposure statement This EUT is compliance with SAR for general population/uncontrolled exposure limits in IC RSS-102 and had been tested in accordance with the measurement methods and procedures specified in IEEE 1528. This equipment should be installed and operated with minimum distance 2.5 cm between the radiator and your body. -
Page 55: Ncc Warning
NCC warning 警語 經型式認證合格之低功率射頻電機,非經許可,公司、商號或使用者均不得擅自變更頻率、 加大功率或變更原設計之特性及功能。 低功率射頻電機之使用不得影響飛航安全及干擾合法通信;經發現有干擾現象時,應立即停 用,並改善至無干擾時方得繼續使用。 前項合法通信,指依電信法規定作業之無線電通信。 低功率射頻電機須忍受合法通信或工業、科學及醫療用電波輻射性電機設備之干擾,減少電磁 波影響,請妥善使用。 Lithium-ion battery warning ATTENZIONE! Rischio di esplosione della batteria se sostituita in modo errato. Sostituire la batteria con un una di tipo uguale o equivalente consigliata dalla fabbrica. Non disperdere le batterie nell’ambiente. VORSICHT! Explosionsgefahr bei unsachgemäßen Austausch der Batterie. -
Page 56: Declaration Of Conformity
Declaration of Conformity We, Acer Incorporated, of 8F., No. 88, Sec. 1, Hsin Tai Wu Rd., Hsichih, Taipei hsien, 221, Taiwan Declare under sole responsibility that the product: Model: S100 Description: Smart Handheld To which this declaration relates, is in conformity with the following standards and/or other normative documents: •... - Page 57 battery charging ...8 information ...47 Bluetooth connections ...31 headset ...38 call history ...17 calls answering ...18 ending ...19 onscreen options ...18 camera icons and indicators ...26 information ...46 shooting a video ...27 supported formats ...27 taking a photo ...27 conference calls ...19 connectivity ...46 contacts adding and editing ...16...
Need help?
Do you have a question about the liquid and is the answer not in the manual?
Questions and answers