Table of Contents
Advertisement
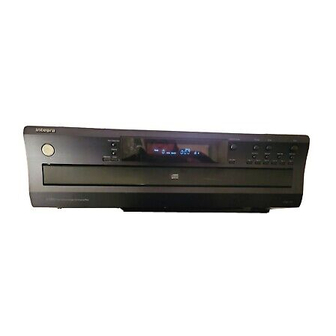
Compact Disc Changer
CDC-3.1
Instruction Manual
Thank you for purchasing the Integra Compact Disc
Changer.
Please read this manual thoroughly before making
connections and plugging in the unit.
Following the instructions in this manual will enable
you to obtain optimum performance and listening
enjoyment from your new Compact Disc Changer.
Please retain this manual for future reference.
CDC-3.1_ cover
1
Contents
Getting Started
Important Safeguards ................. 2
Precautions ................................... 3
Features ........................................ 4
Preparation
Control Positions and Names...... 5
Supplied accessories ................... 5
Remote Controller ....................... 6
System Connections .................... 7
Playing CDs .................................. 8
Using Memory Functions ........... 14
Others
Troubleshooting Guide .............. 16
Specifications ............................. 16
09/05/2000, 4:23 PM
Advertisement
Table of Contents

Related Manuals for Integra CDC-3.1


Summary of Contents for Integra CDC-3.1
-
Page 1: Table Of Contents
Using Memory Functions ... 14 Others Troubleshooting Guide ....16 Specifications ......16 Thank you for purchasing the Integra Compact Disc Changer. Please read this manual thoroughly before making connections and plugging in the unit. Following the instructions in this manual will enable you to obtain optimum performance and listening enjoyment from your new Compact Disc Changer. -
Page 2: Important Safeguards
WARNING: AVIS WARNING TO REDUCE THE RISK OF FIRE OR ELECTRIC SHOCK, DO RISK OF ELECTRIC SHOCK RISQUE DE CHOC ELECTRIQUE NOT EXPOSE THIS APPLIANCE TO RAIN OR MOISTURE. DO NOT OPEN NE PAS OUVRIR The lightning flash with arrowhead symbol, within an equilateral CAUTION: triangle, is intended to alert the user to the presence of uninsulated “dangerous voltage”... -
Page 3: Precautions
Precautions For U.S. model Playable Discs The laser is covered by a housing which prevents expo- This CD changer can play back the following discs. sure during operation or maintenance. However, this prod- Maximum Disc size uct is classified as a Laser Product by CDRH (Center for Disc mark Contents playback time Devices and Radiological Health) which is a department... -
Page 4: Features
Features Precautions 1. Warranty Claim 6-disc carousel changer You can find serial number on the rear panel of this unit. In Up to five discs to be changed without interrupting disc case of warranty claim, please report this number. in play Next Selection function allows next track or disc to be 2. -
Page 5: Control Positions And Names
Control Positions and Names If there is a protective film on the surface of the display that makes it difficult to read the display, remove it. For more information about the buttons and knobs, refer to the pages listed in the brackets ( [ ] ) below. Front panel Open/Close Pause... -
Page 6: Remote Controller
Remote Controller Remote controller 1. Open/close button ( ) [8] 2. Operation buttons : Pause button [9] : Stop button [9, 11] : Play button [8~10, 13, 14] : Fast reverse button [9, 15] NEXT SELECTION : Fast forward button [9, 15] DISC DISC 1 DISC 2... -
Page 7: System Connections
CDC-3.1 while the other end is plugged into the wall Connections for remote control ( AC outlet. When connecting Integra/Onkyo products, it is necessary to attach the cable to be able to use the remote con- Turning on the unit troller of the main component to control the entire sys- tem. -
Page 8: Playing Cds
Playing CDs 1, 3 Normal playback 1. Press the Open/Close button to open the load- ing drawer. Open/Close 2. Place the disc(s) in the disc trays with the label(s) facing up. Front disc tray Pressing the Disc Skip button rotates the carousel so that you can load disc(s) in other disc trays. - Page 9 Playing CDs Display Pause Stop Stopping playback temporarily Pause Press the Pause button. The PAUSE indicator will light up. To resume playback, press the Play button, or press the Pause button again. The CD changer starts playing again from exactly the point at which it stopped. Stopping playback Stop Press the Stop button.
- Page 10 Playing CDs Play Starting playback from a given disc Disc 1 Disc 2 Disc 3 Disc 4 Disc 5 Disc 6 Press the Direct Play button of a disc you wish to play back (Disc 1-Disc 6) on the front panel or the remote controller.
- Page 11 Playing CDs Skip playback Use the buttons. You can also use the remote controller to operate the unit by using the buttons instead of buttons. REMOTE CONTROLLER RC-435C During playback, press the button. The CD changer will stop playing the current Track and will begin playing the next track from the be- ginning.
- Page 12 Playing CDs Selecting the next track to play back Next Selection NEXT SELECTION This function enables you to select the next track or disc to play back. 1. Press the Next Selection button during playback. 2. Select the disc you wish to play using the Direct REMOTE CONTROLLER RC-435C Play buttons (Disc 1-6).
- Page 13 Playing CDs Repeat Random Playing back tracks at random Press the Random button on the unit or the remote controller to enter random mode. The CD changer will play all tracks on all six discs at RANDOM DISC No. 1 2 3 random.
-
Page 14: Using Memory Functions
Using Memory Functions Storing a program into memory and playing it Memory MEMORY Up to 40 tracks can be stored in memory. 1. Press the Memory button. The MEMORY indicator will light up. REMOTE CONTROLLER RC-435C 2. Select the desired disc using the Direct Play but- tons (Disc 1-6). - Page 15 Using Memory Functions Contents of the display Example: When the sixth track of DISC #5 is stored in memory as the second 1 2 3 MEMORY DISC No. track to play back (P-02). TRACK 4 5 6 Track number MEMORY indicator Program number After two seconds Disc Number...
-
Page 16: Troubleshooting Guide
ONKYO U.S.A. CORPORATION ONKYO U.S.A. CORPORATION 200 Williams Drive, Ramesy, N.J. 07446, U.S.A. 200 Williams Drive, Ramesy, N.J. 07446, U.S.A. Tel: 201-825-7950 Fax: 201-825-8150 E-mail: integra@onkyousa.com Tel: 201-825-7950 Fax: 201-825-8150 E-mail: integra@onkyousa.com Integra Division of Integra Division of ONKYO CORPORATION ONKYO CORPORATION Sales &...
Need help?
Do you have a question about the CDC-3.1 and is the answer not in the manual?
Questions and answers