Samsung DVD-R120 Instruction Manual
Hide thumbs
Also See for DVD-R120:
- Instruction manual (366 pages) ,
- Manual de instrucciones (89 pages) ,
- Quick setup manual (6 pages)
Table of Contents
Advertisement
Advertisement
Table of Contents

Related Manuals for Samsung DVD-R120


Summary of Contents for Samsung DVD-R120
- Page 1 Instruction Manual DVD-R120/R121 DVD-R120 DVD-R121 DVD-R123 AK68-00698A-00...
-
Page 2: Warning
MPORTANT NOTE Warning WARNING CAUTION... -
Page 3: Precaution
Precaution Important Safety Instructions Maintenance of Cabinet Disc Handling Holding discs DVD-RAM, DVD-RW and DVD-R DVD-Video, Audio CD Cautions on handling discs Handling Cautions... - Page 4 Disc Storage Using CD-R/RW Using MPEG4 disc Disc Specifications DVD-Video (without QPEL and GMC) .sub, DVD-R Disc Playback and Recording Audio CD CD-R/RW MP3 CD-R/RW DVD-RW Disc Playback and Recording JPEG CD-R/RW...
- Page 5 DVD-RW (VR mode) Do not use the following discs! DVD-RW (Video mode) DVD-RAM Disc Playback and Recording COPY PROTECTION Protection...
-
Page 6: Table Of Contents
Contents Other type of connecting the Audio output cable ..21 Getting Started Getting Started Warning................2 Precaution ..............3 Connecting to AV3 IN, DV input jack....23 System Setup System Setup General Features............8 On-Screen Menu Navigation........24 Before reading the user’s manual......9 Plug & Auto Set up ..........25 How to use the DVD Recorder.........9 Setting the Clock............26 Unpacking ..............11... - Page 7 Recording Recording Before Recording.............40 Playing an Audio CD/MP3 ........62 Playing a Picture ............66 Playing a MPEG4 .............67 Playing the Title List..........68 Editing Recording the current TV programme you are Editing watching ..............42 Basic Editing (Title List) ........... Recording from external equipment you are watching ..............44 Copying from a Camcorder ........45 Making a One Touch Recording (OTR)....46...
-
Page 8: General Features
High quality progressive scan General Features A variety of functions with an easy-to-use user interface High quality digital audio and video recording and playback MPEG4 playback Selectable Recording Mode DivX Certification Automated Quality Adjustment for Timer Recording Creating a DVD video title using DVD-RW/DVD-R disc Copying data from a digital camcorder using a DV input jack... -
Page 9: Before Reading The User's Manual
Before reading the user’s How to use the DVD manual Recorder Step 1 Select the disc type Icons that will be used in manual Step 2 Format the disc to start recording Using a DVD-RAM Using a DVD-RW Using a DVD-R About the use of this user’s manual NOTE Copyright... - Page 10 Step 3 Step 6 Recording Finalising & Playing on other DVD components When using a DVD-RW disc in VR Mode When using a DVD-RW disc in Video Mode When using a DVD-R disc Step 4 Playing Step 5 Editing a recorded disc Creating a playlist (DVD-RAM/-RW in VR mode)
-
Page 11: Unpacking
Unpacking Accessories Setting the Remote Control Preparing the Remote Control Install Batteries in the Remote Control If the remote does not operate properly: Dispose of batteries according to local environmental regulations. Do not put them in the household trash. - Page 12 To determine whether your television is compatible, follow the instructions below. Controllable TV Codes NOTE Then you can control the television using the following buttons after the TV button. NOTE...
-
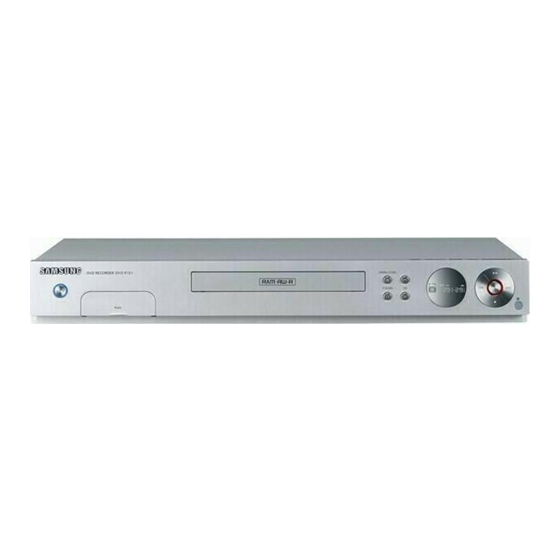
Page 13: Description
Description Front panel (DVD-R120/R123) 1. STANDBY/ON 7. SEARCH/SKIP 2. AV3 INPUT 8. STOP 3. DV-INPUT 9. PLAY/PAUSE 4. DISC TRAY 10. P.SCAN 5. OPEN/CLOSE 11. REC 6. DISPLAY 12. PR ( PROG Front Panel Display (DVD-R120/R123) - Page 14 Front panel (DVD-R121) 1. STANDBY/ON 7. DISPLAY 2. AV3 INPUT 8. SEARCH/SKIP 3. DV-INPUT 9. STOP 4. DISC TRAY 10. Remote Control Reciever 11. PR ( 5. OPEN/CLOSE PROG 6. P.SCAN 12. REC 13. PLAY/PAUSE Front Panel Display (DVD-R121)
-
Page 15: Rear Panel
Rear Panel 1. DIGITAL AUDIO OUT(OPTICAL) 5. S-VIDEO OUT 2. DIGITAL AUDIO OUT(COAXIAL) 6. COMPONENT VIDEO OUT 7. AV1(TV) OUTPUT SCART Connector 3. AUDIO OUT 8. AV2(EXT) INPUT SCART Connector In from aerial connector 4. VIDEO OUT Out to TV connector NOTE... -
Page 16: Tour Of The Remote Control
Tour of the Remote Control 10. MENU Button 11. OK/DIRECTION Buttons (… … / † † / œ œ / √ √ Buttons) 12. REC MODE Button 13. REC Button 14. CANCEL Button 15. REPEAT Button 16. OPEN/CLOSE Button 17. AUDIO/TV MUTE Button 18. -
Page 17: Connecting & Setting Up
Quick Overview Connecting & Setting Up Connecting the DVD-Recoder † Additional connections † Antenna + DVD Recorder + external decoder box + TV † Other type of connecting the Video output cable † Other type of connecting the Audio output cable †... -
Page 18: Additional Connections
Connecting the DVD- Additional connections Recorder INPUT To RF IN - DVD mode To TV RF Cable To ANT INPUT - TV mode NOTE... -
Page 19: Antenna + Dvd Recorder
Antenna + DVD Recorder + Other type of connecting external decoder box + TV the Video output cable Case 1 : Case 2 : Case 3 : Wall S-Video, Component video and Progressive Output Modes DECODER... - Page 20 Case 1 : Connecting to a Video Case 2 : Connecting to an (Composite) output jack S-Video output jack yellow yellow...
-
Page 21: Other Type Of Connecting The Audio Output Cable
Case 3 : Component Video Other type of connecting output jacks the Audio output cable Case 1 : Case 2 : Case 3 : Case 1 : Connecting to your TV COMPONENT green blue NOTE yellow white... - Page 22 Case 2 : Connecting to a stereo Case 3: Connecting to an AV amplifier with AV output jacks amplifier with a digital output jack white white...
-
Page 23: Connecting To Av3 In, Dv Input Jack
Case 2 : Connecting a Connecting to AV3 IN, DV Camcorder to the DV IN jack input jack Case 1 : Case2 : Camcorder Case 1 : Connecting a VCR, Set-Top Box(STB), DVD player or Camcorder to the AV3 IN jacks NOTE Camcorder... -
Page 24: System Setup
On-Screen Menu Navigation System Setup No Disc Timer Record DVD-RAM(VR) Disc Navigation Programme ShowView Title List √ √ Disc Navigation √ √ Timer Record DivX √ √ √ √ Setup Playlist Photo ShowView Extended : Off √ √ √ √ Disc manager Music √... -
Page 25: Plug & Auto Set Up
Plug & Auto Set up Channel scan Now, Scanning. CANCEL MENU Press 1 for English Touche 2 pour Français Drücken Sie 3 Für Deutsch Pulsar 4 para Español Premere 5 per Italiano Auto channel scan completed successfully. Press [OK] button to auto clock set. Druk op 6 voor Nederlands Cancel Auto setup will be started. -
Page 26: Setting The Clock
Check the date and time. …† Setup √ No Disc Clock Set Programme No Disc Setup Setup Time Date Auto Clock Programme System √ √ 12 : 00 01 / JAN / 2005 Clock Set √ √ Setup Language √ √ Audio √... -
Page 27: Presetting Channels With The Auto Setup
…† Auto Presetting Channels with √ Setup the Auto Setup function No Disc Install Programme Auto Setup √ √ Manual Setup Setup √ √ Your data will be lost. Press [OK] to continue, [MENU] to exit. MOVE RETURN EXIT MENU †…œ... -
Page 28: Presetting Channels With The Manual Setup
…† Manual Presetting Channels with √ Setup the Manual Setup function No Disc Manual Setup Name Decoder Edit - - - - - - - √ √ - - - - - - - √ √ - - - - - - - √... -
Page 29: Setting Up The Language Options
…† Setting up the Language √ Options Audio Language: Subtitle Language: Disc Menu Language: On-Screen Menu Language: DivX Subtitle: MENU No Disc Timer Record Programme ShowView √ √ Timer Record √ √ Setup ShowView Extended : Off √ √ …† MOVE RETURN EXIT... -
Page 30: Ep Mode Time Setting
…† EP Mode EP Mode Time Setting √ Time No Disc System Programme EP Mode Time : 6Hours 6 Hours √ √ Chapter Creator : Off 8 Hours √ √ Setup Front Display : Bright √ √ NICAM : On √... -
Page 31: Automatic Chapter Creation
…† Automatic Chapter √ Creation MENU DVD-RW(V) Disc Navigation Disc Navigation Title List √ √ Disc manager Programme Do you want to create the chapter menu Setup after this recording? MOVE RETURN EXIT …† Setup √ œ √ DVD-RW(V) Setup Disc Navigation System √... -
Page 32: Setting Up The Front Display Options
…† Front Setting up the Front √ Display Display Options No Disc System Programme EP Mode Time : 6Hours √ √ Chapter Creator : Off √ √ Setup Front Display : Bright Bright √ √ NICAM : On √ √ Auto Dim DivX(R) Registration √... -
Page 33: Setting Up Nicam Options
…† NICAM Setting up NICAM Options √ No Disc System Programme EP Mode Time : 6Hours √ √ Chapter Creator : Off √ √ Setup Front Display : Bright √ √ NICAM : On √ √ DivX(R) Registration √ √ MOVE RETURN EXIT... -
Page 34: Setting Up The Audio Options
Setting up the Audio …† √ Options œ NOTE Audio Options MENU No Disc Timer Record Digital Output Programme ShowView √ √ Timer Record √ √ Setup ShowView Extended : Off √ √ Bitstream MOVE RETURN EXIT …† Setup √ No Disc Setup NOTE... -
Page 35: Setting Up Video Output Options
…† Video Setting up Video Output √ Output Options No Disc Video Programme TV Aspect : 4:3 Letter Box √ √ 3D Noise Reduction : Off √ √ Setup Video Output : Component √ √ Component MOVE RETURN EXIT MENU Component No Disc Timer Record... -
Page 36: Setting Up The Progressive Scan
Setting up the Progressive Canceling the Progressive scan scan P.SCAN P.SCAN œ √ P.SCAN œ √ Press [Yes] to confirm Interlace scan mode. Otherwise press [No] Press [Yes] to confirm Progressive scan mode. Otherwise press [No] Please set your TV to Interlace input, To deactivate, press [STOP] key. -
Page 37: Setting Up The Display(Video) Options
Setting up the œ NOTE Display(Video) Options Display(Video) Options MENU TV Aspect No Disc Timer Record Programme ShowView √ √ Timer Record √ √ Setup ShowView Extended : Off √ √ No Disc Video Programme TV Aspect : 4:3 Letter Box 4:3 Letter Box √... -
Page 38: Setting Up The Parental Control
√ Setting up the Parental Password Control No Disc Parental Control Programme Password :Off √ √ Setup MOVE RETURN EXIT …† √ MENU No Disc Timer Record Programme ShowView √ √ Timer Record √ √ Setup œ ShowView Extended : Off √... - Page 39 About the Rating Level About the Change Password …† Rating …† Change Level Password No Disc Parental Control No Disc Parental Control Programme Password : On √ √ Programme Password : On √ √ Rating Level : Level 1 Kids Setup √...
-
Page 40: Before Recording
Before Recording Recording Recordable discs Compatibility between Samsung and Other Company’s Recorder NOTE... -
Page 41: Recording Formats
Recording Formats Unformatted Disc Do you want to format this disc? Unrecordable video Uninitialized Disc Do you want to initialize this disc? You cannot record copy protected movie. DVD-RW(VR) Disc Manager Disc Navigation Disc Name √ √ Disc Protection : Not Protected √... -
Page 42: Recording The Current Tv Programme You Are
About INFO Key Recording the current TV programme you are watching Before you start Checking the available disc space (Disc Information) INFO OPEN/CLOSE OPEN/CLOSE œ √ Unformatted Disc Do you want to format this disc? Uninitialized Disc Do you want to initialize this disc? - Page 43 To stop recording PROG. ( / ) number STOP ( REC MODE REC MODE …† NOTE Record Mode SP (02:12) Recording : PR 1 [SP] INFO INFO English -...
-
Page 44: Recording From External Equipment You Are
Recording from external equipment you are watching To pause recording PROG. ( / ) Before you start To stop recording STOP ( OPEN/CLOSE OPEN/CLOSE NOTE INPUT PR Number INPUT REC MODE REC MODE …† Record Mode SP (02:12) -
Page 45: Copying From A Camcorder
Copying from a Camcorder œ √ Before you start To stop recording STOP ( OPEN/CLOSE OPEN/CLOSE NOTE REC MODE REC MODE …† Record Mode SP (02:12) INPUT MOVE RETURN... -
Page 46: Making A One Touch Recording (Otr)
Making a One Touch INFO Recording (OTR) INFO PROG ( / ) INPUT AV1 AV2 AV3 OTR Mode 0:30 OTR is going to be ended soon and power will be turned off automatically. Press [OK] button to continue to use DVD-Recorder. To stop recording 0:30 1:00... -
Page 47: Making A Timer Recording
Source Making a Timer Recording Date Before you start Start/End Time Mode (Recording Mode) TIMER DVD-RAM(VR) Timer Record ShowView Disc Navigation √ √ Timer Record √ √ Playlist ShowView Extended : Off √ √ Disc manager Programme Setup MOVE RETURN EXIT Using the MENU button. -
Page 48: Flexible Recording (For Timer Recording Only)
Editing the Scheduled Record List If the timer settings overlap To exit without saving the current setting To return to the previous menu TIMER DVD-RAM(VR) Timer Record Disc Navigation ShowView √ √ Timer Record √ √ Playlist ShowView Extended : Off √... -
Page 49: Deleting The Scheduled Record List
…† Edit RETURN √ DVD-RAM(VR) Scheduled Record List Recordable Time 02:12 SP No. Source Date Start Mode V/P Edit No. 01 01 -- -- -- - -- --:-- --:-- √ √ Source Date Start End Mode PR 01 01/JAN(SAT) 12 : 00 14 : 00 SP Recordable Time 02:12 SP DVD-RAM(VR) Scheduled Record List... -
Page 50: Using The Showview Feature
Using the ShowView Feature …† DVD-RAM(VR) Scheduled Record List Recordable Time 02:12 SP No. Source Date Start Mode V/P Edit No. 01 01 -- -- -- - -- --:-- --:-- √ √ Source Date Start End Mode PR 01 01/JAN(SAT) 12 : 00 14 : 00 SP Recordable Time 02:12 SP …†... -
Page 51: Showview Extended
ShowView Extended Recording the Standard Timer List MENU DVD-RAM(VR) Disc Navigation Title List Disc Navigation √ √ DivX √ √ Playlist Photo √ √ Disc manager Music √ √ Programme Setup To stop Recording STOP( MOVE RETURN EXIT …† Programme √... -
Page 52: Playback
Before Playing Playback Region code (DVD-Video only) Disc types that can be played D I G I T A L DIGITAL OUT NOTE Discs that cannot be played... -
Page 53: Playing A Disc
NOTE OPEN/CLOSE STOP NOTE Playing a Disc CAUTION OPEN/CLOSE... - Page 54 Using the Search Functions Using the Disc Menu & Title Menu For DVD-VIDEO discs DISC MENU Searching through a Chapter or Track TITLE MENU SEARCH ( For DVD-RAM/RW/R discs TITLE LIST Title List SEARCH NOTE Play List NOTE...
-
Page 55: About Anykey
About ANYKEY Skipping Chapters or Tracks During play, you can search quickly through a chapter or track. SKIP ( If you press the œœ button, If you press the √√ button, Moving to a scene directly using the ANYKEY Slow Motion Play If you want to move to a title, a chapter or a track to find a desired scene. -
Page 56: Using The Repeat Function
If you want to move to a desired time to Using the Repeat Function help you find a scene. ANYKEY DVD-VIDEO Title 1/10 Chapter 1/40 Time 00:01:45 Subtitle Audio D 5.1CH Repeat Angle Zoom Playing Repeatedly(Repeat Playback) MOVE CHANGE …† Time Using the REPEA T button... - Page 57 REPEAT Track Disc Using the ANYKEY button Using the ANYKEY button Music ANYKEY Repeat : Track Play Option : Normal 01. TRACK 1 00 : 52 01. TRACK 1 4:39 02. TRACK 2 4:31 DVD-VIDEO 03. TRACK 3 4:30 Title 1/10 04.
-
Page 58: Selecting The Subtitle
Selecting the Subtitle Playing a Certain section Repeatedly(A-B Repeat Playback) (VR mode) Using the SUBTITLE button Using the SUBTITLE button Using the ANYKEY button Using the ANYKEY button SUBTITLE ANYKEY Subtitle DVD-VIDEO Title 1/10 Chapter 1/40 Time 00:01:45 Subtitle Audio D 5.1CH Repeat Title... -
Page 59: Selecting The Audio Language
Selecting the Audio language Changing the Camera Angle (VR mode) Using the AUDIO button Using the AUDIO button ANYKEY AUDIO Audio ENG Dolby Digital 5.1CH DVD-VIDEO Title 1/10 1/40 Chapter Time 00:01:45 Subtitle Audio D 5.1CH Repeat Angle Zoom MOVE CHANGE …†... -
Page 60: Using Bookmarks
Zooming-In Using Bookmarks ANYKEY DVD-VIDEO MARKER 1/10 Title 1/40 Chapter 00:01:45 Time Subtitle D 5.1CH Audio Bookmark Repeat Angle Zoom MOVE CHANGE MOVE RETURN …† Zoom Bookmark …† œ √ MOVE PLAY CANCEL RETURN œ √ normal size NOTE Bookmark MOVE PLAY CANCEL... - Page 61 Using Markers Playing back a bookmark MARKER MARKER œ √ Marker Bookmark RETURN MOVE PLAY CANCEL RETURN Clearing a bookmark Marker MARKER MOVE PLAY CANCEL RETURN œ √ œ √ Bookmark MOVE PLAY CANCEL RETURN Marker CANCEL Bookmark MOVE PLAY CANCEL RETURN MOVE...
-
Page 62: Playing An Audio Cd/Mp3
Playing back a Marker Playing an Audio CD/MP3 MARKER Playing an Audio CD (CD-DA)/MP3 œ √ Marker Playing an Audio CD(CD-DA) MOVE PLAY CANCEL RETURN Music Repeat : Off Play Option : Normal 01. TRACK 1 00 : 52 01. TRACK 1 4:39 02. - Page 63 Buttons on the Remote Control used for Audio CD(CD-DA) playback Playing an MP3 Disc Disc Navigation Disc Navigation DivX √ √ Photo √ √ Programme Music √ √ Setup MOVE RETURN EXIT …† Disc √ Navigation Disc Navigation Disc Navigation DivX √...
- Page 64 Buttons on the Remote Control used for MP3 playback MP3 Screen Elements Music Repeat : Off Play Option : Normal Straight from the heart 00 :22 ROOT Bryan Adams Bryan Adams_2 Straight from the heart ROOT Run to you 03/06 Heaven MOVE RETURN...
- Page 65 Play Option Mode To Programme Tracks ANYKEY ANYKEY Music Repeat : Off Play Option : Normal Music 01. TRACK 1 00 : 52 01. TRACK 1 4:39 Repeat : Off Play Option : Normal 02. TRACK 2 4:31 01. TRACK 1 00 : 52 03.
-
Page 66: Playing A Picture
PLAY Playing a Picture œ √ Slide Show Speed DSC01189 MOVE RETURN Disc Navigation Disc Navigation DivX √ √ Photo √ √ Programme Music √ √ œ √ Setup MOVE RETURN EXIT …† Disc √ Navigation DSC01189 Disc Navigation MOVE PHOTO RETURN Disc Navigation... -
Page 67: Playing A Mpeg4
MPEG4 Function Description Playing a MPEG4 Disc Navigation Disc Navigation NOTE DivX √ √ Photo √ √ Programme Music √ √ (without QPEL and GMC) Setup MOVE RETURN EXIT .sub, …† Disc √ Navigation Disc Navigation Disc Navigation DivX √ √ Photo √... -
Page 68: Playing The Title List
…† Disc Playing the Title List √ Navigation DVD-RAM(VR) Title List No. Title Length Edit 01 19/APR/2004 1 00:00:21 √ √ 02 19/APR/2004 1 00:00:03 √ √ 03 20/APR/2004 2 00:00:15 √ √ 04 20/APR/2004 2 00:00:16 √ √ 19/APR/2004 12:00 PR12 05 21/APR/2004 1 00:06:32 √... - Page 69 INFO Title List Screen Elements DVD-RAM(VR) DVD-RAM(VR) Title List Title List No. Title Length Edit No. Title Length Edit 01 19/APR/2004 1 00:00:21 00:00:21 √ √ √ √ 02 19/APR/2004 1 00:00:03 00:00:03 √ √ √ √ 03 20/APR/2004 2 00:00:15 03 Sports 00:00:15 √...
-
Page 70: Editing
Editing Title List Play List Recording or editing might not be completed if an error, such as a sudden power failure occurs. Please be aware that a material that has been damaged is unable to be retrieved to its original content. -
Page 71: Basic Editing (Title List)
…† œ √ Basic Editing (Title List) DVD-RAM(VR) Rename Sports(A1) Renaming(Labeling) a Title MOVE RETURN EXIT Back Space: Using the TITLE LIST button Using the TITLE LIST button Space: Delete: TITLE LIST Clear: Save: Using the MENU button MENU …† œ √ Save …†... -
Page 72: Deleting A Title
Locking(Protecting) a Title œ √ DVD-RAM(VR) Title List No. Title Length Edit Using the TITLE LIST button Using the TITLE LIST button 01 Drama 00:00:21 √ √ 02 Music 00:00:03 √ √ 03 Sports 00:00:15 √ √ 04 Movie 00:00:16 √... -
Page 73: Deleting A Section Of A Title
…† Deleting a Section of a Title Delete √ DVD-RAM(VR) Title List No. Title Length Edit 01 Drama 00:00:21 √ √ 02 Music 00:00:03 √ √ Using the TITLE LIST button Using the TITLE LIST button 03 Sports 00:00:15 Play √... - Page 74 Delete DVD-RAM(VR) Edit Title List DVD-RAM(VR) Edit Title List Title List No. 05 Title List No. 05 Start Start Start 00:00:06 Start 00:00:06 00:10:15 Delete 00:00:06 Delete Sports(A1) Sports(A1) Return 21/APR/2005 11:50 Return 00:10:15 21/APR/2005 11:50 00:00:00 MOVE RETURN EXIT MOVE RETURN EXIT...
-
Page 75: Advanced Editing (Playlist)
Advanced Editing DVD-RAM(VR) (Playlist) Make Scene Scene No. 001 Start Start 00:00:10 Title List: 1/6 00:10:00 Make Creating a Playlist New Playlist Return 19/APR/04 12:00 00:10:00 MOVE RETURN EXIT MENU …† - To make a new playlist - Playlist √ Make DVD-RAM(VR) Playlist... -
Page 76: Playing Entries In The Playlist
Playing Entries in the Playlist …† Play DVD-RAM(VR) Edit Playlist No. Title Length Edit 01 23/APR/2005/0 00:00:21 √ √ 02 23/APR/2005/0 00:00:03 √ √ 03 24/APR/2005/1 00:00:15 Play √ √ 04 24/APR/2005/1 00:00:16 Rename √ √ PLAY LIST 24/APR/2005 10:43 05 25/APR/2005/2 00:06:32 Edit Scene √... -
Page 77: Renaming A Playlist Entry
Renaming a Playlist Entry …† œ √ DVD-RAM(VR) Rename Dolphin PLAY LIST MOVE RETURN EXIT DVD-RAM(VR) Edit Playlist No. Title Length Edit 01 23/APR/2005/0 00:00:21 √ √ 02 23/APR/2005/0 00:00:03 √ √ 03 24/APR/2005/1 00:00:15 √ √ 04 24/APR/2005/1 00:00:16 √... -
Page 78: Editing A Scene For The Playlist
Editing a Scene for the Playlist Playing a Selected Scene …† œ √ PLAY LIST DVD-RAM(VR) Edit Scene Scene No. Playlist No. 3 DVD-RAM(VR) Edit Playlist Play No. Title Length Edit Modify 01 Science 00:00:17 √ √ 00:00:26 00:00:07 00:00:04 Move 02 Sky 00:00:06... - Page 79 Modifying a Scene (Replacing a Scene) DVD-RAM(VR) Modify Scene Scene No. 002 Start …† œ √ Start 00:00:25 00:00:30 Change Natural Cancel 23/APR/2005 03:34:00 00:00:30 MOVE RETURN EXIT DVD-RAM(VR) Edit Scene Scene No. Playlist No. 3 Play Modify 00:00:26 00:00:07 00:00:04 Move …†...
- Page 80 Moving a Scene (Changing the Position of a Scene) NOTE …† œ √ Adding a Scene DVD-RAM(VR) Edit Scene Scene No. Playlist No. 3 Play Modify 00:00:26 00:00:07 00:00:04 Move …† œ √ 00:00:03 00:00:11 00:00:04 Delete MOVE RETURN EXIT …†...
-
Page 81: Copying A Playlist Entry To The Playlist
Copying a Playlist Entry to the Playlist DVD-RAM(VR) Add Scene Scene No. 004 Start Using the PLA LIST button Using the PLA LIST button Start 00:00:15 00:00:35 Sclence Cancel APR/23/2005 06:43 AM 00:00:35 PLAY LIST MOVE RETURN EXIT DVD-RAM(VR) Edit Playlist …†... -
Page 82: Deleting A Playlist Entry From The Playlist
…† Delete NOTE DVD-RAM(VR) Edit Playlist No. Title Length Edit 01 Science 00:00:17 √ √ 02 Sky 00:00:06 √ √ 03 Dolphin 00:00:06 Play √ √ 04 Natural 00:00:37 Rename √ √ Dolphin 05 Dolphin 00:00:06 Edit Scene √ √ 7 Scene Copy APR/23/2005 06:43 AM... -
Page 83: Disc Manager
…† Disc Manager œ √ DVD-RAM(VR) Rename Disc Editing the Disc Name MOVE RETURN EXIT MENU INFO DVD-RAM(VR) Disc Navigation Title List Disc Navigation √ √ DivX √ √ …† œ √ Save Playlist Photo √ √ Disc manager Music √... -
Page 84: Disc Protection
Disc Protection Formatting a Disc MENU MENU DVD-RAM(VR) Disc Navigation DVD-RAM(VR) Disc Navigation Title List Disc Navigation √ √ DivX √ √ Playlist Disc Navigation Title List √ √ Photo √ √ DivX √ √ Disc manager Playlist Music √ √ Photo √... -
Page 85: Delete All Title Lists
…† DVD-RW Disc √ Manager DVD-RAM(VR) Disc Manager Disc Name Disc Navigation √ √ DVD-RW(VR) Disc Manager Disc Protection : Not Protected √ √ Playlist Disc Format Disc Name √ √ Disc Navigation √ √ Disc manager Delete All Title Lists Disc Protection : Not Protected √... -
Page 86: Finalising A Disc
Finalising a disc DVD-RW(VR) Disc Manager Disc Navigation Disc Name √ √ Disc Protection : Not Protected √ √ Playlist Disc Format : DVD-VR √ √ Do you want to finalise disc? Disc manager Disc Finalise √ √ Programme Delete All Title Lists √... - Page 87 Unfinalising a disc (V/VR mode) œ √ MENU NOTE DVD-RW(VR:F) Disc Navigation Title List Disc Navigation √ √ DivX √ √ Playlist Photo √ √ Disc manager Music √ √ Programme Setup MOVE RETURN EXIT …† Disc √ Manager DVD-RW(VR:F) Disc Manager Disc Name Disc Navigation...
-
Page 88: Additional Information
Troubleshooting Additional Information Power Checkpoint 1 Recording Checkpoint 1 Checkpoint 2 Checkpoint 3 Checkpoint 1 Troubleshooting..........88 Specifications............92... - Page 89 Playback Checkpoint 1 Checkpoint 1 Checkpoint 2 Checkpoint 3 Checkpoint 1 Checkpoint 1 Checkpoint 1 Checkpoint 1...
- Page 90 Video Timer Recording Checkpoint 1 Checkpoint 1 Checkpoint 2 Checkpoint 2 Checkpoint 3 Checkpoint 4 Sound Checkpoint 1 Checkpoint 2 Checkpoint 1 Checkpoint 2 Checkpoint 3 Checkpoint 4 Checkpoint 1...
-
Page 91: Remote Control Unit
Remote Control Unit Checkpoint 1 Checkpoint 1 Checkpoint 2 Checkpoint 3 Checkpoint 2 Checkpoint 3 Other Checkpoint 1 Checkpoint 1... -
Page 92: Specifications
Specifications Audio Output... - Page 93 (GREECE) FOURLIS TRADE A.E.B.E.
- Page 94 Correct Disposal of This Product (Waste Electrical & Electronic Equipment) (Applicable in the European Union and other European countries with separate collection systems) This marking shown on the product or its literature, indicates that it should not be disposed with other household wastes at the end of its working life.
Need help?
Do you have a question about the DVD-R120 and is the answer not in the manual?
Questions and answers