American Dynamics SpeedDome RHODULP-01 Installation And Service Manual
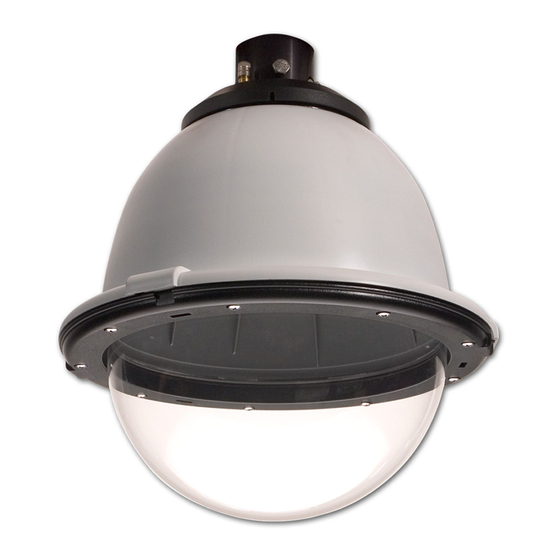
Ultra pressurized outdoor dome housing
Hide thumbs
Also See for SpeedDome RHODULP-01:
- Specifications (2 pages) ,
- Specifications (24 pages) ,
- Specifications (24 pages)
Table of Contents
Advertisement
Quick Links
SpeedDome
Pressurized Outdoor
Dome Housing
Installation and Service Guide
RHODULP-01 (clear bubble)
RHODULP-02 (smoked bubble)
Contents
About this Guide ............................................................ 1
If you need assistance... ......................................... 1
About the Product .......................................................... 1
Important Safeguards .................................................... 2
Unpacking .............................................................. 2
Installation ..................................................................... 3
Mounting the Housing............................................. 3
Calibrating the Pressure Sensor............................. 4
Installing the Dome................................................. 5
Installing the Desiccant Bag Bracket ..................... 5
Attaching the Bubble .............................................. 6
Pressurizing the Housing........................................ 6
Servicing the Pressurized Housing......................... 7
Reference ...................................................................... 8
Wiring Color Code .................................................. 8
Exploded View of Housing...................................... 9
Specifications .............................................................. 10
Declarations................................................................. 10
© 2005 Sensormatic Electronics Corp.
SPEEDDOME ULTRA PRESSURIZED OUTDOOR DOME HOUSING
INSTALLATION AND SERVICE GUIDE
Ultra
®
About this Guide
This guide explains how to install and service the
pressurized outdoor dome housing.
The exclamation point within an
equilateral triangle is intended to alert
the user to presence of important
operating and maintenance (servicing)
instructions in the literature
accompanying the outdoor dome.
If you need assistance...
Contact your Sales Representative.
Note: This housing is designed to
operate with the bubble pointing
down. Installing the housing upside
down can damage its internal
equipment, and will void the
warranty.
About the Product
The outdoor housing is pressurized with dry
nitrogen to eliminate the effects of moisture, dust,
insects, and corrosive exhaust fumes on the CCTV
camera. Dry nitrogen is added during installation.
The housing is pre-wired for RS-422 Installations.
See the "Reference" section in this guide for details
on how to configure the housing on SensorNet/
Manchester networks.
Note: This product is equipped with an absolute
low-pressure sensor. The sensor is connected to
IO PCB ALARM INPUT 1 and can be used to
detect if pressure inside the housing is less than
0.5psi. The sensor will open at 0.5psi and close at
1psi. See "Calibrating the Pressure Sensor"
section in this guide for details on how to calibrate
the sensor. Also, consult the controller's operation
guide for details on how to program the alarm
input.
1 of 10
8200-0462-01, REV. B
Advertisement
Table of Contents

Subscribe to Our Youtube Channel
Related Manuals for American Dynamics SpeedDome RHODULP-01


Summary of Contents for American Dynamics SpeedDome RHODULP-01
-
Page 1: Table Of Contents
SpeedDome Ultra About this Guide ® Pressurized Outdoor This guide explains how to install and service the pressurized outdoor dome housing. Dome Housing The exclamation point within an equilateral triangle is intended to alert Installation and Service Guide the user to presence of important operating and maintenance (servicing) instructions in the literature accompanying the outdoor dome. -
Page 2: Important Safeguards
8. Mounting - This housing must be properly Important Safeguards secured to a supporting structure capable of sustaining the weight of the unit. Accordingly: CAUTION: The housing is a pressurized a. The installation should be made by a enclosure. As such, certain care is qualified installer and be in compliance with required for the safe use of the product. -
Page 3: Installation
6. Loop the safety cable exiting the top of the Installation housing over one of the set screws on the bayonet coupling and connect cables exiting Note: This section assumes cables are routed to housing and pipe together using the two screw- the mounting site. -
Page 4: Calibrating The Pressure Sensor
8. Remove the bubble assembly from the housing Calibrating the Pressure Sensor to access the I/O circuit board inside the The housing includes an absolute pressure sensor housing. that must be calibrated, at the site, just before a. Loosen the nine captive screws on the ring installation. -
Page 5: Installing The Dome
Installing the Dome Installing the Desiccant Bag Bracket Connect the dome camera by aligning the protrusion on the dome with the protrusion on the Two desiccant bag brackets, each with two mounting base (or white mark on the I/O board). desiccant bags, are installed in the housing to Then turn the dome clockwise to lock it. -
Page 6: Attaching The Bubble
The barb connects to the regulator on the tank; the chuck connects to the purge valve on the housing. The American Dynamics product code for the Nitrogen kit (Nitrogen Tank, Hose, and Regulator) is RHONKIT. -
Page 7: Servicing The Pressurized Housing
Purge Procedure Servicing the Pressurized Housing 1. Set the regulator gauge to 10psi. When servicing the pressurized housing includes 2. Fill the housing with dry nitrogen. the removal of the bubble assembly, desiccant Before filling, ensure the two vent bags in the desiccant bag holder must be replaced holes between the top of the housing before reassembly. -
Page 8: Reference
Power (Euro Style Connector P7) Reference Camera Power (24Vac) Black Earth Ground Wiring Color Code Camera Power (24Vac) White Wiring Color Code for Power and Control Control (Euro Style Connector P1) Inputs (outside of housing) RS-422 Rx+ (SensorNet) Orange Power RS-422 Rx–... -
Page 9: Exploded View Of Housing
Exploded View of Housing Parts List 1. Pressured Sealed Housing 2. Housing Coupling 3. Housing Packet a. Screw down connectors (2) b. Mounting 8 x 32 x 1/2in Mounting Screws (4) c. #8 star washers (4) d. Pin shunts (2) e. -
Page 10: Specifications
Power input..........24vac, Class 2 Other Declarations Housing ............ 75W @ 24Vac Thank you for using American Dynamics products. We Heaters (2) ........... 25W each support our products through an extensive and worldwide network of dealers. The dealer, through whom you originally Blowers (2) ..........
Need help?
Do you have a question about the SpeedDome RHODULP-01 and is the answer not in the manual?
Questions and answers