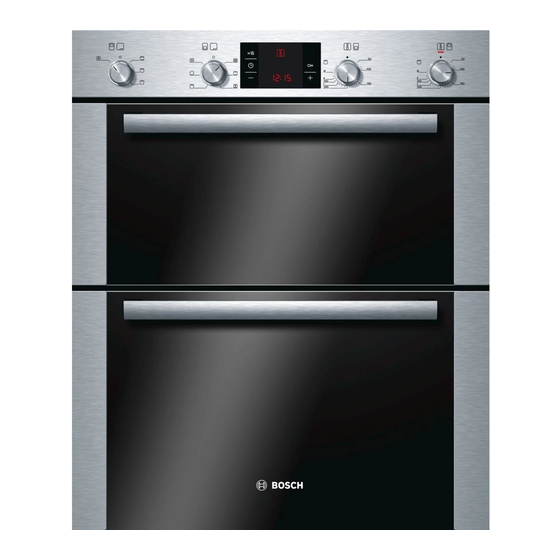
Bosch HBN43B250B Instruction Manual

Bosch HBN43B250B Instruction Manual

Hide thumbs Also See for HBN43B250B:

Advertisement

Double oven HBN43B2.0B
[en] Instruction manual

Advertisement

Table of Contents
loading

Summary of Contents for Bosch HBN43B250B

  • Page 1 Double oven HBN43B2.0B [en] Instruction manual...
  • Page 3: Table Of Contents

    Switching off the childproof lock........... 12 Grilling....................25 Produktinfo Additional information on products, accessories, replacement parts and services can be found at www.bosch-home.com and in the online shop www.bosch-eshop.com : Important safety information Read these instructions carefully. Only then This appliance is intended for domestic use will you be able to operate your appliance only.
  • Page 4 Children must not play with the appliance. Risk of scalding! Children must not clean the appliance or The accessible parts become hot during ■ carry out general maintenance unless they operation. Never touch the hot parts. Keep are at least 8 years old and are being children at a safe distance.
  • Page 5: Causes Of Damage

    Causes of damage the baking tray leaves stains that cannot be removed. If possible, use the deeper universal pan. Caution! Cooling with the appliance door open: only allow the cooking ■ Accessories, foil, greaseproof paper or ovenware on the compartment to cool when it is closed. Even if the appliance ■...
  • Page 6: Function Selector

    Function selector Temperature selector Use the function selectors to set the type of heating. Set the temperature or grill setting using the temperature selector. Main oven ó Setting Meaning Setting Off position The oven does not heat up. Ú Off position The main oven is switched off.
  • Page 7: Your Accessories

    Your accessories The accessories supplied with your appliance are suitable for ò Top oven making many meals. Ensure that you always insert the You can insert the accessories into the cooking compartment accessories into the cooking compartment the right way round. at 2 different levels.
  • Page 8 Optional accessories HEZ number Grill tray HEZ325000 Use for grilling in place of the wire rack or as a splatter guard, so that the oven does not become as dirty as it otherwise might. Only use the grill tray in the universal pan. Grilling on the grill tray: only use at shelf position 1, 2 and 3.
  • Page 9: After-Sales Service Products

    After-sales service products service, specialist retailers or (in some countries) online via the e­Shop. Please specify the relevant product number. You can obtain suitable care and cleaning agents and other accessories for your domestic appliances from the after-sales Cleaning cloths for stainless-steel surfaces Product no. 311134 Reduces the build-up of dirt.
  • Page 10: Rapid Heating

    Rapid heating Set the heating type and temperature for the main oven. Press the button. You can switch on rapid heating for the ó main oven. The main oven will then reach the set temperature particularly symbol lights up in the display. The main oven quickly.
  • Page 11: End Time

    Changing the cooking time The cooking time has elapsed Use the button to change the cooking time. After a few A signal sounds. The main oven stops heating. 00:00 is shown seconds, the change is adopted. If the timer has been set, in the display.
  • Page 12: Childproof Lock

    Childproof lock Switching on the childproof lock ó main oven has a childproof lock to prevent children from switching it on by accident or changing a setting. No cooking time or end time may be set. The main oven does not respond to any settings. You can still Press and hold the button for approximately 4 seconds.
  • Page 13: Cleaning The Hook-In Racks

    Insert the hook-in rack at the rear until the limit stop. Area Cleaning agents Push the hook-in rack towards the rear. Telescopic shelves Hot soapy water: Insert the hook-in rack at the front until the limit stop. Clean with a dish cloth or a brush. Do not soak or clean in the dishwasher.
  • Page 14: Cleaning The Door Panels

    Attaching the door Removing the intermediate panel Reattach the oven door in the reverse sequence to removal. Lift the intermediate panel slightly and pull it out towards you. When attaching the oven door, ensure that both hinges are inserted straight into the opening (figure A). The notch on the hinge must engage on both sides (figure B).
  • Page 15: Troubleshooting

    Troubleshooting Replacing the oven light bulb Malfunctions often have simple explanations. Refer to the table before calling the after-sales service as you may be able to Replace faulty oven light bulbs. remedy the fault yourself. Spare bulbs can be obtained from the after-sales service or Malfunction table specialist retailers.
  • Page 16: Energy And Environment Tips

    Energy and environment tips Here you can find tips on how to save energy when baking and For longer cooking times, you can switch the oven off ■ roasting and how to dispose of your appliance properly. 10 minutes before the end of the cooking time and use the residual heat to finish cooking.
  • Page 17 ó Main oven Food Dish Shelf posi- Type of Temperature Baking time in tion heating in °C minutes Victoria sandwich Wire rack + 160-170 25-30 2 tins, dia. 20 cm 160-170 25-30 140-150 80-100 Light fruit cake Wire rack + deep tin, dia.
  • Page 18: Baking Tips

    ò Top oven Food Dish Shelf posi- Type of Temperature Time tion heating in °C in minutes Victoria sandwich Wire rack + 1 tin, 160-170 25-30 dia. 20 cm Scones Wire rack + baking tray 200-210 10-12 Small cakes Wire rack + 12-cup tin 150-160 25-30 Jam tarts...
  • Page 19 ó Main oven Meat Dish Shelf Type of Temperature Time, mins per 500 g position heating in °C + add. time Beef Slow roast joint Universal pan with roasting rack 130-140 40+40 Top side and top rump Universal pan with roasting rack 160-170 30+25 Lamb...
  • Page 20 If possible, grill items should be of equal thickness. This Tips for grilling ensures that they brown evenly while also remaining succulent. Always grill with the oven door closed. Only add salt to steaks once they have been grilled. When grilling, preheat the oven for approx. 3 minutes, before Turn grilled items after the specified time.
  • Page 21: Tips For Roasting And Grilling

    ò Top oven Observe the notes in the table about preheating. Food Dish Shelf posi- Type of Grill setting Time tion heating in minutes Beef Steaks Wire rack + 1st side 10-13, 2-3 cm thick universal pan 2nd side 6-8 Burgers Wire rack + 1st side 10-12,...
  • Page 22: Preprepared Products

    Preprepared products The cooking result greatly depends on the quality of the food. Pre-browning and unevenness can sometimes even be found Observe the instructions on the packaging. on the raw product. If you line the accessories with greaseproof paper, make sure Leave a little space between bread rolls when crisping them up.
  • Page 23: Special Dishes

    Special dishes Pour into cups or small screw-top jars and cover with cling film. At low temperatures, 3D hot air is equally useful for Preheat the cooking compartment as indicated. producing creamy yoghurt as it is for proving light yeast dough. Place the cups or jars on the cooking compartment floor and First, remove accessories, hook-in racks or telescopic shelves incubate as indicated.
  • Page 24: Acrylamide In Foodstuffs

    Acrylamide in foodstuffs Acrylamide is mainly produced in grain and potato products toast, bread rolls, bread or fine baked goods (biscuits, prepared at high temperatures, such as potato crisps, chips, gingerbread, cookies). Tips for keeping acrylamide to a minimum when preparing food Keep cooking times to a minimum.
  • Page 25: Grilling

    Grilling If you are grilling food directly on the wire rack, the universal pan should also be inserted at level 1. The liquid is then collected, keeping the oven cleaner. ó Main oven Meal Accessories and cookware Level Type of Temperature Cooking time heating...
  • Page 28 Robert Bosch Hausgeräte GmbH Carl-Wery-Straße 34 81739 München Germany www.bosch-home.com *9000715730* 920228 9000715730...

Table of Contents