
Related Manuals for Bosch HBN 43 W 3.0


Summary of Contents for Bosch HBN 43 W 3.0
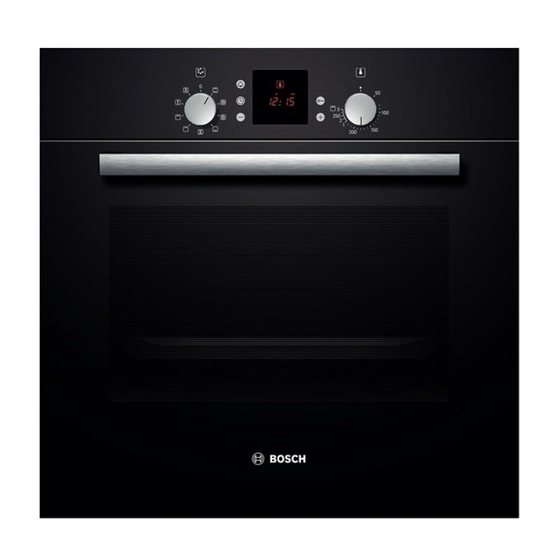
- Page 1 HBN 43 W 3.0 GB Instructions for Use уководство по эксплуатации TR Kullanma kilavuzu...
-
Page 2: Table Of Contents
Table of contents Important information ..... . . Before installation ......Safety information . - Page 3 Table of contents Care and cleaning ......Oven exterior ....... . Oven .
-
Page 4: Important Information
Important information Read this instruction manual carefully. Only then will you be able to operate your cooker safely and correctly.The manufacturer does not accept any re sponsibility if the instruction manual is not followed. Please keep the instruction and installation manual in a safe place. -
Page 5: Safety Information
Safety information This appliance is intended for domestic use only. Only use the cooker for food preparation. Open the oven door carefully. Hot steam may escape. Hot oven Never touch the internal surfaces of the oven or the heating elements. There is a risk of burning. Children must be kept at a safe distance from the appliance. -
Page 6: Your New Cooker
Cooling with the oven door Only leave the oven to cool with the door closed. Do open not allow anything to become trapped in the oven door. Even if you only leave the oven door open slightly, the fronts of adjacent units may become damaged over time. -
Page 7: Function Selector
Function selector Use the function selector to select the type of heating for the oven. Settings Conventional heat Hot air Bottom heating Hot air grilling Radiant grill small area Radiant grill large area Defrosting When you select a function, the oven light switches Temperature selector Use the temperature selector to set the temperature... -
Page 8: Control Buttons And Display Panel
Control buttons and display panel Minus button Use this button to reduce the values set. Plus button + Use this button to increase the values set. Clock button Use this button to set the time of day, the cooking time and the completion time Key button... - Page 9 Hot air A cooling fan in the oven's back wall distributes the heat in a uniform manner throughout the oven. Using hot air, it is possible to bake cakes and pizza on two shelves. The required oven temperatures are lower than those for top/bottom heating. Hot air is ideal for drying food.
-
Page 10: Oven And Shelving Accessories
Radiant grill - large area The entire area under the grill element becomes hot. This is ideal if you wish to cook several steaks, sausages, fish or slices of toast. Defrosting A fan in the rear wall of the oven circulates the air in the oven around the frozen food. -
Page 11: Cooling Fan
Enamel baking tray For moist cakes, pastries, frozen food and large roasts. It can also be used to catch dripping fat when you are grilling directly on the wire grill. Push the baking tray with the sloping edge facing towards the oven door. Aluminium tray For cakes and biscuits. -
Page 12: Heating Up The Oven
Heating up the oven Heat the empty oven with the door closed to remove the new oven smell. Method Set the function selector to t. Use the temperature selector to set the temperature to 240 ºC. Switch off the function selector after 60 minutes. Pre cleaning the accessories Please wash the accessories thoroughly with soapy... -
Page 13: Setting Procedure
Setting procedure Example: Top/bottom heating , 190 ºC Select the desired type of heating using the function selector. Use the temperature selector to set the temperature or grill setting. When the meal is ready Switch off the function selector. You may change the temperature or grill setting at any Changing the setting time. -
Page 14: If The Oven Is To Switch On And Off Automatically
Set the cooking time using the + or - button. + button default value = 30 minutes. - button default value = 10 minutes. The oven switches on after a few seconds. The ? symbol lights up in the display. A signal sounds. -
Page 15: Time
Use the + button to set a later end time. The setting is adopted after a few seconds. The display will show the end time until the oven switches The cooking time has A signal sounds. The oven switches off. elapsed Press the j button twice and switch off the function selector. -
Page 16: Timer
Set the time using the + or - button. The time selected is adopted after a few seconds. Changing the time e.g. Press the clock button twice and change the time from summer to winter with the + or - button. time Hiding the time You can hide the time. -
Page 17: Basic Settings
Set the timer period using the + or - button. + button default value = 10 minutes. - button default value = 5 minutes. The timer starts after a few seconds. The symbol lights up in the display. The time counts down visibly. The time has elapsed A signal sounds. -
Page 18: Changing The Basic Settings
Basic setting Function Change to Signal duration Signal after cooking Signal duration c = approx. time or timer period b = approx. 2 mins. has elapsed. 10 seconds d = approx. 5 mins. Reset time Waiting time between Reset time c = medium the adjustment b = short... -
Page 19: Childproof Lock
Confirm with the clock button. A c will appear in the display for the basic setting for the signal duration. Change the basic setting as described in step 2 and confirm with the clock button. You can now change the reset time. To finish press the clock button. -
Page 20: Care And Cleaning
Care and cleaning Do not use high pressure cleaners or steam jets. Oven exterior Wipe the oven with water and a little washing up liquid. Dry it with a soft cloth. Caustic or abrasive substances are not suitable. If any such substances come into contact with the frontage, wipe it off immediately with water.Slight differences in the colours on the appliance front are caused by the... - Page 21 Half close the oven door. With both hands, grip the bottom of the door on the left and right hand sides. Close the door a little more and pull it out. After cleaning, re install the oven door, following the instructions in reverse order.
-
Page 22: Cleaning Function
If the self cleaning surfaces of the oven are no longer cleaning themselves sufficiently, they can be regenerated using the cleaning function. Should the enamel become slightly stained, this will not affect its self cleaning properties. Cleaning the oven floor Use hot soapy water or a vinegar solution. -
Page 23: Cleaning The Glass Panels
Use the + button to set 1.00 hour. The setting is adopted after a few seconds. The oven will switch off automatically after one hour. Switch off the function selector. Cleaning the glass panels The glass panel on the oven door can be removed to assist in cleaning. -
Page 24: Cleaning The Rails
Cleaning the rails The rails can be removed for cleaning. To unhook the rails: Lift the rails at the front in an upwards direction and unhook them, then pull the rails forward and remove Clean the rails using either washing up liquid and a sponge or a brush. -
Page 25: Troubleshooting
Troubleshooting Should a malfunction occur, it is often only due to a minor fault. Please read the following instructions before calling the after-sales service: Problem Possible cause Comments/remedy The oven does not work. Blown fuse. Look in the fuse box and check that the fuse is in working order. -
Page 26: After Sales Service
Replacing the glass cover The glass cover on the oven light must be replaced if it is damaged. Replacement glass covers may be obtained from the after sales service. To this end, please specify the E number and FD number of your appliance. -
Page 27: Packaging And Old Appliances
Packaging and old appliances Your new appliance was protected by suitable packaging while it was on its way to you. All materials used for this purpose are environmentally friendly and can be recycled. Please make a contribution to protecting the environment by disposing of the packaging appropriately. - Page 28 Tables The values in the table apply to dishes placed in a cold oven. This saves energy. Shorten the baking times indicated by 5 to 10 minutes if you have preheated the oven. The tables show which type of heating is best for different cakes and bakes.
-
Page 29: Baking Tips
Cakes on the tray Level Type of Temperature Baking time heating in ºC in minutes Baking tips You wish to cook to your own recipe. How to check that a sponge cake is cooked properly. The cake collapses. The cake has risen in the centre but is lower at the edges. -
Page 30: Meat, Poultry, Fish, Bakes, Toast
You were baking on several Always use hot air 3 when baking on several levels. Baking levels. The food on the top baking trays that are placed in the oven at the same time will not tray is darker than that on the necessarily be ready at the same time. -
Page 31: Tips For Roasting And Grilling
Place the pieces of meat directly onto the wire grill. If you are grilling just one piece of meat, it will turn out best if you place it in the centre of the wire grill. Additionally, slide the enamelled tray in at height position 1. -
Page 32: Defrosting
The roast is too dark and the Check the shelf position and temperature. crackling is partly burnt. The roast looks good, but the Next time, use a smaller roasting dish or add more liquid. juices are burnt. The roast looks good, but the Next time, use a larger roasting dish or add less liquid. -
Page 33: Drying
Meal Accessories Level Type of Temperature in heating ºC Frozen foods* Wire rack The temperature e.g. cream gateaux, cream cakes, cakes with selector remains chocolate or icing, fruit, switched off chicken, sausages and meat, bread, rolls, pastries and other baked goods Cover frozen food with microwave foil. -
Page 34: Energy Saving Tips
Energy saving tips Only preheat the oven if it specifies in the recipe or in the table in the instruction manual that you should do Use non stick, black painted or enamelled tins. They absorb the heat especially well. If you have several cakes to bake it is best to bake them one after the other. -
Page 35: What Can You Do
What can you do? In general Baking... -
Page 36: Test Dishes
Test dishes In accordance with DIN 44547 and EN 60350 Baking The values in the table apply to dishes placed in a cold oven. Meal Accessories and notes Level Type of Tempera Baking heating ture in ºC time in minutes Ø... - Page 37 Coªep²a¸åe Ha ñ¹o cæeªºe¹ o¢pa¹å¹¿ ¸å¯a¸åe ... . aòa ¸oaø ÿæå¹a ......¥epeª...
- Page 38 Coªep²a¸åe ѹo ªeæa¹¿ ÿpå ¸eåcÿpa¸oc¹å? ....Cepåc¸aø c溲¢a ......šÿa®o®a å...
-
Page 39: Ha ѹO Cæeªºe¹ O¢Pa¹Å¹¿ ¸Å¯a¸åe
Ha ñ¹o cæeªºe¹ o¢pa¹å¹¿ ¸å¯a¸åe ¥epeª ¯o¸¹a²o¯ ¥ope²ªe¸åø ÿpå ¹pa¸cÿop¹åpo®e ¥oª®æ÷ñe¸åe ® õæe®¹poce¹å... - Page 40 ¥paåæa ¹ex¸å®å ¢eµoÿac¸oc¹å ¦opøñå¼ ªºxoo¼ ò®aí Pe¯o¸¹ ¥påñ帾 ÿope²ªe¸å¼ ¥po¹åe¸¿ åæå ío濨a ¸a ª¸e ªºxoo¨o ò®aía oªa ªºxoo¯ ò®aíº Ípº®¹o¾¼ co®...
-
Page 41: Aòa ¸Oaø Ÿæå¹A
Oxæa²ªe¸åe c o¹®p¾¹o¼ ªepýe¼ ªºxoo¨o ò®aía Cå濸o µa¨pøµ¸e¸ ºÿæo¹¸å¹eæ¿ ªepý¾ ªºxoo¨o ò®aía ©epýa ªºxoo¨o ò®aía åcÿo濵ºe¹cø ®a® cåªe¸¿e aòa ¸oaø ÿæå¹a ¥a¸eæ¿ ºÿpaæe¸åø... - Page 42 Pºñ®a ¾¢opa íº¸®ýå¼ ¥oæo²e¸åø Pe¨ºæø¹op ¹e¯ÿepa¹ºp¾ ºC ¦påæ¿ x Pe²å¯¾ ¨påæø...
- Page 43 ©åcÿæe¼ å ®¸oÿ®å ºÿpaæe¸åø š¹aÿæåae¯¾e pºñ®å ¾®æ÷ña¹eæe¼ åª ¸a¨pea...
- Page 44 epx¸å¼ å ¸å²¸å¼ ²ap ¨opøñå¼ oµªºx Hå²¸å¼ ²ap ¦påæ¿ c ®o¸e®ýåe¼...
- Page 45 ¥æoc®å¼ ¨påæ¿, ¯aæaø ÿæoóaª¿ ¥æoc®å¼ ¨påæ¿, ¢oæ¿òaø ÿæoóaª¿ Paµ¯opa²åa¸åe ©ºxoo¼ ò®aí å ÿpå¸aªæe²¸oc¹å...
-
Page 46: Epeª Ÿep¾¯ Åcÿoæ¿Μoa¸åe
¥på¸aªæe²¸oc¹å Peòe¹®å Õ¯aæåpoa¸¸¾¼ ÿpo¹åe¸¿ Aæ÷¯å¸åe¾¼ ÿpo¹åe¸¿ ¥peªapå¹e濸aø oñåc¹®a ÿpå¸aªæe²¸oc¹e¼ ¥epeª ÿep¾¯ åcÿo濵oa¸åe¯... -
Page 47: Hac¹Po¼®A ªºxoo¨o Ò®Aía
Ecæå ¸a 帪å®a¹ope ¯å¨a÷¹ cå¯oæ j å ¹på ¸ºæø Ha¨pea¸åe ªºxoo¨o ò®aía ¥ocæeªoa¹e濸oc¹¿ ªe¼c¹å¼ ¥peªapå¹e濸aø oñåc¹®a ÿpå¸aªæe²¸oc¹e¼ Hac¹po¼®a ªºxoo¨o ò®aía ¾®æ÷ñe¸åe ªºxoo¨o ò®aía pºñ¸º÷ A¹o¯a¹åñec®oe ¾®æ÷ñe¸åe ªºxoo¨o ò®aía... - Page 48 A¹o¯a¹åñec®oe ®æ÷ñe¸åe å ¾®æ÷ñe¸åe ªºxoo¨o ò®aía ™a¢æåý¾ å pe®o¯e¸ªaýåå šc¹a¸o®a º Žo¨ªa ¢æ÷ªo ¢ºªe¹ ¨o¹oo ŵ¯e¸e¸åe ºc¹a¸o®å...
- Page 49 A¹o¯a¹åñec®oe ¾®æ÷ñe¸åe ªºxoo¨o ò®aía pe¯ø ÿpå¨o¹oæe¸åø åc¹e®æo ŵ¯e¸e¸åe ºc¹a¸o®å ¥pe®paóe¸åe ºc¹a¸o®å šc¹a¸o®a ÿpoªoæ²å¹eæ¿- ¸oc¹å ÿpå ¾®æ÷ñe¸¸o¼ 帪å®aýåå pe¯e¸å cº¹o®...
- Page 50 ©ºxoo¼ ò®aí ªoæ²e¸ ®æ÷ña¹¿cø å ¾®æ÷ña¹¿cø a¹o¯a¹åñec®å pe¯ø ÿpå¨o¹oæe¸åø åc¹e®æo š®aµa¸åe...
-
Page 51: Pe¯ø Cº¹O
pe¯ø cº¹o® šc¹a¸o®a Haÿpå¯ep, ÿepexoª c æe¹¸e¨o pe¯e¸å ¸a µå¯¸ee O¹®æ÷ñe¸åe 帪å®aýåå pe¯e¸å cº¹o®... -
Page 52: X99;A¼¯Ep
™a¼¯ep šc¹a¸o®a ³aªa¸¸oe pe¯ø åc¹e®æo... -
Page 53: Aµo¾E ºc¹A¸o®Å
ŵ¯e¸e¸åe pe¯e¸å ¹a¼¯epa A¸¸ºæåpoa¸åe ºc¹a¸o®å pe¯ø ¹a¼¯epa å ÿpoªoæ²å¹e濸oc¹¿ åc¹e®a÷¹ oª¸ope¯e¸¸o ¡aµo¾e ºc¹a¸o®å ¡aµoaø ͺ¸®ýåø ŵ¯e¸e¸åe ºc¹a¸o®a... - Page 54 ŵ¯e¸e¸åe ¢aµo¾x ºc¹a¸oo® ¾ ¸e xo¹å¹e 嵯e¸ø¹¿ ce ¢aµo¾e ºc¹a¸o®å Žoppe®¹åpo®a...
-
Page 55: Æo®Åpo®A ªæø ¢Eµoÿac¸oc¹Å ªe¹E¼
¡æo®åpo®a ªæø ¢eµoÿac¸oc¹å ªe¹e¼ ¡æo®åpo®a ªºxoo¨o ò®aía O¹¯e¸a ¢æo®åpo®å š®aµa¸åø šxoª å oñåc¹®a Ñåc¹®a ÿpå¢opa c¸apº²å... - Page 56 ¥på¢op¾ co c¹a濸o¼ ÿepeª¸e¼ ÿa¸eæ¿÷ ©ºxoo¼ ò®aí ѹo¢¾ ñåc¹®a ¢¾æa æe¨®o¼, ®æ÷ñe¸åe æa¯ÿoñ®å ªºxoo¯ ò®aíº C¸ø¹åe ªepý¾ ªºxoo¨o ò®aía...
- Page 57 Ha¨pea¹e濸¾¼ õæe¯e¸¹ ¨påæø Ñåc¹®a ®a¹aæå¹åñec®o¼ ÿoepx¸oc¹å ªºxoo¨o ò®aía...
- Page 58 Oñåc¹®a ª¸a ªºxoo¨o ò®aía Oñåc¹®a c¹e®æø¸¸o¨o ®oæÿa®a æa¯ÿoñ®å ªºxoo¯ ò®aíº Íº¸®ýåø oñåc¹®å (clean) ¸å¯a¸åe šc¹a¸o®a...
- Page 59 Ñåc¹®a c¹e®æa ©ºxoo¼ ò®aí ¯o²¸o åcÿo濵oa¹¿ ¹oæ¿®o ÿocæe ¹o¨o, ®a® c¹e®æa ¢ºªº¹ ºc¹a¸oæe¸¾ coo¹e¹c¹åe c å¸c¹pº®ýåe¼.
- Page 60 Oñåc¹®a ¸aec¸¾x õæe¯e¸¹o šÿæo¹¸e¸åe ¥på¸aªæe²¸oc¹å...
-
Page 61: ѹO ªeæa¹¿ Ÿpå ¸Eåcÿpa¸oc¹Å
ѹo ªeæa¹¿ ÿpå ¸eåcÿpa¸oc¹å? Heåcÿpa¸oc¹¿ oµ¯o²¸aø ÿpåñå¸a šc¹pa¸e¸åe Pe¯o¸¹ ªoæ²e¸ ÿpoåµoªå¹¿cø ¹oæ¿®o cÿeýåa濸o o¢ºñe¸¸¾¯å co¹pºª¸å®a¯å Cepåc¸o¼ c溲¢¾. ³a¯e¸a æa¯ÿoñ®å ªºxoo¯ ò®aíº ¥ocæeªoa¹e濸oc¹¿ ªe¼c¹å¼... -
Page 62: Cepåc¸aø C溲¢A
³a¯e¸a c¹e®æø¸¸o¨o ®oæÿa®a Cepåc¸aø c溲¢a Ho¯ep E å ¸o¯ep FD šÿa®o®a å o¹c溲åòå¼ ÿpå¢op... -
Page 63: X99;A¢Æåý¾ Å Pe®O¯e¸ªaýåå
™a¢æåý¾ å pe®o¯e¸ªaýåå ¥åpo¨å å ¾ÿeñ®a Íop¯¾ ªæø ¾ÿe®a¸åø... - Page 64 ™a¢æåý¾ ¥åpo¨ íop¯e Íop¯a ¸a peòe¹®e špo- åª ™e¯ÿepa- ¥poªoæ²å- e¸¿ ¸a- ¹ºpa, °C ¹e濸oc¹¿ ¨pea ¾ÿe®a¸åø, ¯å¸ 220 240 40 50 190 210 45 55 Ø 210 230 40 50 Ø 180 200 50 60 210 230 25 35 180 200 45 55 170 190...
- Page 65 160 180 20 30 140 160 35 45 100 120 30 40 100 120 40 50 Pe®o¯e¸ªaýåå ÿo ¾ÿe®a¸å÷ ¾ xo¹å¹e ÿeñ¿ ÿo co¢c¹e¸¸o¯º peýeÿ¹º. ¥poep®a c¹eÿe¸å ÿpoÿe®a¸åø cªo¢¸o¨o ÿåpo¨a. ¥åpo¨ oÿaªae¹. ¥åpo¨ ÿoª¸øæcø ¹oæ¿®o cepeªå¸e, a ÿo ®paø¯ ¸åµ®å¼. ¥åpo¨...
- Page 66 ¾ÿeñ®a ÿoªpº¯ø¸åae¹cø ¸epa¸o¯ep¸o. Ípº®¹o¾¼ ÿåpo¨ ¸åµº oñe¸¿ ce¹æ¾¼. Ípº®¹o¾¼ co® ¾¹e®. ¥på ¾ÿe®a¸åå ¸a ¸ec®oæ¿®åx ºpo¸øx: Ha epx¸e¯ ºpo¸e ¾ÿeñ®a ÿoæºñae¹cø ¹e¯¸ee, ñe¯ ¸a ¸å²¸e¯. o pe¯ø ¾ÿe®a¸åø coñ¸¾x ÿåpo¨o o¢paµºe¹cø ®o¸ªe¸ca¹. øco, ÿ¹åýa, p¾¢a, µaÿe®a¸®å, ¹oc¹¾ ¥ocºªa Pe®o¯e¸ªaýåå ÿo ²ape¸å÷...
- Page 67 Pe®o¯e¸ªaýåå ÿo ²ape¸å÷ ¨påæe ¥på¯ep O¢½e¯ ¥ocºªa špo- åª ™e¯ÿepa- ¥poªoæ²å- e¸¿ ¸a- ¹ºpa, °C, ¹e濸oc¹¿, ¨pea ¨påæ¿ ¯å¸ 230 240 240 250 160 180 150 170...
- Page 68 ¥på¯ep O¢½e¯ ¥ocºªa špo- åª ™e¯ÿepa- ¥poªoæ²å- e¸¿ ¸a- ¹ºpa, °C, ¹e濸oc¹¿, ¨pea ¨påæ¿ ¯å¸ Pe®o¯e¸ªaýåå ÿo ²ape¸å÷ ¨påæe ©æø ¹a®o¨o eca ²ap®o¨o ¹a¢æåýe ¸e¹ µ¸añe¸å¼. Ža® ºµ¸a¹¿, ¨o¹oo ²ap®oe åæå ¸e¹ ±ap®oe cæåò®o¯ ¹e¯¸oe, a ®opoñ®a ¯ec¹a¯å ÿoª¨opeæa ±ap®oe ÿoæºñåæoc¿...
- Page 69 ¡æ÷ªo špo- åª ™e¯ÿepa¹ºpa, ¥poªoæ²å- e¸¿ ¸a- °C ¹e濸oc¹¿, ¨pea ¯å¸ 210 230 25 30 200 220 15 20 200 220 15 20 š®aµa¸åe Paµ¯opa²åa¸åe ¡æ÷ªo ¥på¸aªæe²¸oc¹å špoe¸¿ Cÿoco¢ ™e¯ÿepa¹ºpa, ¸a¨pea °C 40 50 ºC "He²¸¾e" ÿpoªº®¹¾*...
- Page 70 ¥oªcºòåa¸åe ¡æ÷ªo špoe¸¿ Cÿoco¢ ™e¯ÿepa¹ºpa, ¥poªoæ²å¹e濸oc¹¿, ¸a¨pea °C ñ ½ š®aµa¸åe Pe®o¯e¸ªaýåå ÿo õ®o¸o¯åå õæe®¹poõ¸ep¨åå...
-
Page 71: A®Påæa¯åª Ÿpoªº®¹Ax Ÿå¹A¸åø
A®påæa¯åª ÿpoªº®¹ax ÿå¹a¸åø Ža® o¢paµºe¹cø a®påæa¯åª? ®a®åx ¢æ÷ªax coªep²å¹cø ¢oæ¿òoe ®oæåñec¹o a®påæa¯åªa? Ža® õ¹o¨o åµ¢e²a¹¿? O¢óåe pe®o¯e¸ªaýåå: ¾ÿe®a¸åe º º... -
Page 72: X8E;O¸¹Po濸¾E ¢Æ÷ªa
º º Žo¸¹po濸¾e ¢æ÷ªa ¾ÿe®a¸åe ¡æ÷ªo ¥på¸aªæe²¸oc¹å å špo- åª ™e¯ÿepa- ¥poªoæ²å- º®aµa¸åø e¸¿ ¸a- ¹ºpa, °C ¹e濸oc¹¿ ¨pea ¾ÿe®a¸åø, ¯å¸ 160 180 20 30 140 160 30 40 160 180 25 35 150 170 25 35 160 180 30 40 170 190 40 50 160 180... - Page 73 ¡æ÷ªo ¥på¸aªæe²¸oc¹å å špo- åª ™e¯ÿepa- ¥poªoæ²å- º®aµa¸åø e¸¿ ¸a- ¹ºpa, °C ¹e濸oc¹¿ ¨pea ¾ÿe®a¸åø, ¯å¸ 190 210 70 80 Ø 190 210 70 80 Ø ±ape¸åe ¨påæe ¡æ÷ªo ¥på¸aªæe²¸oc¹å špo- åª Pe²å¯ ¥poªoæ²å- e¸¿ ¸a- ¨påæø ¹e濸oc¹¿ ¨pea ¯å¸º¹...
- Page 74 Žçindekiler Dikkat etmeniz gereken hususlar ..Yeni fžržnžnžz ....... Žlk kullanžmdan önce .
- Page 75 Žçindekiler Çocuk emniyeti ......Bakžm ve Temizlik ......Bir aržza halinde yapžlmasž...
-
Page 76: Dikkat Etmeniz Gereken Hususlar
Dikkat etmeniz gereken hususlar Montajdan önce Nakliye hasarlarž Elektrik balantžsž Güvenlik bilgileri Sžcak fžržn... - Page 77 Tamirler Hasar sebepleri Kek sacž veya alüminyum folyo fžržn tabanžnda Fžržnda su Meyve suyu Açžk fžržn sürgüsü ile soutma Çok kirlenmiå fžržn izolasyonu Fžržn sürgüsü oturma yüzeyi...
-
Page 78: Yeni FžRžNžNžZ
Yeni fžržnžnžz Kumanda bölümü Fonksiyon ayar dümesi Pozisyonlar... - Page 79 Isž ayar dümesi º Izgara Izgara kademeleri Kumanda tuålarž ve gösterge alanž...
- Page 80 Düåürülebilir åalter tutamaklarž Isžtma türleri Üstten ve alttan žsžtma Sžcak hava Alttan žsžtma...
- Page 81 Sžcak hava dolaåžmž ile žzgara yapmak Yassž žzgara, küçük yüzey Yassž žzgara, büyük yüzey Buz çözme...
- Page 82 Fžržn ve aksesuar Aksesuarlar Izgara Emaye teps Alüminyum tepsi Soutma fanž...
-
Page 83: X8E;Lk KullanžMdan Önce
Žlk kullanžmdan önce Göstergede j sembolü ve üç sžfžr yanžp sönüyorsa Fžržnžn žsžtžlmasž Yapmanžz gereken iålem º Aksesuarž önceden temizleyin... -
Page 84: FžRžNžN Ayarlanmasž
Fžržnžn ayarlanmasž Fžržnž manüel olarak kapatžnžz Fžržn kendiinden kapanacaktžr Fžržn otomatik olarak açžlacak ve kapanacaktžr Tablolar ve Öneriler Åu åekilde ayarlanžr: º... - Page 85 Yemek piåince Ayar deiåimi Fžržnžn otomatik olarak kapanmasžnž istiyorsanžz Süre dolmuåtur Ayar deiåimi Ayarlamanžn durdurulmasž Saat kapandžžnda süreyi ayarlayžn...
- Page 86 Fžržnžn otomatik olarak açžlžp kapanmasžnž istiyorsanžz Süre dolmuåtur...
-
Page 87: Saat
Saat Åu åekilde ayarlanžr Örn. yaz saatinden kžå saatine deiåtirilmesi Saatin kapatžlmasž... -
Page 88: Çalar Saat
Çalar saat Åu åekilde ayarlanžr Süre doldu Alarm süresinin deiåtirilmesi Ayaržn silinmesi... -
Page 89: Temel Ayarlar
Alarm ve süre aynž zamanda bitmektedir Temel ayarlar Temel ayar Fonksiyon Deiåim Temel ayarlarž deiåtiriniz... -
Page 90: Çocuk Emniyeti
Tüm temel ayarlarž deiåtirmek istemiyorsanžz Düzeltme Çocuk emniyeti Fžržnžn bloke edilmesi Blokajžn iptali Bilgiler... -
Page 91: BakžM Ve Temizlik
Bakžm ve Temizlik Cihazžn džåž Paslanmaz çelik ön yüzeye sahip cihazlar Fžržn Daha kolay temizlik için Fžržn lambasžnžn açžlmasž Fžržn kapažnžn sökülmesi... - Page 92 Kžzartma žsžtma gövdesini aåažya yatžržnžz Fžržndaki katalitik yüzeylerin temizlenmesi...
- Page 93 Fžržn tabanžnžn, tavanžn ve yan duvarlaržnžn temizlenmesi Fžržn tabanžnžn temizlenmesi Clean fonksiyonu Dikkat Åu åekilde ayarlanžr...
- Page 94 Cam yüzey ve levhalaržn temizlenmesi Fžržnž ancak camlar talimatlara uygun biçinmde takžldžktan sonra kullanabilirsiniz. Ayaklaržn temizlenmesi Ayaklaržn çžkaržlmasž:...
-
Page 95: Bir AržZa Halinde YapžLmasž Gereken Iålemler
Ayaklaržn takžlmasž: Conta Aksesuarlar Bir aržza halinde yapžlmasž gereken iålemler Aržza Muhtemel sebebi Bilgi/Giderilmesi Cihazda yapžlacak tamir ve dier iålemleri sadece üretici tarafžndan yetki verilmiå ve eitilmiå servis teknisyenlerine yaptžržnžz. -
Page 96: Yetkili Servis
Fžržnžn lambasžnžn deiåtirilmesi Yapmanžz gereken iålem Cam kapažn deiåtirilmesi Yetkili servis E Numarasž ve FD Numarasž... -
Page 97: Ambalaj Ve Eski Cihaz
Ambalaj ve eski cihaz Tablolar ve yararlž bilgiler Pasta ve çörek Pasta kalžplarž... - Page 98 Tablolar Kalžp içinde Kalžp, žzgara teli Yük Isžtma Sžcaklžk ºC Piåirme pasta üzerinde seklik åekli süresi, dakika 220 240 40 50 190 210 45 55 Ø 210 230 40 50 Ø 180 200 50 60 Tepside piåirilen Yükseklik Isžtma Sžcaklžk ºC Piåirme pasta åekli...
- Page 99 100 120 30 40 100 120 40 50 Kek türü piåirmeye yönelik ipuçlarž Kendi tarifinize göre piåirme yapmak istiyorsunuz. Karžåtžrmalž kekin piåip piåmediini kontrol edebilirsiniz. Kek çökmektedir. Kek ortada yükselmiå ancak kenarlarž daha alçakta kalmžå. Kekin üstü fazla kžzarmaktadžr. Kek kuru. Ekmek veya kek (örn.
- Page 100 Birkaç rafta birden kek piåiriyorsunuz. Üst raftaki kek, alt raftakinden daha koyu renkli, yani daha fazla kžzarmžå. Meyveli veya sulu pasta piåirirken younlaåmžå su oluåur. Et, kümes kayvanlarž, balžk, sufleler, tost Tabak ve çanaklar Kžzartma hakkžnda bilgiler Izgara yapma (grill) hakkžnda bilgiler...
- Page 101 Örnek Miktar Tabak ve Yük Isžtma Isž ºC, Süre, çanaklar seklik åekli žzgara dakika 230 240 240 250 160 180 150 170 3 4 5 Kžzartma ve žzgaraya yönelik ip uçlarž Tabloda ilgili kžzartma için bir ažrlžk bildirilmemiå. Kžzartma etin iyice piåip piåmediini åu åekilde tespit edebilirsiniz.
- Page 102 Kžzartmanžn rengi çok koyu oldu ve kabuu (üstü) kžsmen yandž. Kžzartma güzel görünüyor ama kabžn içindeki sos yandž veya dibi tuttu. Kžzartma güzel görünüyor ama kabžn içindeki sosun rengi çok açžk ve sulu. Kžzartmanžn üzerine sosundan veya suyundan dökünce buhar oluåur. Derin dondurulmuå...
- Page 103 Buz çözme Yemek Aksesuarlar Yükseklik Isžtma Sžcaklžk ºC åekli 40-50 ºC Dondurulmuå gždalar Kurutma Yemek Yükseklik Isžtma Sžcaklžk ºC Süre, saatler åekli...
-
Page 104: GžDa Maddelerinde Bulunan Akrilamid
Enerji tasarrfuna yönelik ip uçlarž Gžda maddelerinde bulunan akrilamid Akrilamid nasžl oluåur? Žlgili besinler hangileridir? -
Page 105: Test Yemekleri
Ne yapabilirsiniz Genel olarak Piåirme º º º º Test yemekleri Hamur iåleri piåirilmesi... - Page 106 Yemek Aksesuarlar ve bilgiler/ Yükseklik Isžtma Sžcaklžk Piåirme uyaržlar åekli ºC süresi, dakika 150 170 20 30 140 160 30 40 160 180 20 30 150 170 25 35 160 180 30 40 170 190 40 50 150 170 50 60 190 210 70 80 Ø...
- Page 107 DE http://www.bosch-hausgeraete.de GB http://www.boschappliances.co.uk FR http://www.bosch-electromenager.com NL http://www.bosch-huishoudelijke-apparaten.nl FI http://www.bosch-kodinkoneet.com DK http://www.bosch-hvidevarer.com ES http://www.bosch-ed.com PT http://www.bosch.pt BE http://www.electro.bosch.be AU http://www.bosch.com.au AT http://www.bosch-hausgeraete.at BR http://www.boschelectrodomesticos.com.br GR http://www.bosch-home.gr US http://www.boschappliances.com 5430003957 (1W02E8) 02 8411...
Need help?
Do you have a question about the HBN 43 W 3.0 and is the answer not in the manual?
Questions and answers