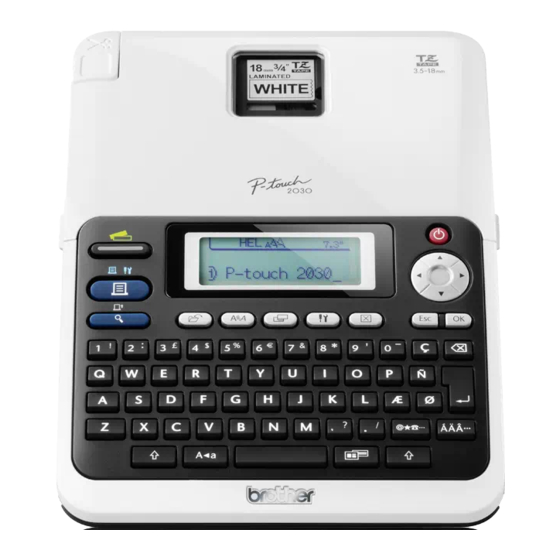
Brother P-touch PT-2030 User Manual
Electronic labeling system
Hide thumbs
Also See for P-touch PT-2030:
- User manual (74 pages) ,
- User manual (66 pages) ,
- Specifications (2 pages)

Related Manuals for Brother P-touch PT-2030


Summary of Contents for Brother P-touch PT-2030
- Page 1 INTRODUCTION GETTING STARTED EDITING A LABEL LABEL PRINTING USING THE FILE MEMORY MAINTAINNING YOUR P-TOUCH LABELER TROUBLESHOOTING APPENDIX INDEX...
- Page 2 The contents of this manual and the specifications of this product are subject to change without notice. If new versions of the PT-2030 software become available, this manual may not reflect the updated features. Therefore, you may find that the software and the contents in this manual are different.
- Page 3 ® Brother Two-Year Limited Warranty and Replacement Service (USA Only) Who is covered: • This limited warranty ("warranty") is given only to the original end-user/retail purchaser (referred to in this warranty as "Original Purchaser") of the accompanying product, consumables and accessories (collectively referred to in this warranty as "this Product").
- Page 4 What Brother will do: If the problem reported concerning your Machine and/or accompanying Consumable and Accessory Items is covered by this warranty and if you first reported the problem to Brother or an Authorized Service Center within the applicable warranty period, Brother or its Authorized Service Center will repair or replace the Machine and/or accompany- ing Consumable and Accessory Items at no charge to you for parts or labor.
- Page 5 Limitations: Brother is not responsible for damage to or loss of any equipment, media, programs or data related to the use of the machine. Except for that repair or replacement as described above, Brother shall not be liable for any direct, indirect, incidental or conse- quential damages or specific relief.
-
Page 6: Important Information
Supplies / Accessories www.brothermall.com or 1-877-552-MALL (6255) BROTHER INTERNATIONAL CORPORATION 100 SOMERSET CORPORATE BLVD. BRIDGEWATER, NEW JERSEY 08807-0911 Please record your model and serial number and your date and location of Purchase below for your records. Keep this information with your proof of purchase (bill of sale) in case your Product requires service. -
Page 7: Table Of Contents
LCD Display ......................11 Key Names and Functions..................12 Power Supply ......................14 Battery........................14 AC Adapter (Optional on the PT-2030.)..............15 Inserting a Tape Cassette ................... 16 Turning Power On/Off ....................17 Feeding Tape ......................18 Feed function ......................18 LCD Display ........................ - Page 8 INTRODUCTION Setting Label Attributes ....................29 Using Auto-Format Layouts ..................31 Using Templates - Example creating an Asset Tag..........31 Using Block Layouts ....................34 Creating a Bar Code Label...................37 Setting Bar Code Parameters................37 Entering Bar Code Data..................38 Editing and Deleting a Bar Code ................40 LABEL PRINTING .................
- Page 9 APPENDIX..................... 59 Specifications ......................59 INDEX ....................60...
-
Page 10: How To Use The P-Touch Labeler
INTRODUCTION How to use the P-touch labeler Create a label with the P-touch labeler GETTING STARTED • Prepare the P-touch labeler. P. 10 CREATING A LABEL • Entering and Editing text. In addition to entering text, the P-touch labeler P. 20 has a large range of formatting options. -
Page 11: Safety Precautions
Safety Precautions To prevent injury and damage, important notes are explained using various symbols. The symbols and their meanings are as follows: Indicates a potentially hazardous situation which, if not avoided, WARNING could result in death or serious injuries. Indicates a potentially hazardous situation which, if not avoided, CAUTION may result in minor or moderate injuries. - Page 12 INTRODUCTION WARNING Battery Follow these guidelines to avoid liquid leakage, heat, rupture of the battery and cause personal injury. DO NOT throw into fire, heat up, short-circuit, recharge, or disassemble the battery. AC adapter Follow these guidelines to avoid fire, damage, electric shock, failure or the risk of injury. Always use the specified voltage DO NOT touch the AC adapter or (120V) and the suggested AC adapter.
- Page 13 CAUTION Battery Follow these guidelines to avoid liquid leakage, heat or rupture of the battery . DO NOT use old and new batteries DO NOT set the positive and negative together. end in the wrong position. DO NOT mix alkaline batteries with Remove the batteries if you do not other type batteries.
-
Page 14: General Precautions
INTRODUCTION General Precautions • DO NOT install this machine near any device that will cause electromagnetic interference.This machine may malfunction if left near a television, radio, etc. • DO NOT use the P-touch labeler in any way or for any purpose not described in this guide. Doing so may result in accidents or damage the machine. -
Page 15: Symbols Used In This Guide
Symbols Used in this Guide The following symbols are used throughout this guide to indicate additional information. This symbol indicates information or directions that may result in damage or injury if ignored, or operations that will result in errors. This symbol indicates information or directions that may help you understand and use the P-touch more efficiently. -
Page 16: Getting Started
Check that the package contains the following before using your P-touch labeler. P-touch labeler PT-2030 Starter Tape Cassette AC adapter User’s Guide (Optional on the PT-2030.) The plug may differ by countries. General Description Tape cassette compartment Tape compartment cover... -
Page 17: Lcd Display & Keyboard
Battery compartment cover Battery case AC adaptor connector LCD Display & Keyboard LCD Display 1. Line number 5.~8. Style guidance Indicates line number within the label Indicates the current font (5), character layout. size (6), character style (7) and frame (8) settings. -
Page 18: Key Names And Functions
GETTING STARTED Key Names and Functions The default language is "English". 1. Power 6. Print Turns the P-touch labeler on and off. • Prints the current label design onto the tape. 2. Cursor ( • Opens the Print Options menu when Moves the cursor in the direction of the used in combination with the Shift arrow. - Page 19 9. Text 16. Shift • Enables character attributes for the Use this key in combination with the label to be set. letter and number keys to type • Character attributes can be set for uppercase letters or the symbols each line of the label when the Text indicated on the number keys.
-
Page 20: Power Supply
GETTING STARTED Power Supply Battery After making sure that the power is off, remove the battery compartment cover on the back of the machine. If the batteries are already in the machine, remove them. Make sure that the power is turned off when replacing batteries. -
Page 21: Ac Adapter (Optional On The Pt-2030.)
AC Adapter (Optional on the PT-2030.) Connect the AC adapter directly to the P-touch labeler. Insert the plug on the AC adapter cord into the connector marked DC IN 9-9.5V on the P-touch labeler. Insert the AC adapter plug into a standard electrical outlet. -
Page 22: Inserting A Tape Cassette
GETTING STARTED Inserting a Tape Cassette Tape cassettes of 0.13", 0.23", 0.35", 0.47" or 0.70" (3.5mm, 6mm, 9mm, 12mm or 18mm) width can be used in your P-touch labeler. Use only Brother tape cassettes with the mark. • If the new tape cassette has a cardboard stopper, be sure to remove the stopper before inserting the cassette. -
Page 23: Turning Power On/Off
Insert the tape cassette into the tape compartment, with the end of the tape facing the machine's tape exit slot, and press firmly until you hear a click. When inserting the tape cassette, make sure that the tape and ink ribbon do not catch on the print head. -
Page 24: Feeding Tape
GETTING STARTED Feeding Tape Feed function The Feed function feeds 0.98" (25mm) of blank tape. • Be sure to feed tape to remove any slack in the tape and ink ribbon after inserting the tape cassette. • Do not pull the label coming out of the tape exit slot. Doing so will cause the ink ribbon to be discharged with the tape. -
Page 25: Setting Language And Unit
Setting Language and Unit Language Press the Setup key to display the Setup menu, select "Language" using the key, and then press the OK or Enter key. Select a language for menu commands and messages shown on the LCD display by using the key. -
Page 26: Editing A Label
EDITING A LABEL Entering and Editing Text Entering Text from the Keyboard • The keyboard of your P-touch labeler can be used in the same way as a standard computer keyboard. Adding a New Line • To end the current line of text and start a new line, press the Enter key. A return mark appears at the end of the line and the cursor moves to the start of the new line. -
Page 27: Deleting Text
Deleting Text Deleting one character at a time • To delete a character from an existing line of text, move the cursor to the character to the right of the position you want to start deleting text and then press the Backspace key. -
Page 28: Entering Symbols
EDITING A LABEL Entering Symbols In addition to the symbols available on the keyboard, there are various symbols (including international and extended ASCII characters) available with the symbol function. To enter a symbol, use the Symbol function (see below). Alternatively, hold down the Shift key and then press a key on the keyboard to enter the symbol printed on the selected key's upper-right corner. - Page 29 Symbol List Category Symbols Punctuation Business Mathematics Brackets Arrows Unit International Number Pictograph Electrical Audio_Visual Signs Communication Vehicle Sports Nature Others The use of the CE mark is strictly governed by one or more European Council directives. Ensure that any labels you produce which use this mark conform with the relevant directives. Entering Symbols...
-
Page 30: Entering Accented Characters
EDITING A LABEL Entering Accented Characters The P-touch labeler can display and print a set of accented characters such as other language specific characters. Enter the character you wish to change to an accented character. Caps mode can be used with the Accent function. Press the Accent key. -
Page 31: Setting Character Attributes
Setting Character Attributes Setting Character Attributes by Label Using the Text key, you can select a font and apply size, width, style, line, and alignment attributes. Press the Text key. The current settings are displayed. Select an attribute using the key, and then set a value for that attribute using the key. - Page 32 EDITING A LABEL Setting Options Attribute Value Result (Helsinki) (Brussels) Font (Florida) (Calgary) When Auto is selected, the text is Auto automatically adjusted to print in the largest size available for each tape width. 42pt 36pt 24pt Size 18pt 12pt Setting Character Attributes...
- Page 33 Attribute Value Result Width x2/3 x1/2 Normal (Bold) (Outline) (Shadow) (Solid) Style (Italic) I+BLD (Italic Bold) I+OUT (Italic Outline) I+SHD (Italic Shadow) I+SLD (Italic Solid) (Vertical) Setting Character Attributes...
-
Page 34: Setting Auto Fit Style
EDITING A LABEL Attribute Value Result Line (Underline) (Strikeout) Left Center Align (Alignment) Right Just (Justify) Setting Auto Fit Style When "Size" is set to "Auto" and "Length" is set to a specific length, you can select the way of reducing the text size to fit within the label length. When "Text Size"... -
Page 35: Setting Label Attributes
Setting Label Attributes Using the Label key, you can create a label with a frame around the text and specify the label length and tab length. (Refer to “Setting Margin” on page 45.) Press the Label key. The current settings are displayed. Select an attribute using the key, and then set a value for that attribute using the... - Page 36 EDITING A LABEL Attribute Value Result Frame The length of the label can be set within the range 1.2" (30mm) - Length 12.0" (300mm). When Auto is selected, the length of the label is automatically adjusted based on the amount of text entered. The length of the tab can be set within the range 0.0"...
-
Page 37: Using Auto-Format Layouts
Using Auto-Format Layouts Using the Auto-Format function you can quickly and easily create labels for a variety of purposes, such as file tabs, equipment labels, name badges, etc. Simply select a layout from the templates or block layouts, enter the text and apply formatting as desired. Symbols and accented characters can also be used in auto-format layouts. - Page 38 EDITING A LABEL Enter the text and then press the OK or Enter key. Repeat this for each text field. After all text fields are entered, the print menu is displayed when the OK or Enter key is pressed. Select "Print" using the key and then press the OK or Enter key to print the label.
- Page 39 Attribute Value Details Bin Box (0.70" x 3.0" [18 mm x 76 mm]) Equipment Label (0.70" x 2.2" [18 mm x 58 mm]) Faceplate (VRT) (0.47" x 2.7" [12 mm x 70 mm]) Cable Wrap (0.70" x 1.5" [18 mm x 39 mm]) Address Label (0.70"...
-
Page 40: Using Block Layouts
EDITING A LABEL Using Block Layouts Press the Auto-Format key to display the Auto-Format screen, and then select “Block Layouts” using the key. Press the OK or Enter key to display the Tape Width screen, and then select a tape width using the key. - Page 41 • Press the Escape key to return to the previous step. • Refer to the Block Layouts table for a list of available block layouts. • To print multiple copies, sequentially numbered copies, or a mirror image of the label, with the print menu displayed hold down the Shift key and press the Print key to display the Print Options menu.
- Page 42 EDITING A LABEL Attribute Value Details 2LineA 2LineB Block layout (0.47" [12 mm] tape) 3Line 1+2Line 2LineA Block layout (0.35" [9 mm] 2LineB tape) 1+2Line Block layout (0.23" [6 mm] 1+2Line tape) Using Auto-Format Layouts...
-
Page 43: Creating A Bar Code Label
Creating a Bar Code Label Using the Bar Code function you can create labels with one dimensional bar codes for use with cash registers, stock control systems or other bar code reader systems, or even asset control tags used in an asset management system. •... -
Page 44: Entering Bar Code Data
EDITING A LABEL Bar Code Settings Attribute Value CODE39, CODE128, EAN-8, EAN-13, Protocol GS1-128 (UCC/EAN-128), UPC-A, UPC-E, I-2/5 (ITF), CODABAR Small Width Large Under# (characters printed below bar code) C.Digit (check digit) (only available for the CODE39, I-2/5 and CODABAR protocols) Entering Bar Code Data Press the Bar Code key. -
Page 45: Special Character List
• Press the Escape key to return to the previous step. • Refer to the Special Characters List table for a list of all available settings. Special Character List CODE39 CODABAR Code Special Character Code Special Character (SPACE) Creating a Bar Code Label... -
Page 46: Editing And Deleting A Bar Code
EDITING A LABEL CODE128, GS1-128 (UCC / EAN-128) Code Special Character Code Special Character Code Special Character (SPACE) FNC3 FNC2 FNC4 FNC1 Editing and Deleting a Bar Code • To edit the bar code data position the cursor beneath the bar code mark on the data entry screen and then open the Bar Code Input screen. -
Page 47: Label Printing
LABEL PRINTING Label Preview Using the Preview function you can check the layout of the label before printing. Press the Preview key. An image of the label is displayed on the screen. The length of the label is shown in the lower-right corner of the screen. Press the key to scroll the preview to the left or right. -
Page 48: Printing A Single Copy
LABEL PRINTING Printing a Single Copy Make sure that the appropriate tape cassette is inserted and ready for printing. Press the Print key. "Printing...Copies" is displayed while the labels are being printed. To stop printing, press the Power key to turn off the P-touch labeler. There are several other messages that may appear when you press the Print key. -
Page 49: Auto-Numbering Labels
Auto-numbering Labels Using the numbering function you can create a set of sequentially numbered labels from a single label format. Make sure that the appropriate tape cassette is inserted and ready for printing. Hold down the Shift key and press the Print key to display the print options screen, and then select "Numbering"... -
Page 50: Mirror Printing
LABEL PRINTING • Letters and numbers increase as shown below: ...9 ...Z ...z ...A9 Spaces (shown as underscores “_” in the example below) can be used to adjust the spacing between characters or to control the number of digits that are printed..99 AA ...ZZ 2_0 ...9_9... -
Page 51: Setting Margin
Setting Margin The tape cutting options allow you to specify how the tape is fed and cut when printing labels. In particular, the “Chain” options greatly reduce the amount of wasted tape by using smaller margins and eliminating blank sections cut between labels. Press the Label key to display the Label menu. -
Page 52: Adjusting The Label Length
LABEL PRINTING Setting Description Example • Use this setting when printing several *Feed the tape before using the cutter. labels with minimum margins. • Feed the tape before using the cutter. Otherwise a part of the text may be cut off. Do not try to pull the tape since this may 0.37"... -
Page 53: Printing From The Label Collection
• The backing of some types of tapes may be pre-cut to make it easier to peel the backing.To remove the backing, simply fold the label lengthwise with the text facing inward, to expose the inside edges of the backing. Next, peel off the backing one piece at a time. •... - Page 54 LABEL PRINTING Label Collection List Category Label Files (0.47" [12 mm] tape only) Office Signage (0.70" [18 mm] tape only) * Labels are for illustrative purposes only. Printing from the Label Collection...
- Page 55 Category Label Caution (0.70" [18 mm] tape only) Shipping (0.70" [18 mm] tape only) (0.70" [18 mm] tape only) * Labels are for illustrative purposes only. Printing from the Label Collection...
- Page 56 LABEL PRINTING Category Label Retail (0.70" [18 mm] tape only) Personal (0.47" [12 mm] tape only) * Labels are for illustrative purposes only. Printing from the Label Collection...
-
Page 57: Using The File Memory
USING THE FILE MEMORY You can store up to 9 of your most frequently used labels in the file memory. Each label is stored as a file, allowing you to quickly and easily recall your label when needed again. • When the file memory is full, each time you save a file you will need to overwrite one of your stored files. -
Page 58: Printing A Stored Label File
USING THE FILE MEMORY Printing a Stored Label File Press the File key to display the File screen. Select "Print" using the key. Press the OK or Enter key. The file number of a stored label is displayed. The label text is also displayed to identify the label. Select a file number using the key, and then press the Print, OK or Enter key to print the selected label. -
Page 59: Maintaining Your P-Touch Labeler
MAINTAINING YOUR P-TOUCH LABELER Resetting the P-touch Labeler You can reset the internal memory of your P-touch labeler when you want to clear all saved label files, or in the event the P-touch labeler is not operating correctly. Resetting the data to factory settings (Label collections stored in Favorites is not reset.) Turn off the machine. -
Page 60: Cleaning The Tape Cutter
MAINTAINING YOUR P-TOUCH LABELER Cleaning the Tape Cutter Tape adhesive can build up on the cutter blade after repeated use, taking the edge off the blade which may result in the tape jamming in the cutter. • About once every year, wipe the cutter blade using a cotton swab moistened with Isopropyl alcohol (rubbing alcohol). -
Page 61: Troubleshooting
TROUBLESHOOTING What to do when... Problem Solution The screen ‘locks’, or Refer to “Resetting the P-touch Labeler” on page 53 and the P-touch labeler reset the internal memory to the initial settings. If resetting does not respond the P-touch labeler does not solve the problem, disconnect normally. -
Page 62: Error Messages
TROUBLESHOOTING Error Messages When an error message appears on the display, follow the directions provided below. Message Cause/Remedy Battery Weak! * The installed batteries are getting weak. Check The installed batteries are about to run out of power. Replace with new batteries or connect the AC adapter before continuing. Battery! Wrong Type An incompatible AC adapter is connected. - Page 63 Message Cause/Remedy Insert An 0.70" (18 mm) tape cassette is not installed when an 0.70" Tape Auto-Format for 0.70" (18 mm) tape is selected. Install an Cassette! * 0.70" (18 mm) tape cassette. Insert 18mm Tape Cassette! * Insert An 0.47" (12 mm) tape cassette is not installed when an 0.47"...
- Page 64 TROUBLESHOOTING Message Cause/Remedy Select Other The tape length set using the tape length setting is shorter Margin! * than the total length of the left and right margins applied for the "Large Margin" setting. Select a different margin setting. Text The length of the label to be printed using the text entered is Too Long! * longer than the length setting.
-
Page 65: Appendix
APPENDIX Specifications Main Unit Item Specification Display Character display 16 characters x 1 guidance and 2 lines text (128 dot x 48 dot) Screen contrast 5 levels (+2, +1, 0, -1, -2) Printing Print method Thermal Transfer Print head 112 dot / 180 dpi Print height 0.62"... -
Page 66: Index
INDEX AC adapter ........15 Return mark ........11 Accented Character List ....24 Auto power-off time ......17 size ............25 Special Character List .......39 Battery ..........14 Specifications ........59 Block Layouts ........35 style ...........25 Symbol List ........23 symbols ..........22 Caps mode ........11 contrast ..........18 cursor keys ........20 tape cassettes ........16 tape length ........11... - Page 67 For purchasing accessories on the Internet: http://www.brothermall.com To order by mail or pay by check, please complete the accessory order form and mail it along with payment to: Brother International Corporation Attn: Consumer Accessory Division P.O. Box 341332 Bartlett, TN 38133-1332...
- Page 68 Printed in China LW6937001...
Need help?
Do you have a question about the P-touch PT-2030 and is the answer not in the manual?
Questions and answers
Adjust dimmer