Table of Contents
Advertisement
Available languages
Available languages
Quick Links
Advertisement
Chapters
Table of Contents

Related Manuals for Dynex DX-CRCF12


Summary of Contents for Dynex DX-CRCF12
- Page 1 Flash Lector de tarjetas Compact Flash DX-CRCF12 U S E R G U I D E G U I D E D E L’ U T I L I S AT E U R • G U Í A D E L U S UA R I O...
-
Page 2: Table Of Contents
Dynex Compact Flash Card Reader/Writer DX-CRCF12 Contents Introduction ...2 Important safety instructions...3 Card reader components...4 Connecting the card reader ...5 Using your card reader...6 Troubleshooting ...11 Specifications ...13 Legal notices ...13 Warranty ...15 Français...17 Español ...33 Introduction Your card reader accepts standard Compact Flash™ (CF) and IBM®... -
Page 3: Important Safety Instructions
Important safety instructions Features Your card reader features: • A small palm-sized form factor • USB-powered operation (an external power adapter is not needed) • Compliance with the USB (Universal Serial Bus) 2.0 specification • Compliance with the USB mass storage device class specification •... -
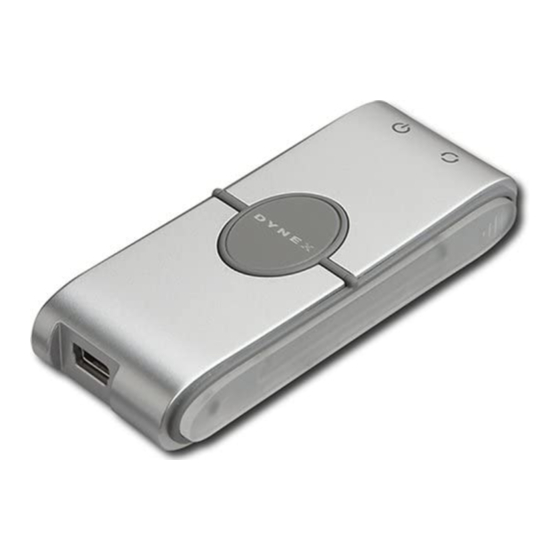
Page 4: Card Reader Components
• Do not remove a card when the LED indicator shows data activity is in progress. You may damage the card or lose data stored on the card. • Your card reader is for general computer use. Do not use your card reader in a computer that requires exceptional reliability, especially if a breakdown or malfunction of your card read might jeopardize life or health, such as aerospace... -
Page 5: Connecting The Card Reader
Connecting the card reader Connecting the card reader To connect your card reader, plug the small end of the included USB cable into your card reader and the other end into an available external USB port. If your computer uses Windows XP, Windows 2000, Windows Vista, or Macintosh OS 10.1 or higher, your computer automatically installs the correct driver, and two new drive icons appear in the My Computer and Windows Explorer windows. -
Page 6: Using Your Card Reader
5 Double-click the DriverInstaller file. 6 Click Install to install the card reader driver. 7 After the driver installation is complete, restart your computer. Using your card reader To use a media card: 1 Insert your memory card into the appropriate slot, as shown in the table on page 7. - Page 7 Using your card reader Feature CF/MD slot Note: The arrow shows the direction you insert the card into the slot. Description Indicates when a slot is reading from or writing to a card. LED off-Your card reader is not being used.
- Page 8 1 Save all files and close all programs. 2 Insert the included utility CD into your CD drive. The driver home page pops up automatically. 3 Click Install driver for Windows. The Dynex CF card reader window opens. Using your card reader...
-
Page 9: Uninstalling The Software
Using your card reader 4 Click Next, then follow the on-screen instructions to install the driver. 5 After the driver installation is complete, restart your computer. Windows displays new drive icons for each of the slots instead of the standard Windows drive icons. 6 When Windows detects a card in a slot, the corresponding drive icon turns from grey to a color, indicating that the card is recognized. - Page 10 3 Click the Remove button to uninstall Dynex CF card reader driver from your computer. 4 Follow the on-screen instructions to remove the driver completely from your computer. After the driver uninstallation is complete, restart your computer. Using your card reader...
-
Page 11: Formatting A Memory Card
Troubleshooting Formatting a memory card If your computer has trouble recognizing a new memory card, format the memory card in your camera or by using the following steps: 1 Insert your memory card into the reader. 2 Click Start, then click My Computer. 3 Under Removable Storage, right-click the appropriate memory card icon. - Page 12 If memory cards appear in My Computer but errors occur when writing or reading, check the following: • Make sure that the memory card is fully inserted into the slot. • Try a different memory card of the same type in the same slot.
-
Page 13: Specifications
Specifications Specifications Memory card slots Indicators USB Transfer Speed USB Cable/Interface OS Support Dimensions (L×D×H) Operating temperature 32° F~104° F (0° C~40° C) Storage temperature Certification Legal notices FCC statement This equipment has been tested and found to comply with the limits for a Class B digital device, pursuant to Part 15 of the FCC Rules. - Page 14 • Connect the equipment into an outlet on a circuit different from that to which the receiver is connected. • Consult the dealer or an experienced radio/TV technician for help. Legal notices...
-
Page 15: One-Year Limited Warranty
Products and parts replaced under this warranty become the property of Dynex and are not returned to you. If service of Products and parts are required after the Warranty Period expires, you must pay all labor and parts charges. -
Page 16: Warranty
REPAIR REPLACEMENT AS PROVIDED UNDER THIS WARRANTY IS YOUR EXCLUSIVE REMEDY. DYNEX SHALL NOT BE LIABLE FOR ANY INCIDENTAL OR CONSEQUENTIAL DAMAGES FOR THE BREACH OF ANY EXPRESS OR IMPLIED WARRANTY ON THIS PRODUCT, INCLUDING, BUT NOT LIMITED TO, LOST DATA, LOSS OF USE OF YOUR PRODUCT, LOST BUSINESS OR LOST PROFITS. -
Page 17: Français
Table des matières Lecteur/enregistreur de carte Compact Flash Dynex Table des matières Introduction ... 17 Instructions de sécurité importantes ...18 Composants du lecteur de cartes...19 Connexion du lecteur de cartes ...20 Installation du lecteur de cartes ...21 Utilisation du lecteur de cartes ...21 Problèmes et solutions ...27... -
Page 18: Instructions De Sécurité Importantes
Fonctionnalités Caractéristiques du lecteur de cartes : • Petite dimension type de poche • Alimenté par le port USB (adaptateur externe non requis) • En conformité avec la spécification d'interface USB (Bus Série Universel) 2.0 • En conformité avec la spécification applicable aux périphériques de stockage USB •... -
Page 19: Composants Du Lecteur De Cartes
Composants du lecteur de cartes • Ne pas entreposer le lecteur de cartes dans un endroit humide. Ne pas laisser de l'humidité ou des liquides s'écouler dans le lecteur de cartes. Les liquides peuvent endommager le lecteur de cartes et provoquer un incendie ou un choc électrique. -
Page 20: Connexion Du Lecteur De Cartes
Configuration système minimale requise • PC IBM ou compatible • Processeur Pentium 133 MHz ou supérieur • Lecteur de CD • 2 Mo d’ e space sur le disque dur • Un port USB externe disponible • Windows Mac OS9 ou supérieur. Connexion du lecteur de cartes Pour connecter le lecteur de cartes, brancher la petite extrémité... -
Page 21: Installation Du Lecteur De Cartes
Utilisation du lecteur de cartes 4 Double-cliquer sur Alcor Generic.sit (format de fichier compressé Mac). 5 Double-cliquer sur le fichier DriverInstaller. 6 Cliquer sur Install pour installer le pilote du lecteur de cartes. 7 Quand l'installation du pilote est terminée, redémarrer l'ordinateur. - Page 22 2 Ouvrir la fenêtre My Computer (Poste de travail) ou Windows Explorer (Explorateur Windows), puis double-cliquer sur l'icône du lecteur correspondant à la fente utilisée. 3 Pour accéder aux fichiers et dossiers de la carte insérée, utiliser les procédures normales de Windows pour ouvrir, copier, coller ou supprimer des fichiers et des dossiers.
- Page 23 Utilisation du lecteur de cartes Fonctionnalités Fente CF/MD Remarque°:La flèche indique le sens dans lequel la carte doit être insérée dans la fente. Personnalisation des icônes du lecteur Remarque : Connecter le lecteur de cartes à l’ o rdinateur avant d’installer le pilote.
- Page 24 3 Cliquer sur Install driver for Windows (Installer le pilote pour Windows). La fenêtre Dynex CF card reader (Lecteur de cartes CF de Dynex) s'affiche. 4 Cliquer sur Next (Suivant), puis suivre les instructions à l'écran pour installer le pilote.
-
Page 25: Désinstallation Du Pilote
(control panel). 2 Cliquer sur control panel pour accéder à Add or Remove Program (Ajout/Suppression de programmes). 3 Cliquer sur le bouton Remove (Supprimer) pour désinstaller de l’ o rdinateur le pilote du lecteur de cartes CF de Dynex. -
Page 26: Formatage De La Carte Mémoire
4 Suivre les instructions à l'écran pour désinstaller complètement le pilote de l’ o rdinateur. Quand la désinstallation du pilote est terminée, redémarrer l'ordinateur. Formatage de la carte mémoire Si l'ordinateur ne reconnaît pas la nouvelle carte mémoire, formater celle-ci dans l'appareil de photo ou comme suit : 1 Insérer la carte mémoire dans le lecteur. -
Page 27: Problèmes Et Solutions
Problèmes et solutions 8 Cliquer sur OK dans la fenêtre Format Complete (Formatage terminé). 9 Cliquer sur Close (Fermer) pour terminer. Problèmes et solutions Si les cartes mémoire ne s'affichent pas dans le Poste de travail (My Computer) ou dans l'Explorateur Windows (Windows Explorer), effectuer les vérifications suivantes : •... - Page 28 • Inspecter l’ e xtrémité de la carte mémoire pour détecter si de la poussière ou un autre objet ne bouche pas l’un des trous. Nettoyer les contacts avec un chiffon non pelucheux légèrement imbibé d’alcool isopropylique. • Si l’ e rreur persiste, remplacer la carte mémoire. Si un message d'erreur s'affiche pendant l'installation de l'application du lecteur de cartes, vérifier ce qui suit°: •...
-
Page 29: Spécifications
Spécifications Spécifications Fentes de la carte mémoire CompactFlash Témoins Vitesse de transfert USB Câble USB/Interface Systèmes d'exploitation pris en charge Dimensions (L×P×H) Température de fonctionnement Température d'entreposage Homologation Avis juridiques Déclaration de la FCC : Cet équipement a été testé et déclaré conforme aux limitations prévues dans le cadre de la catégorie B des appareils numériques, définies par l’article 15 du règlement de la FCC. - Page 30 puis en rallumant l’appareil, essayer de corriger l’interférence au moyen de l’une ou de plusieurs des mesures suivantes : • Réorienter ou déplacer l’antenne réceptrice. • Augmenter la distance entre l’ é quipement et le récepteur. • Brancher l’ é quipement sur la prise électrique d’un circuit différent de celui auquel le récepteur est relié.
-
Page 31: Garantie
Produit par un service de réparation agréé par Dynex ou le personnel du magasin, Dynex (à sa seule discrétion) : (1) réparera le Produit en utilisant des pièces détachées neuves ou remises à neuf; ou (2) remplacera le Produit par un produit ou des pièces neuves ou remises à... - Page 32 • les produits dont le numéro de série usine a été altéré ou enlevé. LA RÉPARATION OU LE REMPLACEMENT, TELS QU’OFFERTS PAR LA PRÉSENTE GARANTIE, CONSTITUENT LE SEUL RECOURS DE L’ACHETEUR. DYNEX NE SAURAIT ÊTRE TENU POUR RESPONSABLE DE DOMMAGES ACCESSOIRES OU CONSÉCUTIFS, RÉSULTANT DE L’INEXÉCUTION D'UNE GARANTIE EXPRESSE OU IMPLICITE SUR CE...
-
Page 33: Español
Contenido Lector de tarjetas Compact Flash Dynex DX-CRCF12 Contenido Introducción ...33 Instrucciones importantes de seguridad...34 Componentes del lector de tarjetas ...35 Conexión del lector de tarjetas ...36 Uso de su lector de tarjetas...37 Localización y corrección de fallas...43 Especificaciones...45 Avisos legales ...45 Garantía ...47... -
Page 34: Instrucciones Importantes De Seguridad
Características Su lector de tarjetas cuenta con: • Tamaño pequeño que cabe en su mano • Alimentado por USB (no se necesita un adaptador de alimentación externo) • Se adhiere a la especificación de USB (Bus Serie Universal) • Se adhiere a la especificación de la clase de dispositivo de almacenamiento masivo USB •... -
Page 35: Componentes Del Lector De Tarjetas
Componentes del lector de tarjetas • No inserte objetos metálicos tal como monedas o clips de papel en su lector de tarjetas. • No saque una tarjeta cuando el indicador LED muestre que se lleva acabo actividad de datos. Podría dañar la tarjeta y perder información almacenada en la tarjeta. -
Page 36: Conexión Del Lector De Tarjetas
Conexión del lector de tarjetas Para conectar su lector de tarjetas, conecte el extremo pequeño del cable USB incluido en su lector de tarjetas y el otro extremo en un puerto USB externo disponible. Si su computadora usa Windows XP, Windows 2000, Windows Vista o Macintosh OS 10.1 o más reciente, su computadora instalará... -
Page 37: Uso De Su Lector De Tarjetas
Uso de su lector de tarjetas 4 Haga doble clic en Alcor Generic.sit (formato de archivos comprimidos de Mac). 5 Haga doble clic en el archivo DriverInstaller. 6 Haga clic en Install (Instalar) para instalar el controlador del lector de tarjetas. 7 Después de finalizar la instalación del controlador, reinicie su computadora. - Page 38 2 Abra la ventana de My Computer (Mi PC) o Windows Explorer (Explorador de Windows) y haga doble clic en el icono de unidad de la tarjeta que está usando. 3 Para tener acceso a los archivos y las carpetas en la tarjeta insertada, use los procedimientos normales de Windows para abrir, copiar, pegar o eliminar archivos y carpetas.
- Page 39 Uso de su lector de tarjetas Función Ranura para CF/MD Nota: La flecha muestra la dirección en la que debe insertar la tarjeta en la ranura. Personalización de los iconos de unidad Nota: Conecte el lector de tarjetas a la computadora antes de instalar el controlador.
- Page 40 3 Haga clic en Install driver for Windows (Instalar el controlador para Windows). Se abrirá la ventana Dynex CF card reader (Lector de tarjetas CF de Dynex). 4 Haga clic en Next (Siguiente) y siga las instrucciones de pantalla para instalar el controlador.
-
Page 41: Desinstalación Del Software
2 Haga clic en control panel (Panel de control) para encontrar Add or Remove Programs (Agregar o quitar programas). 3 Haga clic en el botón Remove (Quitar) para desinstalar de su computadora el controlador del lector de tarjetas CF de Dynex. - Page 42 4 Siga las instrucciones en pantalla para desinstalar completamente el controlador de su computadora. Después de finalizar la desinstalación del controlador, reinicie su computadora. Formateo de una tarjeta de memoria Si su computadora tiene problemas reconociendo una tarjeta de memoria nueva, formatee la tarjeta en su cámara o siguiendo los pasos a continuación: 1 Inserte su tarjeta de memoria en el lector.
-
Page 43: Localización Y Corrección De Fallas
Localización y corrección de fallas 8 Haga clic en OK (Aceptar) en la ventana Format Complete (Formato completo). 9 Haga clic en Close (Cerrar) para finalizar. Localización y corrección de fallas Si las tarjetas de memoria no aparecen en My Comlputer (Mi PC) o en Windows Explorer (Explorador de Windows), verifique lo siguiente: •... - Page 44 • Asegúrese de que la cantidad de información que intenta guardar no sobrepase la capacidad de la tarjeta. • Inspeccione los extremos de las tarjetas de memoria para encontrar sucio o materiales que obstruyan el agujero. Limpie los contactos con un paño sin pelusa y pequeñas cantidades de alcohol isopropílico.
-
Page 45: Especificaciones
Especificaciones Especificaciones Ranuras para tarjeta de memoria Indicadores Velocidad de transferencia de USB Cable/Interfaz de USB Sistemas operativos compatibles Dimensiones (Largo × Profundidad × Alto) Temperatura de operación Temperatura de almacenamiento Certificación Avisos legales Declaración de la FCC Este equipo ha sido sometido a pruebas y se ha determinado que satisface los límites establecidos para clasificarlo cómo dispositivo digital de Clase B de acuerdo con la Parte 15 del reglamento FCC. - Page 46 de radio o televisión, lo cual puede comprobarse encendiendo y apagando el reproductor alternativamente, se recomienda al usuario corregir la interferencia mediante uno de los siguientes procedimientos: • Cambie la orientación o la ubicación de la antena receptora. • Aumente la distancia entre el equipo y el receptor. •...
-
Page 47: Garantía
Productos y repuestos reemplazados bajo esta garantía se volverán propiedad de Dynex y no se le regresarán a usted. Si se requiere la reparación de Productos y partes después de que se vence el Período de Garantía, usted deberá pagar todos los costos de mano de obra y de repuestos. - Page 48 EL REEMPLAZO DE REPARACIÓN SEGÚN PROVISTO BAJO ESTA GARANTÍA ES SU ÚNICO RECURSO. DYNEX NO SERÁ RESPONSABLE POR DAÑOS INCIDENTALES O CONSECUENTES DEBIDO AL INCUMPLIMIENTO DE CUALQUIER GARANTÍA EXPRESA O IMPLÍCITA RELACIONADA CON ESTE PRODUCTO, INCLUYENDO PERO SIN LIMITARSE A LA PÉRDIDA DE INFORMACIÓN, LA PÉRDIDA DE NEGOCIOS O DE...
- Page 49 Avisos legales...
- Page 50 (800) 305-2204 © 2007 Best Buy Enterprise Services, Inc. All rights reserved. DYNEX is a registered trademark of Best Buy Enterprise Services, Inc. All other products and brand names are trademarks of their respective owners. Distributed by Best Buy Purchasing, LLC 7601 Penn Ave.
Need help?
Do you have a question about the DX-CRCF12 and is the answer not in the manual?
Questions and answers