Table of Contents
Advertisement
Quick Links
Advertisement
Table of Contents

Related Manuals for Xerox XC356 - Home Office Copier


Summary of Contents for Xerox XC356 - Home Office Copier
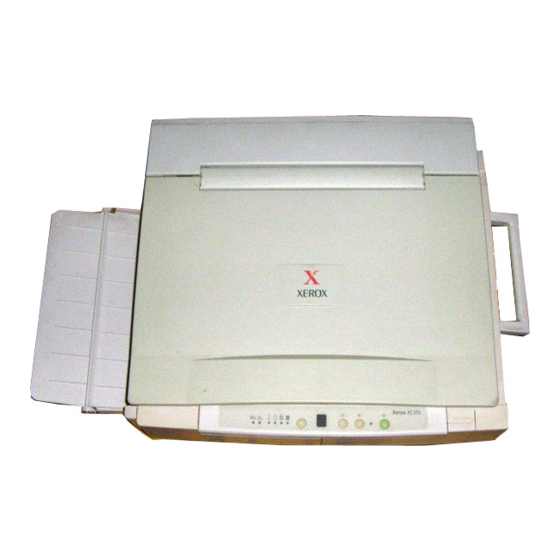
- Page 1 XC353/355/356...
-
Page 2: Table Of Contents
Table of Contents Safety Notes ................... 1 Unpacking....................4 Getting to Know Your Copier ..............5 Rear View ..................... 6 Underside View..................6 Installation ....................7 XC351....................7 XC353/ XC355/ XC356................7 Control Panel..................10 XC351....................10 XC353/ XC355/ XC356................ 10 Paper Specifications ................ - Page 3 Problem Solving................... 28 Problem Solving Chart................ 28 Status Code Chart ................30 Copier Maintenance ................31 Document Glass and Cover ..............31 Lens....................31 Packing the Copier................32 Technical Data..................34...
-
Page 4: Safety Notes
Safety Notes Your copier and supplies have been designed and tested to meet strict safety requirements. These include safety agency examination and approval, and compliance to established environmental standards. Please read the following instructions carefully before operating the copier and refer to them as needed to ensure the continued safe operation of your copier. - Page 5 Safety Notes Do not allow anything to rest on the power cord. Do not locate the copier where persons will step on the cord. The power supply cord is the disconnect device for this equipment. Insure that installation is near the outlet and is easily accessible. Your machine is equipped with an energy saving device to conserve power when the machine is not in use.
- Page 6 Ozone: This product produces ozone during normal operation. The ozone produced is dependent on copy volume and is heavier than air. Providing the correct environmental parameters, as specified in the Xerox installation procedures, will ensure that concentration levels meet safe limits.
-
Page 7: Unpacking
Unpacking IMPORTANT: Save the carton and packing materials for future use. Power Packing Cord material User Guide Packing material Copier Starter Toner Cartridge Carton... -
Page 8: Getting To Know Your Copier
Getting to Know Your Copier XC351 ➀ ➄ ➂ ➁ ➈ ➇ ➆ ➅ ➄ ➀ Document Cover ➁ Document Glass ➂ Front Cover Open Button Paper Tray (XC353/ XC355/ XC356) Paper Feed Slot (XC351) ➄ Paper Guide ➅ Front Cover ➆... -
Page 9: Rear View
Getting to Know Your Copier Rear View ➀ ➂ ➃ ➁ ➀ Serial Number ➁ Power Cord Socket ➂ On/Off Switch ➃ Document Glass Release Button Underside View ➀ ➀ Handle ➁ Drum Cartridge ➂ Bottom Cover Release Lever ➃ Bottom Cover ➄... -
Page 10: Installation
Installation For reliable copier operation and copy quality, Xerox recommends: • Place your copier in a well-ventilated room. • Recommended environment: – Temperature: 50° to 90°F / 10° to 32°C. – Humidity: 20% to 85%. • Place the copier on a flat, level surface. - Page 11 Installation 1. Remove the copier from the bag. 2. Remove the thumbscrews, tape and the label from the bottom of the copier. Note: Failure to remove the thumbscrew will cause a paper jam when operating the copier. 3. Remove all the pieces of tape from the copier and then place the copier on a level surface.
- Page 12 Installation 8. Slide the toner cartridge in until it locks in place. 9. Close the front cover. XC351 skip to step 12 10. Install the paper tray by inserting it at an upward angle into the grooves on the side of the paper feed slot.
-
Page 13: Control Panel
Control Panel XC351 ➂ ➀ ➁ ➃ ➇ XC353/ XC355/ XC356 ➂ ➅ ➀ ➁ ➃ ➄ ➆ ➇ ➈ ➀ Misfeed indicator: Lights when a misfeed occurs. Refer to the Misfeed Removal section. ➁ Toner Cartridge Replacement Indicator: Refer to Toner Cartridge Replacement section. -
Page 14: Paper Specifications
Paper Specifications Paper Storage For reliable copier operation and copy quality, Xerox recommends that the paper be stored: • On a flat surface • In a closed container • In a low humidity area • Tightly wrapped, if the ream is partially used. -
Page 15: Making Copies On The Xc351
Making Copies on the XC351 The Auto Start feature allows you to program the copier while it is warming up. You can select the exposure setting, insert a sheet of paper, and walk away from the copier. Copying will start automatically as soon as the copier is warmed up. -
Page 16: Making Copies On The Xc353, Xc355 And Xc356
Making Copies on the XC353, XC355 and XC356 The Auto Start feature allows you to programme any feature while the copier is warming up. You can programme all the features, press the Start button, and walk away from the copier. Copying will start automatically as soon as the copier is ready. - Page 17 Making Copies on the XC353, XC355 and XC356 7. To make 1 to 9 copies, press the Copy Quantity button to set the number of copies. 8. To make more than 9 copies, press the Copy Quantity button until C is displayed. The copier will now make up to 20 copies.
-
Page 18: Copy Quality
Copy Quality Copy Contrast To compensate for light or dark originals there are five copy contrast settings to choose from (4 for XC353). Each time the Exposure button is pressed, the selection will scroll to the next selection: 1 – Auto, 2– Manual, 3 – Light, 4 – Dark, 5 – Toner Save (not XC353). In Auto mode, the copier automatically selects the exposure based on the original darkness and background. -
Page 19: Two-Sided Copying
Two-Sided Copying 1. Place side 1 original face down on the document glass and make a copy. 2. Place side 2 original face down on the document glass in the opposite orientation from side 1 original. 3. Place the copy of side 1 face down in the paper tray/ paper feed slot. -
Page 20: Setting Copy Exposure Range
Setting Copy Exposure Range The exposure settings, Light, Auto and Dark can be adjusted. This can be useful when copies are consistently too dark or too light. These new settings will remain until they are manually changed again. Note: In the following procedure, it is important to complete step 2 immediately after step 1, as the copier will return to the ready mode in approximately 10 seconds. -
Page 21: Paper Supply Indicator (Xc353, Xc355 And Xc356)
Paper Supply Indicator (XC353, XC355 and XC356) will flash in the Copy Quantity display when the paper tray is empty or the paper has not fed correctly. 2. If there is no paper in the paper tray, add paper and press Start to finish copying. Note: If you turn the power off, all settings will be cleared. -
Page 22: Misfeed Removal
Misfeed Removal If the Misfeed indicator flashes, follow the steps below to clear the misfeed. Note: The Misfeed indicator will light if the copier is not on a level surface. Paper Feed Slot 1. Carefully remove the misfed paper. • If the misfed paper is difficult to remove, remove the paper tray first (XC353/ XC355/ XC356). -
Page 23: Internal Area
Misfeed Removal Internal Area 1. Turn the power off. 2. Press and hold the document glass release button on the rear of the copier and return the document glass to the centre of the copier. XC351 skip to step 5 3. - Page 24 Misfeed Removal Internal Area CAUTION: Be careful not to touch any parts inside the bottom cover. Be careful not to touch the shiny surface of the copy cartridge or expose it to the light for an extended period of time. 7.
-
Page 25: Toner Cartridge
2. Press the front cover open button and open the front cover. 3. Press down on the catch and remove the toner cartridge. 4. Vigorously shake the new toner cartridge horizontally several times and then remove the cover. • Return the empty cartridge to Xerox for recycling. - Page 26 Toner Cartridge Replacement 4. Slide the new toner cartridge in until it locks in place. 5. Close the front cover. 6. Turn the power on. • After installing a new toner cartridge and pressing the start button, the document glass will move back and forth, and the toner cartridge replacement indicator will light for up to 1 minute before copying starts.
-
Page 27: Toner Cartridge Yield
Toner Cartridge Yield Low printed Medium High printed Very high printed area area area area The main factor affecting toner cartridge yield is the printed area of a document. The graph is a sample representation of how the number of copies per cartridge decreases as the printed area increases. -
Page 28: Drum Cartridge Replacement
Drum Cartridge Replacement The useful life of the drum cartridge is approximately 10,000 copies. At 9,700 copies, the Toner Save, Exposure settings, and Ready indicators will flash slowly when the power is turned on, indicating that the replacement cartridge will be needed soon. Copies can still be made. After a further 300 copies, the Ready Indicator will go out, the Toner Save and Contrast Indicators will flash, and the copier will stop operating until the cartridge is replaced. - Page 29 Drum Cartridge Replacement 9. Push the drum cartridge release lever up to release the drum cartridge. 10. Remove the drum cartridge. ➀ Install the top of the new drum cartridge along the grooves on both sides. ➀ ➁ Rotate the drum cartridge in until it clicks into position.
- Page 30 Drum Cartridge Replacement 18. Unfold and open the exit tray. 19. Push the toner cartridge in until it locks in place. Close the front cover. Perform the following steps to reset the copier. 20. While holding the Exposure button, turn the power on.
-
Page 31: Problem Solving
The following chart lists some conditions that may occur and the recommended solutions. Follow the suggested solutions until the problem is corrected. Refer to the Status Code Chart in this section for status code information. If the problem persists, please call your local Xerox helpline or representative for assistance. Condition... - Page 32 Problem Solving Problem Solving Chart Condition Possible Causes Image rubs off the Is the copy paper too heavy? copy easily. Is the copy paper damp? Is there a misfeed in the fusing area? (Refer to Misfeed Removal.) Have the two thumbscrews been removed from the bottom of the copier? (Refer to Installation.) There are fewer Originals contain pictures, solids, or heavy lines.
-
Page 33: Status Code Chart
Problem Solving Status Code Chart Status Suggested Solution Code XC353, XC355 and XC356 Only Ensure that there is paper in the tray. Paper may not have fed correctly. (Refer to Paper Supply Indicator.) L1 – L8 XC353, XC355 and XC356 Only Switch the power OFF. -
Page 34: Copier Maintenance
Copier Maintenance Correct care is essential in order to get good quality copies. Document Glass and Cover Note: Marks on the document glass or inside the document cover will appear on the copy. 1. Wipe the document glass and cover with a soft, clean cloth. -
Page 35: Packing The Copier
Packing the Copier 1. Turn the power off. 2. Disconnect the power cord. 3. Open the cover and remove the toner cartridge. • Reinstall the cover on the toner cartridge and place it in the box. 4. Close the front cover. XC351 skip to step 7 5. - Page 36 Packing the Copier 7. Use the handle to stand the copier upright. 8. Never position the copier with the handle facing the side or bottom. This will cause toner to leak. Tape the bottom cover closed. 9. Lower the copier. Place the paper tray on top of the copier (XC353/ XC355/ XC356).
-
Page 37: Technical Data
Technical Data Type Portable desktop Copy Speed Approximately 3 copies per minute First Copy Out Time 19 seconds (warm) 24 seconds (cold) Copy Ratio 1:1 ±1% Original Size XC351/ XC353/ XC355: Maximum A4 XC356: Maximum 216 mm 356 mm Copy Size XC351/ XC353/ XC355: A6 to A4 XC356: A6 to 216x356mm Exposure System... - Page 39 Xerox Limited Multimedia Professional Services P.O. Box 17 Bessemer Road Welwyn Garden City Hertfordshire AL7 1HE 602P24430...
Need help?
Do you have a question about the XC356 - Home Office Copier and is the answer not in the manual?
Questions and answers