Table of Contents
Advertisement
Available languages
Available languages
Quick Links
Advertisement
Chapters
Table of Contents

Related Manuals for Dukane 28A9115


Summary of Contents for Dukane 28A9115
- Page 1 Liquid Crystal Projector LCOS Technology Model 28A9115 User's Manual...
-
Page 11: Manuel D'utilisation
Liquid Crystal Projector Model 28A9115 USER'S MANUAL Please read this user's manual thoroughly to ensure correct usage through understanding. MANUEL D'UTILISATION Nous vous recommandons de lire attentivement ce manuel pour bien assimiler le fonctionnement de l'appareil. -
Page 12: Table Of Contents
Liquid Crystal Projector USER'S MANUAL USER'S MANUAL Thank you for purchasing this liquid crystal projector. WARNING • Please read the accompanying manual “SAFETY INSTRUCTIONS” and this “USER'S MANUAL” thoroughly to ensure correct usage through understanding. After reading, store this instruction manual in a safe place for future reference. -
Page 13: Features
FEATURES FEATURES This liquid crystal projector is used to project various computer signals as well as NTSC / PAL / SECAM video signals onto a screen. Little space is required for installation and large images can easily be realized. Outstanding Brightness The UHB lamp and high-efficiency optical system assure a high level of brightness. -
Page 14: Part Names
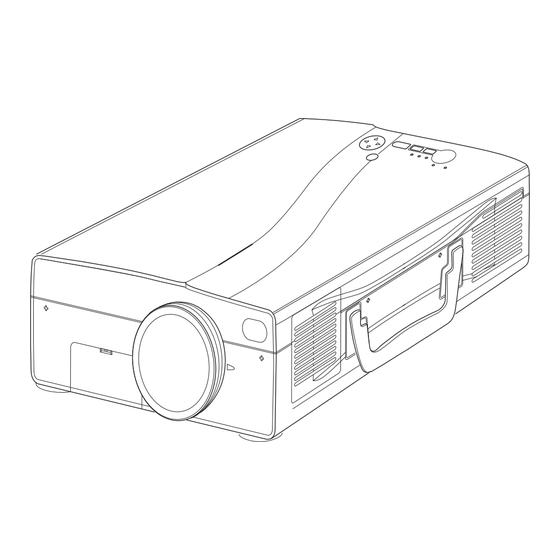
Part Names TEMP Indicator LAMP Indicator STANDBY/ON Button ( ( STANDBY/ON Indicator) VIDEO Button RGB Button Remote Control Sensor Lens AC Inlet (to Power Cord) Power Switch Lens Cap Remote Control Sensor Speaker COMPONENT VIDEO Y Terminal Terminal Terminal VIDEO Terminal VIDEO AUDIO IN R Terminal L/MONO Terminal... - Page 15 • Do not wet the remote control transmitter or place it on any wet object. • Do not place the remote control transmitter close to the cooling fan of the projector. • Do not disassemble the remote control transmitter in case of malfunction. Please bring it to the service station.
-
Page 16: Loading The Batteries
Loading the Batteries Install the AA batteries into the remote control transmitter. 1. Remove the battery cover. Push the knob while lifting up the battery cover. 2. Load the batteries. Make sure the plus and minus poles are correctly oriented. 3. -
Page 17: Installation
• Please basically use liquid crystal projector at the horizontal position. If you use liquid crystal projector by the lens up position, the lens down position and the side up position, this may cause the heat inside to build up and become the cause of damage. -
Page 18: Cabling
• Before connecting, turn off to all devices to be connected, except for the USB cable. • The cables may have to be used with the core set to the projector side. Use the cables which are included with the projector or specified. -
Page 19: Power Connection
Plug & Play This projector is VESA DDC 1/2B compatible. Plug & play is possible by connecting to a computer that is VESA DDC (Display Data Channel) compatible. Please use this function by connecting the accessory RGB cable with RGB IN 1 terminal (DDC 1/2B compatible), or by connecting an optional DVI cable with DVI terminal (DDC 2B compatible). -
Page 20: Operations
Incorrect procedure will reduce the life of the projector lamp and LCD panel. • To prevent any troble, turn on/off the projector when the computer or video tape recorder is OFF. Providing a RS-232C cable is connected, turn on the computer before the projector. -
Page 21: Basic Operation
• Use the remote control transmitter at a distance of approximately 5m from the sensor on the front of the projector, and within a range of 30° left-right. Strong light and obstacles will interfere with operation of the remote control transmitter. - Page 22 Items indicated by (*) may be used from the control panel. Table 3. Basic Operation (continued) Item VOLUME Volume Adjustment : Press the VOLUME Set/Clear Mute Mode : Press the MUTE button. No sound is heard in the MUTE MUTE mode. Automatic Adjustment at RGB Input : Press the AUTO button.
-
Page 23: Setup Menu
Setup Menu The following adjustments and settings are possible when SETUP is selected at the top of the menu. Part of the Setup menu differs between RGB input and video input. Select an item with the buttons, and start operation. Use the Single menu to reduce menu size (see Table 3, MENU SELECT). -
Page 24: Input Menu
Input Menu The following functions are available when INPUT is selected on the menu. Select an item with the operation with the effective on video input mode only, not on RGB input mode, except in the P.IN P. window on RGB input mode. Table 5. -
Page 25: Image Menu
Image Menu The following adjustments and settings are available when IMAGE is selected on the menu. Select an item with the start or stop operation with the Table 6. Image Menu Item Select Blank Screen Color: Select color with the BLANK •... -
Page 26: Options Menu
Options Menu The following adjustments and settings are available when OPT. is selected on the menu. Select an item with the start or stop operation with the indicated (**) are effective on video input mode only, not on RGB input mode, except in the P.IN P. -
Page 27: No Signal Menu
No Signal Menu The same adjustments and settings are available as with the Image and Options menus when the MENU button is pressed during display of the “NO INPUT IS DETECTED ON ***” or “SYNC IS OUT OF RANGE ON ***” message while no signal is received. Table 8. -
Page 28: Maintenance
• Do not use the projector with the lamp cover removed. Lamp Life Projector lamps have a finite life. The image will become darker, and hues will become weaker, after a lamp has been used for a long period of time. -
Page 29: Resetting The Lamp Timer
Replacing the Lamp 1. Switch the projector OFF, remove the power cord from the power outlet, and wait at least 45 minutes for the unit to cool. 2. Prepare a new lamp. 3. Check that the projector has cooled sufficiently, and gently turn it upside down. -
Page 30: Air Filter
The air filter should be cleaned as described below at intervals of approximately 300 hours. 1. Switch the projector power supply OFF, and remove the power cord from the power outlet. 2. Clean the air filter with a vacuum cleaner. -
Page 31: Troubleshooting
TROUBLESHOOTING TROUBLESHOOTING OSD Message The messages as described below may appear on the screen at power ON. Take the appropriate measures when such a message appears. Table 9. OSD Messages Message CHANGE THE LAMP AFTER REPLACING LAMP, RESET THE LAMP TIME. CHANGE THE LAMP AFTER REPLACING LAMP, RESET THE LAMP TIME. -
Page 32: Indicators Message
Indicators Message The POWER indicator, LAMP indicator, and TEMP indicator are lit and blank as follows. Take the appropriate measures. Table 10. Indicators Message STANDBY/ON LAMP TEMP indicator indicator indicator Lights Turns off Turns off The Standby mode has been set. orange Blinks Turns off Turns off Warming up. -
Page 33: Symptom
ENGLISH-22 ENGLISH-22 Turn on the main power switch. Plug the power cord into an AC power outlet. Use the projector or remote control transmitter to set. Connect correctly. Connect correctly. Press VOLUME control or display the menu screen and adjust the volume. -
Page 34: Specifications
Optional Parts • NOTE This specifications are subject to change without notice. Specification Liquid crystal projector 2.3 cm (0.9 type) TFT active matrix 1,397,760 pixels (1365 horizontal x 1024 vertical) Zoom lens F=2.7 ~ 3.1 f=38.0 ~ 49.0 mm 220 W UHB AC100 ~ 120V, 4.0A / AC220 ~ 240V, 1.8A... -
Page 35: Warranty And After-Service
WARRANTY AND AFTER-SERVICE WARRANTY AND AFTER-SERVICE If a problem occurs with the equipment, first refer to the P.20 “TROUBLESHOOTING” section and run through the suggested checks. If this does not resolve the problem contact your dealer or service company. They will tell you what warranty condition is applied. ENGLISH-24 ENGLISH-24... - Page 45 Projecteur à cristaux liquides MANUEL D'UTILISATION MANUEL D'UTILISATION Nous vous remercions d'avoir choisi un projecteur à cristaux liquides. AVERTISSEMENT • Nous vous recommandons de lire attentivement les “CONSIGNES DE SÉCURITÉ” et ce “MANUEL D'UTILISATION” pour bien assimiler le fonctionnement de l'appareil. Après les avoir lus, conservez-les en lieu sûr pour pouvoir vous y référer ultérieurement.
-
Page 46: Caractéristiques
CARACTÉRISTIQUES CARACTÉRISTIQUES Ce projecteur à cristaux liquides sert à projeter sur écran différents signaux d’ordinateurs ainsi que les signaux vidéo NTSC/PAL/SECAM. Peu encombrant, il permet de projeter des images de grande taille. Clarté exceptionnelle Un niveau de clarté supérieur grâce à la lampe UHB et au système optique à rendement élevé. Grossissement fragmentaire Possibilité... -
Page 47: Nomenclature Des Pièces
Nomenclature des pièces Témoin TEMP Témoin LAMP Touche STANDBY/ON (Témoin STANDBY/ON) Touche VIDEO Touche RGB Capteur de télécommande Objectif Arrivée secteur (vers le cordon d'alimentation) Interrupteur d'alimentation Capuchon à objecti Capteur de télécommande Haut-parleur COMPONENT VIDEO Prise Y Prise C Prise C Prise VIDEO VIDEO AUDIO IN... - Page 48 Nomenclature des pièces (suite) Touche STANDBY/ON Touche VIDEO Orienteur à disque (DISK PAD) S'utilise pour exécuter la fonction de décalage et un clic gauche de la souris. Touche AUTO Touche MENU Touche MENU SELECT Dient zum Klicken der linken Maustaste. Touche S'utilisent pour exécuter la fonction de décalage de la...
-
Page 49: Insertion De La Piles
Insertion de la piles Insérez des piles AA dans la télécommande. 1. Retirez le couvercle des piles. Appuyez sur le bouton tout en soulevant le couvercle des piles. 2. Mise en place des piles. Vérifiez que les pôles plus et moins des piles sont dans le bon sens. -
Page 50: Installation
INSTALLATION INSTALLATION Installation du projecteur et de l'écran Déterminez la taille de l'écran et la distance de projection en vous reportant au schéma et au tableau ci-dessous. Les distances de projection indiqués dans la table ci- dessous sont pour iun plein écran (1365 x 1024 points). a: Distance entre le projecteur et l’écran. -
Page 51: Connexions
Connexions Référez-vous à la table ci-dessous pour relier chaque terminal du projecteur chaque à dispositif. Tableau 2. Connexions Fonction RGB IN 1 Entrée RGB analogique RGB IN 2 Sortie RGB analogique RGB OUT Entrée DVI RGB AUDIO IN [RGB 1 / DVI] (interverrouillage avec RGB IN 1 Entrée audio ou DVI) -
Page 52: Raccordement De L'alimentation
Raccordement de l'alimentation Utilisez celui des cordons d'alimentation joints qui convient pour la prise secteur. Raccordez l'entrée CA du projecteur à la prise secteur en branchant le cordon d'alimentation à fond. ATTENTION • Veillez à employer le cordon d'alimentation conformément aux instructions du document “CONSIGNES DE SÉCURITÉ”... -
Page 53: Fonctionnement
FONCTIONNEMENT FONCTIONNEMENT Interrupteur d'alimentation Capuchon à objectif Mise sous 1. Assurez-vous que la fiche du cordon d'alimentation est correctement branchée sur la prise secteur. 2. Placez l'interrupteur d'alimentation sur la position [ | ]. L'appareil passe en veille et le témoin STANDBY/ON devient orange. -
Page 54: Opérations De Base
Opérations de base Les opérations de base qui sont mentionnées dans le tableau 3, sont à réaliser à partir du sont boîtier de télécommande ou de panneau de commande du projecteur. Les postes repérés par (*) peuvent être employés à partir du panneau de commande. Tableau 3. - Page 55 Les postes repérés par (*) peuvent être employés à partir du panneau de commande. Tableau 3. Opérations de base (suite) Postes VOLUME Réglage du niveau d'écoute: Mise en/hors service du silencieux: Appuyez sur la touche MUTE. MUTE Aucune son ne se fait entendre quand le silencieux est en service. Réglage automatique de l'entrée RGB: Appuyez sur la touche AUTO.
-
Page 56: Menu De Mise En Oeuvre
Menu de mise en oeuvre Les ajustements et réglages suivants sont possibles quand CONF. est choisi en haut du menu. Une partie du menu de mise en oeuvre diffère selon qu'il s'agit de l'entrée RGB ou de l'entrée VIDEO/S-VIDEO. Choisissez un poste à l'aide des touches , puis lancez l'opération. -
Page 57: Menu D'entrée
Menu d'entrée Les fonctions suivantes sont disponibles si ENTR. est choisi sur le menu. Choisissez un poste à l'aide des touches l'opération au moyen des touches n’ont d’effet que sur le mode vidéo et non pas sur le mode d’entrée RGB, sauf dans la fenêtre P. -
Page 58: Menu Image
Menu Image Les ajustements et réglages suivants sont possibles quand IMAGE est choisi sur le menu. Choisissez un poste à l'aide des touches puis lancez ou arrêter l'opération au moyen des touches Tableau 6. Menu Image Postes Choix de la couleur de l'écran sans image: Choisissez la couleur à l'aide des touches SUPPR. -
Page 59: Menu Options
Menu Options Les ajustements et réglages suivants sont possibles quand OPT. est choisi sur le menu. Choisissez un poste à l'aide des touches lancez ou arrêter l'opération au moyen des touches fonctions marquées (**) n’ont d’effet que sur le mode vidéo et non pas sur le mode d’entrée RGB, sauf dans la fenêtre P. -
Page 60: Menu No Signal
Menu No Signal Les mêmes ajustements et réglages que ceux proposés par les menus IMAGE et OPT. sont disponibles quand vous appuyez sur la touche MENU au cours de l'affichage du message “ENTREE NON DETEC. SUR ***” ou bien du message “SYNC. HORS PLAGE SUR ***” alors qu'aucun signal n'est reçu. -
Page 61: Entretien
ENTRETIEN ENTRETIEN Lampe Consultez le revendeur avant de remplacer l'ampoule. Pour la lampe fournie en option, reportez-vous à la section "Articles vendus séparément" dans le Tableau 12. Avant de remplacer la lampe, mettez l'appareil hors service, débranchez la fiche du cordon d'alimentation au niveau de la prise secteur et attendez environ 45 minutes, le temps nécessaire au refroidissement de la lampe. -
Page 62: Remplacement De La Lampe
Remplacement de la lampe 1. Mettez l'appareil hors service, débranchez la fiche du cordon d'alimentation au niveau de la prise secteur et attendez environ 45 minutes, le temps nécessaire au refroidissement de l'ampoule. 2. Préparez une ampoule neuve. 3. Assurez-vous que le projecteur est suffisamment froid puis retournez-le doucement. -
Page 63: Remplacement Du Filtre D'air
Filtre d'air Remplacement du filtre d'air Remplacez le filtre d'air s'il n'est pas possible d'éliminer les saletés ou s'il est endommagé. 1. Déposez le couvercle du filtre. 2. Tirez sur le vieux filtre pour l'enlever du boîtier de filtre. 3. Installez correctement le nouveau filtre dans le boîtier. Assurez-vous qu'il n'y a pas d'interstice entre le filtre et le plastique sur le dessus et sur les côtés gauche et droit du filtre. -
Page 64: Dépannage
DÉPANNAGE DÉPANNAGE Messages affichés à l'écran Les messages mentionnés ci-dessous peuvent apparaître sur l'écran au moment de la mise sous tension. Lorsqu'un de ces messages s'affichent, prenez les mesures qui conviennent. Tableau 9. Messages affichés à l'écran Message REMPLACER LA LAMPE REMETTRE LA MINUTERIE À... -
Page 65: Témoins
É É É É Témoins Le témoin POWER, le témoin LAMP et le témoin TEMP sont éclairés ou éteints comme indiqué ci- dessous. Prenez les mesures correctives qui s'imposent. Tableau 10. Témoins Témoin Témoin STANDBY/ON LAMP Eclairé et de Eteint Eteint couleur orange Clignote et de... -
Page 66: Symptômes
é é é é Symptômes Les phénomènes suivants sont souvent considérés comme des anomalies. Ces phénomènes ne sont pas nécessairement des anomalies. Consultez le tableau qui suit. Tableau 11. Symptômes Phénomènes Exemples qui ne sont pas des anomalies •l’interrupteur principal n’est pas allumé. -
Page 67: Caractéristiques Techniques
CARACTÉRISTIQUES TECHNIQUES CARACTÉRISTIQUES TECHNIQUES Tableau 12. Caractéristiques techniques Poste Nom de produit Dimension du panneau Panneau à cristaux Système d'excitation liquides Pixels Objectif Lampe Haut-parleur Alimentation Consommation Température ambiante Dimensions Poids (masse) RGB IN Entrée de signal RGB1 AUDIO IN RGB2 VIDEO S-VIDEO... -
Page 68: Garantie Et Service Après-Vente
GARANTIE ET SERVICE APRÈS-VENTE GARANTIE ET SERVICE APRÈS-VENTE En cas d'anomalie, reportez-vous tout d'abord au page 20 "DÉPANNAGE" et procédez aux vérifications suggérées. Si cela ne permet de résoudre le problème qui se pose à vous, consultez le revendeur ou le service d'entretien. On vous dira quelle condition de garantie est applicable. FRANÇAIS - 24... - Page 69 LEGAL INFORMATION FIVE-YEAR LIMITED WARRANTY This Dukane LCD projector is warranted to the original purchaser for a period of five (5) years from the original purchase date - in normal use and service - against defects in material and workmanship. DUKANE CORPORATION EXPRESSLY DISCLAIMS ALL OTHER WARRANTIES OF MERCHANTABILITY AND FITNESS FOR A PARTICULAR PURPOSE.
- Page 70 Dukane Corporation Audio Visual Products Division 2900 Dukane Drive St. Charles, IL 60174-3395 E-mail: avsales@dukane.com Phone: (630) 584-2300 Orders: (800) 676-2485 Information: (800) 676-2486 Fax: (630) 584-5156 Parts & Service: (800) 676-2487 Fax: (630) 584-0984 Audio Visual Products Part # 401-573-00...
Need help?
Do you have a question about the 28A9115 and is the answer not in the manual?
Questions and answers