Dacor RO130 Installation Instructions Manual
Ro model series
Hide thumbs
Also See for RO130:
- Use and care manual (48 pages) ,
- Planning manual (2 pages) ,
- Installation instructions manual (36 pages)

Subscribe to Our Youtube Channel
Related Manuals for Dacor RO130


Summary of Contents for Dacor RO130
- Page 1 Installation Instructions Renaissance Wall Oven RO Model Series Part No. 105487 Rev. A...
- Page 2 All specifications are subject to change without notice. Dacor assumes no liability for changes to specifications. ® © 2011 Dacor, all rights reserved.
-
Page 3: Table Of Contents
WARNING • Always contact the Dacor Customer Service Team about problems and conditions that you don’t under- WARNING – NEVER use this appliance as a space stand. See Customer Service Information. -
Page 4: General Safety Precautions
• Do not touch the interior surfaces of the oven during how to turn off electric power to the oven. Dacor use. After use, make sure these surfaces have had is not responsible for service required to correct a sufficient time to cool before touching them. -
Page 5: Customer Service Information
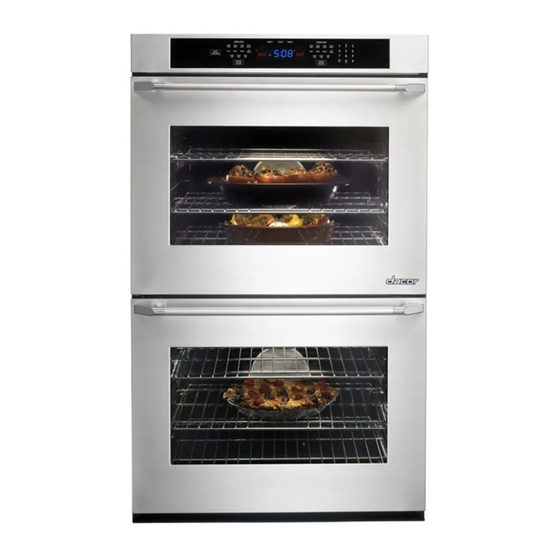
Model Identification If you have questions or problems with installation, contact RO130S your Dacor dealer or the Dacor Customer Service Team. Single oven with stainless steel around control panel and For repairs to Dacor appliances under warranty call the stainless steel door front. Equipped with stainless steel Dacor Distinctive Service line. -
Page 6: Product Specifications
Product Specifications Electrical Specifications • It is the owner’s responsibility to ensure that a licensed Model Dedicated Circuit total Connected electrician performs the installation of the electrical sup- Number Requirements Load ply for this appliance. The electrical installation, includ- RO130S ing minimum supply wire size, must comply with the 240 Vac 60 Hz, RO130B... - Page 7 Design Specifications Product Dimensions All tolerances: ±1/16 (±1.6 mm), unless otherwise stated. Top of Top of chassis chassis Utility Utility cutout cutout Conduit: 60” (152 cm) long Control panel front Top of chassis Control panel side view Conduit: Single Oven 60”...
-
Page 8: Important
3/4” (1.9 cm) thick plywood is recommended. • Dacor recommends installing the electrical junction box in the one of the locations shown. Cabinet Dimensions Cabinet tolerances: +1/16 (1.6 mm), -0, unless otherwise stated. - Page 9 Installation Specifications Cabinet Dimensions Cabinet tolerances: +1/16 (1.6 mm), -0, unless otherwise stated. Recommended Recommended electrical electrical location location 1” (2.5 cm) min. to bottom of cabinet door 3/4” (1.9 cm) support platform 1” (2.5 cm) min. 1” (2.5 cm) min. to top of 3/4”...
-
Page 10: Installation Instructions
• Use and care manual • Broil grill and pan • Mounting screws (Wood, #6 X ¾, Dacor PN 83331, • Dacor Stainless Steel Cleaner 4 for single ovens, 6 for double ovens) (stainless steel models only) •... -
Page 11: Electrical Connection
Installation Instructions Electrical Connection Connecting to a Four Wire Electrical System WARNING 1. Separate the wires coming out of the appliance conduit. 2. Connect the white wire from the appliance conduit to • If the electrical service provided does not meet the the white (neutral) supply wire in the junction box. - Page 12 Installation Instructions Electrical Connection - (continued) Connecting to a Three Wire Electrical System with External Ground - Where Local Connecting to a Three Wire Electrical Codes Permit System - Where Local Codes Permit WARNING WARNING • Do not ground the appliance to a gas supply pipe or hot water pipe.
- Page 13 Installation Instructions Insulating device 4 AWG wire (minimum) Clamps Bare metal Insulated Pipe Jumper Incoming power Wire nut, Junction box 4 places WHITE Separate 10 AWG WHITE wire minimum GREEN Clamp wire tightly BLACK to pipe GREEN BLACK Conduit to oven three Wire Connection with External Ground...
-
Page 14: Installing The Oven In The Cabinet
Installation Instructions Installing the Oven in the Cabinet 3. Locate the mounting holes in the trim on both sides of the oven. There are four (4) holes, two (2) on each side, for single oven models and six (6) holes for dou- WARNING ble oven models. -
Page 15: Reinstalling The Oven Door
• Turn on power and repeat the above heating test. • If the appliance still does not work, contact Dacor Distinctive Service at (877) 337-3226. Do not attempt to repair the appliance yourself. If you need service, be sure to have the model and serial numbers available when you call. -
Page 16: Installation Checklist
Installation Instructions Installation Checklist WARNING To ensure proper installation, the installer must complete the checklist below to make sure that no part of the in- stallation has been overlooked. □ Is the oven mounted on a level platform? □ Is the oven wired and grounded according to these instructions and in accordance with all applicable elec- trical codes? See pages 4 and 9. -
Page 17: Notes
Notes... - Page 18 Notes...
- Page 20 Dacor ● 600 Anton Blvd. Suite 1000 Costa Mesa, CA 92626 ● Phone: (800) 793-0093 ● Fax: (626) 403-3130 ● www.dacor.com...
Need help?
Do you have a question about the RO130 and is the answer not in the manual?
Questions and answers