
Related Manuals for DREAM MULTIMEDIA DREAMBOX DM 500S


Summary of Contents for DREAM MULTIMEDIA DREAMBOX DM 500S
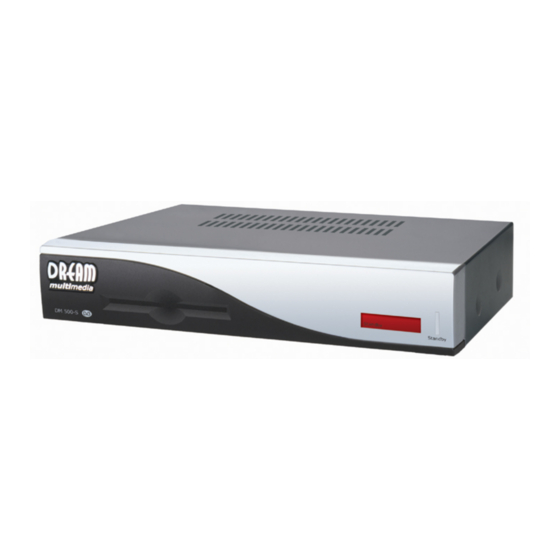
- Page 1 Dreambox DM 500S User’s Manual Digital satellite receiver for free and encrypted DVB-TV Programs Communication-Port Smartcard Reader Linux OS Rev.1.0_rel.1.05_dd_eng...
-
Page 2: Table Of Contents
Contents Contents ..............................- 2 - Views ................................- 4 - Description Frontview ..........................- 5 - 3.1. Smartcard Reader ............................- 5 - 3.2. Standby Led..............................- 5 - 3.3. RC Led................................ - 5 - 3.4. Standby on/off............................. - 5 - Description Rearview .......................... - Page 3 Teletext - Software Decoder (TuxText) activating..................- 31 - Expert Setup ............................. - 33 - 32.1. Communication (Network, LAN Setup) ..................... - 34 - 32.2. Communication (Network, WAN (DSL) Setup) ..................- 35 - 32.3. NGrab Streaming Setup..........................- 35 - 32.4.
-
Page 4: Views
Views Frontview Rearview: - 4 -... -
Page 5: Description Frontview
Description Frontview 3.1. Smartcard Reader Plug in your Dreamcrypt Smartcard with the gold chip face downwards and inwards into the Smartcard Reader. Dreamcrypt is a trademark of Dream-Multimedia-Tv GmbH 3.2. Standby Led The Standby Led lits red, if the Dreambox is in Standby state. 3.3. -
Page 6: Description Rearview
Description Rearview 4.1. LNB In Connect the coaxial cable from your LNB here. Please switch the power off from the the Dreambox first. 4.2. LNB Out Connect an analogue receiver here. Remember to shutdown your Dreambox into Standby-Mode, if you wish to view analogue TV. -
Page 7: Safety Instructions
Safety Instructions Please read the Safety Instructions completely and carefully, before using the Dreambox. The Manufacturer takes no responsibility of incorrect handling of the Dreambox. Allow enough space around the Dreambox for sufficient ventilation. Do not cover the Dreambox’s ventilation openings with items such as newspapers, tablecloths, curtains etc. -
Page 8: Delivering
Delivering The box of your DM 500S should contain the following items: 1 receiver Dreambox 500S 1 powersupply 1 remote control 1 user’s manual (newest release @ http://www.dream-multimedia-tv.de 2 batteries (1,5V Microcell / AAA ) Optional parts: 1 wireless keyboard Installation Insert 2 AAA (1,5V) batteries, taking care to observe the + and - markings indicated inside, into the Remote Control. - Page 9 Remote Control Power-Button Option-Buttons MENU-Button INFO-Button EXIT-Button Volume-Mute-Button Channel-up-Button OK-Button Volume (-) Button Volume (+) Button Channel-down-Button Numeric-Keyboard Arrow-right-Button Arrow-left-Button - 9 -...
-
Page 10: Important Notes About Condition
Important Notes about Condition All Functions of the Dreambox will be controlled via an OSD-Menu (On-Screen-Display). This makes the Condition of the Dreambox very easy for you. Possible Options are assigned by four colored dots or beams (red, green, yellow, blue) in the OSD-Menu and are activated with the Option-Buttons on the Remote Control. -
Page 11: Remote Control Describtion
Remote Control describtion POWER-Button This Button switches your Dreambox on or off. See passage Dreambox switching on / off. Numeric-Keyboard Enter a Service number directly from the Numeric-Keyboard. The Service numbers are shown on the left side of the Servicelist. In the OSD-Mainmenu are numbers shown in front of the Option or Function, in this case you can enter the desired number to access the Option or Function directly without moving the Cursorbeam to it. -
Page 12: Dreambox Switching On/Off
MENU-Button This Button shows the OSD-Mainmenu or the Servicemenu inside an opened Channellist. Channel-up-Button This Button switches a Channel forward. Channel-down-Button This Button switches a Channel backward. Dreambox switching on/off Use the Power-Button to switch the Dreambox on or off. Unplug the Mains powercord to make the Dreambox completely powerless. -
Page 13: Sleeptimer
Sleeptimer Press the Power-Button for at least 3 seconds, select “set sleeptimer” to enter this menu. Define a max. duration of 240 minutes. Define if the Dreambox should shutdown or should go into standby by setting a check into one of the checkboxes beside shutdown and standby with the OK-Button. -
Page 14: Infobar
Infobar The Infobar appears and disappears by pressing the INFO-Button once, if no OSD-Menu is shown on your tv screen. The Infobar shows all nessesary Information about the selected Service. Channelname Remain Time Actual Time Channelnumber Dolby Digital Program Upcomming Program Overall Time Aspect Ratio Actual Program... -
Page 15: Infobar - Epg (Electronic Program Guide)
14.1. Infobar - EPG (Electronic Program Guide) The red dot in the Infobar appears if the selected program transmits EPG informations. Press the red Option-Button to enter the EPG. Press the OK-Button to view detailed Information. Press the EXIT-Button to exit this menu. 14.2. -
Page 16: Infobar - Audio Track
14.3. Infobar - Audio Track The yellow dot in the Infobar appears if the selected Service transmittes multipile Audio-Tracks. Use the Navigation-Buttons left or right to choose the different Audio-Modes, Left-Mono, Stereo, Right-Mono. Press the OK-Button to activate. Use the Navigation-Buttons up or down to choose another Audio-Language. -
Page 17: Setup - Osd Language
Setup - OSD Language Press the MENU-Button to enter the OSD-Mainmenu. Go to Setup -> System Settings -> OSD Language. Use the Navigation-Buttons up or down to choose your language. Press the OK-Button to activate. Exit all menus and reenter. Setup - Time Zone Press the MENU-Button to enter the OSD-Main menu. -
Page 18: Satellite Configuration
Satellite Configuration Press the MENU-Button to enter the OSD-Mainmenu. Go to Setup -> Service Searching -> Satellite Configuration. Navigate to the upper Dropdownlist and choose your appropiate Satellite Configuration and press the OK-Button. Choose your Satellites the Dish is adjusted to and press the green Option-Button to save configuration. -
Page 19: Motor Setup
Motor Setup Press the MENU-Button to enter the OSD-Mainmenu. Go to Setup -> Service Searching -> Motor Setup. Before proceeding with the Motor Setup refer to passage Satellite Configuration and choose from the upper Dropdownlist “many satellites via DiSEqC Rotor” and press the OK-Button, if you setup a Motor for the first time. -
Page 20: Automatic Transponder Scan
Automatic Transponder Scan Press the MENU-Button to enter the OSD-Main menu. Go to Setup -> Service Searching -> Automatic Transponder Scan. The Automatic Transponder Scan scans one satellite after one which is configured. Select the first satellite to scan and press the OK- Button. -
Page 21: Automatic Multisat Scan
Automatic Multisat Scan Press the MENU-Button to enter the OSD-Mainmenu. Go to Setup -> Service Searching -> Automatic Multisat Scan. The Automatic Multisat Scan is recommened for scanning all configured satellites at once. By pressing the OK-Button on each satellite a coupler times, you set the scan method. -
Page 22: Transponder Edit
Transponder Edit Press the MENU-Button to enter the OSD-Mainmenu. Go to Setup -> Service Searching -> Transponder Edit. This Menu keeps all known satellites the Dreambox scans for. If you recognize a missing satellite, add or edit the satellite. Pressing the OK-Button on the sat-button, enters the Satellite Edit Menu. -
Page 23: Service Organising - Create New Bouquet
Service Organising - create new Bouquet The Bouquets are used to save your favorite services from the Main Servicelist into one simple bouquet. You can ether add a TV or Radio Bouquet. In this example we only describe creating a TV Bouquet, because its always the same procedure. -
Page 24: Service Organising - Add Services To Bouquet
Service Organising - Add services to Bouquet Press the MENU-Button to enter the OSD-Mainmenu. Go to Setup -> Service Organising -> Add services to Bouquet. This Menu shows Bouquet Types, Dreambox allows you to add services to. Select TV and press the OK-Button. This Menu shows the System default Bouquets, Servicenumbers and Favorites (TV). -
Page 25: Service Organsing - Edit Bouquets
Service Organsing - Edit Bouquets Press the MENU-Button to enter the OSD-Mainmenu. Go to Setup -> Service Organising -> Edit bouquets. In this Menu you can only rename the selected Bouquet Type by pressing the yellow Option-Button. Choose a Bouquet Type you wish to edit a Bouquet from. -
Page 26: Parental Lock
Parental Lock Press the MENU-Button to enter the OSD-Mainmenu. Go to Setup -> Parental Lock. Parental lock is used to lock services of your choice inside the Servicelist against access. Setup lock is used to lock the Menu Setup against access. The Parental setup requires a four digit code of your choice called PIN for Parental lock and Setup lock. -
Page 27: Services Locking / Unlocking
Services locking / unlocking Press the TV-Button to bring up the Servicelist. Choose the Service you want to lock / unlock and press the MENU-Button. You can lock / unlock services in any Servicelist. Press the desired Option-Button to enter either Services, Satellites, Providers or Bouquets. -
Page 28: A/V Settings
A/V Settings Press the MENU-Button to enter the OSD-Mainmenu. Go to Setup -> Sytem Settings -> A/V Settings. Use ether the Navigation-Buttons left and right or the OK-Button to change or set the Values. Color Format: CVBS(FBAS), RGB (Red, Green, Blue seperated), SVideo (Color- and Brightnes signal seperated) and YPbPr (Component signal e.g. -
Page 29: Osd Settings
OSD Settings Press the MENU-Button to enter the OSD-Mainmenu. Go to Setup -> System Settings -> OSD Settings. Use the Navigation-Buttons left or right to decrease or increase the selected slider. Alpha: Setup how much the tv picture should be visable through the OSD. - Page 30 30.2. Available Skins Bluenigma BIG Neutino-Style Silver Metal Screwed Stone Simple and Stylish 16:9 has the same look like Simple and Stylish, but is optimized for 16:9 TV’s. Simple and Stylish - 30 -...
-
Page 31: Teletext - Software Decoder (Tuxtext) Activating
30.3. TuxText position Press the MENU-Button to enter the OSD-Mainmenu. Go to Setup -> Sytem Settings -> OSD Settings, press the yellow Option-Button (TuxText position). What is TuxText? TuxText is a Plugin (additional Software), which allows the Dreambox to decode the digital Teletext. - Page 32 TuxText viewing options: Press the Volume-Mute-Button a couple of times to switch to alpha-mode, invisible-mode and full-mode. The alpha-mode shows the picture from the running program through the Textpages. The invisible-mode shows the complete picture from the running program without exiting the TuxText. The full-mode brings back the Textpage.
-
Page 33: Expert Setup
Expert Setup Press the MENU-Button to enter the OSD-Mainmenu. Go to Setup -> Expert Setup. Auto bouquet change: Press the OK-Button to set a toggle. If you reach the end of a Bouquet, the Dreambox switches to the next Bouquet. Skip confirmations: Press the OK-Button to set a toggle. -
Page 34: Communication (Network, Lan Setup)
32.1. Communication (Network, LAN Setup) Press the MENU-Button to enter the OSD-Main menu. Go to Setup -> Expert Setup -> select Communication Setup. Use the Navigation-Buttons and the Numeric- Keyboard to set the Values. Enter the IP-Address here. The IP-Address is used to specify the Host IP-Address. -
Page 35: Communication (Network, Wan (Dsl) Setup)
32.2. Communication (Network, WAN (DSL) Setup) Press the MENU-Button to enter the OSD-Mainmenu. Go to Setup -> Expert Setup -> Communication Setup. Navigate to Type, press the OK-Button and select WAN(PPoE). Use this Type of Connection only, if the Dreambox is connected directly to a DSL- Modem. -
Page 36: Software Update Over Internet
32.4. Software Update over Internet Press the MENU-Button to enter the OSD-Main menu. Go to Setup -> Expert Setup -> Software Update -> select Internet Update. The Internet Update function only works, if you have configured the Network, and the Dreambox is connected to ether a Router or a DSL-Modem. -
Page 37: Information - Streaminfo / About
Information - Streaminfo / About Press the MENU-Button to enter the OSD-Main menu. Go to Information. Press the OK-Button to enter the Streaminfo. Use the Navigation-Button right to open the following windows. Use the Navigation-Button left to go back. Navigate to “About” and press the OK-Button to enter. -
Page 38: Dreamup - Software Upgrade
DreamUp - Software upgrade !!!! Very important, please read this passage completely, before starting upgrading !!!! Dreamup and the Images (Software) for the DM500S are available at our Website www.dm500.com. Remove all cables from the Dreambox. Connect only the serial and the Patchcable. The Mainspowercord is disconnected. -
Page 39: Dreamup - Preparing Dreamup
34.1. DreamUp - Preparing DreamUp Start the Software DreamUp2.14b on your PC. Choose the COM Port, which is connected to the Dreambox. Make shure the Checkbox „Use Network“ is checked. If not, the Software connects only serial. Type in the IP-Address from your PC „Local IP (PC)“. Type in an IP-Address „Remote IP (Box)“... -
Page 40: Dreamup - Establish A Connection
34.2. DreamUp - Establish a Connection Click on the Connect-Button. Dreamup tells you, that the Connection is prepared Plug in NOW the Mainspowercord into the Dreambox. - 40 -... - Page 41 After Dreamup has connected to the Dreambox, the other Buttons appear in black letters. You can now use them. Click on the Ping-Button to test the Ethernet Connection. You will notice the Ping result in the Log window. If not, please check your Network configuration. - 41 -...
-
Page 42: Dreamup - Backup Software
34.3. DreamUp - Backup Software Clicking on the Backup-Button saves the complete installed Software with all your settings. The file window opens. Type in any name of your choice plus the extension .img or .bin. - 42 -... - Page 43 After clicking on the Save-Button the Software will be downloaded from your Dreambox. Watch the Progress bar and Status. You get a message from Dreamup after downloading has been finished. With result 0, everything is ok. Click on the OK-Button to quit. - 43 -...
-
Page 44: Dreamup - Erasing Software
34.4. DreamUp - Erasing Software Click on the Erase-Button to erase the currently installed Software. This is sometimes, but not always nessesary. You will get a security question from DreamUp, if you are sure. Click on the Yes-Button. - 44 -... - Page 45 Watch the Progress bar and Status. After erasing the Software, Dreamup tells you that everything is ok with a flash erase result 0. Click on the OK-Button to quit. - 45 -...
-
Page 46: Dreamup - Flashing Software
34.5. DreamUp - Flashing Software Click on the Flash-Button to select an Imagefile (Software). Choose an imagefile and click on the Open-Button. - 46 -... - Page 47 After clicking on the Open-Button, the image will be immediately uploaded to the Dreambox. Watch the Progress bar, the Status and Log window. After the upload is completed the flash will be erased. Watch the Status and Log window. - 47 -...
- Page 48 The image will be verified after flashing. The flash procedure is completed, if you get a Flash update finished result 0. Click on the OK-Button to quit. - 48 -...
-
Page 49: Technical Data
Technical Data 250 MHz IBM PowerPC Processor (350 Mips) Linux open source (most parts under the terms of GPL, accordingly expandable)- Supports Linux Standard API (Direct-FB, Linux-FB, LIRC) 1 x Smartcard-Reader MPEG2 Hardware decoding (fully DVB compliant) Common available NIMs (DVB-S, DVB-T, DVB-C) 100 MBit full duplex Ethernet Interface V.24/RS232 Interface 32 MByte of RAM... - Page 50 Output digital: Output Level 0,5 Vss on 75 Ohm Sampled Data Filtering 32 kHz, 44.1 kHz, 48 kHz S/PDIF-Output optical (AC3) Video parameter: Ouput Level FBAS 1 Vss +/- 0.3 dB on 75 Ohm TV-Scart: Output: FBAS,RGB,S-VHS over OSD selectable Serial Interface RS 232: Typ RS232 bidirectional Bitrate 115,2 kBit/s max.
-
Page 51: Contact & Support Information
Contact & Support Information Headquarter & Distribution: Dream-Multimedia-Tv GmbH Pierbusch 24 D-44536 Lünen Germany Technical Support: E-Mail: support@dream-multimedia-tv.de Webseite: Weblink: http://www.dream-multimedia-tv.com Support Forum: Weblink: http://www.dream-multimedia-tv.de/board/index.php Software Support (actual images): Weblink DM500: http://www.dm500.com Digital unterschrieben von Daniel Doege CN: CN = Daniel Doege, C = DE, O = Dream-Multimedia-Tv GmbH, OU = Support Ursache: Ich bin der Verfasser dieses Dokuments Speicherort: Lünen... -
Page 52: Warranty Card
Warranty card Warranty card Model Type: ..................Serial No.: ................... Mac No.: ....................(Serial and Mac No. is located at the back of your Dreambox) Customer Address: Name:....................Street: ....................Country: ....................Postcode: ..…….. Town: ............Reseller Adddress: Name:....................Street: ....................Country: .................... - Page 53 DREAM - Service-paper Please fill out this form clearly and completely. Send it back to your dealer/distributor of your country. It is very important that you write in clear letters - this accelerates the procedure and makes it more simple. Without copy of invoice no service-works will be effected.
Need help?
Do you have a question about the DREAMBOX DM 500S and is the answer not in the manual?
Questions and answers