Table of Contents
Advertisement
Available languages
Available languages
Quick Links
Dreambox DM 500+
S/C/T
Bedienungsanleitung
User Manual
Digitaler Satellitenempfänger zum Empfang von freien
Digital satellite receiver for free and encrypted
und verschlüsselten DVB-Programmen.
Digital Video Broadcasting (DVB).
Communication-Port
Kommunikations-Schnittstelle
Smartcard Reader
Smartcard Leser
Linux OS
Linux OS
B e d i e n u n g s a n l e i t u n g D r e a m b o x D M 7 0 2 5
Advertisement
Chapters
Table of Contents

Related Manuals for DREAM MULTIMEDIA DM500 PLUS S


Summary of Contents for DREAM MULTIMEDIA DM500 PLUS S
- Page 1 Dreambox DM 500+ S/C/T Bedienungsanleitung User Manual Digitaler Satellitenempfänger zum Empfang von freien Digital satellite receiver for free and encrypted und verschlüsselten DVB-Programmen. Digital Video Broadcasting (DVB). Communication-Port Kommunikations-Schnittstelle Smartcard Reader Smartcard Leser Linux OS Linux OS B e d i e n u n g s a n l e i t u n g D r e a m b o x D M 7 0 2 5 deutsch...
-
Page 2: Table Of Contents
B e d i e n u n g s a n l e i t u n g D r e a m b o x D M 5 0 0 + deutsch I n h a l t s v e r z e i c h n i s 1. - Page 3 B e d i e n u n g s a n l e i t u n g D r e a m b o x D M 5 0 0 + deutsch 36. Benutzeroberfläche (OSD) ......................- 76 - 36.1 Skin Einstellung........................
-
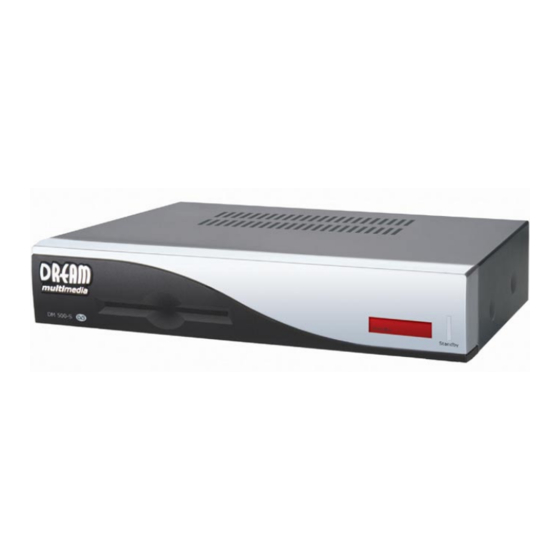
Page 4: Geräteansichten
B e d i e n u n g s a n l e i t u n g D r e a m b o x D M 5 0 0 + deutsch Geräteansichten Vorderansicht Smartcard Leser Standby Standby LED FB LED ein/aus Rückansicht DM 500+-C/T Audio... -
Page 5: Erklärung Vorderansicht
B e d i e n u n g s a n l e i t u n g D r e a m b o x D M 5 0 0 + deutsch E r k l ä r u n g V o r d e r a n s i c h t Smartcardleser Stecken Sie Ihre Dreamcrypt Smartcard, mit dem Chip nach unten und nach vorne gerichtet den Smartcard-Leseschacht. - Page 6 B e d i e n u n g s a n l e i t u n g D r e a m b o x D M 5 0 0 + deutsch Serielle Schnittstelle (RS232C, Sub-D, 9-pol.) Die serielle Schnittstelle dient zum Update der Betriebssoftware und der Vorprogrammierung mittels PC.
-
Page 7: Sicherheitshinweise
B e d i e n u n g s a n l e i t u n g D r e a m b o x D M 5 0 0 + deutsch Sicherheitshinweise Bevor Sie Ihre Dreambox in Betrieb nehmen, sollten Sie zu Ihrem Schutz die Sicherheitshinweise gut durchlesen. -
Page 8: Betriebspausen
B e d i e n u n g s a n l e i t u n g D r e a m b o x D M 5 0 0 + deutsch Betriebspausen Wird das Gerät längere Zeit nicht betrieben, ziehen Sie bitte das Stromkabel aus der Steckdose. -
Page 9: Entsorgungshinweise
B e d i e n u n g s a n l e i t u n g D r e a m b o x D M 5 0 0 + deutsch Entsorgungshinweise Die Verpackung der Dreambox besteht ausschließlich aus wieder verwertbaren Materialien. Bitte führen Sie diese entsprechend sortiert dem “Dualen System”... -
Page 10: Lieferumfang
B e d i e n u n g s a n l e i t u n g D r e a m b o x D M 5 0 0 + deutsch Lieferumfang Prüfen Sie die Lieferung auf Vollständigkeit. Im Lieferumfang sind enthalten: 1 Dreambox DM 500+ 1 Steckernetzteil CWT 12V, 2A, 24W... -
Page 11: Fernbedienung
B e d i e n u n g s a n l e i t u n g D r e a m b o x D M 5 0 0 + deutsch Fernbedienung MUTE-Taste Standby-Taste Zehner-Tastatur Pfeil-Rechts-Taste Pfeil-Links-Taste Kanal-auf-Taste INFO-Taste MENU-Taste... -
Page 12: Wichtige Hinweise Zur Bedienung
B e d i e n u n g s a n l e i t u n g D r e a m b o x D M 5 0 0 + deutsch Wichtige Hinweise zur Bedienung Über das OSD (On Screen Display) wird die Bedienung der Dreambox stark vereinfacht. Alle möglichen Optionen werden über vier farbige Punkte/Balken (rot, grün, gelb, blau) angezeigt und können über die Fernbedienung mit den Optionstasten aktiviert werden. -
Page 13: Tastenerklärung Der Fernbedienung
B e d i e n u n g s a n l e i t u n g D r e a m b o x D M 5 0 0 + deutsch Tastenerklärung der Fernbedienung MENU-Taste Befinden Sie sich im TV- oder RADIO-Modus, öffnet sich durch Druck auf die MENU-Taste das OSD Hauptmenü. - Page 14 B e d i e n u n g s a n l e i t u n g D r e a m b o x D M 5 0 0 + deutsch Pfeil-Links-Taste Pfeil-Rechts-Taste Diese Tasten ermöglichen es Ihnen, direkt durch die Wiedergabeliste vor und zurück zu zappen, ohne die Wiedergabeliste aufzurufen.
-
Page 15: Dreambox Ein- Bzw. Ausschalten
B e d i e n u n g s a n l e i t u n g D r e a m b o x D M 5 0 0 + deutsch TEXT–Taste Mit der TEXT-Taste gelangen Sie in den Teletext (TuxTxt). Befinden Sie sich in einer Kanalliste, gelangen Sie mit dieser Taste direkt in den Datei-Modus. -
Page 16: Sleeptimer
B e d i e n u n g s a n l e i t u n g D r e a m b o x D M 5 0 0 + deutsch Sleeptimer Bitte lesen Sie den Abschnitt Dreambox ein- bzw. ausschalten, um zu erfahren, wie Sie in dieses Menü... - Page 17 B e d i e n u n g s a n l e i t u n g D r e a m b o x D M 5 0 0 + deutsch Über dieses Symbol gelangen Sie in das „Gerät ausschalten Menü“.
-
Page 18: Infobar
B e d i e n u n g s a n l e i t u n g D r e a m b o x D M 5 0 0 + deutsch Infobar Die Infobar erscheint beim Programmwechsel und zeigt Ihnen die folgenden Informationen an. -
Page 19: Infobar - Epg (Electronic Program Guide)
B e d i e n u n g s a n l e i t u n g D r e a m b o x D M 5 0 0 + deutsch 17.1 Infobar - EPG (Electronic Program Guide) Der rote Punkt links von „EPG“... - Page 20 B e d i e n u n g s a n l e i t u n g D r e a m b o x D M 5 0 0 + deutsch Es erscheint das Menü „Timer bearbeiten “. Benutzen Sie die Navigationstasten , um die einzelnen Optionen zu erreichen und die OK-Taste, um die jeweilige Dropdownliste zu öffnen oder in die...
-
Page 21: Infobar - Unterkanäle
B e d i e n u n g s a n l e i t u n g D r e a m b o x D M 5 0 0 + deutsch Haben Sie bei der EPG-Darstellungs-Auswahl den Multi-EPG aufgerufen, erscheint dieses Fenster. -
Page 22: Infobar - Tonspur
B e d i e n u n g s a n l e i t u n g D r e a m b o x D M 5 0 0 + deutsch 17.3 Infobar - Tonspur Der gelbe Punkt links von „Tonspur“ in der Infobar erscheint, sofern der gewählte Sender verschiedene Tonspuren zur Verfügung stellt. -
Page 23: Sprache Einstellen
B e d i e n u n g s a n l e i t u n g D r e a m b o x D M 5 0 0 + deutsch Sprache einstellen Ist kein OSD Menü auf Ihrem Fernsehgerät gewählt (sichtbar), gelangen Sie durch Drücken der MENU-Taste in das OSD Hauptmenü. -
Page 24: Zeitzone Einstellen
B e d i e n u n g s a n l e i t u n g D r e a m b o x D M 5 0 0 + deutsch Zeitzone einstellen Ist kein OSD Menü auf Ihrem Fernsehgerät gewählt (sichtbar), gelangen Sie durch Drücken der MENU-Taste in das OSD Hauptmenü. - Page 25 B e d i e n u n g s a n l e i t u n g D r e a m b o x D M 5 0 0 + deutsch Das Menü „Zeitzonen“ erscheint. Drücken Sie die OK-Taste, um in die Auswahlliste für die Zeitzonen zu gelangen.
-
Page 26: Manuelle Zeitkorrektur
B e d i e n u n g s a n l e i t u n g D r e a m b o x D M 5 0 0 + deutsch 19.1 manuelle Zeitkorrektur Bitte lesen den Abschnitt Zeitzone einstellen, um zu erfahren, wie Sie in dieses Menü gelangen. -
Page 27: Signalanzeige (Antenne Ausrichten, Dm 500+-T)
B e d i e n u n g s a n l e i t u n g D r e a m b o x D M 5 0 0 + deutsch Signalanzeige (Antenne ausrichten, DM 500+-T) Ist kein OSD Menü auf Ihrem Fernsehgerät gewählt (sichtbar), gelangen Sie durch Drücken der MENU-Taste in das OSD Hauptmenü. -
Page 28: Abschalten (Dm 500+-T)
B e d i e n u n g s a n l e i t u n g D r e a m b o x D M 5 0 0 + deutsch 20.1 5V abschalten (DM 500+-T) Ist kein OSD Menü auf Ihrem Fernsehgerät gewählt (sichtbar), gelangen Sie durch Drücken der MENU-Taste in das OSD Hauptmenü. -
Page 29: Automatische Sendersuche (Dm 500+-T)
B e d i e n u n g s a n l e i t u n g D r e a m b o x D M 5 0 0 + deutsch 20.2 Automatische Sendersuche (DM 500+-T) Ist kein OSD Menü auf Ihrem Fernsehgerät gewählt (sichtbar), gelangen Sie durch Drücken der MENU-Taste in das OSD Hauptmenü. - Page 30 B e d i e n u n g s a n l e i t u n g D r e a m b o x D M 5 0 0 + deutsch Ihnen wird nun angezeigt, dass für Ihre Region ein gültiger Transponder gefunden wurde.
-
Page 31: Manuelle Sendersuche (Dm 500+-T)
B e d i e n u n g s a n l e i t u n g D r e a m b o x D M 5 0 0 + deutsch 20.3 Manuelle Sendersuche (DM 500+-T) Ist kein OSD Menü auf Ihrem Fernsehgerät gewählt (sichtbar), gelangen Sie durch Drücken der MENU-Taste in das OSD Hauptmenü. -
Page 32: Automatische Sendersuche (Dm 500+-C)
B e d i e n u n g s a n l e i t u n g D r e a m b o x D M 5 0 0 + deutsch Automatische Sendersuche (DM 500+-C) Ist kein OSD Menü auf Ihrem Fernsehgerät gewählt (sichtbar), gelangen Sie durch Drücken der MENU-Taste in das OSD Hauptmenü. - Page 33 B e d i e n u n g s a n l e i t u n g D r e a m b o x D M 5 0 0 + deutsch Ihnen wird nun angezeigt, dass für Ihren Kabelanbieter ein gültiger Transponder gefunden wurde.
-
Page 34: Manuelle Sendersuche (Dm 500+-C)
B e d i e n u n g s a n l e i t u n g D r e a m b o x D M 5 0 0 + deutsch 21.1 Manuelle Sendersuche (DM 500+-C) Ist kein OSD Menü auf Ihrem Fernsehgerät gewählt (sichtbar), gelangen Sie durch Drücken der MENU-Taste in das OSD Hauptmenü. -
Page 35: Satfinder (Spiegel Ausrichten, Dm 500+-S)
B e d i e n u n g s a n l e i t u n g D r e a m b o x D M 5 0 0 + deutsch Satfinder (Spiegel ausrichten, DM 500+-S) Ist kein OSD Menü auf Ihrem Fernsehgerät gewählt (sichtbar), gelangen Sie durch Drücken der MENU-Taste in das OSD Hauptmenü. -
Page 36: Satellitenkonfiguration (Dm 500+-S)
B e d i e n u n g s a n l e i t u n g D r e a m b o x D M 5 0 0 + deutsch Satellitenkonfiguration (DM 500+-S) Ist kein OSD Menü auf Ihrem Fernsehgerät gewählt (sichtbar), gelangen Sie durch Drücken der MENU-Taste in das OSD Hauptmenü. -
Page 37: Ein Einzelner Satellit - Direkte Verbindung (Dm 500+-S)
B e d i e n u n g s a n l e i t u n g D r e a m b o x D M 5 0 0 + deutsch 23.1 ein einzelner Satellit - direkte Verbindung (DM 500+-S) Diese Satellitenkonfiguration benötigen Sie, wenn Sie nur eine einzelne Satellitenposition mit einem Single Universal LNB empfangen möchten. -
Page 38: Zwei Satelliten Via Toneburst Ansteuerung (Dm 500+-S)
B e d i e n u n g s a n l e i t u n g D r e a m b o x D M 5 0 0 + deutsch 23.2 zwei Satelliten via Toneburst Ansteuerung (DM 500+-S) Diese Satellitenkonfiguration benötigen Sie, wenn Sie zwei Satellitenpositionen über jeweils ein Single Universal LNB für nur einen Teilnehmer, bzw. - Page 39 B e d i e n u n g s a n l e i t u n g D r e a m b o x D M 5 0 0 + deutsch 23.3 2 Satelliten via 22KHz (nur Highband, DM 500+-S) Diese Satellitenkonfiguration benötigen Sie, wenn Sie zwei Satellitenpositionen über jeweils ein Single Universal LNB für nur einen Teilnehmer, bzw.
-
Page 40: Zwei Satelliten Über Diseqc A/B (Dm 500+-S)
B e d i e n u n g s a n l e i t u n g D r e a m b o x D M 5 0 0 + deutsch 23.4 zwei Satelliten über DiSEqC A/B (DM 500+-S) Diese Satellitenkonfiguration benötigen Sie, wenn Sie zwei Satellitenpositionen über jeweils ein Twin Universal oder Quad Universal LNB für vier oder acht und mehr Teilnehmer, bzw. -
Page 41: Vier Satelliten Über Diseqc Opt A/B (Dm 500+-S)
B e d i e n u n g s a n l e i t u n g D r e a m b o x D M 5 0 0 + deutsch 23.5 vier Satelliten über DiSEqC OPT A/B (DM 500+-S) Diese Satellitenkonfiguration benötigen Sie, wenn Sie vier Satellitenpositionen über jeweils ein Single Universal oder Twin Universal LNB für vier oder acht und mehr Teilnehmer, bzw. -
Page 42: Mehrere Satelliten Mit Diseqc Rotor (Dm 500+-S)
B e d i e n u n g s a n l e i t u n g D r e a m b o x D M 5 0 0 + deutsch 23.6 mehrere Satelliten mit DiSEqC Rotor (DM 500+-S) Diese Satellitenkonfiguration benötigen Sie, wenn Sie mehrere Satellitenpositionen über einen DiSEqC 1.2 Rotor oder Stab mit einem Single Universal LNB für einen Teilnehmer, bzw. - Page 43 B e d i e n u n g s a n l e i t u n g D r e a m b o x D M 5 0 0 + deutsch TIPP: Wenn Sie die Sat/Positionsliste nicht erst abändern wollen, sich sicher sind, welche Satelliten Sie mit Ihrem Rotor, Stab oder Multifeedanlage empfangen können, dann wählen Sie bitte in der oberen...
- Page 44 B e d i e n u n g s a n l e i t u n g D r e a m b o x D M 5 0 0 + deutsch Sie sehen, dass der „DiSEqC - Modus“ nicht eingestellt ist.
-
Page 45: Motor Konfiguration (Dm 500+-S)
B e d i e n u n g s a n l e i t u n g D r e a m b o x D M 5 0 0 + deutsch Motor Konfiguration (DM 500+-S) Diese Satellitenkonfiguration benötigen Sie, wenn Sie mehrere Satellitenposition mit einem Single Universal LNB über einen Rotor / Stab empfangen möchten. -
Page 46: Beispieltabelle Für Diseqc 1.2 Rotor (Dm 500+-S)
B e d i e n u n g s a n l e i t u n g D r e a m b o x D M 5 0 0 + deutsch Nehmen Sie sich die Liste der eingebauten Satellitentabelle von Ihrem Rotor zur Hand und speichern Sie jede Satellitenposition, die Sie empfangen möchten, links in die Liste ein. -
Page 47: Sendersuche Pro Satellit (Automatische Sendersuche, Dm 500+-S)
B e d i e n u n g s a n l e i t u n g D r e a m b o x D M 5 0 0 + deutsch Sendersuche pro Satellit (Automatische Sendersuche, DM 500+-S) Ist kein OSD Menü... - Page 48 B e d i e n u n g s a n l e i t u n g D r e a m b o x D M 5 0 0 + deutsch Ihnen wird nun angezeigt, dass auf dem Satelliten ein gültiger Transponder gefunden wurde.
- Page 49 B e d i e n u n g s a n l e i t u n g D r e a m b o x D M 5 0 0 + deutsch Sie werden jetzt vom System gefragt, ob Sie noch einen weiteren Satelliten absuchen lassen wollen.
-
Page 50: Sendersuche Alle Satelliten (Automatische Multisat Sendersuche, Dm 500+-S)
B e d i e n u n g s a n l e i t u n g D r e a m b o x D M 5 0 0 + deutsch Sendersuche alle Satelliten (Automatische Multisat Sendersuche, DM 500+-S) Ist kein OSD Menü... - Page 51 B e d i e n u n g s a n l e i t u n g D r e a m b o x D M 5 0 0 + deutsch Mit der OK-Taste wechseln Sie zwischen den Optionen des jeweiligen Satelliten, die in der Multisat Sendersuche durchgeführt werden sollen.
- Page 52 B e d i e n u n g s a n l e i t u n g D r e a m b o x D M 5 0 0 + deutsch Hier sehen Sie das erste Menü für den ersten Satelliten, der abgesucht wird.
- Page 53 B e d i e n u n g s a n l e i t u n g D r e a m b o x D M 5 0 0 + deutsch Sie werden jetzt vom System gefragt, ob Sie noch einen weiteren Transponder absuchen lassen wollen.
-
Page 54: Manuelle Sendersuche (Dm 500+-S)
B e d i e n u n g s a n l e i t u n g D r e a m b o x D M 5 0 0 + deutsch Manuelle Sendersuche (DM 500+-S) Ist kein OSD Menü auf Ihrem Fernsehgerät gewählt (sichtbar), gelangen Sie durch Drücken der MENU-Taste in das OSD Hauptmenü. -
Page 55: Transponder Bearbeiten (Dm 500+-S)
B e d i e n u n g s a n l e i t u n g D r e a m b o x D M 5 0 0 + deutsch Transponder bearbeiten (DM 500+-S) Ist kein OSD Menü auf Ihrem Fernsehgerät gewählt (sichtbar), gelangen Sie durch Drücken der MENU-Taste in das OSD Hauptmenü. - Page 56 B e d i e n u n g s a n l e i t u n g D r e a m b o x D M 5 0 0 + deutsch Folgen Sie den Anweisungen in der Statuszeile dieses Menüs.
- Page 57 B e d i e n u n g s a n l e i t u n g D r e a m b o x D M 5 0 0 + deutsch Über dieses Menü können Sie einen Transponder dem Satelliten hinzufügen.
-
Page 58: Serviceverwaltung - Neues Bouquet Erstellen
B e d i e n u n g s a n l e i t u n g D r e a m b o x D M 5 0 0 + deutsch Serviceverwaltung - neues Bouquet erstellen Ist kein OSD Menü auf Ihrem Fernsehgerät gewählt (sichtbar), gelangen Sie durch Drücken der MENU-Taste in das OSD Hauptmenü. - Page 59 B e d i e n u n g s a n l e i t u n g D r e a m b o x D M 5 0 0 + deutsch Mittels der Zifferntasten auf Ihrer Fernbedienung werden die Buchstaben durch mehrmaliges Drücken ausgewählt.
-
Page 60: Serviceverwaltung - Services Zu Einem Bouquet Hinzufügen
B e d i e n u n g s a n l e i t u n g D r e a m b o x D M 5 0 0 + deutsch 30.1 Serviceverwaltung - Services zu einem Bouquet hinzufügen Lesen Sie bitte zuvor den Abschnitt Serviceverwaltung - neues Bouquet erstellen, um zu erfahren, wie Sie in dieses Menü... - Page 61 B e d i e n u n g s a n l e i t u n g D r e a m b o x D M 5 0 0 + deutsch Die Providerliste erscheint nun. Navigieren Sie auf den Provider ARD.
-
Page 62: Serviceverwaltung - Bouquets Bearbeiten
B e d i e n u n g s a n l e i t u n g D r e a m b o x D M 5 0 0 + deutsch 30.2 Serviceverwaltung - Bouquets bearbeiten Lesen Sie bitte zuvor den Abschnitt Serviceverwaltung - neues Bouquet erstellen, um zu erfahren, wie Sie in dieses Menü... - Page 63 B e d i e n u n g s a n l e i t u n g D r e a m b o x D M 5 0 0 + deutsch Mit der roten Optionstaste können Sie einen Sender aus dem Bouquet löschen.
-
Page 64: Jugendschutz Und Setupsperre
B e d i e n u n g s a n l e i t u n g D r e a m b o x D M 5 0 0 + deutsch Jugendschutz und Setupsperre Ist kein OSD Menü auf Ihrem Fernsehgerät gewählt (sichtbar), gelangen Sie durch Drücken der MENU-Taste in das OSD Hauptmenü. -
Page 65: Jugendschutz Aktivieren
B e d i e n u n g s a n l e i t u n g D r e a m b o x D M 5 0 0 + deutsch 31.1 Jugendschutz aktivieren Lesen Sie bitte zuvor den Abschnitt Jugendschutz und Setupsperre, um zu erfahren, wie Sie in dieses Menü... - Page 66 B e d i e n u n g s a n l e i t u n g D r e a m b o x D M 5 0 0 + deutsch Sie erhalten danach eine Quittierung vom System, dass die PIN geändert wurde.
-
Page 67: Jugendschutz Deaktivieren
B e d i e n u n g s a n l e i t u n g D r e a m b o x D M 5 0 0 + deutsch 31.2 Jugendschutz deaktivieren Lesen Sie bitte zuvor den Abschnitt Jugendschutz und Setupsperre, um zu erfahren, wie Sie in dieses Menü... -
Page 68: Setupsperre Aktivieren
B e d i e n u n g s a n l e i t u n g D r e a m b o x D M 5 0 0 + deutsch 31.3 Setupsperre aktivieren Lesen Sie bitte zuvor den Abschnitt Jugendschutz und Setupsperre, um zu erfahren, wie Sie in dieses Menü... - Page 69 B e d i e n u n g s a n l e i t u n g D r e a m b o x D M 5 0 0 + deutsch Sie erhalten danach eine Quittierung vom System, dass die PIN geändert wurde.
-
Page 70: Setupsperre Deaktivieren
B e d i e n u n g s a n l e i t u n g D r e a m b o x D M 5 0 0 + deutsch 31.4 Setupsperre deaktivieren Lesen Sie bitte zuvor den Abschnitt Jugendschutz und Setupsperre, um zu erfahren, wie Sie in dieses Menü... -
Page 71: Sender Sperren
B e d i e n u n g s a n l e i t u n g D r e a m b o x D M 5 0 0 + deutsch Sender sperren Lesen Sie bitte zuvor den Abschnitt Jugendschutz und Setupsperre, um zu erfahren, wie Sie den Jugendschutz aktivieren. -
Page 72: Sender Entsperren
B e d i e n u n g s a n l e i t u n g D r e a m b o x D M 5 0 0 + deutsch Sender entsperren Drücken Sie die OK-Taste, um die Kanalliste zu öffnen. -
Page 73: Bild Und Ton Einstellungen
B e d i e n u n g s a n l e i t u n g D r e a m b o x D M 5 0 0 + deutsch Bild und Ton Ist kein OSD Menü auf Ihrem Fernsehgerät gewählt (sichtbar), gelangen Sie durch Drücken der MENU-Taste in das OSD Hauptmenü. - Page 74 B e d i e n u n g s a n l e i t u n g D r e a m b o x D M 5 0 0 + deutsch Ändern Sie bei Bedarf mit den Navigationstasten links/rechts und der OK-Taste die Einstellungen.
-
Page 75: Tastatur
B e d i e n u n g s a n l e i t u n g D r e a m b o x D M 5 0 0 + deutsch Tastatur Ist kein OSD Menü auf Ihrem Fernsehgerät gewählt (sichtbar), gelangen Sie durch Drücken der MENU-Taste in das OSD Hauptmenü. -
Page 76: Benutzeroberfläche (Osd)
B e d i e n u n g s a n l e i t u n g D r e a m b o x D M 5 0 0 + deutsch Benutzeroberfläche Ist kein OSD Menü auf Ihrem Fernsehgerät gewählt (sichtbar), gelangen Sie durch Drücken der MENU-Taste in das OSD Hauptmenü. - Page 77 B e d i e n u n g s a n l e i t u n g D r e a m b o x D M 5 0 0 + deutsch Mit den Navigationstasten links/rechts können Sie die Transparenz, die Helligkeit und den Kontrast des OSD (On Screen Displays) verändern.
-
Page 78: Skin Einstellung
B e d i e n u n g s a n l e i t u n g D r e a m b o x D M 5 0 0 + deutsch 36.1 Skin Einstellung Lesen Sie bitte zuvor den Abschnitt Benutzeroberfläche, um zu erfahren, wie Sie in dieses Menü... -
Page 79: Verfügbare Skins
B e d i e n u n g s a n l e i t u n g D r e a m b o x D M 5 0 0 + deutsch 36.2 verfügbare Skins Bluenigma BIG Silver Metal Neutrino-style Screwed Stone Carbon... -
Page 80: Videotext Position Einrichten
B e d i e n u n g s a n l e i t u n g D r e a m b o x D M 5 0 0 + deutsch 36.3 Videotext Position einrichten Lesen Sie bitte zuvor den Abschnitt Benutzeroberfläche, um zu erfahren, wie Sie in dieses Menü... - Page 81 B e d i e n u n g s a n l e i t u n g D r e a m b o x D M 5 0 0 + deutsch Navigieren Sie auf den Button „Speichern“ und drücken Sie die OK-Taste, oder drücken Sie die grüne Optionstaste, um die Einstellungen zu speichern.
-
Page 82: Teletext (Tuxtxt)
B e d i e n u n g s a n l e i t u n g D r e a m b o x D M 5 0 0 + deutsch Teletext (TuxTxt, Videotext) Was ist TuxTxt? TuxTxt ist ein Plugin (eingebautes Zusatzprogramm), welches erlaubt den digitalen Videotext zu decodieren, ähnlich wie ein analoger Videotext-Decoder in einem Fernseher. - Page 83 B e d i e n u n g s a n l e i t u n g D r e a m b o x D M 5 0 0 + deutsch TuxTxt Konfigurationsmenü: Wird die Startseite 100 angezeigt, gelangen Sie durch Drücken der MENU-Taste in das Konfigurationsmenü...
-
Page 84: Experten Einstellungen
B e d i e n u n g s a n l e i t u n g D r e a m b o x D M 5 0 0 + deutsch Experten Einstellungen Ist kein OSD Menü auf Ihrem Fernsehgerät gewählt (sichtbar), gelangen Sie durch Drücken der MENU-Taste in das OSD Hauptmenü. - Page 85 B e d i e n u n g s a n l e i t u n g D r e a m b o x D M 5 0 0 + deutsch Keine Fehlermeldungen: Setzen Sie einen Haken mit der OK-Taste hinter diese Option, so werden Fehlermeldungen unterbunden, wie z.B.
-
Page 86: Kommunikation/Netzwerk (Lan Einrichten, Nfs Freigaben)
B e d i e n u n g s a n l e i t u n g D r e a m b o x D M 5 0 0 + deutsch 38.1 Kommunikation/Netzwerk (LAN einrichten, NFS Freigaben) Lesen Sie bitte zuvor den Abschnitt Experten Einstellungen, um zu erfahren, wie Sie in dieses Menü... - Page 87 B e d i e n u n g s a n l e i t u n g D r e a m b o x D M 5 0 0 + deutsch Benutzen Sie die Navigationstasten und die Zifferntasten, um die Werte einzugeben.
- Page 88 B e d i e n u n g s a n l e i t u n g D r e a m b o x D M 5 0 0 + deutsch Haben Sie die blaue Optionstaste im Kommunikation/Netzwerk-Menü...
-
Page 89: Ngrab - Streaming
B e d i e n u n g s a n l e i t u n g D r e a m b o x D M 5 0 0 + deutsch 38.2 NGrab - Streaming Lesen Sie bitte zuvor den Abschnitt Experten Einstellungen, um zu erfahren, wie Sie in dieses Menü... -
Page 90: Fernbedienung Einrichten
B e d i e n u n g s a n l e i t u n g D r e a m b o x D M 5 0 0 + deutsch 38.3 Fernbedienung einrichten Lesen Sie bitte zuvor den Abschnitt Experten Einstellungen, um zu erfahren, wie Sie in dieses Menü... -
Page 91: Werkseinstellungen
B e d i e n u n g s a n l e i t u n g D r e a m b o x D M 5 0 0 + deutsch 38.4 Werkseinstellungen Lesen Sie bitte zuvor den Abschnitt Experten Einstellungen, um zu erfahren, wie Sie in dieses Menü... -
Page 92: Timer
B e d i e n u n g s a n l e i t u n g D r e a m b o x D M 5 0 0 + deutsch Timer Ist kein OSD Menü auf Ihrem Fernsehgerät gewählt (sichtbar), gelangen Sie durch Drücken der MENU-Taste in das OSD Hauptmenü. -
Page 93: Information - Streaminformationen
B e d i e n u n g s a n l e i t u n g D r e a m b o x D M 5 0 0 + deutsch Informationen - Streaminformationen Ist kein OSD Menü auf Ihrem Fernsehgerät gewählt (sichtbar), gelangen Sie durch Drücken der MENU-Taste in das OSD Hauptmenü. -
Page 94: Information - Über
B e d i e n u n g s a n l e i t u n g D r e a m b o x D M 5 0 0 + deutsch Informationen - Über Lesen Sie bitte zuvor den Abschnitt Informationen - Streaminformationen, um zu erfahren, wie Sie in dieses Menü... -
Page 95: Technische Daten
B e d i e n u n g s a n l e i t u n g D r e a m b o x D M 5 0 0 + deutsch Technische Daten • 250 MHz IBM PowerPC Prozessor (350 MIPS) •... - Page 96 B e d i e n u n g s a n l e i t u n g D r e a m b o x D M 5 0 0 + deutsch Ethernet: 100 Mbit bi-direktionales Interface Funktion: Update der Betriebssoftware u. Vorprogrammierung Eingangsspannung: 12V Steckernetzteil 110-230V / 50-60Hz Wechselspannung +/- 15% Allgemeines:...
-
Page 97: Kontakt & Support Informationen
B e d i e n u n g s a n l e i t u n g D r e a m b o x D M 5 0 0 + deutsch Kontakt & Support Informationen Hauptfirmensitz & Vertrieb: Dream-Multimedia GmbH Pierbusch 24-26 44536 Lünen... -
Page 98: Service Begleitschein
DREAMBOX - Service Begleitschein Bitte komplett ausgefüllt der Ware beifügen und an Ihren Händler ( = Vertragspartner) zurücksenden Den Schein bitte unbedingt leserlich ausfüllen, um einen reibungs- und fehlerloseren Ablauf zu gewährleisten! Ohne Rechnungskopie kann keine Service-Abwicklung stattfinden! Bitte senden Sie nur die defekten Teile (ohne Zubehör) ein! - Festplatte bitte eingebaut lassen! Kunden-Nr.: Retourdatum: Name /Firma... -
Page 99: Copyright Hinweise
B e d i e n u n g s a n l e i t u n g D r e a m b o x D M 5 0 0 + deutsch Copyright Hinweise © Dream-Multimedia 2007. Alle Rechte vorbehalten. Das vorliegende Produkt-Paket enthält Dateien, die unter verschiedenen Lizenzen verbreitet werden, insbesondere unter einer Open Source Lizenz, der GNU General Public License. - Page 100 Dreambox DM 500+ S/C/T Bedienungsanleitung User Manual Digitaler Satellitenempfänger zum Empfang von freien Digital satellite receiver for free and encrypted und verschlüsselten DVB-Programmen. Digital Video Broadcasting (DVB). Communication-Port Kommunikations-Schnittstelle Smartcard Reader Smartcard Leser Linux OS Linux OS...
- Page 101 U s e r M a n u a l D r e a m b o x D M 5 0 0 + english T a b l e o f c o n t e n t s 1.
- Page 102 U s e r M a n u a l D r e a m b o x D M 5 0 0 + english 36. OSD settings ..........................- 76 - 36.1 Skin Setup........................... - 78 - 36.2 Available Skins........................- 79 - 36.3 Setting the teletext (TuxText) position ..................
- Page 103 U s e r M a n u a l D r e a m b o x D M 5 0 0 + english V i e w s Front panel Smartcard Reader Standby Standby LED RC LED On / off Rear panel DM 500+-C/T Audio output...
-
Page 104: Explanation Front Panel
U s e r M a n u a l D r e a m b o x D M 5 0 0 + english E x p l a n a t i o n f r o n t p a n e l Smartcard Reader Insert your Dreamcrypt Smartcard with the golden chip facing down and forward into the Smartcard reader. - Page 105 U s e r M a n u a l D r e a m b o x D M 5 0 0 + english Serial interface (RS232C, Sub-D, 9-pin) The Serial Port is used to update the operating system. Please connect a serial null modem cable here.
-
Page 106: Safety Instructions
U s e r M a n u a l D r e a m b o x D M 5 0 0 + english S a f e t y I n s t r u c t i o n s Please read the safety instructions completely and carefully, before using the Dreambox. -
Page 107: Shut Down
U s e r M a n u a l D r e a m b o x D M 5 0 0 + english S h u t D o w n In case your Dreambox is in use for a longer period of time disconnect the power plug from the power outlet. -
Page 108: Disposal Instructions
U s e r M a n u a l D r e a m b o x D M 5 0 0 + english D i s p o s a l i n s t r u c t i o n s The packaging of the Dreambox only consists of reusable materials. -
Page 109: Packaging Contents
U s e r M a n u a l D r e a m b o x D M 5 0 0 + english P a c k a g i n g c o n t e n t s Please check the completeness of the box. - Page 110 U s e r M a n u a l D r e a m b o x D M 5 0 0 + english R e m o t e C o n t r o l MUTE-Button Standby-Button Numeric Keypad Arrow-right-Button Arrow-left-Button...
-
Page 111: Important Notes About Operation
U s e r M a n u a l D r e a m b o x D M 5 0 0 + english Important notes about operation All functions of the Dreambox can be controlled via OSD-Menu (On-Screen-Display). This makes the handling of the Dreambox very easy for you. -
Page 112: Remote Control Buttons
U s e r M a n u a l D r e a m b o x D M 5 0 0 + english Remote Control Buttons MENU-Button If you are in TV- or RADIO-Mode, pressing this button will bring up the OSD main menu. The OSD main menu has the following options: - (1) TV Mode - (2) Radio Mode... - Page 113 U s e r M a n u a l D r e a m b o x D M 5 0 0 + english Arrow-left-Button Arrow-right-Button These Buttons enable to jump back or forwards through the Playlist. The Playlist contains the last chosen services, which have been selected.
-
Page 114: Turning Your Dreambox On And Off
U s e r M a n u a l D r e a m b o x D M 5 0 0 + english TEXT-Button The TEXT-Button activates the Teletext (TuxTxt). If you are in the stations list, pressing this button will directly take you to the FILE-Mode. -
Page 115: Sleeptimer
U s e r M a n u a l D r e a m b o x D M 5 0 0 + english Sleeptimer Press the Power-Button for at least 3 seconds, select "set sleeptimer" to access this menu. This is he sleeptimer menu. - Page 116 U s e r M a n u a l D r e a m b o x D M 5 0 0 + english Selecting this symbol takes you to the shutdown menu. Selecting the option ‚Shutdown now’ will turn you Dreambox off.
-
Page 117: Infobar
U s e r M a n u a l D r e a m b o x D M 5 0 0 + english Infobar The Infobar appears and disappears by pressing the OK-Button once, if no OSD menu is shown on your screen. -
Page 118: Infobar - Epg
U s e r M a n u a l D r e a m b o x D M 5 0 0 + english 17.1 Infobar - EPG (Electronic Program Guide) The red dot in the Infobar appears if the selected station transmits EPG information. If no OSD menu is visible on your screen and you are in TV mode press the TV-Button to access the service list. - Page 119 U s e r M a n u a l D r e a m b o x D M 5 0 0 + english Pressing the green Options-Button will show the “Timer Edit” menu. Use the Navigation-Buttons to reach the desired option and use the OK-Button to open up the drop down menus.
-
Page 120: Infobar - Sub Services
U s e r M a n u a l D r e a m b o x D M 5 0 0 + english If you selected Multi-EPG when you were asked for the EPG style you will see this view. Use the Navigation-Buttons to navigate to the desired event. -
Page 121: Infobar - Audio Tracks
U s e r M a n u a l D r e a m b o x D M 5 0 0 + english 17.3 Infobar – Audio tracks The yellow dot in the Infobar appears if the selected station transmits multiple Audio tracks. Pressing the yellow Options-Button in TV or Radio mode will reveal the audio menu of the service. -
Page 122: Setting Osd Language
U s e r M a n u a l D r e a m b o x D M 5 0 0 + english Setting OSD language If no OSD menu is visible on your screen, press the Menu-Button to open the main OSD menu. -
Page 123: Setting The Time Zone
U s e r M a n u a l D r e a m b o x D M 5 0 0 + english Setting the time zone If no OSD menu is visible on your screen, press the Menu-Button to open the main OSD menu. - Page 124 U s e r M a n u a l D r e a m b o x D M 5 0 0 + english The “Time Zone Setup” menu will open up. Press the OK-Button to get open the list of time zones.
-
Page 125: Manual Time Correction
U s e r M a n u a l D r e a m b o x D M 5 0 0 + english 19.1 Manual time correction Please read the section Setting the time zone to learn how to get into this menu. Navigate to the option “Time Correction”... -
Page 126: Signal Strength (Adjusting Your Antenna, Dm 500+-T)
U s e r M a n u a l D r e a m b o x D M 5 0 0 + english Signal strength (Adjusting your antenna, DM 500+-T) If no OSD menu is visible on your screen, press the Menu-Button to open the main OSD menu. -
Page 127: Disable 5V (Dm 500+-T)
U s e r M a n u a l D r e a m b o x D M 5 0 0 + english 20.1 Disable 5V (DM 500+-T) If no OSD menu is visible on your screen, press the Menu-Button to open the main OSD menu. -
Page 128: Automatic Transponder Scan (Dm 500+-T)
U s e r M a n u a l D r e a m b o x D M 5 0 0 + english 20.2 Automatic transponder scan (DM 500+-T) If no OSD menu is visible on your screen, press the Menu-Button to open the main OSD menu. - Page 129 U s e r M a n u a l D r e a m b o x D M 5 0 0 + english You now should see that a valid transponder has been found and the checkboxes in front of “LOCK” and “SYNC”...
-
Page 130: Manual Transponder Scan (Dm 500+-T)
U s e r M a n u a l D r e a m b o x D M 5 0 0 + english 20.3 Manual Transponder scan (DM 500+-T) If no OSD menu is visible on your screen, press the Menu-Button to open the main OSD menu. -
Page 131: Automatic Transponder Scan (Dm 500+-C)
U s e r M a n u a l D r e a m b o x D M 5 0 0 + english Automatic transponder scan (DM 500+-C) If no OSD menu is visible on your screen, press the Menu-Button to open the main OSD menu. - Page 132 U s e r M a n u a l D r e a m b o x D M 5 0 0 + english You now should see that a valid transponder has been found and the checkboxes in front of “LOCK” and “SYNC”...
-
Page 133: Manual Transponder Scan (Dm 500+-C)
U s e r M a n u a l D r e a m b o x D M 5 0 0 + english 21.1 Manual transponder scan (DM 500+-C) If no OSD menu is visible on your screen, press the Menu-Button to open the main OSD menu. -
Page 134: Satfinder (Adjusting Your Dish, Dm 500+-S)
U s e r M a n u a l D r e a m b o x D M 5 0 0 + english Satfinder (Adjusting your dish, DM 500+-S) If no OSD menu is visible on your screen, press the Menu-Button to open the main OSD menu. -
Page 135: Satellite Configuration
U s e r M a n u a l D r e a m b o x D M 5 0 0 + english Satellite configuration If no OSD menu is visible on your screen, press the Menu-Button to open the main OSD menu. -
Page 136: One Single Satellite - Direct Connection
U s e r M a n u a l D r e a m b o x D M 5 0 0 + english 23.1 one single satellite – direct connection Use this type of configuration if you want to receive a single satellite with a Single Universal LNB. -
Page 137: Satellites Via Toneburst
U s e r M a n u a l D r e a m b o x D M 5 0 0 + english 23.2 2 satellites via Toneburst Use this type of configuration if you want to receive two satellites from one LNB each. It does not matter if you use one or two dishes to achieve this. -
Page 138: Satellites Via 22Khz (Highband Only)
U s e r M a n u a l D r e a m b o x D M 5 0 0 + english 23.3 2 satellites via 22KHz (Highband only) Use this type of configuration if you want to receive two satellites from one LNB each. It does not matter if you use one or two dishes to achieve this. -
Page 139: Satellites Via Diseqc A/B
U s e r M a n u a l D r e a m b o x D M 5 0 0 + english 23.4 2 satellites via DiSEqC A/B Use this type of configuration if you want to receive two satellites from one Twin Universal or Quad Universal LNB. -
Page 140: Satellites Via Diseqc Opt A/B
U s e r M a n u a l D r e a m b o x D M 5 0 0 + english 23.5 4 satellites via DiSEqC OPT A/B Use this type of configuration if you want to receive four satellites from one Twin Universal or Quad Universal LNB. -
Page 141: Many Satellites Via Diseqc Rotor
U s e r M a n u a l D r e a m b o x D M 5 0 0 + english 23.6 Many satellites via DiSEqC Rotor Use this type of configuration if you want to receive many satellites with a DiSEqC 1.2 Rotor or Stab from a Single Universal LNB. - Page 142 U s e r M a n u a l D r e a m b o x D M 5 0 0 + english Hint: If you do not want to change the satellite position list before hand, just select the option “Single satellite – direct connection”...
- Page 143 U s e r M a n u a l D r e a m b o x D M 5 0 0 + english As you can see, the „DiSEqC - Mode“ is not set yet. Please leave the “Toneburst” mode as it is. Press the number “2”...
-
Page 144: Motor Setup
U s e r M a n u a l D r e a m b o x D M 5 0 0 + english Motor Setup Use this type of configuration if you want to receive many satellites with a Rotor or Stab from a Single Universal LNB. -
Page 145: Example Table For The Diseqc 1.2 Rotor (Sg21000)
U s e r M a n u a l D r e a m b o x D M 5 0 0 + english Take the list of preset satellite positions of your rotor, which can usually be found in the rotor’s manual and add each satellite that you want to receive in the list in the left. -
Page 146: Automatic Transponder Scan (Dm 500+-S)
U s e r M a n u a l D r e a m b o x D M 5 0 0 + english Automatic transponder scan (DM 500+-S) If no OSD menu is visible on your screen, press the Menu-Button to open the main OSD menu. - Page 147 U s e r M a n u a l D r e a m b o x D M 5 0 0 + english You now should see that a valid transponder has been found and the checkboxes in front of “LOCK” and “SYNC”...
- Page 148 U s e r M a n u a l D r e a m b o x D M 5 0 0 + english You will now be prompted if you want to scan another satellite. Press the green Options-Button if that is the case and you have setup another satellite in the satellite list.
-
Page 149: Automatic Multisat Scan (Dm 500+-S)
U s e r M a n u a l D r e a m b o x D M 5 0 0 + english Automatic multisat scan (DM 500+-S) If no OSD menu is visible on your screen, press the Menu-Button to open the main OSD menu. - Page 150 U s e r M a n u a l D r e a m b o x D M 5 0 0 + english Pressing the OK-Button will toggle between the available scan options. Setting the multisat scan option to “all” will scan for all available services no matter if they are free or encrypted.
- Page 151 U s e r M a n u a l D r e a m b o x D M 5 0 0 + english The menu for the first scanned satellite is depicted on the left. The menu for the second scanned satellite is depicted on the left.
- Page 152 U s e r M a n u a l D r e a m b o x D M 5 0 0 + english The System will now ask you, if you want to scan any other transponders. Press the red Options-Button to quit the transponder scan.
-
Page 153: Manual Transponder Scan (Dm 500+-S)
U s e r M a n u a l D r e a m b o x D M 5 0 0 + english Manual transponder scan (DM 500+-S) If no OSD menu is visible on your screen, press the Menu-Button to open the main OSD menu. -
Page 154: Edit A Transponder (Dm 500+-S)
U s e r M a n u a l D r e a m b o x D M 5 0 0 + english Edit a transponder (DM 500+-S) If no OSD menu is visible on your screen, press the Menu-Button to open the main OSD menu. - Page 155 U s e r M a n u a l D r e a m b o x D M 5 0 0 + english Follow the instructions in this menu. Press the Navigation-Buttons to reach the desired option and use the OK-Button to change them. Network search: The NIT holds the Information about the Satellites and the TV/Radio- Programs.
- Page 156 U s e r M a n u a l D r e a m b o x D M 5 0 0 + english Through this menu you can a transponder to a satellite. Using the Numeric Keypad of your remote control enter the transponder frequency and symbol rate.
-
Page 157: Service Organizing - Adding A New Bouquet
U s e r M a n u a l D r e a m b o x D M 5 0 0 + english Service organizing – Adding a new Bouquet If no OSD menu is visible on your screen, press the Menu-Button to open the main OSD menu. - Page 158 U s e r M a n u a l D r e a m b o x D M 5 0 0 + english Using the Numeric Keypad on your remote control and pressing the numbers several times will let you choose the desired letters and numbers.
-
Page 159: Service Organizing - Adding Services To An Existing Bouquet
U s e r M a n u a l D r e a m b o x D M 5 0 0 + english 30.1 Service organizing – Adding services to an existing Bouquet Please read the section Service organizing – Adding a new Bouquet to learn how to get into this menu. - Page 160 U s e r M a n u a l D r e a m b o x D M 5 0 0 + english The providerlist will show up. In our example we will choose the provider “ARD”. Press the OK-Button. You now see the services that are provided by “ARD”.
-
Page 161: Service Organizing - Editing A Bouquet
U s e r M a n u a l D r e a m b o x D M 5 0 0 + english 30.2 Service organizing – Editing a Bouquet Please read the section Service organizing – Adding a new Bouquet to learn how to get into this menu. - Page 162 U s e r M a n u a l D r e a m b o x D M 5 0 0 + english Pressing the red Options-Button will delete the service from the Bouquet. Attention: This will happen without question if you really want to do it! Pressing the green Options-Button will pick up the selected service and enable you to move its position...
-
Page 163: Parental Lock And Setup Lock
U s e r M a n u a l D r e a m b o x D M 5 0 0 + english Parental lock and Setup lock If no OSD menu is visible on your screen, press the Menu-Button to open the main OSD menu. -
Page 164: Activating The Parental Lock
U s e r M a n u a l D r e a m b o x D M 5 0 0 + english 31.1 Activating the parental lock Please read the section Parental lock and Setup lock to learn how to get into this menu. Check the checkbox in front of “Parental lock”... - Page 165 U s e r M a n u a l D r e a m b o x D M 5 0 0 + english If everything went right you will be prompted that your PIN has been changed. Press the OK-Button. If the PIN you entered twice are not the same you will be prompted this error message.
-
Page 166: Deactivating The Parental Lock
U s e r M a n u a l D r e a m b o x D M 5 0 0 + english 31.2 Deactivating the parental lock Please read the section Parental lock and Setup lock to learn how to get into this menu. Uncheck the checkbox in front of “Parental lock”... -
Page 167: Activating The Setup Lock
U s e r M a n u a l D r e a m b o x D M 5 0 0 + english 31.3 Activating the setup lock Please read the section Parental lock and Setup lock to learn how to get into this menu. Check the checkbox in front of “Setup lock”... - Page 168 U s e r M a n u a l D r e a m b o x D M 5 0 0 + english If everything went right you will be prompted that your PIN has been changed. Press the OK-Button. If the PIN you entered twice are not the same you will be prompted this error message.
-
Page 169: Deactivating The Setup Lock
U s e r M a n u a l D r e a m b o x D M 5 0 0 + english 31.4 Deactivating the setup lock Please read the section Parental lock and Setup lock to learn how to get into this menu. Uncheck the checkbox in front of “Setup lock”... -
Page 170: Locking A Service
U s e r M a n u a l D r e a m b o x D M 5 0 0 + english Locking a service Please read the section Parental lock and Setup lock to learn how activate the parental lock. -
Page 171: Unlocking A Service
U s e r M a n u a l D r e a m b o x D M 5 0 0 + english Unlocking a service Press the OK-Button to open the service list. Navigate to the service you want to unlock and press the Menu-Button. -
Page 172: Audio/Video Settings
U s e r M a n u a l D r e a m b o x D M 5 0 0 + english Audio/Video settings If no OSD menu is visible on your screen, press the Menu-Button to open the main OSD menu. - Page 173 U s e r M a n u a l D r e a m b o x D M 5 0 0 + english Use the Navigation-Buttons left and right and the OK-Button to change the values. Color format: CVBS(FBAS), RGB (Red, Green, Blue separated), SVideo (Color- and Brightness signal separated) and YPbPr (Component signal e.g.
-
Page 174: Keyboard
U s e r M a n u a l D r e a m b o x D M 5 0 0 + english Keyboard If no OSD menu is visible on your screen, press the Menu-Button to open the main OSD menu. -
Page 175: Osd Settings
U s e r M a n u a l D r e a m b o x D M 5 0 0 + english OSD settings If no OSD menu is visible on your screen, press the Menu-Button to open the main OSD menu. - Page 176 U s e r M a n u a l D r e a m b o x D M 5 0 0 + english Using the Navigation-Buttons left and right you can change the transparency, brightness and contrast settings of the OSD (On Screen Display). Alpha: The “Alpha”...
-
Page 177: Skin Setup
U s e r M a n u a l D r e a m b o x D M 5 0 0 + english 36.1 Skin Setup Please read the section OSD settings to learn how to get into this menu. A skin changes the appearance of the OSD. -
Page 178: Available Skins
U s e r M a n u a l D r e a m b o x D M 5 0 0 + english 36.2 Available Skins Bluenigma BIG Silver Metal Neutrino-style Screwed Stone Carbon BlueQT Simple and Stylish The skin Simple and Stylish 16:9 looks just like the Simple and Stylish skin. -
Page 179: Setting The Teletext (Tuxtext) Position
U s e r M a n u a l D r e a m b o x D M 5 0 0 + english 36.3 Setting the teletext (TuxText) position Please read the section OSD settings to learn how to get into this menu. What is TuxText? TuxText is a Plugin (additional Software), which allows the Dreambox to decode the digital Teletext. - Page 180 U s e r M a n u a l D r e a m b o x D M 5 0 0 + english Press the green Options-Button to save your settings. You will be taken back to the “System” menu.
-
Page 181: Teletext (Tuxtext)
U s e r M a n u a l D r e a m b o x D M 5 0 0 + english Teletext (TuxText) What is TuxText? TuxText is a Plugin (additional Software), which allows the Dreambox to decode the digital Teletext. - Page 182 U s e r M a n u a l D r e a m b o x D M 5 0 0 + english TuxText configuration menu: If teletext page 100 is shown you can press the MENU-Button to enter the configuration menu of the TuxText.
-
Page 183: Expert Setup
U s e r M a n u a l D r e a m b o x D M 5 0 0 + english Expert setup If no OSD menu is visible on your screen, press the Menu-Button to open the main OSD menu. - Page 184 U s e r M a n u a l D r e a m b o x D M 5 0 0 + english Hide error windows: If enabled no more error messages, i.e.: service not found, will be shown. Automatically show Infobar: If enabled the Infobar will be shown every time a new show starts.
-
Page 185: Communications Setup (Setting Up Lan, Nfs Shares)
U s e r M a n u a l D r e a m b o x D M 5 0 0 + english 38.1 Communication setup (Setting up LAN, NFS shares) Please read the section Expert setup to learn how to get into this menu. Navigate to the option “Communication setup”... - Page 186 U s e r M a n u a l D r e a m b o x D M 5 0 0 + english Use the Navigation-Buttons and the Numeric Keypad to enter or change the values. Enter the IP address here. DHCP: If enabled your Dreambox will get its IP from a DHCP server.
- Page 187 U s e r M a n u a l D r e a m b o x D M 5 0 0 + english Pressing the blue Options-Button in the “Communication setup” menu will take you to the “Mount Manager” menu. You can setup up to eight different configurations to connect your Dreambox to shared folders on your PC.
-
Page 188: Ngrab - Streaming Setup
U s e r M a n u a l D r e a m b o x D M 5 0 0 + english 38.2 NGrab - Streaming Setup Please read the section Expert setup to learn how to get into this menu. In this menu you can set the IP address and port number of the NGrab server. -
Page 189: Remote Control Setup
U s e r M a n u a l D r e a m b o x D M 5 0 0 + english 38.3 Remote control setup Please read the section Expert setup to learn how to get into this menu. Navigate to the option “Remote control”... -
Page 190: Reset To Factory Defaults
U s e r M a n u a l D r e a m b o x D M 5 0 0 + english 38.4 Reset to factory defaults Please read the section Expert setup to learn how to get into this menu. Navigate to the option “Remote control”... -
Page 191: Timer
U s e r M a n u a l D r e a m b o x D M 5 0 0 + english Timer If no OSD menu is visible on your screen, press the Menu-Button to open the main OSD menu. -
Page 192: Information - Streaminformation
U s e r M a n u a l D r e a m b o x D M 5 0 0 + english Information - Streaminformation If no OSD menu is visible on your screen, press the Menu-Button to open the main OSD menu. -
Page 193: Information - About
U s e r M a n u a l D r e a m b o x D M 5 0 0 + english Information - About Please read the section Information – Streaminformation to learn how to get into this menu. -
Page 194: Technical Data
U s e r M a n u a l D r e a m b o x D M 5 0 0 + english Technical data • 250 MHz IBM PowerPC Processor (350 MIPS) • Linux Operating System, Open Source •... - Page 195 U s e r M a n u a l D r e a m b o x D M 5 0 0 + english Ethernet: 100 Mbit compatible, bi-directional interface Function Update of Firmware and Preprogramming Input voltage: 12V power converter 110-230V / 50-60Hz AC +/- 15% Physical specification: Ambient Temperature +15°C...+35°C Humidity <...
-
Page 196: Contact & Support Information
U s e r M a n u a l D r e a m b o x D M 5 0 0 + english Contact & support information Headquarter & Distribution: Dream-Multimedia GmbH Pierbusch 24-26 44536 Lünen Germany Dealer’s Hotline: (Dealers only) 3 85 85 90 112 Tel.: +49 (0)180 -... -
Page 197: Service Slip
DREAMBOX - Service Slip Please fill out this from completely and return it to your dealer (= contractor) Please write legible to ensure a quick and problem-free progess! If you do not attach a copy of your invoice no service will take place! Please only send the defective parts without any accessories! - Leave the HDD installed! Customer number: Returndate:... -
Page 198: Copyright Notes
U s e r M a n u a l D r e a m b o x D M 5 0 0 + english Copyright Notes © Dream-Multimedia 2007. All rights reserved. This product contains files that are distributed under different licenses, especially a Open Source License, the GNU General Public License. -
Page 199: Gnu General Public License
GNU GENERAL PUBLIC LICENSE Version 2, June 1991 Copyright (C) 1989, 1991 Free Software Foundation, Inc. 51 Franklin Street, Fifth Floor, Boston, MA 02110-1301, USA Everyone is permitted to copy and distribute verbatim copies of this license document, but changing it is not allowed. Preamble The licenses for most software are designed to take away your freedom to share and change it. - Page 200 2. You may modify your copy or copies of the Program or any portion of it, thus forming a work based on the Program, and copy and distribute such modifications or work under the terms of Section 1 above, provided that you also meet all of these conditions: a) You must cause the modified files to carry prominent notices stating that you changed the files and the date of any change.
- Page 201 6. Each time you redistribute the Program (or any work based on the Program), the recipient automatically receives a license from the original licensor to copy, distribute or modify the Program subject to these terms and conditions. You may not impose any further restrictions on the recipients' exercise of the rights granted herein. You are not responsible for enforcing compliance by third parties to this License.
Need help?
Do you have a question about the DM500 PLUS S and is the answer not in the manual?
Questions and answers