Table of Contents
Advertisement
Quick Links
Advertisement
Table of Contents

Related Manuals for IBM 72335LU - System x3850 M2


Summary of Contents for IBM 72335LU - System x3850 M2
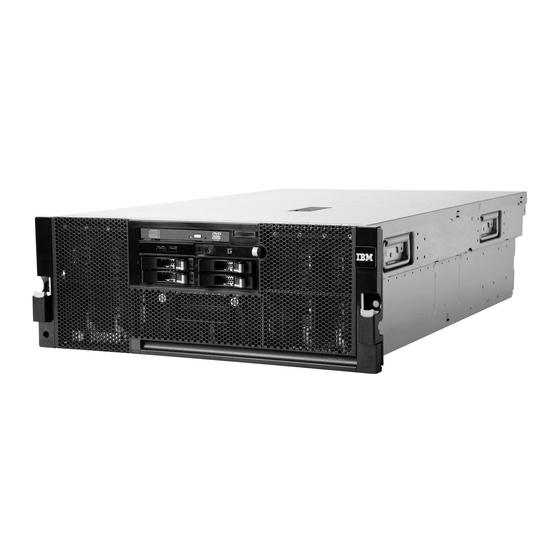
- Page 1 IBM System x3850 M2 and System x3950 M2 Type 7141 User’s Guide...
- Page 3 IBM System x3850 M2 and System x3950 M2 Type 7141 User’s Guide...
- Page 4 Note: Before using this information and the product it supports, read the general information in “Notices,” on page 73. First Edition (November 2007) © Copyright International Business Machines Corporation 2007. All rights reserved. US Government Users Restricted Rights – Use, duplication or disclosure restricted by GSA ADP Schedule Contract with IBM Corp.
-
Page 5: Table Of Contents
Reliability, availability, and serviceability ....7 IBM Director ......8 The UpdateXpress program . - Page 6 Using the LSI Logic MegaRAID Storage Manager program ..69 Chapter 4. Updating IBM Director ....71 Appendix.
-
Page 7: Safety
Vor der Installation dieses Produkts die Sicherheitshinweise lesen. Prima di installare questo prodotto, leggere le Informazioni sulla Sicurezza. Les sikkerhetsinformasjonen (Safety Information) før du installerer dette produktet. Antes de instalar este produto, leia as Informações sobre Segurança. © Copyright IBM Corp. 2007... - Page 8 Be sure to read all caution and danger statements in this document before you perform the procedures. Read any additional safety information that comes with the server or optional device before you install the device. IBM System x3850 M2 and System x3950 M2 Type 7141: User’s Guide...
- Page 9 Statement 1: DANGER Electrical current from power, telephone, and communication cables is hazardous. To avoid a shock hazard: v Do not connect or disconnect any cables or perform installation, maintenance, or reconfiguration of this product during an electrical storm. v Connect all power cords to a properly wired and grounded electrical outlet.
- Page 10 Statement 2: CAUTION: When replacing the lithium battery, use only IBM Part Number 15F8409 or an equivalent type battery recommended by the manufacturer. If your system has a module containing a lithium battery, replace it only with the same module type made by the same manufacturer.
- Page 11 Statement 4: ≥ 18 kg (39.7 lb) ≥ 32 kg (70.5 lb) ≥ 55 kg (121.2 lb) CAUTION: Use safe practices when lifting. Statement 5: CAUTION: The power control button on the device and the power switch on the power supply do not turn off the electrical current supplied to the device.
- Page 12 If you suspect a problem with one of these parts, contact a service technician. Statement 26: CAUTION: Do not place any object on top of rack-mounted devices. Statement 27: CAUTION: Hazardous moving parts are nearby. IBM System x3850 M2 and System x3950 M2 Type 7141: User’s Guide...
-
Page 13: Chapter 1. The System X3850 M2 And System X3950 M2 Server
Safety Information This document is in PDF on the IBM System x Documentation CD. It contains translated caution and danger statements. Each caution and danger statement that appears in the documentation has a number that you can use to locate the corresponding statement in your language in the Safety Information document. -
Page 14: Notices And Statements In This Document
This document is in PDF on the IBM System x Documentation CD. It contains information to help you solve problems yourself, and it contains information for service technicians. Depending on the server model, additional documentation might be included on the IBM System x Documentation CD. -
Page 15: Features And Specifications
Features and specifications The following information is a summary of the features and specifications of the server. Depending on the server model, some features might not be available, or some specifications might not apply. Notes: 1. Racks are marked in vertical increments of 4.45 cm (1.75 inches). Each increment is referred to as a unit, or “U.”... - Page 16 Sound power, operating: 6.6 bel – Minimum: 0.39 kVA System BIOS, FPGA, diagnostics, service declared – Typical: 0.8 kVA processor, BMC, and SAS microcode – Maximum: 1.65 kVA IBM System x3850 M2 and System x3950 M2 Type 7141: User’s Guide...
-
Page 17: What Your Server Offers
IBM Director documentation on the IBM Director CD. v IBM Electronic Service Agent IBM Electronic Service Agent is a software tool that monitors the server for hardware error events and automatically submits electronic service requests to the IBM Support Center. Also, it can collect and transmit system configuration information on a scheduled basis so that the information is available to you and your support representative. - Page 18 IBM Director. For more information, including the required levels of IBM Director and Active Energy Manager, see the IBM Director documentation on the IBM Director CD, or go to http://www.ibm.com/servers/eserver/xseries/systems_management/ ibm_director /extensions/.
-
Page 19: Reliability, Availability, And Serviceability
SMP capability. v Systems-management capabilities The server supports an IBM Remote Supervisor Adapter II. When this adapter is used with the systems-management software that comes with the server, you can manage the functions of the server locally and remotely. The Remote Supervisor Adapter II also provides system monitoring, event recording, and dial-out alert capability. -
Page 20: Ibm Director
Ease of use, training, and setup. IBM Director also provides an extensible platform that supports advanced server tools that are designed to reduce the total cost of managing and supporting IBM System x3850 M2 and System x3950 M2 Type 7141: User’s Guide... -
Page 21: The Updatexpress Program
Reduced service and support costs For more information about IBM Director, see the documentation on the IBM Director CD that comes with the server, the IBM Director Information Center at http://publib.boulder.ibm.com/infocenter/eserver/v1r2/topic/diricinfo_all/ diricinfoparent.html, and the IBM System x and xSeries Systems Management Web page at http://www.ibm.com/systems/management/, which presents an overview of... -
Page 22: Server Controls, Connectors, Leds, And Power
Information LED Ethernet icon LED System-error LED Locator button/locator LED Ethernet port activity LEDs Power-control button cover The following controls and LEDs are on the operator information panel: IBM System x3850 M2 and System x3950 M2 Type 7141: User’s Guide... - Page 23 Locator LED: Use this LED to visually locate the server among other servers. You can use IBM Director to light this LED remotely or press the locator button to light the LED manually. This LED is also lit during startup.
-
Page 24: Rear View
Locator LED: Use this LED to visually locate the server among other servers. You can use IBM Director to light this LED remotely or press the locator button to light the LED manually. This LED is also lit during startup. - Page 25 (BMC) and is assigned two MAC addresses. For information about configuring the controller, see the Broadcom NetXtreme Gigabit Ethernet Software CD that comes with the server. Remote Supervisor Adapter II controls, connectors, and LEDs: These controls, connectors, and LEDs are used for system management information and control. Adapter activity LED Power LED Reset button (recessed)
-
Page 26: Server Power Features
You can turn on the server and start the operating system by pressing the power-control button. The server can also be turned on in any of the following ways: IBM System x3850 M2 and System x3950 M2 Type 7141: User’s Guide... -
Page 27: Turning Off The Server
v If a power failure occurs while the server is turned on, the server will restart automatically when power is restored. v If the server is installed in a static partition, you can turn on the server and start the operating system by pressing the power-control button on the primary node in the partition. - Page 28 If the Wake on LAN feature turned on the server, the Wake on LAN feature can turn off the server. v You can turn off the server through a request from the service processor. IBM System x3850 M2 and System x3950 M2 Type 7141: User’s Guide...
-
Page 29: Chapter 2. Installing Optional Devices
Media hood EIA mounting bracket (left) DVD interposer card Chassis Media hood DVD drive air baffle Hard disk drive filler EIA mounting bracket (right) Bezel Operator information panel Front USB Hard disk drive © Copyright IBM Corp. 2007... - Page 30 Top cover Remote Supervisor Adapter II PCI divider with battery holder Adapter-retention bracket ServeRAID-MR10k controller PCI divider PCI switch-card assembly Hot-swap power supply I/O board shuttle assembly IBM System x3850 M2 and System x3950 M2 Type 7141: User’s Guide...
-
Page 31: Memory-Card Dimm Connectors
Memory-card DIMM connectors The following illustration shows the DIMM connectors on the memory card. DIMM 1 DIMM 2 DIMM 3 DIMM 4 DIMM 5 DIMM 6 DIMM 7 DIMM 8 Memory-card LEDs The following illustration shows the LEDs on the memory card. Memory hot-swap enabled LED Visible from top of Memory-card/DIMM error LED... -
Page 32: Microprocessor-Board Connectors
Microprocessor 4 VRM 3 VRM 4 Microprocessor 1 Microprocessor 2 Memory card 1 Memory card 4 Memory card 3 Memory card 2 VRM 2 VRM 1 Scalability key IBM System x3850 M2 and System x3950 M2 Type 7141: User’s Guide... -
Page 33: Microprocessor-Board Leds
Microprocessor-board LEDs The following illustration shows the LEDs on the microprocessor board. FPGA heartbeat BMC heartbeat Board fault LED Microprocessor 3 Microprocessor 4 error LED error LED VRM 3 error LED VRM 4 error LED Microprocessor 1 Microprocessor 2 error LED error LED VRM 1 error LED VRM 2 error LED... -
Page 34: Microprocessor-Board Jumpers
Note: Only use the force BMC update jumper if the normal firmware update procedure fails and the operational firmware image is corrupted. Use of the force BMC update jumper disables normal baseboard management controller operation. IBM System x3850 M2 and System x3950 M2 Type 7141: User’s Guide... -
Page 35: I/O Board Connectors
I/O board connectors The following illustration shows the connectors on the I/O board. Remote Supervisor Adapter II Internal USB ServeRAID-MR10K Hot-plug switch card backplane PCI Express x8 signal (x8 lanes) slot 1 PCI Express x8 (x8 lanes) slot 2 Remote Supervisor PCI Express x8 Adapter II... -
Page 36: I/O-Board Jumpers
The default position is pins 1 and 2. Move the jumper to pins 2 and 3 to prevent a Wake on LAN packet from waking the system when the system is in the powered-off state. IBM System x3850 M2 and System x3950 M2 Type 7141: User’s Guide... -
Page 37: Sas-Backplane Connectors
SAS-backplane connectors The following illustration shows the connectors on the SAS backplane. SAS hard disk drive connectors SAS signal connector SAS power connector Chapter 2. Installing optional devices... -
Page 38: Installation Guidelines
2. Under Product support, click System x. 3. Under Popular links, click Software and device drivers. 4. Click IBM System x3850 M2 or IBM System x3950 M2 to display the matrix of downloadable files for the server. For additional information about tools for updating, managing, and deploying firmware, see the System x and xSeries Tools Center at http:// publib.boulder.ibm.com/infocenter/toolsctr/v1r0/index.jsp. -
Page 39: System Reliability Guidelines
When you are finished working on the server, reinstall all safety shields, guards, labels, and ground wires. v For a list of supported optional devices for the server, see http://www.ibm.com/ servers/eserver/serverproven/compat/us/. System reliability guidelines... -
Page 40: Handling Static-Sensitive Devices
3. Slide the server out of the rack until the slide rails lock into place. Top cover Cover release latch Bezel IBM System x3850 M2 and System x3950 M2 Type 7141: User’s Guide... -
Page 41: Installing A Serveraid-Mr10K Sas Controller
4. Lift the cover-release latch. The cover slides to the rear approximately 13 mm (0.5 inch). Lift the cover off the server. Attention: For proper cooling and airflow, replace the top cover before you turn on the server. Operating the server for more than 2 minutes with the top cover removed might damage server components. -
Page 42: Installing An Adapter
You do not have to turn off the server to install a hot-plug adapters in slots 6 and 7. However, you must turn off the server when you perform any steps that involve installing or removing cables. IBM System x3850 M2 and System x3950 M2 Type 7141: User’s Guide... - Page 43 v The PCI Express bus configuration is as follows: – Non-hot-plug, half-length PCI Express x8 (x8 lanes): slot 1 through slot 5 – Hot-plug, half-length PCI Express x8 (x8 lanes): slot 6 and slot 7 Attention: Static electricity that is released to internal server components when the server is powered-on might cause the server to halt, which might result in the loss of data.
-
Page 44: Installing A Hot-Swap Hard Disk Drive
The server supports up to four 1-inch (26 mm) slim-high, 2.5-inch, hot-swap hard disk drives in the standard hot-swap bays. v For a list of supported optional devices for the server, see http://www.ibm.com/ servers/eserver/serverproven/compat/us/. v Inspect the drive tray for signs of damage. - Page 45 v If the server will be configured for RAID operation, see the documentation that comes with the controller for instructions for installing a hard disk drive. v All hot-swap drives in the server should have the same throughput speed rating; using drives with different speed ratings might cause all drives to operate at the lowest throughput speed.
-
Page 46: Installing An Internal Removable Flash Drive
PC2-5300 SDRAM Registered DIMM specifications. For a list of the supported optional devices for the server, see http://www.ibm.com/servers/eserver/ serverproven/compat/us/. v The server supports up to four memory cards. Each memory card holds up to eight DIMMs. IBM System x3850 M2 and System x3950 M2 Type 7141: User’s Guide... - Page 47 v At least one memory card with one pair of DIMMs must be installed for the server to operate. v When you install additional DIMMs on a memory card, be sure to install them in pairs. v You do not have to save new configuration information to the BIOS when you install or remove DIMMs.
- Page 48 Tenth 3 and 7 Eleventh 3 and 7 Twelfth 3 and 7 Thirteenth 4 and 8 Fourteenth 4 and 8 Fifteenth 4 and 8 Sixteenth 4 and 8 IBM System x3850 M2 and System x3950 M2 Type 7141: User’s Guide...
- Page 49 Table 7. Memory-card installation sequence for memory-mirroring configuration DIMM pair installation order Memory card Connector numbers First 1 and 5 1 and 5 Second 1 and 5 1 and 5 Third 2 and 6 2 and 6 Fourth 2 and 6 2 and 6 Fifth 3 and 7...
-
Page 50: Active Memory
DIMM. This LED also turns off when the release levers are opened. Active Memory Active Memory is an IBM technology that improves the reliability of the DIMMs ™ through the memory mirroring, memory scrubbing, and Memory ProteXion features. -
Page 51: Adding And Replacing A Memory Card
e. Select Memory Mirroring Settings. f. Enable the memory mirroring setting from within this window. g. Save the settings and exit the Configuration/Setup Utility program. When memory mirroring is enabled, the data that is written to memory is stored in two locations. One copy is stored in the memory port 1 DIMMs, and a second copy is stored in the memory port 2 DIMMs. - Page 52 Grasp the new memory card by the retention levers and turn the memory card so that the connector aligns with the connector on the microprocessor board and the guides on the chassis. IBM System x3850 M2 and System x3950 M2 Type 7141: User’s Guide...
-
Page 53: Installing Dimms
b. Insert the memory card into the memory-card connector. c. Press the memory card into the connector and close the small retention lever. d. Wait 2 seconds and close the large retention lever. e. Slide the orange release latch to the locked position. If you have other devices to install or remove, do so now. - Page 54 To avoid this potential problem, always use an electrostatic-discharge wrist strap or other grounding system when you work inside the server with the power on. IBM System x3850 M2 and System x3950 M2 Type 7141: User’s Guide...
- Page 55 2. Remove the server cover (see “Removing the cover and bezel” on page 28). 3. Make sure that the memory hot-swap enabled LED is lit. If the LED is not lit, enable memory mirroring (see “Active Memory” on page 38). Release latch 4.
- Page 56 DIMM from the package. 6. Turn the DIMM so that the DIMM keys align correctly with the slot. IBM System x3850 M2 and System x3950 M2 Type 7141: User’s Guide...
-
Page 57: Installing A Microprocessor
The following notes describe the type of microprocessor that the server supports and other information that you must consider when you install a microprocessor: v For a list of supported optional devices for the server, see http://www.ibm.com/ servers/eserver/serverproven/compat/us/. v The server supports up to four Intel Xeon microprocessors. If you are installing two or more microprocessors, they must be the same cache size and type, and the same clock speed. - Page 58 2. Under Product support, click System x. 3. Under Popular links, click Software and device drivers. 4. Click IBM System x3850 M2 or IBM System x3950 M2 to display the matrix of downloadable files for the server. v Obtain an SMP-capable operating system. For a list of supported operating systems, see http://www.ibm.com/servers/eserver/serverproven/compat/us/.
- Page 59 Fan 4 Fan 5 Fan 6 Fan 1 Fan 2 Fan 3 Memory Memory Cards Cards 2. Microprocessor socket 2 must always contain either a heat-sink blank or a microprocessor and heat sink. 3. The microprocessor air-baffle must always be installed between microprocessor socket 1 and socket 2.
- Page 60 To avoid bending the pins on the microprocessor, do not use excessive force when you press it into the socket. 10. Position the microprocessor over the microprocessor socket and carefully press the microprocessor into the socket. IBM System x3850 M2 and System x3950 M2 Type 7141: User’s Guide...
- Page 61 Microprocessor Microprocessor orientation indicator Microprocessor connector Microprocessor- release lever 11. Close the microprocessor-release lever to secure the microprocessor. Heat-sink retention clip Alignment posts 12. Remove the heat sink from its package and open the heat-sink retention clip: a. Release the heat-sink retention clip from the locked position. b.
-
Page 62: Completing The Installation
I/O board. a. SAS power cable b. SAS 4x signal cable c. Operator information panel cable IBM System x3850 M2 and System x3950 M2 Type 7141: User’s Guide... -
Page 63: Connecting The Cables
d. Dual USB ports cable e. DVD cable 2. If you removed the server cover, place the cover-release latch in the open (up) position. Insert the bottom tabs of the top cover into the matching slots in the server chassis. Press down on the cover-release latch to lock the cover in place. -
Page 64: Updating The Server Configuration
RAID capabilities and you have installed or removed a hard disk drive, you might have to reconfigure the disk arrays. For information about configuring the integrated Gigabit Ethernet controller, see “Configuring the Gigabit Ethernet controller” on page 64. IBM System x3850 M2 and System x3950 M2 Type 7141: User’s Guide... -
Page 65: Chapter 3. Configuring The Server
II User’s Guide on the IBM System x Documentation CD. v IBM Electronic Service Agent IBM Electronic Service Agent is a software tool that monitors the server for hardware error events and automatically submits electronic service requests to the IBM Support Center. Also, it can collect and transmit system configuration information on a scheduled basis so that the information is available to you and your support representative. -
Page 66: Using The Configuration/Setup Utility Program
Select this choice to view the machine type and model of the server, the serial number, the revision level or issue date of the BIOS and diagnostics code IBM System x3850 M2 and System x3950 M2 Type 7141: User’s Guide... - Page 67 stored in electrically erasable programmable ROM (EEPROM), and the revision level of the firmware on the Remote Supervisor Adapter II. – System Card Data Select this choice to view vital product data (VPD) for some server components. v Devices and I/O Ports Select this choice to view or change assignments for devices and input/output (I/O) ports.
- Page 68 Disable is the default value. - Processor Hardware Prefetcher Select this choice to enable or disable the hardware prefetcher. Enable is the default value. - Processor Execute Disable Bit IBM System x3850 M2 and System x3950 M2 Type 7141: User’s Guide...
- Page 69 Enable is the default value. – TPM Menu Select this choice to set the trusted platform module (TPM) feature. For more information, see http://www.ibm.com/systems/support/supportsite.wss/ docdisplay?lndocid=MIGR-5072502&brandind=5000008. – Partition Chassis Options Select this choice to set the partition configuration options for use in a multi-node configuration.
- Page 70 This is a nonselectable menu item that displays the BMC MAC address. v Host Name Select this choice to set the BMC host name. The default value is the lower 4 bytes of the MAC address. v DHCP Control IBM System x3850 M2 and System x3950 M2 Type 7141: User’s Guide...
- Page 71 Determination and Service Guide on the IBM System x Documentation CD for instructions. Select Clear error logs to clear the BMC system event log. Note: Use the IBM Remote Supervisor Adapter II system event log or run the diagnostic programs for more information about the error codes.
-
Page 72: Passwords
If a power-on password is set, you can enable the Unattended Start mode, in which the keyboard and mouse remain locked but the operating system can start. You can unlock the keyboard and mouse by typing the power-on password. IBM System x3850 M2 and System x3950 M2 Type 7141: User’s Guide... -
Page 73: Administrator Password
If you forget the power-on password, you can regain access to the server in any of the following ways: v If an administrator password is set, type the administrator password at the password prompt. Start the Configuration/Setup Utility program and reset the power-on password. -
Page 74: Using The Serverguide Setup And Installation Cd
When you use the ServerGuide Setup and Installation CD, you do not need setup diskettes. You can use the CD to configure any supported IBM server model. The setup program provides a list of tasks that are required to set up your server model. -
Page 75: Typical Operating-System Installation
3. From the menu on the left side of the page, click System x support search. 4. From the Task menu, select Install. 5. From the Product family menu, select IBM System x3850 M2 or IBM System x3950 M2. 6. From the Operating system menu, select your operating system, and then click Search to display the available installation documents. -
Page 76: Using The Boot Menu Program
Broadcom NetXtreme Gigabit Ethernet Software CD that comes with the server. To find updated information about configuring the controller, complete the following steps. Note: Changes are made periodically to the IBM Web site. The actual procedure might vary slightly from what is described in this document. 1. Go to http://www.ibm.com/systems/support/. -
Page 77: Using The Firmware Update Utility Program
2. Under Product support, click System x. 3. Under Popular links, click Software and device drivers. 4. Click IBM System x3850 M2 or IBM System x3950 M2 to display the matrix of downloadable files for the server. 5. From the BMC software section, download the file for the operating system and for the DOS firmware update utility from which you will perform the configuration and create a firmware update diskette or CD. -
Page 78: Using The Management Utility Program
Using the management utility program Use the baseboard management controller management utility program to remotely manage and configure a server. The following features are available from the program: IBM System x3850 M2 and System x3950 M2 Type 7141: User’s Guide... -
Page 79: Using The Raid Configuration Programs
2. Under Product support, click System x. 3. Under Popular links, click Software and device drivers. 4. Click IBM System x3850 M2 or IBM System x3950 M2 to display the matrix of downloadable files for the server. 5. From the BMC software section, download the management utility (SMBRIDGE). -
Page 80: Using The Lsi Logic Configuration Utility Program
Global properties v Cylinder head sector (CHS) mapping v Advanced device properties, such as I/O timeouts and LUNs to scan v Spin-up properties v PHY properties IBM System x3850 M2 and System x3950 M2 Type 7141: User’s Guide... -
Page 81: Using The Lsi Logic Megaraid Storage Manager Program
Using the LSI Logic MegaRAID Storage Manager program Use the LSI Logic MegaRAID Storage Manager program to monitor and manage the disk-array subsystem connected to the integrated SAS controller with RAID capabilities and the ServeRAID-MR10k controller option. The LSI Logic MegaRAID Storage Manager program, device drivers, and information come with the ServeRAID-MR10k controller option. - Page 82 IBM System x3850 M2 and System x3950 M2 Type 7141: User’s Guide...
-
Page 83: Chapter 4. Updating Ibm Director
Chapter 4. Updating IBM Director If you plan to use IBM Director to manage the server, you must check for the latest applicable IBM Director updates and interim fixes. To install the IBM Director updates and any other applicable updates and interim fixes, complete the following steps: 1. - Page 84 IBM System x3850 M2 and System x3950 M2 Type 7141: User’s Guide...
-
Page 85: Appendix. Notices
Web sites. The materials at those Web sites are not part of the materials for this IBM product, and use of those Web sites is at your own risk. IBM may use or distribute any of the information you supply in any way it believes appropriate without incurring any obligation to you. -
Page 86: Important Notes
Maximum internal hard disk drive capacities assume the replacement of any standard hard disk drives and population of all hard disk drive bays with the largest currently supported drives available from IBM. IBM System x3850 M2 and System x3950 M2 Type 7141: User’s Guide... -
Page 87: Product Recycling And Disposal
IBM makes no representations or warranties with respect to non-IBM products. Support (if any) for the non-IBM products is provided by the third party, not IBM. Some software may differ from its retail version (if available), and may not include user manuals or all program functionality. -
Page 88: Battery Return Program
United States, go to http://www.ibm.com/ibm/environment/ products/index.shtml or contact your local waste disposal facility. In the United States, IBM has established a return process for reuse, recycling, or proper disposal of used IBM sealed lead acid, nickel cadmium, nickel metal hydride, and battery packs from IBM equipment. - Page 89 For proper collection and treatment, contact your local IBM representative. For California: Perchlorate material – special handling may apply. See http://www.dtsc.ca.gov/ hazardouswaste/perchlorate/.
- Page 90 IBM System x3850 M2 and System x3950 M2 Type 7141: User’s Guide...
-
Page 91: Index
7 activity LED 10 filler panel 33 filler panel illustration 33 illustration 33 danger statements 2 status LED 10 device drivers 9 heat output 4 dimensions 4 hot-add, memory 44 drives 4 © Copyright IBM Corp. 2007... - Page 92 10 DVD-ROM activity 10 error password memory 19, 38 administrator 61 memory card 19, 38 power-on 60 microprocessor 21 power-on override jumper 61, 66 microprocessor board 21 IBM System x3850 M2 and System x3950 M2 Type 7141: User’s Guide...
- Page 93 passwords 60 temperature 4 power requirement 4 trademarks 73 power supply turning off the server 15 connector 13, 14 turning on the server 14 specification 4 power-control button 11 button cover 11 UpdateXpress 9 power-on USB connectors 10, 14 LED 11, 12 utility password 60 baseboard management controller utility...
- Page 94 IBM System x3850 M2 and System x3950 M2 Type 7141: User’s Guide...
- Page 96 Part Number: 40M2362 Printed in USA (1P) P/N: 40M2362...
Need help?
Do you have a question about the 72335LU - System x3850 M2 and is the answer not in the manual?
Questions and answers