Table of Contents
Advertisement
Advertisement
Chapters
Table of Contents

Related Manuals for Pioneer AVH-P6300BT


Summary of Contents for Pioneer AVH-P6300BT
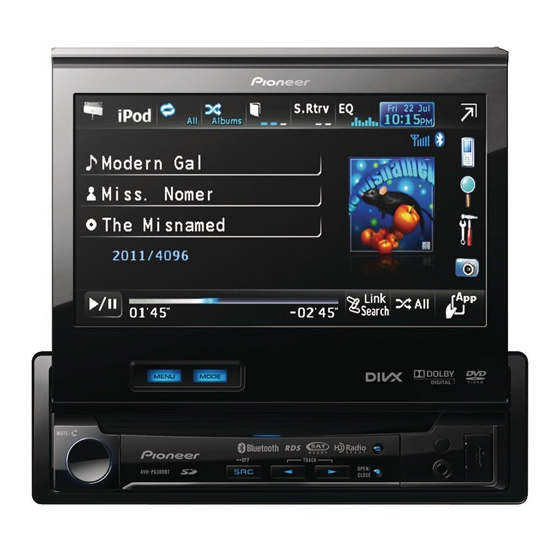
- Page 1 Owner’s Manual DVD AV RECEIVER AVH-P6300BT English...
-
Page 2: Table Of Contents
Contents Thank you for purchasing this PIONEER product. To ensure proper use, please read through this manual before using this product. It is especially important that you read and observe WARNINGs and CAUTIONs in this manual. Please keep the manual in a safe and accessible place for future refer- ence. - Page 3 Contents Operating this unit’s iPod function from your Switching the SIRIUS display 46 iPod 34 Using the Instant Replay function 46 Random play (shuffle) 35 Switching the seek mode 46 Playing all songs in random order (shuffle Switching the reception mode 46 all) 35 Calling a number in the phone book 47 Repeating playback 35...
- Page 4 Contents Using an external unit 70 Installation Connecting the units 71 Installation 80 Additional Information Troubleshooting 84 Error messages 86 Understanding auto EQ error messages 90 Understanding messages 90 Indicator list 91 Handling guidelines 93 Compressed audio compatibility (disc, USB, SD) 95 iPod compatibility 96 Sequence of audio files 97...
-
Page 5: Precautions
Section Precautions IMPORTANT SAFEGUARDS WARNING Please read all of these instructions regarding ! Do not attempt to install or service your your display and retain them for future refer- display by yourself. Installation or servi- ence. cing of the display by persons without 1 Read this manual fully and carefully be- training and experience in electronic fore operating your display. -
Page 6: To Avoid Battery Exhaustion
Section Precautions Parking brake interlock backing up. Do not use for entertainment pur- poses. Certain functions (Video viewing and certain ! Please note that the edges of the rear view touch panel keys) offered by this unit could be camera images may differ slightly according dangerous and/or unlawful if used while driv- to whether full screen images are displayed ing. -
Page 7: Before You Start
Before you start can be deceiving. Over time, your hearing FCC ID: AJDK034 “comfort level” adapts to higher volumes of MODEL NO.: AVH-P6300BT sound, so what sounds “normal” can actually IC: 775E-K034 be loud and harmful to your hearing. Guard... -
Page 8: Dvd Video Disc Region Numbers
Specifications on page 102). Long Beach, CA 90801-1760 800-421-1404 CANADA About this manual Pioneer Electronics of Canada, Inc. This unit features a number of sophisticated CUSTOMER SATISFACTION DEPARTMENT functions to ensure superior reception and op- 300 Allstate Parkway eration. All the functions have been designed... -
Page 9: Visit Our Website
Section Before you start Removing the front panel For warranty information please see the Lim- ited Warranty sheet included with this unit. % Pinch the top and bottom of its right side and pull the front panel out. Take care not pinch it too tightly or to drop it, Visit our website and also avoid contact with water or other fluids to prevent permanent damage. -
Page 10: Demo Mode
Section Before you start Turn the ignition switch OFF. the response positions of the touch panels (Touch Panel Calibration) on page 69. Press RESET with a pen tip or other pointed instrument. Use and care of the remote control Installing the battery Slide the tray on the back of the remote con- trol out and insert the battery with the plus (+) RESET button... -
Page 11: Using The Remote Control
Section Before you start ! “Perchlorate Material – special handling may apply. See www.dtsc.ca.gov/hazardouswaste/ perchlorate. (Applicable to California, U.S.A.)” Using the remote control Point the remote control in the direction of the front panel to operate. Important ! Do not store the remote control in high tem- peratures or direct sunlight. -
Page 12: What's What
Section What’s what Head unit CAUTION ! Use an optional Pioneer USB cable (CD-U50E) to connect the USB audio player/USB mem- ory as any device connected directly to the unit will protrude out from the unit and may be dangerous. -
Page 13: Remote Control
Section What’s what Remote control Part Operation Press to select the tuner band when tuner is selected as a source. Also used to cancel the control mode of functions. Press to switch be- BAND/ESC tween modes when playing discs with compressed audio and audio data (CD- DA) such as CD-... -
Page 14: Basic Operations
For details, refer to Setting the rear view camera (back up camera) on page 63. Rear Switching the rear view ! An external unit refers to a Pioneer product, View image on or off. such as those which will be available in the fu- Turning the unit off. -
Page 15: Operating The Scroll Icon And The Scrubber Bar
Section Basic operations Operating the scroll icon Activating the touch panel and the scrubber bar keys Wed 28 May Audio 12:45 Fader/Balance F/R 0 L/R 0 Graphic EQ Super Bass Auto EQ Sonic Center Control L/R 0 Loudness High Subwoofer 01:45 -02:45 Return... -
Page 16: Opening And Closing The Lcd Panel
Section Basic operations Displaying the menu. CAUTION Refer to Introduction of menu opera- Keep hands and fingers clear of the unit when tions on page 52. opening, closing, or adjusting the LCD panel. Be Displaying still images as a slide especially cautious of children’s hands and fin- show when listening to another gers. -
Page 17: Tuner
Section Tuner Introduction of tuner Manual tuning (step by step) using the buttons 1 Press c or d (TRACK/SEEK). operations Seek tuning using the buttons 1 Press and hold c or d (TRACK/SEEK). Local Wed 28 May Note Radio 12:45 Listening AM radio while an iPod is charged from Abcdeabcdeabcde 87.9... -
Page 18: Introduction Of Video Playback Operations
Section Playing moving images Introduction of video Touch panel keys playback operations Selecting the repeat range. Refer to Repeating playback You can view DVD/DVD-R/DVD-RW/CD/CD-R/ on page 35. CD-RW/USB/SD/iPod. During playback, touch the If an iPod with video capabilities is connected point at which you want to re- to this unit using an interface cable such as sume playback the next time... -
Page 19: Playing Moving Images
Section Playing moving images Starting the search function. Speeding down the playback Refer to Searching for the part speed in four steps, during you want to play on page 37. slow motion playback on Refer to Selecting files from Video CD. the file name list on page 39. - Page 20 ! While the iPod is connected to this unit, the title. Refer to Automatic playback of DVDs on page iPod cannot be turned on or off. ! While an iPod is connected to this unit, PIONEER, However, the iPod can be turned on or off Accessory Attached or (check mark) is dis- when you select an SD as the source.
-
Page 21: Playing Audio
Section Playing audio Introduction of sound Switching the equalizer curves. playback operations Refer to Using the equali- zer on page 53. You can listen to DVD-R/DVD-RW/CD/CD-R/ Touch and hold for more CD-RW/USB/SD/iPod sound files. than two seconds to turn Audio CD the auto-equalizer on or off. - Page 22 Playback will automatically start. ! While an iPod is connected to this unit, PIONEER, Refer to Displaying lists related to the currently Accessory Attached or (check mark) is dis- playing song (Link Search) played on the iPod.
-
Page 23: Operations
Pandora applica- connect to the Internet. ! Pandora’s service is currently only available in tion. the U.S. ! Ability of the Pioneer car audio/video products to access the Pandora service is subject to S.Rtrv Pandora Wed 28 May... - Page 24 Section â Using Pandora Touch panel keys Playing songs 1 Open the USB port cover. Switching the S.Rtrv 2 Connect an iPod to the USB cable using an iPod (sound retriever) function setting while playing Dock Connector. 3 Start up the Pandora application installed on the Pandora.
-
Page 25: Playing Still Images
Section Playing still images Introduction of still image Starting or pausing the sli- playback operations deshow. You can view still images saved in CD-R/CD- Rotating the displayed pic- RW/USB/SD. ture 90° clockwise. Capturing an image in 1 2 3 JPEG files. Refer to Capture an image Wed 28 May Photo... -
Page 26: Operations
Section Playing still images Introduction of still image Rotating the displayed pic- playback as a slideshow ture 90° clockwise. operations Capturing an image in JPEG files. You can view still images saved in CD-R/CD- Refer to Capture an image RW/USB/SD as a slideshow when listening to in JPEG files on page 40. -
Page 27: Bluetooth Telephone
Section Bluetooth Telephone Introduction of Bluetooth Indicates that an incoming call has been re- ceived and has not been checked yet. telephone operations ! Not displayed for calls made when your cellular phone is disconnected from this Telephone standby display unit. - Page 28 Section Bluetooth Telephone Accepting an incoming call. 1 Connection Making a phone call, when First, you need to connect a Bluetooth telephone selecting a phone number. to this unit. Switching between callers on For detailed instructions on connecting your hold. phone to this unit via Bluetooth wireless technol- Ending a call.
-
Page 29: P.ch 2
Section XM/SIRIUS tuner Introduction of XM/SIRIUS ual. This manual provides information on these points. For all other information on tuner operations using the SIRIUS tuner, please refer to the SIR- IUS operation manual. SIRIUS tuner ! With this unit, you can operate one addi- 1 2 3 tional function: XM/SIRIUS channel direct Mode... -
Page 30: Xm/Sirius Tuner
Section XM/SIRIUS tuner SIRIUS tuner information Selecting a band (XM1, XM2 or XM3) for XM tuner. Band: Switching the SIRIUS information. Selecting a band (SIRIUS1, Refer to Switching the SIRIUS display on SIRIUS2 or SIRIUS3) for the page 46. SIRIUS tuner. Touch and hold for more than two seconds to scroll the text. -
Page 31: Hd Radioä Tuner
Section HD Radioä tuner Introduction of HD Radioä Displaying the preset chan- nel list. tuner operations Refer to Storing and recalling stations on the next page. Band: Selecting a band (FM1, FM2, Seek Digital Blending Local Wed 28 may 12:45 Radio D/A Auto FM3 for FM or AM). -
Page 32: Detailed Instructions
Section Detailed instructions Storing and recalling stations Display the preset screen. Refer to Introduction of tuner operations on You can easily store up to six stations for each page 17. band as presets. Refer to Introduction of HD Radioä tuner opera- ! Six stations for each band can be stored in tions on the previous page. -
Page 33: Using Itunes Tagging
Section Detailed instructions Using iTunes tagging You can store the information if the TAG indi- cator is displayed while the desired song is This function can be operated with the following being broadcast. iPod models. # While storing the tag data on this unit, TAG —... -
Page 34: Operating The Dvd Menu
Section Detailed instructions # Depending on the contents of the DVD disc, CD (audio data (CD-DA))—Music/ROM (com- pressed audio)—Video (DivX video files)— this function may not work properly. In such Photo (JPEG picture files) cases, use the touch panel keys to operate the DVD menu. -
Page 35: Random Play (Shuffle)
Section Detailed instructions ! All – Repeat all videos/songs in the se- — iPod touch 4th generation (software ver- sion 4.1 or later) lected list on the iPod — iPod touch 3rd generation (software ver- Repeat all files sion 4.0 or later) —... -
Page 36: Browsing For A Video/Music On The Ipod
Section Detailed instructions ! Audiobooks (audiobooks) Display the iPod menus. Refer to Playing moving images on page 18. Touch the title of the list that you want to play. Switch to iPod video mode. Repeat this operation until you find the de- sired video/music. -
Page 37: Resume Playback (Bookmark)
Section Detailed instructions ! This function cannot be operated during Resume playback (Bookmark) some DVD videos or Video CD playback (Function for DVD video) featuring PBC (playback control). By using the Bookmark function, you can re- sume playback from a selected scene the next Start the search function. -
Page 38: Changing The Subtitle Language During Playback (Multi-Subtitle)
Section Detailed instructions ! Depending on the setting, the video may not Return to the specified scene be played back with the audio system used to (Function for DVD video) record the DVD. ! You will return to normal playback if you This function cannot be used if a specified change the Audio during fast forward/fast re- scene has not been preprogrammed on the... -
Page 39: Selecting Tracks From The Track Title List
Section Detailed instructions Start playback of the selected list. Notes ! You can display the menu by touching Return during PBC playback. For details, refer to the Starting playback of the selected list. instructions provided with the disc. ! PBC playback of a Video CD cannot be can- celed. -
Page 40: Playing Divxâ Vod Content
Section Detailed instructions Touch the title of the list that you want Capture an image in JPEG files to play. You can capture image data and use it as wall- paper. Images can be stored and recalled ea- Start playback of the selected list. sily in this unit. -
Page 41: Selecting And Playing The Quickmix/Station List
Section Detailed instructions Full (full screen) Selecting and playing the The 4:3 picture is enlarged in the horizontal direc- QuickMix/station list tion only, giving you a 4:3 TV picture (normal pic- Touch the list for your Pandora stations to se- ture) without any omissions. -
Page 42: Switching The Xm/Sirius Channel Selection Mode
Section Detailed instructions Storing or canceling a bookmark. Touch c or d on the buttons to select the desired channel in the selected channel category. Adding information for the song cur- rently playing to Bookmarks. Selecting a channel from the Adding artist information for the song currently playing to Book- XM channel list display... -
Page 43: Using The Mymix Function
Section Detailed instructions # (XM tuner) Touch 0 to 9 to input the desired chan- nel number. The song title and artist name of up to 12 tracks # To cancel the input numbers, touch C. can be stored. Old tracks will be overwritten when saving more than 12 tracks. - Page 44 Section Detailed instructions Turning the MyMix function on Deleting a song from the or off MyMix playlist for XM tuner You can turn the MyMix function off and stop You can delete each song in the MyMix play- the alerts for all the songs in the MyMix play- list.
-
Page 45: Using The Game Alert Function
Section Detailed instructions # When you have already selected 12 teams, A message to confirm deletion will appear. FULL is displayed and additional teams cannot be selected. In this case, first delete a selected Touch Yes. team and then try again. That song will be deleted from the MyMix play- list. -
Page 46: Displaying The Radio Id
Replay mode. analog broadcast automatically. If this func- ! To use this function, a Pioneer SIRIUS bus tion is set to Analog, the tuner will only re- interface (e.g. CD-SB10) is required. ceive analog broadcasts. -
Page 47: Calling A Number In The Phone Book
Section Detailed instructions D/A Auto—Analog Note Depending on the cellular phone, the phone book Note may not be transferred automatically. In this If SEEK MODE is set to Seek HD and BLENDING case, operate your cellular phone to transfer the is set to Analog, the tuner cannot receive broad- phone book. -
Page 48: Using The Missed, Received And Dialed Call Lists
Section Detailed instructions Make the call. Setting automatic answering Refer to Introduction of Bluetooth telephone op- If this function is on, this unit automatically erations on page 27. answers all incoming calls. End the call. % Turn automatic answering on or off. Refer to Introduction of Bluetooth telephone op- Refer to Introduction of Bluetooth telephone op- erations on page 27. -
Page 49: Making A Call By Entering Phone Number
Section Detailed instructions Touch one of preset dial keys to select Note the desired phone number. Entering phone number mode cannot be oper- # If you want to delete a preset phone number, ated unless a Bluetooth telephone is connected touch and hold the preset dial key. -
Page 50: Using A Bluetooth Device To Pair
Section Detailed instructions # To cancel searching, touch Stop. Display the Bluetooth Connection # If five devices are already paired, Menu. Memory Full is displayed and pairing cannot be Refer to Introduction of Bluetooth telephone op- performed. In such cases, delete a paired device erations on page 27. -
Page 51: Connecting To A Bluetooth Device Automatically
Section Detailed instructions Connecting to a Bluetooth Display the Bluetooth Connection Menu. device automatically Refer to Introduction of Bluetooth telephone op- If this function is set to on, a connection be- erations on page 27. tween your Bluetooth device and this unit will Touch Bluetooth Version to display de- take place automatically as soon as the two vice information. -
Page 52: Menu Operations
Section Menu operations ! You cannot display the Audio function menu Introduction of menu when the mute function is on or a JPEG file is operations playing. Audio Fader/Balance F/R 0 L/R 0 Graphic EQ Super Bass Auto EQ Sonic Center Control L/R 0 Loudness High... -
Page 53: Audio Adjustments
Section Menu operations Audio Adjustments Display Equalizer curve Note Vocal Vocal When selecting FM as the source, you cannot Custom1 Custom 1 switch to Source Level Adjuster. Custom2 Custom 2 Flat Flat Using fader/balance adjustment Super Bass Super bass You can change the fader/balance setting to provide an ideal listening environment for all ! The equalizer curves for Custom1 and of the occupied seats. -
Page 54: Adjusting Loudness
Section Menu operations Touch Graphic EQ on the audio function Adjusting loudness menu. Loudness compensates for deficiencies in the low- and high-frequency ranges at low volume. Touch c or d to select the desired item. Powerful—Natural—Vocal—Custom1— Display the audio function menu. Custom2—Flat—Super Bass Refer to Introduction of menu operations on page 52. -
Page 55: Boosting The Bass
Section Menu operations Boosting the bass Touch Source Level Adjuster on the audio function menu. You can boost the bass level. Touch a or b to adjust the source vo- Display the audio function menu. lume. Refer to Introduction of menu operations on Range: +4 to –4 page 52. -
Page 56: Setting Up The Dvd Player
Section Menu operations Setting up the DVD player Display the Video Setup menu. Refer to Introduction of menu operations on Setting the subtitle language page 52. You can set a desired subtitle language. When Touch Audio Language on the Video available, the subtitles will be displayed in the Setup menu. -
Page 57: Setting The Slide Show Interval
Section Menu operations Setting the multi-angle DVD Pan Scan setting. Confirm whether the disc package bears the mark. display 16 : 9 LB ! The TV aspect ratio cannot be changed for The angle icon can be set so it appears on some discs. -
Page 58: Setting The Divx Subtitle File
Section Menu operations Setting the code number and level Changing the level A code number must be registered in order to You can change the set parental lock level. play back discs with parental lock. Display the Video Setup menu. Display the Video Setup menu. -
Page 59: Automatic Playback Of Dvds
Section Menu operations Touch DivX Subtitle on the Video Setup Touch DivX VOD on the Video Setup menu to select the desired subtitle setting. menu. ! Original – Display the DivX subtitles Touch Deregistration Code. ! Custom – Display the DivX external subti- # To cancel deregistration, touch Cancel. -
Page 60: System Settings
Section Menu operations System settings Touch Rear Speaker on the system menu to switch the subwoofer output or Switching the auxiliary setting full-range speaker. # When no subwoofer is connected to the rear Activate this setting when using an auxiliary output, select Full (full-range speaker). -
Page 61: Clearing Bluetooth Memory
Section Menu operations Clearing Bluetooth memory Notes ! When Mute is displayed, the sound is turned Important off and no audio adjustments can be made. Never turn the unit off while the Bluetooth mem- ! When ATT is displayed, the sound is attenu- ory is being cleared. -
Page 62: Displaying The Bluetooth System Version
Section Menu operations Displaying the Bluetooth Adjusting the LCD panel slide system version position If this unit fails to operate properly, you may You can adjust the LCD panel slide position so need to consult your dealer for repair. In such that the panel is set back or forward. -
Page 63: Switching The Warning Tone
When you connect this unit to an AV equip- CAUTION ment to this unit, select the suitable video sig- Pioneer recommends the use of a camera nal setting. which outputs mirror-reversed images. ! As this function is initially set to Auto, the... - Page 64 Section Menu operations ! You can operate this function only for the resulting in battery drainage. Be sure to place video signal input into the AV input. the microphone in the specified location. Display the system menu. Before operating the auto EQ function Refer to Introduction of menu operations on ! Carry out auto EQ in as quiet a place as page 52.
- Page 65 Section Menu operations — The front, center and rear speakers will Plug the microphone into the micro- automatically be adjusted to a high phone input jack on this unit. pass filter setting. ! Previous settings for auto EQ will be over- written.
-
Page 66: Entertainment Settings
Section Menu operations Entertainment settings The customized color has been stored in the memory. Selecting the illumination color The set color will be recalled from the memory the next time you touch the same icon. This unit is equipped with multiple-color illu- mination. -
Page 67: Customizing Menus
Section Menu operations Customizing menus Display menu columns to register. Refer to Introduction of menu operations on page 52. You can customize menus except Video Setup menu. Touch and hold the menu column to register it. # To cancel registration, touch and hold the menu column again. -
Page 68: Other Functions
Section Other Functions # You cannot adjust the picture adjustment for Changing the picture the rear view camera when Camera Polarity is adjustment set to Off. (Refer to Setting the rear view camera You can adjust the Brightness (brightness), (back up camera) on page 63.) # With some rear view cameras, picture adjust- Contrast (contrast), Color (color) , Hue (hue), Dimmer (dimmer), Temperature (tempera-... -
Page 69: Adjusting The Response Positions Of The Touch Panels (Touch Panel Calibration)
AUX source ! If the touch panel cannot be adjusted prop- and is assigned to AUX. erly, consult your local Pioneer dealer. Turn the unit off. About AUX connection methods Refer to Basic operations of this unit on page You can connect auxiliary devices to this unit. -
Page 70: Using An External Unit
Refer to Using the auto-equalizer Using an external unit on page 54. An external unit refers to a Pioneer product, such as those which will be available in the fu- Actions will differ depending on ture. Although incompatible as a source, the the connected external unit. -
Page 71: Connecting The Units
! The black cable is ground. When installing CAUTION this unit or power amp (sold separately), make ! PIONEER does not recommend that you in- sure to connect the ground wire first. Ensure stall or service your display unit yourself. In-... - Page 72 Section Installation na, connect it to the antenna booster power Important ! This unit cannot be installed in a vehicle with- supply terminal. ! Never connect the blue/white cable to the out ACC (accessory) position on the ignition power terminal of an external power amp. switch.
- Page 73 Section Installation...
-
Page 74: Connecting The Power Cord
Section Installation Connecting the power cord Wired remote input (WIRED REMOTE INPUT) 17 cm (6-3/4 in.) Hard-wired remote control adapter can be connected (sold separately). RGB input 17 cm (6-3/4 in.) Microphone input Jack (MIC) Microphone (supplied) This product (13 ft. 1 in.) Fuse (10 A) Yellow Connect to the constant 12 V supply terminal. - Page 75 Section Installation Antenna input IP-BUS input (Blue) Pioneer IP-BUS accessories IP-BUS cable Navigation system 26 pin cable (Supplied with Navigation system) (AVIC-U220 (sold Insert the 26 pin cable in the direction separately)). indicated in the figure. Please contact your dealer to inquire Fuse resistor about the connectable navigation system.
-
Page 76: When Connecting To Separately Sold Power Amp
Section Installation When connecting to separately sold power amp Rear output (REAR OUTPUT) 13 cm (5-1/8 in.) To rear output 13 cm (5-1/8 in.) Front output (FRONT OUTPUT) To front output Subwoofer output (SUBWOOFER OUTPUT) 17 cm (6-3/4 in.) To subwoofer Power amp output (sold separately) -
Page 77: Connecting The System
Section Installation Connecting the system Wired remote input (WIRED REMOTE INPUT) Hard-wired remote control adaptor can be connected (sold separately). HD Radio tuner (sold separately) This product IP-BUS input IP-BUS cable (Supplied with HD Radio tuner) When connecting the external video component and the display When using a display connected to rear video output This product’s rear video output and rear audio output are for connection of a display to... - Page 78 Section Installation RCA cables (sold separately) Rear monitor output (REAR MONITOR OUTPUT) To video input Display with RCA 13 cm (5-1/8 in.) input jacks (sold separately) This product To audio inputs Mini pin plug cable (sold separately) Rear audio output (REAR MONITOR OUTPUT(AUDIO)) RCA cables (sold separately) 17 cm (6-3/4 in.)
-
Page 79: When Connecting With A Rear View Camera
Section Installation When connecting with a rear This product view camera When this product is used with a rear view camera, it is possible to automatically switch from the video to rear view image when the gear shift is moved to REVERSE (R). Rear view camera input (REAR VIEW CAMERA IN) WARNING... -
Page 80: Installation
Section Installation ! The cords must not cover up the area shown Installation in the figure below. This is necessary to allow Notes the amplifiers to radiate freely. ! Check all connections and systems before final installation. ! Do not use unauthorized parts as this may cause malfunctions. - Page 81 Section Installation 1 Use binding screws (4 mm × 3 mm) only. 1 Side bracket (small) 2 Flush surface screw (5 mm × 6 mm) Tighten two screws on each side. Use any of binding screws (4 mm × 3 mm), Install the unit into the dashboard.
-
Page 82: Installing The Microphone
Section Installation Installing the microphone CAUTION It is extremely dangerous to allow the micro- phone lead to become wound around the steer- ing column or gearstick. Be sure to install the unit in such a way that it will not obstruct driving. Note 1 Mounting sleeve Install the microphone in a position and orienta-... - Page 83 Section Installation Install the microphone clip on the rear side of the steering column. 1 Microphone clip 2 Clamp Use separately sold clamps to secure the lead where necessary inside the vehicle. When installing the microphone on the steering column Install the microphone on the micro- phone clip.
-
Page 84: Additional Information
Appendix Additional Information Troubleshooting Symptom Cause Action (Refer- ence page) Common There is no The parking Connect the park- Symptom Cause Action (Refer- image dis- brake cable is ing brake cable, ence page) played. not connected. and apply the park- ing brake. - Page 85 Appendix Additional Information Symptom Cause Action (Refer- Symptom Cause Action (Refer- ence page) ence page) Nothing is dis- The rear view Connect a rear Dialog lan- The DVD being The language can- camera is not view camera. guage (and played does not not be switched if played.
-
Page 86: Error Messages
Error messages of the unit is out- returns to a tem- side the normal perature within the When you contact your dealer or your nearest operating range. normal operating Pioneer Service Center, be sure to note the limits. error message. - Page 87 Appendix Additional Information Message Cause Action Message Cause Action Rental Ex- The inserted disc Select a file that Format Read Sometimes there Wait until the mes- pired. contains expired can be played. is a delay be- sage disappears tween the start of and you hear DivX VOD con- tent.
- Page 88 Appendix Additional Information Message Cause Action Message Cause Action Check USB The USB connec- Check that the Format Read Sometimes there Wait until the mes- tor or USB cable USB connector or is a delay be- sage disappears USB cable is not tween the start of and you hear has short-...
- Page 89 Pandora appli- above action, Pandora Ap- cation on your please contact plication on iPod/iPhone. your dealer or an Device. authorized Pioneer No Active Sta- No station se- Select a station. Service Station. tion lected. Pandora Message Cause...
-
Page 90: Understanding Auto Eq Error Messages
! Check the battery from the battery to this unit. voltage. Understanding messages Messages Translation Pioneer recommends the use of a camera which outputs mirror- Screen image may ap- reversed images. pear reversed. Otherwise, the screen image will appear re-... -
Page 91: Indicator List
Appendix Additional Information Indicator list ! Indicates that a cellular phone is connected. ! Indicates that an incoming call Area 1 Area 2 has been received and has not been checked yet. ! Not displayed for calls made when your cellular phone is disconnected from this unit. - Page 92 Appendix Additional Information Shows which subtitle language Shows the category name. has been selected. Shows the folder name of the folder Shows which viewing angle has containing the MP3/WMA/AAC file been selected. currently being played. Shows the file name of the MP3/ Shows which audio output has WMA/AAC file currently being been selected.
-
Page 93: Handling Guidelines
Appendix Additional Information Handling guidelines Read the precautions for discs before using them. Certain functions may not be available for some DVD Discs and player video discs. Use only discs featuring any of following logos. It may not be possible to play back some DVD video discs. - Page 94 Appendix Additional Information SD memory card DVD-R/DVD-RW discs Unfinalized DVD-R/-RW discs which have been re- This unit supports only the following types of SD corded in the Video format (video mode) cannot be memory cards. played back. ! SD Playback of DVD-R/DVD-RW discs may not be possi- ! SDHC ble, due to disc characteristics, scratches or dirt on the disc, or dirt, condensation, etc.
-
Page 95: Compressed Audio Compatibility (Disc, Usb, Sd)
Appendix Additional Information JPEG picture files Compressed audio compatibility (disc, USB, SD) JPEG is short for Joint Photographic Experts Group and refers to a still image compression technology standard. Files are compatible with Baseline JPEG and EXIF 2.1 File extension: .wma still images up to a resolution of 8 192 ×... -
Page 96: Ipod Compatibility
Appendix Additional Information LPCM: Not compatible CAUTION ! Pioneer accepts no responsibility for data lost Bit rate: 8 kbps to 320 kbps (CBR), VBR on the USB memory/USB portable audio Sampling frequency: 8 kHz to 48 kHz player/SD memory card even if that data is Compatible external subtitle file extension: .srt... -
Page 97: Sequence Of Audio Files
Appendix Additional Information Using the display correctly CAUTION Pioneer accepts no responsibility for data lost on CAUTION the iPod, even if that data is lost while this unit is ! If liquid or foreign matter should get inside used. this unit, turn off the power immediately and consult your dealer or the nearest authorized PIONEER Service Station. -
Page 98: Copyright And Trademark
! When using a cellular phone, keep the an- tered trademarks owned by Bluetooth SIG, Inc. and any use of such marks by Pioneer tenna away from the display to prevent dis- Corporation is under license. Other trade-... - Page 99 The SAT RADIO READY mark indicates that iPod touch are trademarks of Apple Inc., regis- the Satellite Radio Tuner for Pioneer (i.e., XM tered in the U.S. and other countries. “Made for iPod” and “Made for iPhone” mean tuner and Sirius satellite tuner which are sold separately) can be controlled by this unit.
- Page 100 Appendix Additional Information ! The system will use direct satellite-to-recei- ver broadcasting technology to provide lis- teners in their cars and at home with crystal-clear sound seamlessly from coast to coast. Satellite radio will create and package over 100 channels of digital-quality music, news, sports, talk and children’s programming.
-
Page 101: Language Code Chart For Dvd
Appendix Additional Information Language code chart for DVD Language (code), input code Japanese (ja), 1001 Dzongkha (dz), 0426 Kurdish (ku), 1121 Kinyarwanda (rw), 1823 English (en), 0514 Ewe (ee), 0505 Komi (kv), 1122 Sanskrit (sa), 1901 French (fr), 0618 Esperanto (eo), 0515 Cornish (kw), 1123 Sardinian (sc), 1903 Spanish (es), 0519... -
Page 102: Specifications
Appendix Additional Information Specifications Phase ........Normal/Reverse Bass boost: General Gain ........+12 dB to 0 dB Power source ......14.4 V DC (10.8 V to 15.1 V DVD Player allowable) System .......... DVD video, Video CD, CD, Grounding system ....Negative type WMA, MP3, AAC, DivX, Maximum current consumption JPEG system... - Page 103 Appendix Additional Information AAC decoding format .... MPEG-4 AAC (iTunes en- coded only) (Ver. 9.0.3 and earlier) DivX decoding format .... Home Theater Ver. 3, 4, 5.2, 6 (.avi, .divx) FM tuner Frequency range ...... 87.9 MHz to 107.9 MHz Usable sensitivity .....
- Page 104 TEL: (03) 9586-6300 PIONEER ELECTRONICS OF CANADA, INC. 300 Allstate Parkway, Markham, Ontario L3R 0P2, Canada TEL: 1-877-283-5901 TEL: 905-479-4411 PIONEER ELECTRONICS DE MEXICO, S.A. de C.V. Blvd.Manuel Avila Camacho 138 10 piso Col.Lomas de Chapultepec, Mexico, D.F. 11000 TEL: 55-9178-4270 先鋒股份有限公司...
Need help?
Do you have a question about the AVH-P6300BT and is the answer not in the manual?
Questions and answers