Table of Contents
Advertisement
Advertisement
Table of Contents

Related Manuals for NextBase CLICK 7


Summary of Contents for NextBase CLICK 7
- Page 1 MODEL No . Click 7 OPERATION MANUAL...
- Page 2 PRECAUTIONS Thank you for purchasing this tablet DVD player. Please read this manual carefully before operation and reserve it for future reference. It will be helpful to you when you encounter any operational problem. CAUTION: These servicing instructions are for use by qualified service personnel only.
- Page 3 PRECAUTIONS MACROVISION: This product incorporates copyright protection technology that is protected by U.S. patents and other intellectual property rights. Use of this copyright protection technology must be authorized by Macrovision. If not, the use of this technology is only permitted for domestic use and other limited playback uses.
-
Page 4: Table Of Contents
TABLE OF CONTENTS PRECAUTIONS PRECAUTIONS..............TABLE OF CONTENTS TABLE OF CONTENTS............. CAUTIONS ON USING CAUTIONS ON USING THIS PLAYER......THIS PLAYER DISCS PLAYABLE TYPES OF DISCS PLAYABLE ON THIS PLAYER.... PLAYABLE FORMATS ............PACKAGE CONTENTS PACKAGE CONTENTS............. PARTS AND REMOTE FRONT................ - Page 5 TABLE OF CONTENTS AUDIO SETUP AUDIO OUT..............DIGITAL SETUP SOUND EFFECT............. DYNAMIC RANGE............DIVX[R] VOD..............DISC SETUP DISC MENU..............INFORMATION..............MUTE................AUDIO................SUBTITLE............... REPEAT................ZOOM................MODE MODE................USB AND MEMORY CARD READING......FUNCTIONS ON THE PLAYING A T FAST SPEED..........REMOTE CONTROL A-B PLAYBACK...............
-
Page 6: Cautions On Using This Player
CAUTIONS ON USING THIS PLAYER CAUTIONS ON USING THIS PLAYER 1. DO NOT MOVE THE PLAYER DURING PLAYBACK During playback, the disc spins at high speed. So do not lift or move the player. Doing so may damage the disc. 2. -
Page 7: Playable Formats
DISCS PLAYABLE TYPES OF DISCS PLAYABLE ON THIS PLAYER The discs listed on the table below can be played on this player without an adapter. The marks shown on the table below are indicated on the disc's label, package or jacket. Types of playable Diameter/Playable sides Playback time... -
Page 8: Package Contents Package Contents
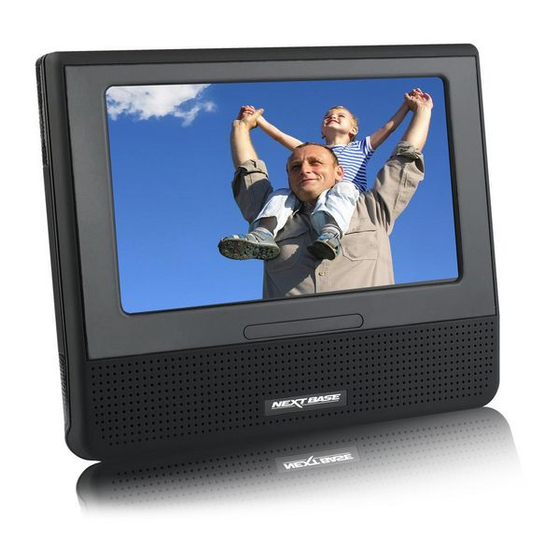
PACKAGE CONTENTS PACKAGE CONTENTS After unpacking, check the package contents of Click 7 first. Quick Start Operation Manual Click 7 AC/DC Adapter Remote Control Earphone Carrying Bag External Battery (optional) FM Transmitter (optional) Note: The actual products might appear slightly different from the pictures shown above. MOBIL E ENTERTAINMENT... - Page 9 PARTS AND REMOTE CONTROL FRONT 1. Remote Control Sensor and IR Receiver 1. LED Indicator When the player is powered by adapter or battery, it turns on. When the player is not powered, it turns off. 2. ON / Press it for about 2 seconds to turn the player on. Press it to start / pause the playback.
-
Page 10: Right
PARTS AND REMOTE CONTROL Press it to skip to the next track / chapter when playing DVD. Press it for about 2 seconds to forward a clip. Press it to move downwards. Press it to skip to the previous track / chapter when playing DVD. Press it for about 2 seconds to backward a clip. -
Page 11: Left
PARTS AND REMOTE CONTROL LEFT 1. Lock Lock / unlock the stand and Click & Go. BACK 1. Stand 2. Lock The player can stand with it. Lock / unlock the stand and Click & Go. HOW TO USE THE STAND 1. -
Page 12: Remote Control
PARTS AND REMOTE CONTROL REMOTE CONTROL OPTION MODE MENU AUDIO SUBTITLE MUTE ANGLE REPEAT PROGRAM MOB IL E ENTERTAINMENT... - Page 13 PARTS AND REMOTE CONTROL 1. ON/ 9. MENU Press it to start / pause the playback. Press it to display DVD menu. Press it to confirm the selection. Keep pressing it for 3 seconds to wake 10. MUTE up from Standby mode. Press it to turn on/off the audio mute.
-
Page 14: Notes On Using The Remote Control
PARTS AND REMOTE CONTROL NOTES ON USING THE REMOTE CONTROL 1. Do not drop or step on the remote control or subject it to shocks. 2. Note that the remote control may not work if there is any obstacle between the remote control sensor and itself. -
Page 15: Connections Connecting The Adapter To A Socket
CONNECTIONS CONNECTING THE ADAPTER TO A SOCKET DC IN12V SD/MMC/MS USING AN EARPHONE /AN AMPLIFIER 1. Set the volume to its minimum sound level. 2. Connect an earphone or an amplifier to the earphone jack. 3. Adjust the volume to a sound level you prefer. DC IN12V SD/MMC/MS CONNECTING ACCESSORIES TO iX PORT... -
Page 16: Inserting A Usb Disk Into The Player
CONNECTIONS INSERTING A USB DISK INTO THE PLAYER Insert a USB disk as shown below. DC IN12V SD/MMC/MS Note: The player may not work properly if a USB disk is connected to a USB cable / hub. INSERTING A MEMORY CARD INTO THE PLAYER Insert a memory card as shown below. -
Page 17: Basic Operations Turning On The Player
BASIC OPERATIONS TURNING ON THE PLAYER 1. Connect the included AC/DC adapter to a socket. 2. Connect the DC output plug of the adapter to the DC input jack on the unit. 3. Once the player is connected to the adapter or the backplate of Click & Go, the player will automatically turn on. -
Page 18: Turning Off The Player
BASIC OPERATIONS TURNING OFF THE PLAYER 1. Press OFF / on the unit for about 2 seconds. 2. Unplug the adapter from a socket. 3. Disconnect the DC output plug from the DC input jack. Note: 1. If there is no operation within 5 minutes, the message below will pop up on the screen for 10 seconds. -
Page 19: Loading
BASIC OPERATIONS LOADING 1. Press the OPEN button on the unit to open the disc door. 2. Insert a disc, and press it down with your fingers near the center hole. You can hear a click sound. 3. Close the disc door. Note: 1. -
Page 20: Playback
BASIC OPERATIONS PLAYBACK OPTION 1. Turn the power on. MODE 2. Open the disc door, and insert a disc correctly. MENU AUDIO SUBTITLE MUTE 3. Close the disc door. ANGLE REPEAT PROGRAM 4. The player will load the disc, and start the playback automatically. -
Page 21: System Setup Option
SYSTEM SETUP OPTION When the OPTION button on the unit is pressed, an option list will pop up, which includes the settings of IR Headphone, Display, Setup, Disc Menu, Information, Mute, Audio, Subtitle, Repeat, and Zoom. IR Headphone Display Setup Disc Menu Information Mute... -
Page 22: Display
SYSTEM SETUP DISPLAY Navigate to Display, and press to enter the sub-menu. 1. Brightness: Navigate to Brightness , press , and then use to adjust the brightness. Press to confirm. 2. Color: Navigate to Color , press , and then use to adjust the color. -
Page 23: Screen Saver
SYSTEM SETUP SCREEN SAVER Navigate to Screen Saver, and press to enter the sub-menu. On: Select this to activate the screen saver. When the player is in STOP or NO DISC status, or there is no motion for a long time, the screen will be displayed to protect the screen from damages. -
Page 24: Password
SYSTEM SETUP PASSWORD The Password function is provided for parents to give DVD access to their kids selectively. For the first time use, enter 0000 or the assigned password to unlock the parental control. Once the parental control is unlocked, go to the Rating menu and set the rating for a program. - Page 25 SYSTEM SETUP DEFAULT Select this to resume all the settings to default. System Setup TV System Screen Saver TV Type Password Rating Restore Default MOB IL E ENTERTAINMENT...
-
Page 26: Subtitle
LANGUAGE SETUP LANGUAGE Navigate to Language Setup, press to enter the DISPLAY menu, and press again to enter the LANGUAGE menu. 6 optional languages are provided: English,Deutsch,Espanol,FranCais,Italiano,and Swedish. Select the language you prefer, and press to confirm. The default language is English. Language Setup Display English... -
Page 27: Audio Setup
AUDIO SETUP AUDIO OUT Navigate to Audio Setup, press to highlight the AUDIO OUT menu, and press again to enter the sub-menu. There are 3 optional audio output modes: Analogue, SPDIF/RAW, and SPDIF/PCM. Analogue: analogue output audio signal. SPDIF/RAW: digital decoder/amplifier audio signal output. SPDIF/PCM: digital audio signal output for use with digital stereo amplifier. -
Page 28: Digital Setup
DIGITAL SETUP SOUND EFFECT Navigate to Digital Setup, press to enter the Sound Effect menu, and press again to enter the sub-menu. 2 sound output effects are provided: Normal and Surround. Choose the effect you prefer, and press to confirm. Digital Setup Sound Effect Normal... -
Page 29: Divx[R] Vod
DIGITAL SETUP DIVX[R] VOD DivX(R) VOD files are downloaded after paying a rental from certain commercial websi t es. Prior to downloading a VOD you need to input the registration number of your DVD player on the purchase form on the site. Write down the VOD 8-character registration number so that you can fill in the form on the website you purchase your DivX(R) VOD files from To check the registration number, press OPTION on the unit or on the remote control, navigate to Setup, and press... -
Page 30: Disc Setup
DISC SETUP DISC MENU If a disc is provided with a menu, you can display the menu by navigating to Disc Menu and pressing , or by pressing the MENU button on the remote control. OPTION IR Headphone MODE Display Setup Disc Menu Information... -
Page 31: Mute
DISC SETUP 0 / 3 0 / 13 00:00:01 MUTE To mute the sound, you can either navigate to MUTE and press , or press the MUTE button on the remote control. Repeating the above step will un-mute the sound. OPTION IR Headphone MODE... - Page 32 DISC SETUP AUDIO If a DVD is provided with different audio languages, you can choose the audio language you prefer by navigating to Audio and pressing , or by pressing the AUDIO button on the remote control. OPTION IR Headphone MODE Display Setup...
-
Page 33: Subtitle
DISC SETUP SUBTITLE Select the subtitle you prefer on DVDs by navigating to Subtitle and pressing , or pressing the SUBTITLE button on the remote control during playback. OPTION IR Headphone MODE Display Setup Disc Menu Information MENU AUDIO SUBTITLE MUTE Mute SUBTITLE... -
Page 34: Repeat
DISC SETUP REPEAT During a playback, if the option Repeat is selected, or the Repeat button on the remote control is pressed, the title/chapter of a DVD or the track/entire disc of a CD will be played repeatedly. OPTION IR Headphone MODE Display Setup... - Page 35 DISC SETUP ZOOM If you want to zoom the picture on the screen, navigate to Zoom and press . The zooming rate will be changed to 2, 3, 4, 1/ 2, 1/3, 1/4 and 1 time its original si z e each time the button is pressed.
-
Page 36: Mode
MODE MODE When the MODE button on the unit is pressed, an option list will pop up, which includes DVD, USB, Memory Card, and AV Input. DVD: Select this if you want to play the DVD inside the player. Navigate to , and press to start the playback. -
Page 37: Usb And Memory Card Reading
MODE USB AND MEMORY CARD READING When inserting a USB disk and a memory card at the same time, the player will play the contents in the storage which was inserted in the player last time. If a storage base is connected to the player while another storage base is playing, the playback will stop, and the player will play the media contents in the newly-inserted storage base. -
Page 38: Functions On The Remote Control
FUNCTIONS ON THE REMOTE CONTROL PLAYING AT FAST SPEED 1. Press on the remote control during playback. OPTION 2. The playback speed will be changed each time you press or. It MODE w ill re specti vely c hange to 2, 4, 8, 20 and 1 time its normal speed. Note: MENU AUDIO... -
Page 39: Program
FUNCTIONS ON THE REMOTE CONTROL PROGRAM The PROGRAM function can automatically play chapters or tracks according to the order you program. 1. After inserting a disc, press the PROGRAM button on the remote control, and the menu below will pop up. OPTION MODE PROGRAM... - Page 40 FUNCTIONS ON THE REMOTE CONTROL 3. Use to move the cursor to Play, and press to confirm. PROGRAM 1 01:01 5 -- : -- 9 -- : -- 13 -- : -- 2 01:02 6 -- : -- 10 -- : -- 14 -- : -- 3 -- : -- 7 -- : -- 11 -- : -- 14 -- : -- 4 -- : -- 8 -- : -- 12 -- : -- 16 -- : -- Play...
-
Page 41: Playing A Disc In Mp3 Or Jpeg Format
FUNCTIONS ON THE REMOTE CONTROL PLAYING A DISC IN MP3 OR JPEG FORMAT When a disc is inserted and if there is an MP3 file in the disc, the player will play the file automatically as shown below. 002/041 123.MP3 00:00:30 Press OFF to exit the page and enter the folder list. - Page 42 FUNCTIONS ON THE REMOTE CONTROL 4. During playback, you can press the A-B button to get the A-B repeat function. Or, you can press the REPEAT button to change the repeat modes, which includes Repeat: [ Repeat 1 ] means repeating the clip that is playing; Repeat: [ Repeat Dir ] means repeating the folder;...
- Page 43 FUNCTIONS ON THE REMOTE CONTROL n If you want to view JPEG files: 1. Navigate to , and press to enter the folder list. 2. Select the folder which stores the JPEG files you want to view, and press to enter the folder.
- Page 44 FUNCTIONS ON THE REMOTE CONTROL n If you want to watch video clips: 1. Navigate to , and press to enter the folder list. 2. Select the folder which stores the clips you want to watch, and press to enter the folder. 3.
-
Page 45: Dimension And Parameters
OTHER DIMENSION AND PARAMETERS Product name: Click 7 Power: 12V / 1.5A Consumption: <10W Audio out: Line L/R Video out: S-Video / CVBS 196x160x30mm (per unit) Size: Weight: 705 g (per unit) MOB IL E ENTERTAINMENT... -
Page 46: Trouble Shooting
OTHER TROUBLE SHOOTING Symptoms Possible causes Remedies Load the disc with the label side Disc is not loaded correctly. The disc up, and firmly press it into the center hole. does not Make sure there is no scratch or Disc is scratched or not clean. play fingerprint on it. - Page 47 CLICK 7-NB-ENG-MANUAL-B2...
Need help?
Do you have a question about the CLICK 7 and is the answer not in the manual?
Questions and answers