Alesis Studio Interface MasterControl Reference Manual
Alesis studio interface reference manual
Hide thumbs
Also See for Studio Interface MasterControl:
- Quick start manual (56 pages) ,
- Reference manual (56 pages)
Table of Contents
Advertisement
Advertisement
Table of Contents

Subscribe to Our Youtube Channel
Related Manuals for Alesis Studio Interface MasterControl


Summary of Contents for Alesis Studio Interface MasterControl
- Page 1 REFERENCE MANUAL...
-
Page 3: Table Of Contents
DISABLING WINDOWS SYSTEM SOUNDS ... 31 ALESIS FIREWIRE CONTROL PANEL (WINDOWS)... 32 MAC AUDIO CONFIGURATION ... 34 AUDIO MIDI SETUP... 34 ALESIS FIREWIRE CONTROL PANEL (MAC) ... 35 GLOBAL MENUS ... 36 MONITORING & CONTROL ROOM FEATURES... 39 DIRECT MONITORING ... 40 CREATING A CUBASE LE PROJECT FOR RECORDING ... -
Page 4: Introduction
Low-latency ASIO, WDM, and CoreAudio drivers for high performance and the lowest possible latency. Steinberg Cubase and Ableton Live Lite Alesis Edition included in the box so you can get started recording and mixing immediately. How this manual is organized This reference manual is designed to get you up and running with the MasterControl fast. -
Page 5: First Things First: Driver Installation
The software DVD that comes with the MasterControl contains some powerful music applications. If you don’t already have a Digital Audio Workstation (DAW) program, install Cubase LE and or Ableton Live Lite Alesis Edition, both of which are provided on the DVD. These programs are a fantastic way to get started in computer-based recording. -
Page 6: Rear Panel Features
REAR PANEL FEATURES MIC / LINE INPUTS – These two inputs can accept microphones (using an XLR cable) or an instrument or line-level device (using a 1/4” cable) such as a guitar, bass, sampler, or other audio device. These are balanced, low-impedance inputs. For best results when connecting balanced, line-level gear, use a TRS (tip-ring-sleeve) cable to connect to the 1/4"... - Page 7 FireWire chain to see if that solves the problem. POWER IN – Connect the included power adapter to the MasterControl here. Only use an approved Alesis adapter. Other adapters may damage your MasterControl. Note: These MIDI connections may 176.4kHz and 192kHz sample rates.
-
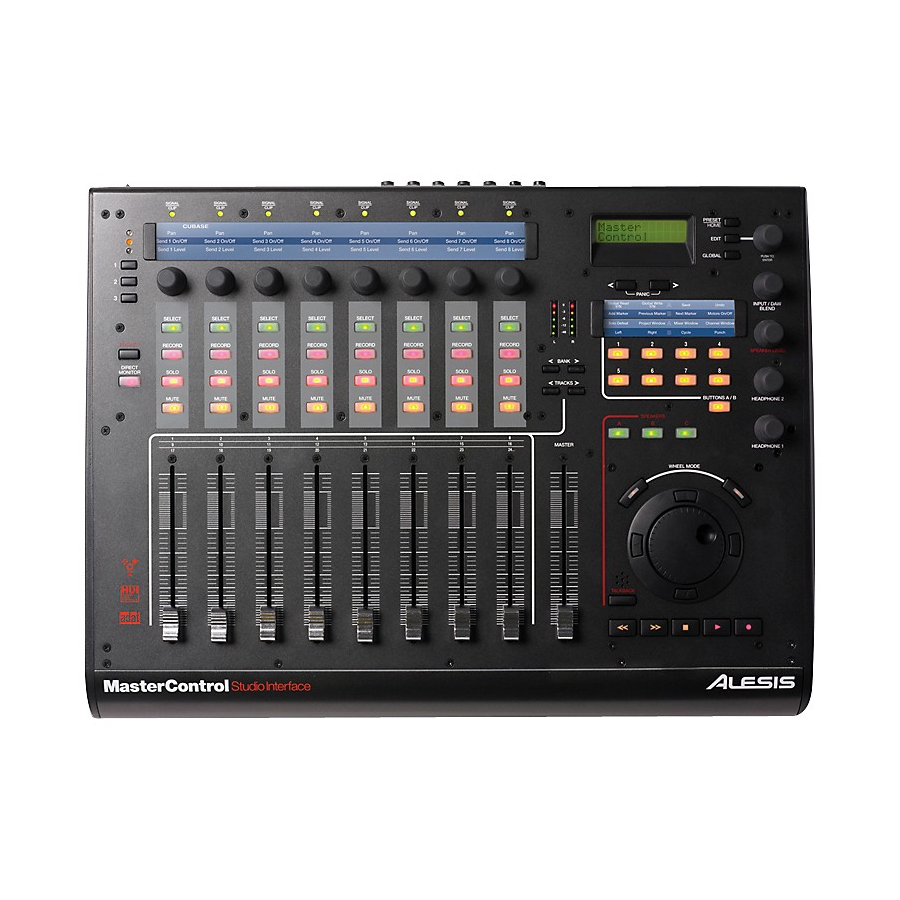
Page 8: Top Panel Features
TOP PANEL FEATURES This section breaks down the control surface into its functional areas. The area being discussed is shaded in the accompanying diagrams. (A) Analog Input Signal Indicators (B) DAW Control: Channels (C) DAW Control: Multi-Function Knobs (D) DAW Control: Transport (E) DAW Control: Assignable Button Banks (F) Monitoring / Control Room Features (G) Configuration Controls... -
Page 9: (B) Daw Control: Channels
(B) DAW CONTROL: CHANNELS CHANNEL FADER – Use this 100mm, touch-sensitive fader to adjust the volume levels of each channel. The exact level will be shown in the DISPLAY. MASTER FADER – This fader controls the DAW’s master fader. Note that different DAWs control this fader differently. -
Page 10: (C) Daw Control: Multi-Function Knobs
(C) DAW CONTROL: MULTI-FUNCTION KNOBS TEMPLATE OVERLAY – Place the long plasticized overlay (included) that matches your currently selected DAW preset here. Remove the plastic protective covering from the template overlay before placing it in the slot. Insert one end first, then bend the overlay slightly upwards in order to slide the overlay into the opposite slot. -
Page 11: (E) Daw Control: Assignable Button Banks
(E) DAW CONTROL: ASSIGNABLE BUTTON BANKS TEMPLATE OVERLAY plasticized overlay (included) that matches your currently selected DAW preset here. ASSIGNABLE BUTTONS perform functions in your DAW such as SAVE, LOOP, etc. For most presets, you can re-assign the buttons to various functions by pressing EDIT at the upper right of the MasterControl. -
Page 12: (G) Configuration Controls
Preset 2: Ableton Live Preset 3: Cakewalk Sonar Preset 4: Logic Pro Preset 5: Samplitude Preset 6: Digital Performer Preset 7: Alesis HD24 Preset 8: ProTools Preset 9: Reason Preset 10: Soundtrack Pro Preset 11: Plug-in 1 Preset 12: Plug-in 2... - Page 13 EDIT – In Edit Mode, you can change the assignments for the A and B banks of the ASSIGNABLE buttons – a total of 16 assignable functions. DISPLAY will look like the image on the right and the ASSIGNABLE BUTTONS will light up orange. First, press the button whose function you want to assign (the other buttons will become unlit).
-
Page 14: Configuring Your Digital Audio Workstation Software For Use With The Mastercontrol
Mac users should note that, in all cases, the Alesis drivers should be selected under AUDIO MIDI setup before opening your DAW. In most cases for Mac, it will not be necessary for you to choose the Alesis drivers within your DAW as well. -
Page 15: Cubase And Nuendo Setup: Selecting The Audio Driver (Windows Only)
(WINDOWS ONLY) This discussion addresses Cubase. Nuendo setup is similar. From the menu bar, go to Devices Click on “VST Audio System” in the left-hand pane. Then, in the right-hand pane, select “ASIO Alesis Firewire” for the ASIO driver. Device Setup…... -
Page 16: Cubase And Nuendo Setup: Control Surface (Mac And Windows)
CUBASE AND NUENDO SETUP: CONTROL SURFACE (MAC AND WINDOWS) Again from the menu bar, go to Devices Click the “+” button on the upper-left corner of the window and select “Mackie Control” from the list. Device Setup…... - Page 17 Press “OK” to accept this setting. Once the MasterControl is selected as the audio device, individual channels must be activated for use. From the “Devices” menu, select “VST Connections.” Mackie Control, select “Alesis FireWire” from the MIDI Input and MIDI Some versions Cubase,...
- Page 18 In this first tab labeled “Inputs,” you can decide which of the MasterControl’s channels will be routed to the Cubase’s inputs. Click the entries under “Device Port” to select an available channel from a drop-down menu. (This number and kind of available channels will vary depending on the sampling rate.) If necessary, you can add more buses by clicking the “Add Bus”...
-
Page 19: Ableton Live Setup
If you want, you can rename channels by clicking on the entry under “Bus Name.” This is useful for keeping track of which instrument is on each stereo channel. Close the window. You are now ready to begin recording with the MasterControl. See the Cubase/Nuendo notes later in this manual for details on MasterControl operation with these DAWs. - Page 20 Click the Audio tab. Select “ASIO” from the Driver Type drop-down menu. (The MasterControl will still work if another option like MME/DirectX is selected, but we recommend using ASIO as it is a better choice.) Then select “ASIO Alesis FireWire” as the Audio Device.
- Page 21 Click “Input Config.” In the window that appears, select the inputs from the MasterControl that you want to be sent to the DAW, then click “OK.” Click “Output Config.” In the window that appears, select the outputs on the MasterControl to which the DAW will send its audio.
- Page 22 Close the Preferences window. From the menu bar, go to Insert Be sure the circular button on the right-hand side of the screen labeled “I-O” is Underneath each track, you should see the headings “Audio From,” “Monitor,” and “Audio To.” (MIDI tracks will read “MIDI” instead of “Audio.”) In order for Live to receive audio from the MasterControl’s outputs, the first box under “Audio From”...
- Page 23 Underneath “Monitor,” select the monitoring configuration you want. channel when it is “record-armed” or recording. “In” will monitor the channel continuously, whether it is being recorded or not. “Off” will disable monitoring for that track. The box underneath “Audio To” should read “Master.” If it doesn’t, click the box and select it. This process (Steps #9-12) should be repeated for each channel you want to record.
-
Page 24: Cakewalk Sonar Setup
From the menu bar, go to Options Click the button with the “star” icon to add a new device. Select “Mackie Control” from the Controller/Surface drop-down menu, and select “Alesis FireWire” for the Input Port and Output Port. Click “OK,” then close the Controller/Surfaces window. - Page 25 From the menu bar, go to Options Click the “Advanced” tab. Select “ASIO” as the “Driver Mode.” Most users will find that this provides better performance than WDM/KS mode. If you change this setting, you will need to exit and then restart Sonar. Audio…”...
- Page 26 On the “General” tab, select any available MasterControl channels as the “Playback Timing Master.” We recommend “ASIO Alesis FireWire MasterControl DAW1,” which corresponds to the physical MON / LINE OUTPUTS 1 and 2 on the MasterControl. Select any available analog MasterControl channel as the “Playback Record Master.”...
- Page 27 Move to the “Drivers” tab. Click on each input pair and also on the output pair to make them available to Sonar. The available input channels (corresponding to the MasterControl’s input channels) will depend on the sampling rate, which you can set in the “General” tab. There will always be three available output channels, which correspond to the three stereo pairs of physical outputs (1/2, 3/4, and 5/6) on the MasterControl.
-
Page 28: Logic Pro Setup
LOGIC PRO SETUP From the menu bar, go to Logic Pro Click on “New” and select “Install” from the drop-down menu. Preferences Control Surfaces Setup. - Page 29 Select “Mackie Designs > Mackie Control > Logic Control” from the list, and click “Add” at the bottom-right. Close the window. Select “Alesis FireWire” for the Out Port and Input. See the Logic notes later in this manual for details on MasterControl operation with Logic.
-
Page 30: Samplitude Setup
Connect the “Alesis FireWire” interface to this new device by clicking and dragging your cursor from the output of the “Alesis FireWire” to the input of the “MasterControl” and the output of the “MasterControl” to the input of the “Alesis FireWire.”... -
Page 31: Audio Inputs And Outputs
AUDIO INPUTS AND OUTPUTS Channels Sent from the MasterControl to the Computer The FireWire port sends every available individual MasterControl channel to the computer. This means that, from the MasterControl, you can send a maximum of 26 channels: eight analog channels, 16 digital channels over the ADAT connections, and two digital channels over the coaxial S/PDIF connection. -
Page 32: Windows Audio Configuration
Choose Sounds and Audio Devices (XP) or Sounds (Vista). Click the “Audio” tab. Change the default devices for both sound playback and sound recording to “Alesis FireWire Audio.” If you will be using MIDI, select “Alesis FireWire MIDI” from the MIDI music playback menu. -
Page 33: Disabling Windows System Sounds
DISABLING WINDOWS SYSTEM SOUNDS Windows System Sounds – the sounds that Windows plays to signal starting up, shutting down, alerts and so forth – can interfere with your audio recording. We strongly suggest disabling these sounds. Click the “Sounds” tab of Sounds and Audio Devices (XP) or Sounds (Vista). Under the “Sound Scheme”... -
Page 34: Alesis Firewire Control Panel (Windows)
“see” it. Check the mixer’s connection to your computer. You can chain multiple Alesis Firewire devices together via their Firewire ports. If you do so, you must choose one of them, here, as the clock master for your entire system. - Page 35 Adjusting the sample rate: You can change the sample rate that the MasterControl uses in this area. Some audio programs require that you change the sample rate under their Project Setup or similar menus. For instance, Cubase will take control of this parameter. Adjusting latency by changing the buffer size: “Latency”...
-
Page 36: Mac Audio Configuration
On Mac, after you install the drivers, open the Audio MIDI Setup utility. Choose “Alesis Firewire” for your “Default Input” and “Default Output” devices under Mac’s Audio MIDI Setup utility. Also, choose your clock source, and set your sample rate here. -
Page 37: Alesis Firewire Control Panel (Mac)
MasterControl is not shown, then your computer does not “see” it. Check the mixer’s connection to your computer. You can chain multiple Alesis Firewire devices together via their Firewire ports. If you do so, you must choose one of them, here, as the clock master for your entire system. -
Page 38: Global Menus
GLOBAL MENUS Press GLOBAL button configuration, including where you want to route which channels, talkback and footswitch settings, and other features. Use the PAGE buttons beneath the DISPLAY to scroll through the settings. For each page, you can scroll through your options with the VALUE / ENTER knob at top right. - Page 39 Direct Monitoring When the MasterControl’s Direct Monitoring function is enabled, the signal you are hearing is taken directly from the MasterControl rather than from your DAW. This allows you and your musicians to monitor the audio with no perceptible delay (latency). Here, you can choose whether or not the Direct Monitoring signal will be blended with the signal from the DAW in each channel pair.
-
Page 40: Factory Reset
Factory Reset Activating a Factory Reset will restore all default settings and Preset configurations. If you want to reset, select “Reset all.” You will be asked, “You sure?” If you want to continue, select “Yes.” The DISPLAY will read “Resetting” with two asterisks moving across the screen to indicate its progress. -
Page 41: Monitoring & Control Room Features
MONITORING & CONTROL ROOM FEATURES Speakers / Outputs Controls The SPEAKERS / OUTPUTS buttons allow you to monitor the MasterControl’s MON / LINE OUTPUTS as follows: The “A” SPEAKERS / OUTPUTS button monitors the “A” outputs (Channels 1 and 2) The “B”... -
Page 42: Direct Monitoring
When you are recording simpler projects that put less strain on your computer, you can generally choose lower buffer settings in the Alesis Firewire control panel. When your buffer sizes are low enough, you can use the input monitoring feature of your DAW recorder, and the latency (delay) experienced by your performers will be very slight. -
Page 43: Creating A Cubase Le Project For Recording
CREATING A CUBASE LE PROJECT FOR RECORDING Once you have set up Cubase to work with the MasterControl, you’re ready to create an audio project. Choose File New Project. You can begin with a template or an empty file. For now, begin with an empty file. Cubase needs to know where to place audio. - Page 44 Now, you have a blank project. Add an audio track for recording by choosing Project Track Audio. Be sure that the “inspector” – a strip on the left-hand side of Cubase that shows all sorts of information about the selected track –...
- Page 45 Choose an input for your track by selecting it from the drop-down menu of available inputs. By default, the input will be the first stereo bus in the “VST Connections” window. You will do most of your monitoring through the mixer. However, if you want to monitor with Cubase’s effects, or if you just want to hear what the computer is hearing, press the direct monitoring button next to the Record Enable button.
-
Page 46: Important Points For Users Of Various Daws
IMPORTANT POINTS FOR USERS OF VARIOUS DAWS When using the MasterControl with various Digital Audio Workstations (DAWs), you will find the control surface interacts slightly differently with some of them. This is normal! This section lists the kinds of control surface behavior that are unique to certain DAWs, using their current versions at the time of this writing. -
Page 47: Logic Pro
Ensure that you choose a “Mackie Control” control surface. The “Logic Control” control surface uses a different set of MIDI messages and is not compatible with the Alesis MasterControl. Rows 2 and 3 on the MasterControl correspond to different modes in Logic: Row 2 is Send Mode. -
Page 48: Digital Performer
Grouping and ungrouping faders must be done within the Digital Performer software. This cannot be done from the MasterControl. ALESIS HD24 / HD24XR This preset allows one-way control from the MasterControl to an Alesis HD24 or HD24XR. COMPUTER CONNECTION: computer via Firewire, as normal. -
Page 49: Pro Tools
PRO TOOLS JOG is unavailable in Pro Tools. This is a limitation of the HUI protocol used by Pro Tools. Pressing the SCRUB button puts the JOG WHEEL into Scrub Mode. When scrubbing, if you want your cursor to remain at the last scrub point in the timeline, go to Setup>Preferences>Operation>Transport and check "Edit Insertion Follows Scrub/Shuttle."... -
Page 50: Plug-In 1, 2
These presets are designed to control virtual instruments and effects plugins. If you are using a virtual instrument within a DAW, you will need to disconnect the Alesis Firewire MIDI ports from control surface operation (Mackie Control or HUI) so that you can use the MasterControl as a generic MIDI controller. -
Page 51: Signal Flow Diagram
SIGNAL FLOW DIAGRAM... -
Page 52: Specifications
SPECIFICATIONS Microphone preamplifier Gain range: +9.1dB to +59.2dB Impedance: 3.67K @ min gain; 3.33K @ max gain Line preamplifier Gain range: -7dB to +43.1dB Maximum input signal levels before clipping Mic In to Line Out: At min gain: 9.6dBu in, 18.7dBu out (gain = 9.1dB) At max gain: -40.5dBu in, +18.7dBu out (gain = 59.2dB) Line In 1-2 Max input signal level before clipping (at midband frequencies): At unity gain: 18.7 to 18.9dBu... -
Page 53: Trademarks
TRADEMARKS All trademarks are the property of their respective owners. Specifically: “MasterControl” is a trademark of Alesis, LLC. “Soundtrack,” Soundtrack Pro,” “Logic,” Logic Pro,” “CoreAudio,” “CoreMIDI,” “Mac” and “Mac OS” are trademarks of Apple, Inc. “Windows,” “Windows XP,” and “Windows Vista” are trademarks of Microsoft Corporation. - Page 56 www.alesis.com...
Need help?
Do you have a question about the Studio Interface MasterControl and is the answer not in the manual?
Questions and answers