Table of Contents
Advertisement
Quick Links
Advertisement
Table of Contents

Subscribe to Our Youtube Channel
Related Manuals for Digimate DGL20


Summary of Contents for Digimate DGL20
- Page 1 20” LCD TV DGL20 User’s Manual...
-
Page 2: Important Safeguards
WARNING: TO PREVENT FIRE OR SHOCK HAZARD, DO NOT EXPOSE THIS APPLIANCE TO RAIN OR MOISTURE. WARNING: This equipment has been tested and found to comply with the limits for a Class B digital device, pursuant to Part 15 of the FCC Rules. - Page 3 10. POWER SOURCES This unit should be operated only from the type of power source indicated on the rating plate. If you are not sure of the type of power supply to your home, consult your appliance dealer or local power company. For units intended to operate from battery power, or other sources, refer to the operating instructions.
- Page 4 TO PREVENT POSSIBLE DANGER, ELECTRIC SHOCK, AND OTHER INJURIES WHEN HANDLING YOUR DISPLAY, PLEASE BE AWARE OF ALL WARNINGS AND SAFETY PRECAUTIONS CONTAINED BELOW. Never Insert anything into DISPLAY!! Do not insert anything through the openings in the unit, where they can touch dangerous voltage points or damage parts.
-
Page 5: Fcc Compliance Statement
CONFORMITY AND COMPLIANCE FCC Compliance Statement This equipment has been tested and found to comply with the limits for a Class B digital device, pursuant to Part 15 of the FCC Rules. These limits are designed to provide reasonable protection against harmful interference when the equipment is operated in a residential installation. -
Page 6: Antenna Connections
ANTENNA CONNECTIONS If you are using an indoor or outdoor antenna, follow the instructions below that correspond to your antenna system. If you are using a cable TV (CATV) see “CABLE TV CONNECTIONS”. Combination VHF/UHF Antenna (Single 75 Ohm cable or 300 Ohm twin-lead wire) Connect the 75 Ohm cable from the combination VHF/UHF antenna to the Antenna Jack. -
Page 7: Table Of Contents
Introduction Congratulations on the purchase of your LCD TV. This handbook has been designed to help you install and operate your display. We would recommend reading it thoroughly. Table of contents Getting Started Features ……………………………………………………………………... 7 Standard accessories ……………………………………………………... 7 Location of controls …………….……………………………………………... -
Page 8: Getting Started
˙Supports VGA resolution of 640x480 pixels ˙Digital Character Smoothing ˙Analog TV tuner ˙Windows 95/98/2000/XP Plug & Play Compliant ˙Versatile, User friendly OSD ˙Plug & Play: Conforms to VESA standards and supports DDC1/2B spec. Unpacking and checking package contents Before unpacking your LCD Display, prepare a stable, level, and clean surface near a wall outlet for your LCD Display. -
Page 9: Battery Installation
REMOTE CONTROL BATTERY INSTALLATION Slide the battery compartment cover. Install two “AAA” batteries (supplied), paying close attention to the + / - polarity diagram in the battery compartment. Replace the compartment cover. BATTERY PRECAUTIONS The precautions below should be followed when using batteries in this device: Use only the size and type of batteries specified. -
Page 10: Operating The Monitor
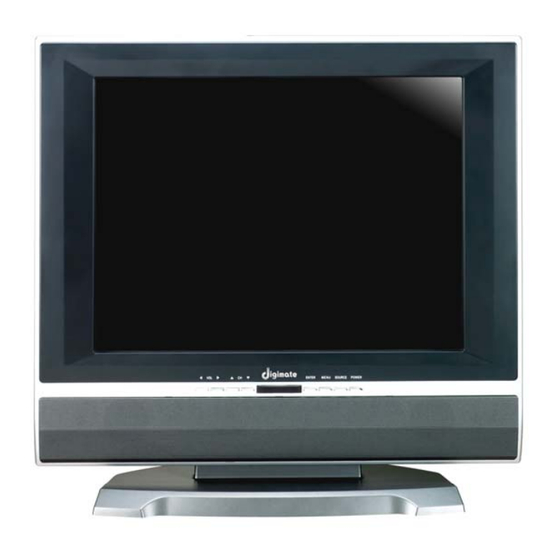
Front View Operating the monitor Front panel buttons: ① POWER:Press to activate the Display On and Off (standby). ② SOURCE:Press to display and cycle through all of the available input sources. ③ MENU:Press to see OSD menu of your TV’s adjustments / selections. (It can stop scan function when auto scan function is active) ④... -
Page 11: Rear Panel Jacks
Rear View REAR PANEL JACKS Side view Connect the coaxial cable or antenna. (If connectors do not match, ① use adaptor included) YCbCr Audio Audio input terminal for connecting the YCbCr audio source. ② Connects to the component video output terminal of a video source YcbCr Video ③... -
Page 12: The Remote Control Keys
Item Power Power on / off Select channel by numbers. Number keys Enter Press to confirm selection after entering channel number Menu Access menu / turn PBC on and off during VCD disc Channel select Volume control Confirm the adjustment or the “selected” item. Enter V-chip Turn V-chip mode on and off. -
Page 13: Installing Your Display
Step 1. Positioning the display set Place your TV Display set on a solid stable surface. Do not expose the display to water, or a heat Source. Do not obstruct the ventilation grid at rear. Step 2. Connecting the aerials 1. -
Page 14: Setup
You’ll need to set a few important menu items the first time you turn on your Display. Step 1. Select the language and the country: This menu allows you to choose OSD (On Screen Display) language displayed and county. Menu-TV Picture Audio Input Select... -
Page 15: Basic Operation
Remote Power on/off Press the “POWER’ key to turn on the Display. Source select Using remote control Press SOURCE to select the input signal. Each time the SOURCE button is pressed, the on-screen display will cycle between: S-VIDEO Component (YCbCr) Using menu control Press MENU to access the “main menu”, and press... -
Page 16: Input Select
To access MENU, navigate and make adjustments, use MENU、 CH、 CH、 VOL、 VOL and ENTER keys. Pressing MENU key displays the OSD menu. Use CH、 CH on the remote control to scroll the options on the menu. Press “Enter” to select submenus, Use / to adjust the settings. -
Page 17: Picture Adjusting
[ Picture Adjusting ] 1. Press MENU, select PICTURE and press ENTER. 2. Press “CH ” key to select BRIGHTNESS / CONTRAST / HUE / SATURATION / BLACK LEVEL, then press ENTER. Use adjust. In TV & Video mode Picture Brightness Contrast Saturation... - Page 18 [ Audio Adjusting ] 1. Press MENU, select AUDIO and press ENTER. 2. Use the navigator In TV & Video & PC mode Audio Volume Mute Mute Note: You can adjust volume by pressing press “MUTE” on the remote directly to mute the sound. [ MISC Adjusting ] 1.
-
Page 19: Other Function Setting
Fine tune The proximity of mountains or high buildings may attribute to ghost pictures or shadows. In this case, try adjusting “fine tune” to obtain reception. 1. Press MENU and navigate to select “Fine Tune”, and press ENTER. 2. Press “Fine Tune”... -
Page 20: Closed Caption
Closed caption is a system which allows you to read the voice content of television programs on the TV screen to help the hearing impaired. This feature uses onscreen text boxes to show conversation and dialogue while the program is in progress. Usually C.C. 1 is the most used. C.C. 2 may be used for alternate languages. -
Page 21: Using Remote Control
The V-Chip feature automatically blocks TV programs and movies based on violence, sex, or other content you may believe inappropriate for children. Once you block programs, you can unblock by entering a password. Using remote control: 1. Press “V-Chip” key on the remote control and the password OSD will show on the screen. -
Page 22: Changing Password
While V-chip menu (OSD) is displayed; - Select “MPAA” and press ENTER, the default settings are all blocked. - Use to “block“ or “unblock” the categories. “ “ ” ” TV P.G. (parental guideline) V-chip reads the program’s age- based rating. If you have blocked the rating, you will receive a rating message while you select the blocked program. -
Page 23: Other Information
Perform the adjustments according to Instruction Manual. If the problem still exists and you cannot correct the problem, stop using the DISPLAY and contact your dealer or the nearest service center for further assistance. SYMPTOMS Make sure the power cord is firmly plugged in the socket. -
Page 24: Vga Mode
Supported Frequencies Display Mode (panel resolution supported if available) VESA SVGA (panel resolution supported if available) Other Information Analog Horizontal Frequency 31.5 KHz 640 x 480 37.9 KHz 37.5 KHz 640 x 350 31.5 KHz 720 x 400 31.5 KHz 35.1 KHz 37.9 KHz 800 x 600...
Need help?
Do you have a question about the DGL20 and is the answer not in the manual?
Questions and answers