Advertisement
Getting Started
Please read the manual carefully before use to ensure appropriate use of product functions. Please keep this manual for future inquiries.

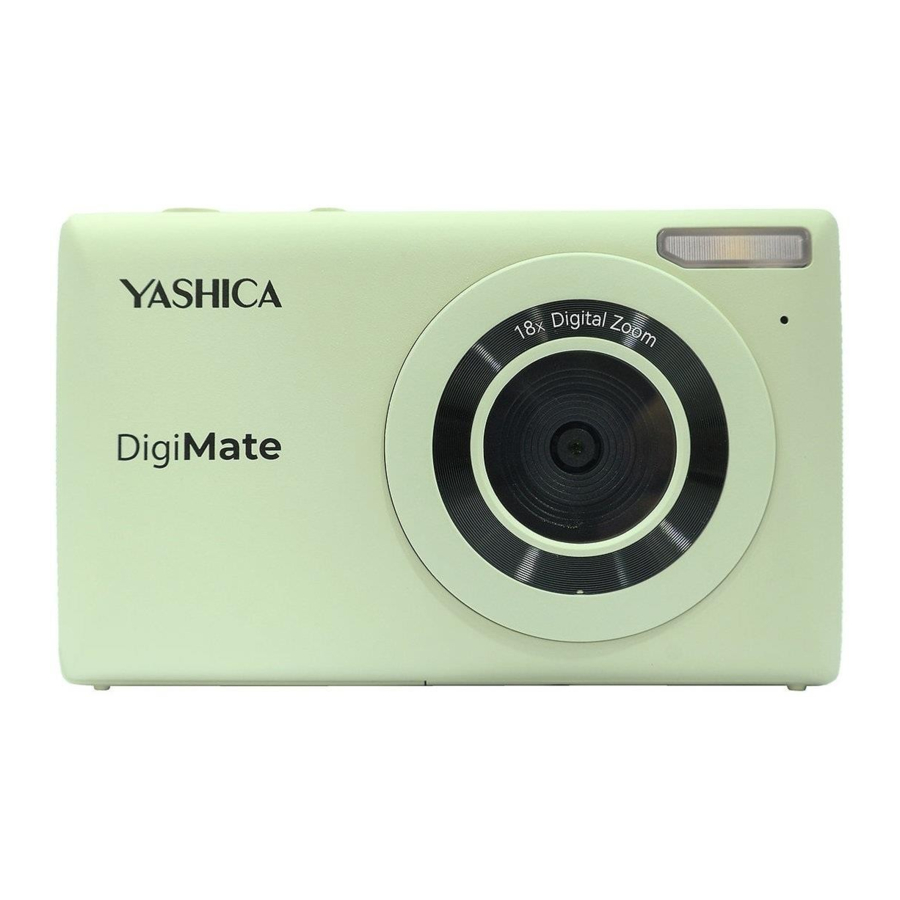
What is in YASHICA DigiMate?
- YASHICA DigiMate Camera
- Storage bag
- User Manual
- Type-C USB Charging Cable
- Hand strap
- Cleaning cloth
- Key chain
Product Overview

- Lens
- Flashlight
- Display
- Charging Indicator
- Zoom out
- Zoom in
- Up/Deleting Files Button
- Right/Flash setting/Fast Forwarding Button
- OK Button/Menu Button
- Down/Timer Setting Button
- Left/Grid Setting/Rewinding Button
- Playback Function
- Mode Setting Button
(Photo/Video/Time Lapse/Slow motion/Photo timer/Playback) - Power Button
- Shutter Button
- 3.5mm Interface
- Tripod Mount
- Battery Cover (Battery slot /TF/Micro SD card slot inside)
*No TF/Micro SD Card is included.* - Type-C USB Port
- Speaker
- Handstrap Hook
First time using YASHICA DigiMate
- Inserting the TF/MicroSD Card
- Open the battery cover on the left bottom (camera lens facing the user) to insert the TF/MicroSD Card into the TF/ MicroSDCard Slot. When the card is locked, you will hear a "click" sound.
- Close the cover.
Remarks: Make sure the device is turned off.
![]()
Format the TF/MicroSD Card for first time use. - Use the TF/MicroSD card with C10 or higher speed.
- If the TF/Micro SD card is not formatted, a box will pop up to ask you to format the card. Please proceed to format the memory card.
- Format the TF/MicroSD Card in the camera. Press Menu Button and go to Format function, select OK to confirm.
- If there is any existing data in the TF/MicroSD card, please back up the data before formatting. The data cannot be recovered after confirming the option to format the TF/MicroSD card.
- Charging YASHICA DigiMate
- Connect the Charging Cable to the USB Type-C Port.
- The charging indicator turns red while being charged. It will turn green and automatically turn off when the camera is fully charged. Make sure the battery is inserted in the camera, and charge with the provided Type C USB charging cable.
- It takes about 2 hours to charge the battery.
- Attaching the hand strap
- Attach the provided hand strap to the hook.
- Attaching to tripod
- Mount the camera to tripods with 1/4"-20 thread mount for capturing the moments in photos or video.
- Attaching an adaptor or instrument for the 3.5mm interface Plug in professional microphones or instrument to improve.
- the sound quality

Operational Instructions
- Lens
Focus lens - Flashlight
Flashlight. - Display
Display screen. - Charging Indicator
Blue light: The camera is working with battery.
Red light: The camera is charging; it will be off when the camera is fully charged.
Remarks: You can use the camera while charging it with a portable charger. - Zoom out
Zoom out while taking photos and videos.
Remarks: The button sound volume cannot be changed, it can only be turned off or on. - Zoom in
Zoom in while taking photos and videos.
Remarks: The button sound volume cannot be changed, it can only be turned off or on. - Up/Deleting Files Button
Up: Going up in the menu settings.
Go to Mode Setting Button to choose Playback and choose Delete current file/Delete all files/Cancel. - Right/Flash setting/Fast Forwarding Button
Up: Going right in the menu settings
Press once to turn on the flashlight.
Press two times to turn on auto the flashlight when there is not enough light in the detection. - OK Button/Menu
OK: Select the parameter and confirm the setting.
Enter Menu settings for Photo mode:- Photo Resolution
- Auto
- Continuous Shooting
- Photo Quality
- Effect
- White Balance
- ISO
- Exposure
- Metering Mode
- Flashlight
Enter Menu settings for Video mode.
- Video Resolution
- Recording Sound
- Continuous Shooting
- Video Quality
- Effect
- White Balance
- ISO
- Contrast
- Exposure
- Metering Mode
- Flashlight
Settings:
- Language
- Date-Time
- Light Source Frequency
- Indicator Light
- Button sound
- Power on/off sound
- Auto Screensaver
- Auto Shutdown
- Time Watermark
- Format
- Image Rotation
- Reset to Factory
Settings
- Filmware Version
Press OK button to choose from the parameters available in each setting.
Press Mode button as the return to the Menu last page/ home page.
- Down/Timer Setting Button
Left: Going left in the menu settings Timer:
Press once to set the 3-second timer.
Press 2 times to set the 10-second timer. Press 3 times to set the 15-second timer.
Press 4 times to set the 20-second timer.
Press 5 times to set the 30-second timer. Press 6 times to cancel the timer. - Left/Grid Setting/Rewinding Button
Left: Going left in the menu settings.
Press once to see the grid for photo taking.
Press 2 times to cancel the setting. - Mode Setting Button (Photo/ Video/ Time Lapse/ Slow motion/ Photo timer/ Playback)
Mode Setting
Press once to see the following options.- Photo mode
- Video mode
- Time Lapse
Select the mode and press OK button.
Acting as the Back/Return option to the last page/homepage option.
- Power Button
Turn the camera on and off. - Shutter Button
In Photo mode, press to take a photo.
Press shortly to focus. - 3.5mm Audio Interface
Plug in professional microphones or instrument to improve the sound quality - Tripod Mount
- Battery Cover
(Battery slot /TF/Micro SD card slot inside) *No TF/Micro SD Card is included.*
Install battery and Micro SD card - Type-C USB Port
USB Type-C charging and connect to the computer with the cable. - Speaker
- Handstrap Hook
Attach a hand strap
Camera settings
The camera supports photos and videos in corresponding modes.
How to Take A Photo
- The camera is in photo mode by default when you turn on the camera.
- Press Shutter Button to take a photo.
How to Record A Video
- Press the Mode Setting Button to choose and enter Video Mode. Press the Shutter Button to start/stop recording.
- When recording, there is a blue flashing sign as the Indicator Light and the recording will start from 00:00:01 onwards.
- Press Shutter Button to stop recording.
How to Take A Time Lapse Video
- Press the Mode Setting button to choose and enter Time Lapse.
- Press Shutter Button to start a slow motion video. When recording, there is a blue flashing sign as the Indicator Light and you can see the red dot near the date and time tag.
- Press Shutter Button to stop the time lapse video.
How to Take A Slow Motion Video
- Press the Mode Setting button to choose and enter Slow Motion.
- Press Shutter Button to start a time lapse video. When recording, there is a blue flashing sign as the Indicator Light and you can see the red dot near the date and time tag.
- Press Shutter Button to stop the slow motion video.
How to Set the Timer
- After entering this mode, the default timer is 3 seconds for taking a photo.
- Press the Down Button once to change the setting to 5 seconds.
- Press the Down Button two times to change the setting to 10 seconds.
- Press the Down Button three times to change the setting to 20 seconds.
How to Playback and Delete Files (Photos and Videos)
- Press the Mode Setting Button to choose the Playback.
- Press Left or Right Button to select and go back and forth for photos and videos.
- Press Up Button. Choose from the option "Delete current file/ Delete all files/Cancel"
- Press OK and a box pops out. Choose Confirmation or Cancel, and Press OK button to confirm your option to delete the select image/video.
- Alternatively, Choose Cancel and press OK to exit delete files.
- Please press the "Mode" button to exit the Playback mode.
Display overview

- Photo/ Video Mode
- Photo/Video Resolution
- Photo Quality
- Remaining photos/Remaining storage
- TF/Micro SD Card Inserted
- Flashlight
- Battery Level
- Effect
- Exposure
- AWB
- ISO Setting
- Grid Setting
- Digital Zoom
- Date and Time
Menu Settings for Photo Mode
![]()
Photo Resolution
You can choose to set the photos in the following resolutions:
48MP/44MP/30MP/24MP/20MP/12MP/8MP/5MP/3MP.
The default setting is 48MP.
Press Mode Button to return to the Menu Settings.
![]()
Timer
You can set the timer function from Off/ 3 seconds/ 10 seconds/ 15 seconds/ 20 seconds/ 30 seconds. The default setting is off.
Press Mode Button to return to the Menu Settings.
![]()
Continuous Shooting
You can set the continuous shooting function to be 3 photos per shoot/ 5 photos per shoot of 10 photos per shoot. The default setting is off.
Press Mode Button to return to the Menu Settings.
![]()
Photo Quality
You can set the photo quality to be general, good or very good. The setting allows you to pick the photo quality. The default setting is very good.
Press Mode Button to return to the Menu Settings.
![]()
Effect
You can choose the photo effects based on your preference.
The default setting is normal.
Press Mode Button to return to the Menu Settings.
![]()
White Balance
You can choose the white balance to be Auto, Sunny, Cloudy, Incandescent Light, Fluorescent Light.
The default setting is Auto.
You can choose the photo effects based on your preference. Press Mode Button to return to the Menu Settings.

ISO
You can choose the ISO based on your preferences from Auto, 100, 200, 400, 800, 1600, 3200 and 6400. The default setting is Auto.
Press Mode Button to return to the Menu Settings.
![]()
Exposure
You can set the exposure from +3 to -3.
The default setting is 0.
Press Mode Button to return to the Menu Settings.
![]()
Metering Mode
You can choose the following options: Average Metering, Center Metering, Spot Metering and Matrix Metering. The default setting is Average Metering.
Press Mode Button to return to the Menu Settings.
![]()
Flashlight
You can choose the flashlight settings here: Off/On/Auto
Auto power off setting to be off, 1 minute, 2 minutes, 3 minutes, 4 minutes, 5 minutes or 10 minutes.
The default setting is off.
Menu Settings for Video Mode
![]()
Video Resolution
You can choose to set the video resolution in the following resolutions:
4K 30 FPS - 720P 120FPS
2.7K 30FPS - 720P 60FPS
1080P 60 FPS - 720P 30FPS
1080P 30 FPS
The default setting is 4K 30FPS.
Press Mode Button to return to the Menu Settings.
![]()
Recording Sound
You can choose to record the sound/audio in the video. The default setting is on.
![]()
Loop Recording
You can set the loop recording for the videos to be taken at a certain period of time and continue as a separate a video.
You can choose from off/ 2 minutes/ 3 minutes/5 minutes
It means that after the video is taken to 2 minutes, the video will be saved and the camera will start a new recording. The default setting is off.
Press Mode Button to return to the Menu Settings.
![]()
Video Quality
You can set the video quality to be general, good or very good. The setting allows you to pick the video quality. The default setting is very good.
Press Mode Button to return to the Menu Settings.
![]()
Effect
You can choose the photo effects based on your preference.
The default setting is normal.
Press Mode Button to return to the Menu Settings.
![]()
White Balance
You can choose the white balance to be Auto, Sunny, Cloudy, Incandescent Light, Fluorescent Light.
The default setting is Auto.
You can choose the photo effects based on your preference. Press Mode Button to return to the Menu Settings.
![]()
ISO
You can choose the ISO based on your preferences from Auto, 100, 200, 400, 800, 1600, 3200 and 6400. The default setting is Auto.
Press Mode Button to return to the Menu Settings.
![]()
Contrast
You can choose the contrast based on your preferences: 0/1/2/3/4/5.
The default setting is 0.
Press Mode Button to return to the Menu Settings.
![]()
Exposure
You can set the exposure from +3 to -3.
The default setting is 0.
Press Mode Button to return to the Menu Settings.
![]()
Metering Mode
You can choose the following options: Average Metering, Center Metering, Spot Metering and Matrix Metering. The default setting is Average Metering.
Press Mode Button to return to the Menu Settings.
![]()
Flashlight
You can choose the flashlight settings here: Off/On/Auto
Auto power off setting to be off, 1 minute, 2 minutes, 3 minutes, 4 minutes, 5 minutes or 10 minutes. The default setting is off.
Overall System Settings
![]()
Language
There are 11 languages to support, including
- Simplified Chinese
- Traditional Chinese
- English
- Japanese
- Korean
- German
- Italian
- Spanish
- Portugese
- Bahasa
- Thai
- French
The default language is in English.
Press Mode Button to return to the Menu Settings.
![]()
Date-Time
You can choose to turn on or off the Date-Time tag. You can choose to set date in the following format.
YYYY/MM/DD hr: min: sec
The default setting is on.
![]()
Frequency
The frequency setting is 60Hz/50Hz.
The default setting is Auto.
Press Mode Button to return to the Menu Settings.
![]()
Indicator Light
You can set the indicator light to be off/on. The default setting is on.
![]()
Button sound
You can choose to turn on or off the button sound. The default setting is on.
![]()
Power on/off sound
You can choose to include the power on or off sound.
The default setting is on.
![]()
Auto Screensaver
You can choose to set the screensaver option to be off, 10 seconds, 20 seconds or 30 seconds. For setting 10/20/30 seconds, it means the camera is inactive after the set time and the screen turns black. Once you press any button, the camera will be turned on.
The default setting is off.
Press Mode Button to return to the Menu Settings.
![]()
Auto Shutdown
You can choose the Auto Shutdown function to be off/ 1 minute/ 3 minutes / 5 minutes / 30 minutes / 60 minutes. The default setting is 3 minutes.
Press Mode Button to return to the Menu Settings.

Time Watermark
You can choose to include the time and date as a watermark/tag on the photo/video. The default setting is on.

Format
This function allows you to format the TF/Micro SD Card.
If there is any pre-existing photos or videos, please back up before proceeding to format the TF/Micro SD card. Formatting sets the TF/Micro SD card to fit with the camera's file structure in storing the photos and videos.

Image Rotation
You can choose the photo to be rotated. The default setting is off.

Reset To Factory Settings
You can choose to reset system to original factory setting.

Firmware Version
You can see the firmware information.
Model: DigiMate
Version: V1.2.0
How to Download Photo/ Video Files to Computer with USB Card Reader
- Connect the TF/MicroSD card to a USB Card Reader.
- You can see a folder with the files, and hence, you can download the photo and videos flies from the camera to your computer.
- After downloading, please remove the USB Type-C cable and press "Eject".
How to Download Photo/ Video Files to Computer
- Turn on the camera and connect it the camera with the USB Type-C cable and the computer
- You can see the screen pops out: Mass Storage Mode, PC Camera or Charging Mode.
- Click Mass Storage Mode and the folder with the files will pop out. You can download the photo and videos flies from the camera to your computer.
- After downloading, please remove the USB Type-C cable and press "Eject".
Connecting the PC Camera mode:
This camera can be used as a web cam.
Remarks: No other functions can be used.
Charging Mode
You can still use the camera while it is being charged.
Turn off the camera will speed up the charging process.
Remarks for battery:
If the battery is mishandled, the battery can possibly burst, leading to a fire or burn. Please be aware of the following cautions.
- Do not disassemble.
- Do not crush and do not expose the battery to any shock or excessive force, such as hammering, dropping or stepping on it.
- Do not allow metal objects to come into contact with the battery terminals.
- Do not expose the battery to temperature above 60°C (140°F) in direct sunlight or in a car parked under the sun. - Do not incinerate or dispose of in fire.
- Do not handle the damaged or leaking lithium ion battery.
- Make sure to charge the battery with a reliable charger.
- Keep the battery pack out of the reach of young children.
- Keep the battery pack dry.
- Replace only with the same battery with YASHICA.
- Dispose of used battery packs promptly as described in the instructions.
Cleaning and Maintenance
- If the camera is not used for an extended period, remove the battery and store it in a dust-free, dry environment at a temperature not exceeding 30℃.
- To proIong the battery Iife, it is recommended to fuIIy discharge it before storage.
- After the battery is fuIIy charged, discharge it compIeteIy at Ieast once every 3 months.
- If there is dust or dirt on the Iens or screen, gentIy wipe and clean the camera with the provided cleaning cloth.
- Avoid dropping it or subjecting it to strong impacts or vibrations.
Troubleshooting
| Problem | Solution |
| The camera cannot be turned on because of low/no battery. | The battery is not charged. Please charge the battery and you will see the charging indicator turns red. |
| The battery could be inverted, please make sure that the battery is not inverted. | |
| The camera crashes/the screen is frozen. | Do not press the buttons too quickly or the camera system may not be able to handle the command. |
| Please check whether the TF/Micro SD card is in CIass 10, the maximum storage is not more than 256G. | |
| The camera crashes/the screen is frozen. | Do not press the buttons too quickly or the camera system may not be able to handle the command. |
| Make sure the TF/Micro SD card is inserted properly. Please check whether the memory card is inserted backwards. | |
| Back up the photos and videos from the TF/MicroSD Card to your computer or other storage medium. Format the TF/MicroSD Card from the Format function or from your computer. |
Specification
| Product Name | YASHICA DigiMate |
| Model Number | YAS-DGM100 |
| Sensor | 8MP CMOS sensor |
| ISO | Auto, 100, 200, 400, 800, 1600, 3200 |
| Memory | Micro SD/TF Card, Support up to 128GB (Not included in the camera) |
| Lens | Fixed, F/3.2 f=7.36mm |
| Focus | Auto focus 1meter |
| Photo | File Format: JPEG Resolution: 3MP, 5MP, 8MP, 12MP, 20MP, 24MP, 30MP, 44MP, 48MP, 64MP |
| Video | File Format: MP4 Resolution: HD 1280X720@120FPS, FHD 1920X1080@60FPS, 2.7K 2688X1520@30FPS, 4K 3840X2160@30FPS |
| Zoom | 18X Digital Zoom |
| Anti-shake | DIS |
| Speaker | Built in |
| Screen | 2.7 inch TFT screen(4:3) |
| LED light | <1.5M |
| Camera flash | Auto, on, off |
| White balance | Auto/Daylight/Cloudy/fluorescent/Incandescent |
| Light Exposure | -3.0EV~+3.0EV |
| Camera timer | OFF/3s/5s/10s/20s |
| Por | USB2.0 |
| Auto power-off | OFF/1min/3min/5min |
| Battery | Li-ion |
If you have further questions or comments, please contact our customer support team - at cs@yashica.com.
Documents / ResourcesDownload manual
Here you can download full pdf version of manual, it may contain additional safety instructions, warranty information, FCC rules, etc.
Advertisement


Need help?
Do you have a question about the DigiMate 100 and is the answer not in the manual?
Questions and answers