Table of Contents
Advertisement
Available languages
Available languages
Quick Links
Advertisement
Table of Contents

Related Manuals for ALPATEC BAP 16


Summary of Contents for ALPATEC BAP 16
- Page 1 AND HIGH AND HIGH VELOCITY F VELOCITY F BAP 16 BAP 16 M O D E D ’ E M P L O I M O D E D ’ E M P L O I U S E R M A N U A L...
- Page 2 F R A N Ç A I S F R A N Ç A I S ALPATEC vous félicite d’avoir choisi ce produit et vous remercie de votre confiance. Pour votre confort et votre sécurité, votre article a été vérifié à toutes les étapes de sa fabrication et a passé...
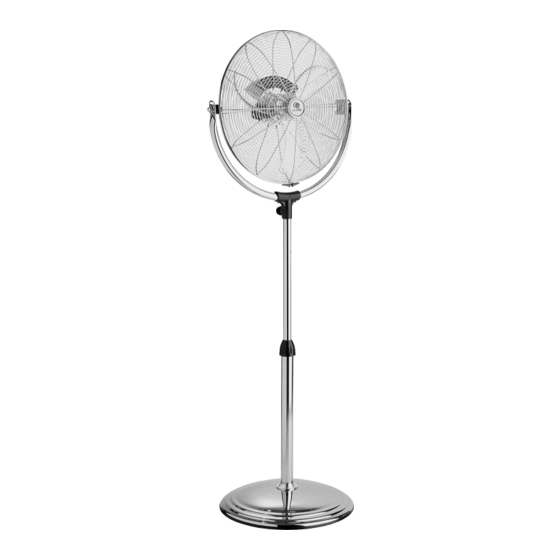
- Page 3 notice_BAP16-reso 12/12/05 10:34 Page 3 CARACTERISTIQUES CARACTERISTIQUES Voltage : 230 V (50Hz) Consommation : 60 W Vitesses de ventilation : 3 Débit d’air : 4500 m DESCRIPTION DE L ’APP AREIL DESCRIPTION DE L ’APP AREIL 1. Fixation 2. Rondelle 3.
- Page 4 notice_BAP16-reso 12/12/05 10:34 Page 4 ASSEMBLAGE DE L ’APP AREIL ASSEMBLAGE DE L ’APP AREIL - Fixer le tube principal (6) et la base (4) à l’aide des 4 vis (5). Laisser glisser le couvercle (7) au-dessus des vis. - Positionner le stabilisateur (3) sous la base (4) et fixer l’ensemble à l’aide de la fixation (1) et de la rondelle (2).
- Page 5 E N G L I S H For your comfort and safety, ALPATEC has checked all the steps of manufacturing. The products have been made for you to enjoy their design and easiness to use. ALPATEC, a complete range of air conditioners, coolers, fans and heaters for you to be completely satisfied.
- Page 6 notice_BAP16-reso 12/12/05 10:34 Page 6 SPECIFICA TIONS SPECIFICA TIONS Voltage : 230 V (50Hz) Consommation : 60 W Vitesses de ventilation : 3 Débit d’air : 4500 m DESCRIPTION DESCRIPTION 1. L screw 2. Washer 3. Weight base insert 4. Base 5.
- Page 7 notice_BAP16-reso 12/12/05 10:34 Page 7 HOW TO ASSEMBLE HOW TO ASSEMBLE - Fix the tube (6) with the base (4) using the screws (5). Place the cap (7). - Position the weighed base insert (3) under the base (4) and secure with the L screw (1) and the washer (2).
- Page 8 notice_BAP16-reso 12/12/05 10:34 Page 8 Indications relatives à la protection de l’environnement Au terme de sa durée de vie, ce produit ne doit pas être éliminé avec les ordures ménagères mais doit être remis à un point de collecte destiné au recyclage des appareils électriques et électroniques. Le symbole figurant sur le produit, la notice d’utilisation ou l’emballage vous indique cela.
Need help?
Do you have a question about the BAP 16 and is the answer not in the manual?
Questions and answers