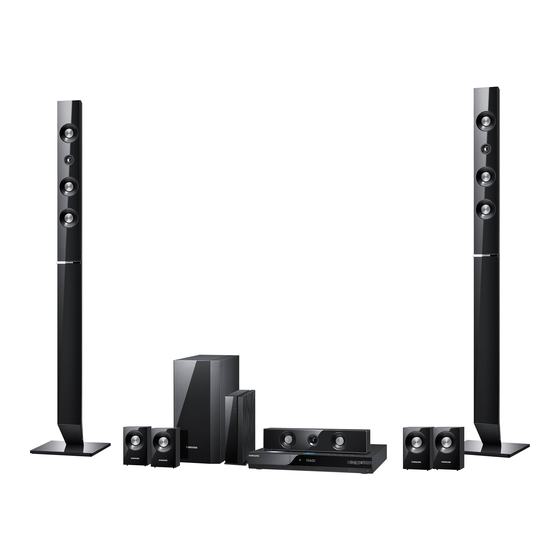
Samsung HT-C6730W User Manual
7.1ch blu-ray home theater system
Hide thumbs
Also See for HT-C6730W:
- User manual (72 pages) ,
- Upgrade instructions (1 page) ,
- User manual (69 pages)

Related Manuals for Samsung HT-C6730W


Summary of Contents for Samsung HT-C6730W
-
Page 1: Home Theater System
HT-C6730W 7.1CH Blu-ray Home Theater System user manual imagine the possibilities Thank you for purchasing this Samsung product. To receive more complete service, please register your product at www.samsung.com/register... -
Page 2: Safety Information
Safety Information Safety Warnings TO REDUCE THE RISK OF ELECTRIC SHOCK, DO NOT REMOVE THE COVER (OR BACK). NO USER-SERVICEABLE PARTS ARE INSIDE. REFER SERVICING TO QUALIFIED SERVICE PERSONNEL. CAUTION RISK OF ELECTRIC SHOCK DO NOT OPEN The lighting fl ash and Arrowhead within CAUTION : TO REDUCE THE RISK OF ELECTRIC The explanation point within the triangle is Triangle Is awarning sign alerting you of... -
Page 3: Important Safety Instructions
RF Radiation Exposure Statement This equipment complies with FCC RF Radiation Exposure limits set forth for an uncontrolled environment. This equipment should be installed and operated with a minimum distance of 20cm between the radiator and your body. This transmitter must not be co-located or operating in conjunction with any other antenna or transmitter. This device complies with part 15 of the FCC Rules. -
Page 4: Cautions On Handling And Storing Discs
1 or 2 hours with the In the case of using open source software, Open Source power on. Licenses are available on the product menu. Copyright © 2010 Samsung Electronics Co., Ltd. All rights reserved. English... -
Page 5: Table Of Contents
Connecting to the Network Connecting the FM Antenna Before Starting (Initial settings) SETUP Setting the Menu Display TV Aspect Ratio BD Wise (Samsung Products only) Resolution HDMI Format Movie Frame (24 Fs) Progressive Mode Still Mode HDMI Deep Color Audio... - Page 6 Energy Saving Front Display Power On/Off Sound Light Effect Support Software Upgrade Contact Samsung Playing a Disc BASIC FUNCTIONS Using the Disc menu / Title menu / Popup menu Using the Search and Skip Functions Slow Motion Play/Step Motion Play...
-
Page 7: Getting Started
You can enjoy music files by connecting your iPod to the product with the supplied iPod dock. BD Wise BD Wise automatically adjusts BD Wise-compliant Samsung products to their optimal settings. This feature is enabled only if BD Wise-compliant Samsung products are connected to each other using an HDMI cable. Internet@TV You can download various fee charged or free of charge applications through the network connection. -
Page 8: Icons That Will Be Used In Manual
Getting Started Icons that will be used in manual Make sure to check the following terms before reading the user manual. Term Logo Icon Definition BD-ROM This indicates a function available on a BD-ROM. This indicates a function available on a BD-RE/-R disc recorded in the BD-RE/-R BD-RE format. -
Page 9: Disc Types And Characteristics
For Blu-ray Disc Dolby Digital Plus additional information, refer to the Disc Types and Characteristics section of this Manual. If you encounter compatibility problems, please contact the SAMSUNG customer care center at 1-800 SAMSUNG. ✎ NOTE NTSC broadcast system in ... -
Page 10: Disc Types
Mongolia • This product can play back DVD-R disc recorded and fi nalized with a Samsung DVD video recorder. China • Playback can be perfomed with DVD-RW discs in the Video Mode and fi nalized only. -
Page 11: Disc Format
Audio CD DivX (Digital video express) • An audio disc on which 44.1kHz PCM Audio is DivX is a video fi le format developed by Microsoft and is recorded. based on MPEG4 compression technology to provide • This product can play back CD-DA format audio audio and video data over the Internet in real-time. - Page 12 Getting Started Supported File Formats Video File Support File Extension Container Video Codec Audio Codec Resolution 1920x1080 Divx 3.11/4.x/5.1/6.0 XviD 1920x1080 *.avi MP4v3 1920x1080 1920x1080 H.264 BP/MP/HP 1920x1080 VC-1 AP 1920x1080 DivX 5.1/6.0 *.mkv XviD 1920x1080 1920x1080 H.264 BP/MP/HP 1920x1080 VC-1 AP *.wmv WMV (wmv9)
-
Page 13: Accessories
Bigger the image resolution, the longer the Notes on USB connection delay to displaying. DRM applied MP3 fi les downloaded from a Supported devices: commercial site are not played back. USB storage media, MP3 player, digital camera, External HDD device is not supported. USB card reader Supported fi... -
Page 14: Description
Getting Started Description Front Panel DISC TRAY Insert disc here. DISPLAY Displays the playing status, time, etc. REMOTE CONTROL SENSOR Detects signals from the remote control. OPEN/CLOSE BUTTON Opens and closes the disc tray. Switches the mode as follows : FUNCTION BUTTON BD/DVD D. -
Page 15: Rear Panel
Rear Panel FM ANT COMPONENT OUT DIGITAL WIRELESS HDMI IN HDMI OUT AUDIO IN iPod OPTICAL SPEAKER IMPEDANCE : 3 VIDEO OUT SPEAKER OUTPUT CONNECTORS Connect the front, center, surround back, subwoofer speakers. The cooling fan supplies cool air to the product to prevent overheating COOLING FAN and always revolves when the power is on. -
Page 16: Remote Control
Getting Started Remote control Tour of the Remote Control Use to select the mode. FUNCTION POWER TV SOURCE Press to select TV's video mode. Turn the product on and off. Set a Sleep time to shut off the BD RECEIVER/TV SLEEP procuct. -
Page 17: Installing Batteries In The Remote Control
York 15, 17, 18, 48, 54, Magnavox be possible, depending on your brand of TV. 59, 60, 62, 72, 89 Yupiteru The remote control will work with Samsung TVs Marantz 40, 54 Zenith 58, 79 Matsui Zonda by default. -
Page 18: Connections 18 Connecting The Speakers
Connections This section involves various methods of connecting the product to other external components. Before moving or installing the product, be sure to turn off the power and disconnect the power cord. Connecting the Speakers 2~3m 2~3m Installing the DPL IIx Installing the DPL IIz Position of the product Place it on a stand or cabinet shelf, or under the TV stand. -
Page 19: Speaker Components
Speaker Components Assembled Speakers (L) (R) SCREW (5x15): 2EA SCREW (4x20): 8EA CENTER SPEAKER STAND FRONT CENTER STAND BASE (L) (R) (L) (R) FRONT SPEAKER SUBWOOFER SUBWOOFER SURROUND SURROUND BACK SURROUND SURROUND BACK SPEAKER CABLE SPEAKER SPEAKER SWA-5000 TX Card Wireless Receiver Module Speaker Cable (2EA) ✎... -
Page 20: Installing The Speakers On The Tallboy Stand
Connections Installing the Speakers on the Tallboy Stand Turn the Stand Base upside-down and connect it to the Stand. Stand Base Stand Insert small screws (4x20, For connecting Stand & Stand Base) clockwise into the four holes marked using a screwdriver as shown in the illustration. CAUTION ... - Page 21 Connecting The Speakers Press down the terminal tab on the back of the speaker. Insert the black wire into the black terminal (–) and the red wire into the red (+) terminal, and then release the tab. Connect the connecting plugs to the back of the product by matching the colors of the speaker plugs to the speaker jacks.
- Page 22 Connections CAUTION Do not let children play with or near the speakers. They could get hurt if a speaker falls. When connecting the speaker wires to the speakers, make sure that the polarity (+/ –) is correct. Keep the subwoofer speaker out of reach of children to prevent children from inserting their hands or alien substances into the duct (hole) of the subwoofer speaker.
-
Page 23: Connecting External Devices/Your Tv Via Hdmi
Connecting External Devices/your TV via HDMI HDMI is the standard digital interface for connecting to devices such as a TV, projector, DVD player, Blu-ray player, set top box, and more. Becuase HDMI is all digital, you'll enjoy digital quality video and sound as it was originally created, without the distortions that can be caused when digital content is converted to analog. - Page 24 Connections Connecting External Devices/your TV via HDMI HDMI IN : Connecting to an External Component with an HDMI Cable Connect an HDMI cable (not supplied) from the HDMI IN jack on the back of the product to the HDMI OUT jack on your digital device.
-
Page 25: Connecting The Video Out To Your Tv
Connecting the Video Out to your TV Blue Green METHOD 1 COMPONENT OUT METHOD 2 Yellow VIDEO OUT METHOD 1 : Component Video (BETTER QUALITY) If your television is equipped with Component Video inputs, connect a Component video cable (not supplied) from the Component Video Output (Pr, Pb and Y) jacks on the back of the product to the Component Video Input Jacks on your TV. -
Page 26: Connecting Audio From External Components
Connections Connecting Audio from External Components COMPONENT OUT COMPONENT OUT DIGITAL DIGITAL HDMI IN HDMI IN HDMI OUT HDMI OUT AUDIO IN AUDIO IN OPTICAL VIDEO OUT VIDEO OUT White Optical Cable (not supplied) Audio Cable (not supplied) If the external analog component has only one Audio Out, connect either left or right. -
Page 27: Connecting To The Network
✎ NOTE Internet access to Samsung’s software update server may not be allowed, depending on the router you use or the ISP’s policy. For more information, contact your ISP (Internet Service Provider). For DSL users, please use a router to make a network connection. -
Page 28: Connecting The Fm Antenna
Connections Connecting to the Network Wireless Network Broadband service Wireless IP sharer Networking with PC for AllShare function (See pages 61~62) You can connect the player to your network with a Wireless IP sharer. A wireless AP/IP router is required to make a wireless network connection. To set the network options, see page 39. ✎... -
Page 29: Setup 29 Before Starting (Initial Settings)
Setup Press the ◄► buttons to select the desired Before Starting (Initial Settings) Network Settings : Wired, Wireless or PBC Turn on your TV after connecting the product. (WPS), and then press the ENTER button. (When the product is connected to TV for the fi rst If you do not know your Network Settings, time, the product will turn on automatically and press the BLUE (D) button on your remote... -
Page 30: Setting The Menu
When the product is connected to the network, RETURN Button : Return to the previous menu. select Internet@TV from the home menu. Download desired content from Samsung AppS. ENTER / DIRECTION Button: The access steps may differ depending on the Press the arrow buttons to move the cursor and select selected menu. -
Page 31: Display
BD Wise (Samsung Products only) Display You can confi gure various display options such as BD Wise is Samsung's latest inter-connectivity feature. the TV Aspect Ratio, the Resolution, etc. When you connect Samsung products with BD-Wise to each other via HDMI, the optimum TV Aspect Ratio resolution is set automatically. - Page 32 Setup Resolution according to the output mode • Blu-ray Disc playback HDMI / connected HDMI / not connected Output Setup HDMI Mode Component/VIDEO Mode Component Mode VIDEO Mode Auto Optimal Resolution 480i 1080p, Movie Frame (24Fs) off 1080p@60F 480i 1080p/1080i, 1080p@24F 480i Movie Frame (24Fs) on...
-
Page 33: Hdmi Format
HDMI Format Progressive Mode You can optimize the color setting from the HDMI Set to improve picture quality when you view DVDs. output by selecting a connected device Type: • Auto : Select to have the product automatically • TV : Select if connected to a TV via HDMI. set the best picture for the DVD you're watching. -
Page 34: Audio
Setup Distance Audio If the speakers cannot be placed at equal Speaker Setting distances from the listening position, you can adjust the delay time of the audio signals from the front, center, surround, surround back and DPL llz subwoofer speakers. •... -
Page 35: Musical Room Calibration
✎ Musical Room Calibration NOTE Setting the Musical Room Calibration By setting the Musical Room Calibration (MRC) function takes about 3 minutes. function just once when you relocate or install the You can only use the Musical Room Calibration product, you can have the product automatically setup if there is no disc in the player. -
Page 36: Digital Output
Setup ✎ Digital Output NOTE Be sure to select the correct Digital Output Set Digital output depending on the connected or you will hear no sound or a loud noise. receiver. (For more details, please refer to the If the HDMI device (Receiver, TV) is not compatible digital output selection). -
Page 37: Dynamic Range Control
This function is not available if the HDMI cable 0 msec and 300 msec. Adjust it to the optimal does not support CEC. If your Samsung TV has an n logo, then setting. it supports the Anynet+ function. ... -
Page 38: Clock
Setup Description of Device (Storage) Information DivX(R) Registration on the Product View DivX(R) VOD Registration Code to purchase • Total Size : Total size of the Device (Storage). and play DivX(R) VOD content. • Available Size : Available size of the Device (Storage). ✎... -
Page 39: Network Setup
Network Setup Settings Network Settings To begin setting up the network connection for Display On-Screen Menu Internet Protocol Setup : Auto Audio Disc Menu your product, follow these steps: IP Address System Audio Subnet Mask Network Subtitle In the Home menu, press the ◄► buttons to Gateway Language : Auto... - Page 40 Setup Press the RED (A) button on the remote Settings control. Network Settings Display On-Screen Menu Internet Protocol Setup : Manual Press the PBC (WPS) button on your router Audio Disc Menu IP Address System Audio within two minutes. Your product displays Subnet Mask : 255 255 255 Network...
- Page 41 When done, press the YELLOW (C) button Settings on your remote, or move to the Done Display Network Settings button, and then press the ENTER button. Network Selection Audio The Network Connecting screen appears. System Connecting to network. Network Network Name(SSID) : shj Wait until the connection confi...
-
Page 42: Network Status
Setup When done with each fi eld, use the ► BD-LIVE Internet Connection button to move successively to the next Select whether to allow an Internet connection fi eld. when BD-LIVE service is used. You can also use the other arrow buttons to •... -
Page 43: Security
Security General When you operate this menu for the fi rst time, the Background password setup screen appears. Enter the desired 4-digit password using the number Change the background theme of the menu screen. buttons. (Default password is set to 0000.) Parental Rating Settings Background... -
Page 44: Support
Never turn the product off or on manually during the update process. Samsung Electronics shall take no legal responsibility for product malfunction caused by an unstable Internet connection or consumer negligence during software upgrade. -
Page 45: Basic Functions
Basic Functions Disc Structure Playing a Disc The contents of disc are usually divided as below. Playback • Blu-ray Disc, DVD-VIDEO Press the OPEN/CLOSE ( ) button to open title 1 title 2 the disc tray. chapter 1 chapter 2 chapter 1 chapter 2 chapter 3... -
Page 46: Using The Search And Skip Functions
Basic Functions Using the Title Menu Using the Search and Skip Functions During playback, you can search quickly through a chapter or track, and use the skip function to jump to the next selection. TITLE MENU During playback, press the TITLE MENU button on the remote POPUP control. -
Page 47: Slow Motion Play/Step Motion Play
Slow Motion Play/Step Motion Play Repeat Slow Motion Play hzZyx To return to normal play, press the REPEAT button again. • In pause mode, press the SEARCH () Press the ▲▼ buttons to select Off, then button. press the ENTER button. If you press the SEARCH () button, the playback speed is reduced to ✎... -
Page 48: Using The Tools Button
Basic Functions Information about the primary / secondary Using the TOOLS button mode is also displayed if the Blu-ray Disc has a During playback, you can operate the BONUSVIEW section. TOOLS disc menu by pressing the TOOLS Use the ◄► button to switch between button. -
Page 49: Changing The Camera Angle
• Caption Function User : The user can adjust the sharpness and noise reduction function respectively. Setting the BONUSVIEW • You must have some experience with video extraction and editing in order to use this feature properly. • To use the caption function, save the caption The BONUSVIEW feature allows you to view fi... -
Page 50: Listening To Music
Basic Functions Listening to Music STOP button : Stops a track. SKIP($) button : During playback, moves to the next page in the Music List or moves to the Buttons on the Remote Control next track in the Playlist. used for Music Playback SKIP (#)button : During playback, moves to the previous page in the Music List or moves to the previous track in the Playlist. -
Page 51: Repeat An Audio Cd/Mp3
To move to the Music List, press the STOP () Displays the music information. or RETURN button. The Music List screen appears. Displays the playlist. Press the ▲▼◄► buttons to move to the desired track, then press the YELLOW (C) button Shows the current track/total tracks. -
Page 52: Sound Mode
Basic Functions Dolby Pro Logic II Mode Sound Mode You can select the desired Dolby Pro DSP (Digital Signal Processor) Function Logic II audio mode. PL II button. Press the DSP regulates the volume level and decreases drastic volume changes Setting the speakers with DPL IIz when you change channels or during a Set the DPL IIz of speaker settings to “On”. -
Page 53: Playing Back A Picture
✎ NOTE Using the TOOLS button The Dolby Prologic II is not available for sound source encoded in 7.1 CH format or HD sound. TOOLS During the slide show playback, you For 2 channel audio CD/MP3 playback, wireless can use various function by pressing receiver does not produce sound (for rear and the TOOLS button. -
Page 54: Playing Back A Usb Storage Device
Basic Functions ✎ NOTE Playing Back a USB Storage Device You must remove the USB storage device safely by performing the “Safe to Remove You can use the USB connection to play multimedia Hardware” function to prevent possible fi les (MP3, JPEG, DivX, etc.) downloaded from a USB damage to the USB memory. -
Page 55: Simple Playback Of Internet Radio (Pandora)
Setting Mono/Stereo Using an iPod You can enjoy music and video fi les from an iPod Press the MO/ST button. MO/ST through the product. • Each time the button is pressed, the sound switches between STEREO and MONO. iPod • In a poor reception area, select MONO for a clear, interference-free reception. - Page 56 ENTER button. Make sure to connect the dock connector so that Press the ◄► buttons to select Videos, then press the label “SAMSUNG” faces upward. the ENTER button. “Made for iPod” means that an electronic accessory has been designed to connect specifi cally to the Select the video fi...
-
Page 57: Network Services
Settings : You can set up the system and create accounts, etc. Press the ◄► buttons to select Internet@ Samsung AppS : You can download various for TV and press the ENTER button. a fee or free-of-charge application services. In the start screen of the Internet@TV service, you will see the service agreement screen. - Page 58 Pressing the FULL SCREEN button on the Samsung Electronics shall take no legal remote while you are using the Screen Keypad responsibility for any interruption of the lets you change the text fi elds to lower case, Internet@TV service caused by the service upper case, numbers, and icons.
- Page 59 Account Login System Setup For a more enjoyable application experience, Reset register and log in to your account. Resets Internet@TV settings to factory default To do this, you must create an account fi rst. (For settings. instructions on creating an account, refer to Internet@TV ID on this page) ✎...
-
Page 60: Samsung Apps
Network Services Service Manager Using the color buttons with the Samsung Apps Delete and lock applications installed in Internet@ • RED (A) (Login) : To log in to the internet service. • GREEN (B) (Thumbnail View) : To change Lock the view mode. -
Page 61: Bd-Live
PC via the network (See pages 27~28) and Check the size of the remaining memory. install the SAMSUNG PC Share Manager on the The memory device must have at least 1GB PC. To install Share Manager, follow these steps. - Page 62 Share from the menu bar. the server function. Click Set Device Policy and click Accept. The search and skip operation may differ depending on the server function. SAMSUNG PC Share Manager File Share Server Help Server : PC Share Manager...
-
Page 63: Other Information
Refer to the chart below when this product does not function properly. If the problem you are experiencing is not listed below or if the instructions below do not help, turn off the product, disconnect the power cord, and contact Samsung Electronics at 1-800-SAMSUNG. Symptom Check/Remedy I cannot eject the disc. - Page 64 Other information Symptom Check/Remedy Aspect ratio cannot be changed. • You can play 16:9 BD/DVDs in 16:9 Wide mode, 4:3 Letter Box mode, or 4:3 Pan - Scan mode, but 4:3 BD/DVDs can be seen in 4:3 ratio only. Refer to the Blu-ray Disc jacket and then select the appropriate function.
- Page 65 Symptom Check/Remedy PC Share Manager function I can see folders shared through the • Since it shows only fi les corresponding to the Image, Music, and Movie PC Share Manager, but I cannot see categories, fi les that do not correspond to these categories may not be the fi...
-
Page 66: Index
Network Language Title menu LAN Cable Light Effect Title list Wireless Network TV Aspect FM Antenna TV Screen Saver Contact Samsung Mono/Stereo Movie Frame (24 Fs) Musical Room Calibration USB Storage MUTE Zoom Network Setup Network Settings Network Status English... -
Page 67: Specifi Cations
Specifi cations Power Requirements AC 120V, 60Hz Power Consumption 75 W Weight 8.3 Ibs General Dimensions 16.9 (W) x 2.4 (H) x 13.0 (D) inches Operating Temperature Range +41°F to +95°F Operating Humidity Range 10 % to 75 % Signal/noise ratio 70 dB Usable sensitivity 10 dB... - Page 68 Center : 1.28 Ibs , Subwoofer : 9.92 Ibs *: Nominal specifi cation - Samsung Electronics Co., Ltd reserves the right to change the specifi cations without notice. - Weight and dimensions are approximate. - Design and specifi cations are subject to change without prior notice.
- Page 69 SAMSUNG will repair or replace this product, at our option and at no charge as stipulated herein, with new or reconditioned parts or products if found to be defective during the limited warranty period specified above. All replaced parts and products become the property of SAMSUNG and must be returned to SAMSUNG.
- Page 70 Contact SAMSUNG WORLD WIDE If you have any questions or comments relating to Samsung products, please contact the SAMSUNG customer care center. Contact Center Contact Center Area Web Site Area Web Site ` North America www.samsung.com/ch 0848 - SAMSUNG (7267864, Switzerland www.samsung.com/...
- Page 71 QUESTIONS OR COMMENTS? COUNTRY CALL OR VISIT US ONLINE AT WRITE Samsung Electronics America, Inc. 1-800-SAMSUNG IN THE US www.samsung.com/us 85 Challenger Road Ridgefi eld Park, (7267864) NJ 07660-2112 Code No. AH68-02268N...
Need help?
Do you have a question about the HT-C6730W and is the answer not in the manual?
Questions and answers