Table of Contents
Advertisement
Available languages
Available languages
Advertisement
Table of Contents

Related Manuals for Canton DIGITAL MOVIE DM 70


Summary of Contents for Canton DIGITAL MOVIE DM 70
- Page 1 DIGITAL MOVIE pure music...
- Page 2 Deutschland / Germany Tel.: +49(0) 60 83 28 70 Phone: +1-612-706-9250 Fax: +49(0) 60 83 28 113 Fax: +1-612-706-9255 e-mail: info@canton.de e-mail: info@cantonusa.com Die Adressen der internationalen Canton-Vertriebspartner finden Sie unter: The addresses of Canton’s international distributors can be found at: www.canton.de...
- Page 3 öffnung. Schwingungen und Vibrationen können zur Beschädigung von Gegen- auf, um auch später noch nachschlagen zu können. ständen führen. Canton kann für Schäden, die aus Nichtbeachtung der folgenden Punkte Stecken Sie keine Gegenstände oder Körperteile in die Öffnung des Subwoofers. resultieren, nicht haftbar gemacht werden.
- Page 4 Sehr geehrter Kunde, willkommen in der Canton-Familie und vielen Dank für Ihr Vertrauen, das Sie uns mit dem Kauf dieses Systems entgegenbringen. Sie haben sich für ein hochwertiges Lautsprecher-System entschieden und damit Ihren hohen Anspruch an Klang- und Verarbeitungsqualität bewiesen.
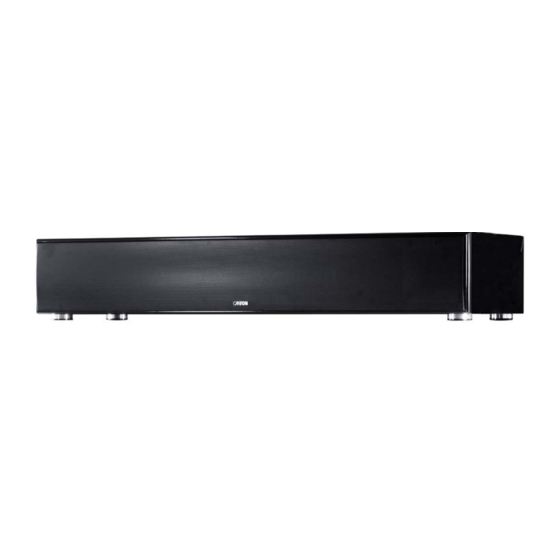
- Page 6 Rückansicht des DM 70 Umschalter SAT (optisch oder coaxial) Netzschalter Betriebsanzeige (rot = standby, grün = ein) SUB OUT - Ausgang PRE OUT 2.1/5.1 Mode Vorverstärker - Ausgang Digital Eingänge für SAT und DVD Buchse zum Anschluss des Netzkabels Analoge Eingänge für TV und AUX (sonstiges Gerät)
-
Page 7: Platzierung Der Lautsprecher
Anschluss der Quellgeräte Die Canton DM-Systeme bieten eine Vielzahl von Anschlussmöglichkeiten für alle gängigen Quellgeräte, wie zum Beispiel DVD-Player, Videorecor- der, Satelliten-Receiver, Multimedia-Konsolen (Playstation®, X-Box®, ...) etc. Hierbei werden die Audioanschlüsse Ihrer Quellgeräte mit den entsprechenden Anschlüssen auf der Rückseite des DM 70 verbunden (DVD an DVD, SAT an SAT, usw..). Quellgeräte, die über einen digitalen Ausgang für Dolby Digital und DTS Bitstreams verfügen, sollten auch digital mit dem DM System verbunden werden. - Page 8 Fernbedienung Standby-Anzeige Ein/Standby-Taste Multifunktionsanzeige Setup-Anzeige Wiedergabe-Modus-Anzeige Dekodier-Modus Lautstärke-Tasten Mute-Taste Wiedergabe-Modus Geräteauswahl-Tasten Setup (+/-)-Tasten Speaker-Delay (Distance) Speaker-Level Basskorrektur-Taste Taste zur Einstellung der Bässe Test-Tone Taste zur Einstellung der Höhen Tasten zur Einstellung der Einschaltlautstärke Dynamik-Anpassung Setup Taste zum Einstellen der Lippensynchronität...
-
Page 9: Inbetriebnahme Der Fernbedienung
Gebrauch der Fernbedienung Wenn alle Geräte miteinander verbunden sind und der Netzschalter am System eingeschaltet ist, befindet sich das Canton DM-System im Standby- Modus. Durch einmaliges Drücken einer beliebigen Taste wird die Fernbe- dienung aktiviert. Wird sie länger als 30 Sek. nicht benutzt, geht sie in den Ruhezustand über. - Page 10 Bedienung des DM-Systems Drücken Sie , um das DM-System zu starten. Danach leuchten: - eine Lautstärke LED - eine Wiedergabemodus LED - eine oder zwei Dekodiermodus LEDs Wenn Sie das DM-System wieder ausschalten möchten, drücken Sie erneut Das DM-System wird in den Standby-Modus versetzt. Hauptmenü...
- Page 11 Einstellen des DIGITAL MOVIE Nachdem Sie Ihr DM-System erfolgreich angeschlossen haben, sollten Sie als nächstes die einzelnen Komponenten auf Ihren Hörraum anpassen. Wenn Sie Einstellungen am DM-System vornehmen wollen, schalten Sie dieses bitte ein und drücken Sie zunächst die Taste für ca.
-
Page 12: Speaker Setup
Speaker Setup Speaker Delay (Distance) Messen Sie zunächst die Entfernung zwischen den Einzel- komponenten des DM Systems und Ihrer bevorzugten Hörposition. Gehen Sie wie zuvor beschrieben vor um die Funktion (Entfer- nung der Lautsprecher) zu aktivieren. Drücken Sie die Taste so oft bis sie den gewünschten Lautsprecher ausgewählt haben. - Page 13 Speaker Level Zur Lautstärkeanpassung des DM-Systems dient der . Dieser ist erst nach Aktivierung der Funktion aktivierbar. Achtung! Bevor Sie den Testton aktivieren, stellen Sie die Lautstärke des Systems im normalen Bedienmodus über die einen moderaten Wert (40-50). Über die Tasten kann der Pegel des ausgewählten Lautsprechers separat verändert werden.
-
Page 14: System Setup
System Setup Raumanpassung Über die Tasten können Sie das System an Ihren Hörraum anpassen. Der Wertebereich reicht von -6dB bis +6dB. Die Maximalwerte (-6dB und +6dB) werden durch Leuchten der „beiden“ linken bzw. der beiden rechten LEDs angezeigt. Hierzu als Hilfe: Bei akustisch stark bedämpften Räumen - evtl. - Page 15 Laufzeitverzögerung Mit lip sync kann das Bild mit dem Ton synchronisiert werden, um z.B. Stimmen an zeitlich verzögerte Mundbewegungen anzupassen. Mit den Tasten kann eine Audio Signal-Verzögerung von 0ms bis 70ms eingestellt werden. Dynamikanpassung Über die Taste kann die Dynamik des Systems angepasst werden.
-
Page 16: Startup Volume
Startup Volume Dieser Wert legt die maximale Lautstärke fest, mit der das DM- System beim Einschalten die Tonwiedergabe beginnt. Wird das Gerät bei einer geringeren Lautstärke ausgeschaltet, bleibt diese erhalten. Nach dem Drücken der Taste kann die Einschaltlautstärke festgelegt werden. Der Wertebereich entspricht dem der normalen Wiedergabelautstärke. - Page 17 Preset Das Preset legt fest, in welchem Modus Ihr DM-System betrieben wird. Die Anzeige unterscheidet zwischen funktionsspezifischen und produktspezifischen Eigenschaften. Als Funktionen können ein 2.1 (Werkseinstellung) oder 5.1 Modus erscheinen. Im 5.1 Modus besteht die Möglichkeit ein aktives oder funkgesteuertes (wireless) Lautsprechersystem als Rear Lautsprecher über den „2.1 MODE/5.1 MODE“...
- Page 18 Fernbedienung an DM anmelden Zur Anmeldung der Fernbedienung an das DM System gehen Sie wie folgt vor: 1. Verbinden Sie das DM mit dem Netz und schalten Sie es am Netzschalter ein. Achten Sie darauf, dass das System zuvor für mindestens 20 sec ausgeschaltet war.
-
Page 19: Fehlerbehebung
Problembehebung und Optimierung Fehler Mögliche Ursache Fehlerbehebung Kein Ton 1. Die Lautstärke ist auf 0 bzw. sehr leise gestellt 1. Erhöhen Sie die Lautstärke oder mute wurde gedrückt 2. Wählen Sie den zur Quelle zugehörigen Eingang 2. Es wurde der falsche Eingang (input) ausgewählt Kein Ton bei Eingang Sat 1. - Page 20 Fehler Mögliche Ursache Fehlerbehebung Klang ist dumpf (zu wenig Höhen) 1. Sie geben ein Stereo - Signal im Virtual Surround 1. Ändern Sie den Wiedergabemodus in Stereo Modus wieder (S.10) 2. Ihr Raum ist akustisch stark bedämpft 2. Heben Sie den Hochtonpegel unter dem Punkt „Raumanpassung“...
- Page 21 2. Die Batterie richtig einlegen Allgemeine Pflegehinweise Einspielphase Um möglichst lange Freude an Ihren Canton Lautsprechern zu haben, Um seine maximale Leistungsfähigkeit zu entwickeln, benötigt ein beachten Sie bitte folgendes: Setzen Sie das Gehäuse der Lautspre- Lautsprecher eine Einlaufzeit von ca. 15-20 Betriebsstunden. In dieser cher nicht direktem Sonnenlicht aus.
- Page 23 Canton cannot be held responsible for any damages that may occur through If any sound distortion occurs, such as unnatural knocking, throbbing or high failure to observe the following points.
-
Page 24: System Description
Dear Customer, Welcome to the Canton family and thank you for the confidence that you have shown in us by purchasing this product. You have chosen a high quality loudspeaker system, which demonstrates your desire for excellence in terms of sound and workmanship. - Page 26 Rearview of the DM 70 SAT (optical or coaxial) switch Mains switch Operation display (red = standby, green = on) SUB OUT - output PRE OUT 2.1/5.1 Mode preamplifier - output Digital inputs for SAT and DVD Jack for connecting the power cable Analogue inputs for TV and AUX (external equipment)
-
Page 27: Positioning The Loudspeaker
Connecting source devices The Canton DM system offers a multitude of connection possibilities for all current audio sources, such as DVD players, video recorders, satellite receivers, multimedia consoles (Playstation®, X-Box®, ...) etc. The audio connections of your audio source devices can be connected to the relevant inputs on the rear of the DM 70 (DVD to DVD, SAT to SAT, etc. -
Page 28: Remote Control
Remote Control Standby display On/Standby button Multifunction display Setup display Playback mode display Decoder mode Volume buttons Mute button Playback mode Device selection buttons Setup (+/-) buttons Speaker delay (Distance) Speaker level Bass expantion Bass set button Test tone Treble set button Volume buttons Dynamics modulation Setup... -
Page 29: Setting Up The Remote Control
When all the devices are connected and the system is plugged in at the mains the Canton DM system is in standby mode. Press any button to activate the remote control. If the remote control is not used for more than 30 seconds it returns to standby mode and can be reactivated by pressing any button. - Page 30 Using the DM system Press to activate the DM system. The following lights will come on: - one volume LED - one playback mode LED - one or two decoder mode LEDs Press again to turn the DM system off. The DM system will go into standby mode.
- Page 31 Setting up the DIGITAL MOVIE Once your DM system has been successfully connected you need to adjust the individual components to suit the enviroment. To adjust the DM system, turn it on and press the button for about 3 seconds. The LED „Set“ will start to flash. You can then use the relevant buttons (spk level, spk delay, bass exp…) to activate the desired functions.
- Page 32 Speaker Setup Speaker Delay (Distance) First measure the distance between the individual component parts of the DM system and your preferred listening position. Activate the function (distance of loudspeaker) as described above. Press the button repeatedly until you have selected your chosen loudspeaker.
- Page 33 Speaker Level is used to set the volume of the DM system. This can only be activated after the function has been selected. Warning! Before activating the test tone use the buttons to set the volume of the system in normal operating mode to a moderate value (40-50).
- Page 34 System Setup Room Settings Use the buttons to adjust the system to your room. The values range from -6dB to +6dB. The maximum values (- 6dB and +6dB) are indicated by both LEDs on the left or the two right LEDs.
- Page 35 Time delay With lip sync the image can be synchronised with the sound, e.g. in order to match voices to delayed mouth movement. It is possible to set an audio signal delay of 0 to 70ms using the buttons Dynamics button can be used to adjust the dynamics of the system.
- Page 36 Startup Volume This value establishes the maximum volume that applies when the DM system is turned on. If the device is set to a lower volume when it is turned off this value remains in place. Press the button to set the startup volume. The range corresponds to the normal reproduction volume.
- Page 37 Preset The Preset establishes in what mode your DM system will operate. The display differentiates between function-specific and product- specific characteristics. Functions can be 2.1 Mode (factory setting) or 5.1 Mode. In the 5.1 Mode it is possible to operate active or wireless loudspeaker as rear speakers via the „2.1 MODE/5.1 MODE“...
- Page 38 Registering the remote control with the DM To register the remote control with the DM system follow the following process: 1. Connect the DM to the power supply and switch it on at the mains. Be careful to ensure that the system was previously switched off for at least 20 seconds.
- Page 39 Troubleshooting and Optimisation Error Possible causes Solutions No sound 1. The volume is set at 0 or very low or the sound 1. Increase the volume has been muted 2. Select the correct input for the audio source 2. The wrong input has been selected No sound with Sat input 1.
- Page 40 Error Possible causes Solutions Sound is dull (too little treble) 1. You are playing back a stereo signal in Virtual 1. Change the playback mode to Stereo Surround mode (Pg.30) 2. Your room has very ‘dead’ acoustics 2. Increase the treble levels as described in „Room settings“...
-
Page 41: General Care And Maintenance
2. Insert the battery correctly General care and maintenance Running-in time To ensure that you enjoy your Canton loudspeakers for a very long In order to develop its maximum performance ability a loudspeaker time please note the following care and maintenance instructions: Do needs a running-in time of approx 15 –... - Page 43 About TruSurround XT SRS TruSurround XT®, an audio enhancement technology from SRS Labs, processes multichannel content to create an immersive surround Dolby, Pro Logic, and the double-D symbolareregistered sound experience so the listener feels as if „phantom“ speakers trademarksofDolbyLaboratories. appear to extend all around them, producing an amazing surround sound effect, without the clutter of extra wires or speakers placed Manufactured under license under U.S.
-
Page 44: Garantie
This guarantee applies to all loudspeakers sold by an authorised Canton dealer. In case of damage please contact your local dealer or contact the Canton Service Department directly. Canton Elektronik GmbH+Co KG · Neugasse 21-23 · D-61276 Weilrod Händlerstempel ·...
Need help?
Do you have a question about the DIGITAL MOVIE DM 70 and is the answer not in the manual?
Questions and answers