Table of Contents
Troubleshooting

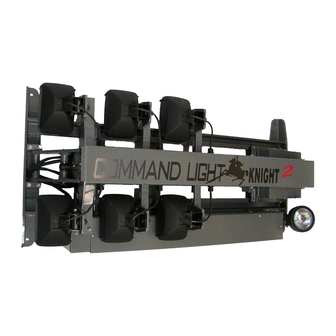
Related Manuals for Command Light KNIGHT2 KL475


Summary of Contents for Command Light KNIGHT2 KL475
- Page 1 COMMAND LIGHT P.O. BOX 87 LOVELAND, CO 80539 PHONE: 1-800-797-7974 FAX: 1-970-667-4296 WEB: www.commandlight.com Serial Numbers: KL4901 and higher This document supersedes all previous documents. Effective Wednesday, January 04, 2006...
-
Page 2: Table Of Contents
Please take the time to read this manual before installing or operating the light. Save this guide for future reference. CONTENTS 1. BREAKAGE OR DAMAGE DURING SHIPMENT ........................4 1. BREAKAGE OR DAMAGE DURING SHIPMENT ........................5 2. GENERAL DESCRIPTION AND SPECIFICATIONS........................6 ..................................7 EATURE DENTIFICATION... - Page 3 12. PARTS LISTS ....................................37 (KL450 S ) - S 1 ......................37 ARTS TANDARD SSEMBLY IGURE – S 2 ..............................41 ELAY ARTS IGURE – S 3..............................43 ONTROLLER ARTS IGURE – S 4 .................................44 OLSTER ARTS IGURE – S 5 ..........................45 ACKLIGHT PTION ARTS IGURE...
- Page 4 Thank you for investing in a Command Light product. In order to serve you better, when contacting Command Light for assistance please have the serial number(s) available. The serial number can be located stamped into the frame in proximity to the power connection entrance.
-
Page 5: Breakage Or Damage During Shipment
1. Breakage or Damage During Shipment The transportation company is fully responsible for all shipping damage and will resolve problems promptly if you handle it correctly. Please read these instructions carefully. Examine the contents of all shipping cases. If you find any damage, call your transportation agent at once and have them make a description on the freight or express bill describing the damage and the number of pieces. -
Page 6: General Description And Specifications
2. General Description and Specifications The COMMAND LIGHT KNIGHT V2 is designed to provide high-intensity emergency scene lighting with quick precision. As with any electromechanical device, take precautionary steps to assure safe operation. Never operate the KNIGHT near overhead power lines. -
Page 7: Feature Identification
Feature Identification... -
Page 8: Product Safety Precautions
3. Product Safety Precautions Never operate the KNIGHT near overhead high voltage power lines. The KNIGHT is manufactured from electrically conductive materials. Do not use the KNIGHT for uses other than its’ intended purpose. Do not move emergency vehicle with the light extended. -
Page 9: Operation
4. Operation Raising the light from the nested position Using the control box, raise the lower or upper stage. You may also activate both stages simultaneously. Control switches are of momentary action style and must be held in the “on” position to actuate the stages. -
Page 10: Installation
The screws for the cover are located in a parts bag inside the installation kit box. Installation Kit Included with the COMMAND LIGHT is an installation kit. Verify that the contents of the kit includes the following items: 50 feet of 10GA-4 Conductor power cable... -
Page 11: Location Requirements
When routing the connecting electrical wires take care to avoid sharp bends, hot components or other hazards to the wire. The KNIGHT is not designed to be operated in a raised position while the vehicle is in motion. The includes warning circuit wiring to enable a warning device, letting the vehicle operator know KNIGHT when the KNIGHT is not in the nested (travel) position. -
Page 12: Mounting
Mounting Place the provided spacers in the location of the light mounting holes. The spacers may be modified to conform to the contour of the mounting location. Remove any obstructions below the mounting surface such as headliners. Attach any necessary lifting attachments to the unit. The center of gravity (balance point) is slightly behind the lower bank of lights. -
Page 13: Electrical Wiring
6. Electrical Wiring Run the control wire from the control box to the KNIGHT Run the power wire from the breaker box or generator to the KNIGHT . A 40 Amp breaker is recommended for all models of KNIGHT Make the control connections in the KNIGHT entrance box. -
Page 14: 120 Vac Wiring Diagram
120 VAC Wiring Diagram 240 VAC Wiring Diagram If 240 VAC operation is desired, remove the jumper wire between the red and black leads. NOTE: The load on the (2) power legs will not be equally balanced. The RED lead powers the lamps and will carry ≈33% more load. -
Page 15: 220 Vac European
220 VAC European Verify that there is sufficient overhead room available and test operation of the light. 220 VAC / 12 VDC European Verify that there is sufficient overhead room available and test operation of the light. -
Page 16: Warning Device Installation
7. Warning Device Installation The KNIGHT nest sensor can be used to activate a warning device when the light is extended. Typically, the vehicle will have a light or buzzer that actuates when the compartment doors are open. To connect such a device determine whether it is activated when it receives 12 VDC or when it receives a path to ground. -
Page 17: Maintenance
8. Maintenance Lamp Replacement WARNING: NEVER remove any lamp from it’s socket while power supply is engaged! Allow sufficient time for the lamps to cool. The surrounding metal lamp housings can cause serious burns. Tools required: Clean oil-free cloth Cleaning alcohol Protective gloves Position lamp tree so lamps are readily accessible. -
Page 18: Kl475/490
KL475/490 Remove the (4) screws that hold the lamp bezel in place. Use caution, The lamp bezel and lens may fall if not properly grasped. Caution: be certain that the lamp is cool to the touch before handling. Do not touch the lamp directly. Use a clean oil-free towel to handle the lamp. -
Page 19: Center Switch Cam Adjustment
• If it is still hitting off center, repeat previous steps. • If problems adjusting center still persist you may need to adjust the center switch bracket, or call Command Light at 1-800-797-7974 to order a new switch, part number 069-14222. Note: By making a mark next to the cam on the bottom of the spindle, this makes judging the distance much easier. -
Page 20: Rotation Drive Belt Adjustment
Rotation Drive Belt Adjustment Raise lamp tree to permit easy access. Remove the (6) screws that retain the 2-piece midplate cover in place. Remove the (4) screws that retains the midplate surround cover. Rotate the cover up and away from the main lift arm, around the pivot point Loosen, but do not remove, screws that retain rotation motor. -
Page 21: Rotation Drive Belt Replacement
Rotation Drive Belt Replacement Remove midplate covers as outlined previously. Raise lamp tree enough to provide easy access to the twist-lock connectors located above the actuator. Disconnect all connectors found. The number of connectors will vary depending on what options you model of light tower has. Loosen and remove (4) hex head bolts securing lamp tree. - Page 22 While supporting the actuator remove lamp tree mount arms. Use caution the actuator weighs approximately 13 pounds [6kg] and can cause injury if not supporting adequately. Mount arms are universal and can go on either side. Note position of lamp tree mount holes in photo at right for proper reassembly position Remove (4) E-ring retaining clips securing actuator lower pivot pin in place.
- Page 23 Belt will take some effort to slide past the dust shield. Work it over the shield a little at a time. Once belt is past the shield, slide rotation motor towards the center of the motor mount. Begin guiding the belt over the drive pulley.
-
Page 24: Power Failure
9. Power Failure The KNIGHT can be retracted manually if power to the unit is lost. If power loss is temporary, reestablishing power may be easier than manually retracting the light. Disconnect all power sources from the KNIGHT Retract the lower stage first. Slowly apply pressure to the rotation platform to manually rotate to the centered position. -
Page 25: Retract The Upper Stage
Retract the upper stage. Support the lamp tree with temporary blocking to relieve the tension on the upper actuator pivot pins. Unfasten the twist lock connector for the upper actuator. The connector is located above and in front of the actuator. -
Page 26: Troubleshooting
10. Troubleshooting General Problem Possible Cause Solution Unit will not extend No power to the unit Check power input connections. Incorrect installation Refer to installation instructions. Upper stage will not Lower stage not raised Raise lower stage higher. rotate above 40mm Rotation motor in Allow rotation motor to cool. -
Page 27: Autopark Malfunction
Autopark Malfunction Problem Possible Cause Solution Autopark button must Improper or faulty Check nest switch ground and operation. be held in to park unit ground Water in electronics Remove moisture from ground points and electronics. Do not use a pressure washer to clean unit. Stuck or broken nest Clean switch plunger surface of accumulated debris. -
Page 28: Sensor Switch Troubleshooting
Sensor Switch Troubleshooting Description Function Problem Solution Rotation Limit Mercury switch. Provides ground for Lamps will not Adjust angle of switch, Switch (item 106 safety limit relays. Prevents operation illuminate, upper replace if necessary. on parts list) of lamps and rotation when lower stage stage will not rotate. -
Page 29: Technical Specifications
11. Technical Specifications KL435 / KL450 Dimensions: Height(Depth) Length Width Retracted 11.375” 47” 23” Extended 7’4” 52” 23” 10” Maximum 54” Minimum 24” Minimum Recessed installation Weight: 136 pounds Wiring: 110 VAC 10/4 SO cord 50’ provided Control wiring 22/20 PVC Jacketed 50’... -
Page 31: Kl470Mh
KL470MH Dimensions: Height(Depth) Length Width Retracted 14.75” 47” 27” Extended 7’4” 52” 27” 10” Maximum 54” Minimum 30” Minimum Recessed installation Weight: 160 pounds Wiring: 110 VAC 10/4 SO cord 50’ provided Control wiring 22/20 PVC Jacketed 50’ provided Relay protection: Lights Cole-Hersey 3055... -
Page 33: Kl475/490
KL475/490 Dimensions: Height(Depth) Length Width Retracted 13.375” 54.75” 30” 7’4” 95.25” 30” Extended Recessed installation 13” Maximum 58” Minimum 32” Minimum Weight: 174 pounds Wiring: 240 VAC 10/4 SO cord 50’ provided Control wiring 22/20 PVC Jacketed 50’ provided Relay protection: Lights Cole-Hersey 3055... -
Page 35: Kl495A
KL495A Dimensions: Height(Depth) Length Width Retracted 11.375” 54.75” 23” 7’4” 95.25” 23” Extended Recessed installation 10” Maximum 58” Minimum 24” Minimum Weight: 174 pounds Wiring: 240 VAC 10/4 SO cord 50’ provided Control wiring 22/20 PVC Jacketed 50’ provided Relay protection: Lights Cole-Hersey 3055... -
Page 37: Parts Lists
12. Parts Lists Parts List (KL450 Standard Assembly) - See Figure 1 ITEM DESCRIPTION PART NO. 075-01000A FRAME, MAIN 034-11042 BOLT, HEX HEAD, 5/16-18 X 1, SS 034-11053 WASHER, SPLIT RING LOCK, 5/16, SS 075-06500 PLATE, DOWN LIMIT STRIKE 034-13033 SCREW, HEX HEAD, ¼-20 X 7/8, SS 069-15336 E-CLIP... - Page 38 034-10951 NUT, LOCKING, #8, SS 034-11017 SCREW, HEX HEAD, ¼-20 X 1, SS 034-11028 WASHER, SPLIT RING LOCK, ¼, SS 075-03000 BLOCK, PIVOT, MAIN LIFT UPPER 075-03520 PLUNGER, DOWN LIMIT 075-03510 PLATE, DOWN LIMIT SWITCH 069-15360 SWITCH, DOWN LIMIT 034-11001 SCREW, PH MS, ¼-20 X ½...
- Page 39 034-11041 SCREW, HEX HEAD, 5/16-18 X ¾ , SS 034-11053 WASHER, SPLIT RING LOCK, 5/16, SS 034-11033 NUT, NYLOCK, ¼-20, SS 034-11017 SCREW, PH MS, ¼-20 X 7/8 , SS 034-11112 NUT, ¼-20, JAM, SS 034-11020 BOLT, HEX HEAD, ¼-20 X 1¾ , SS 034-11033 NUT, NYLOCK, ¼-20, SS 069-15332...
- Page 40 Figure 1...
-
Page 41: Relay Box Parts - See Figure 2
Relay Box Parts – See Figure 2 PART NO. DESCRIPTION 069-15360 SWITCH, NEST 069-15351 SOCKET, 2 POSITION 069-15347 SOCKET, 7 POSITION 069-15350 SOCKET, 10 POSITION 065-13530 BREAKER, 12V 40A 065-13529 BREAKER, 24V 20A 065-14020 RELAY, AC LAMPS 065-13730 SOCKET, BOSCH 065-13729 RELAY, BOSCH 065-14780... - Page 42 Figure 2...
-
Page 43: Controller Parts - See Figure 3
Controller Parts – See Figure 3 ITEM PART NO. DESCRIPTION 065-12833 PLASTIBOX P5-11333-E 075-00722 SWITCH MOUNT PLATE 065-13959 LABEL, CONTROL PANEL 065-12844 SWITCH SPST, LIGHT BANK 065-12844 SWITCH SPST, STROBE 065-12846 BOOT, SWITCH COVER 065-12845 SWITCH DPMT, ROTATION 065-12845 SWITCH DPMT, UP STAGE 065-12845 SWITCH DPMT, LOW STAGE 065-12842... -
Page 44: Holster Parts - See Figure 4
Holster Parts – See Figure 4 065-12921 LABEL, CAUTION 065-13730 RELAY MODULE 034-10909 #6 X ” SM SCREW 034-10951 8-32 LOCKNUT SS 075-00712 HOLSTER, COVER 034-10902 4-40 HEX NUT 065-14139 LABEL, STOP 034-14283 #4 INTERNAL LOCK WASH 065-14138 LABEL, AUTOPARK 065-12826 TERM STRIP 4 POLE 075-00711... -
Page 45: Backlight Option Parts List - See Figure 5
Backlight Option Parts List – See Figure 5 ITEM PART NO QTY DESCRIPTION 075-12090W TREE, BACKLIGHT, KV2, WELDMENT 075-12060W MOUNT, LAMP, BACKLIGHT, KV2 069-14154 PULLEY, 48 GR, 3MM P, .3125 ID 069-14155 BELT, 11 GR, 3MM P, 333MM 034-10990 NUT, 10-32, HEX, SS 065-13834 GEAR MOTOR, BACKLIGHT, 2L005 075-12080... -
Page 46: Metal Halide , Option , Lamp Tree Parts List - See Figure 6
Metal Halide, Option, Lamp Tree Parts List – See Figure 6 ITEM PART NO QTY DESCRIPTION 075-08000W TREE, METAL HALIDE, KV2, WELDMENT 075-08001 TREE, COVER, METAL HALIDE 034-10973 SCREW, 10-24 X ½, PHP, SS 075-08100A DIN, BLOCK, ASSEMBLY DN-T10EB DIN, END BLOCK DN-T10RED DIN, CONNECTOR, SINGLE, RED DN-T10BLK... -
Page 47: Metal Halide , Option , Transformer Compartment Parts List - See Figure 7
Metal Halide, Option, Transformer Compartment Parts List – See Figure 7 ITEM PART NO DESCRIPTION 075-08200 BOX, TRANSFORMER, METAL HALIDE 075-08300 LID, TRANSFORMER BOX, METAL HALIDE 034-10938 SCREW, 8-32 X 3/8, PHP, SS TRANSFORMER, 175 W, METAL HALIDE SCREW, 10-24 X 3-1/2, PHP, SS 034-10978 WASHER, INTERNAL LOCK, #10, SS 034-10989... -
Page 48: Description
Aerial, Option, Lamp Tree Parts List – See Figure 8 ITEM PART NO DESCRIPTION 075-08000W TREE, AERIAL, KV2, WELDMENT 065-14031 FIXTURE, LAMP, FRC, 1000W 075-90004 HARNESS, LAMP, AERIAL, KV2 034-11017 BOLT, ¼-20 X 1, HEX, SS 034-11016 BOLT, ¼-20 X 3/4, HEX, SS 034-11029 WASHER, FLAT, ¼, SS 034-11033... -
Page 49: Kl475/490, Option , Lamp Tree Parts List - See Figure 8
KL475/490, Option, Lamp Tree Parts List – See Figure 8 PART NO DESCRIPTION 075-08000HS TREE, HSL, KV2, WELDMENT 065-14036 FIXTURE, LAMP, HS, Specify Wattage 075-90000 HARNESS, LAMP, KV2 065-12852 SEALING CONNECTOR 075-08002 BRACKET, NEST... -
Page 50: Control Wiring Schematics
13. Control Wiring Schematics Control Box – Straight Cord... -
Page 51: Control Box - Coiled Cord
Control Box – Coiled Cord... -
Page 52: Kl450
KL450... -
Page 53: Kl470Mh
KL470MH... -
Page 54: Kl490
KL490... -
Page 55: Euro 220 Volt
EURO 220 Volt... -
Page 56: Euro 220 Volt / 12Vdc
Euro 220 Volt / 12VDC... -
Page 57: Limited Warranty
COMMAND LIGHT at the above address indicating the model number, serial number and type of defect. No parts or equipment will be received by COMMAND LIGHT for repair or replacement under this warranty without specific written authority from COMMAND LIGHT in advance.
Need help?
Do you have a question about the KNIGHT2 KL475 and is the answer not in the manual?
Questions and answers