Sangean U3 User Manual
Hide thumbs
Also See for U3:
- Operating instructions manual (96 pages) ,
- Service manual (39 pages) ,
- Specification sheet (1 page)
Table of Contents
Advertisement
Advertisement
Table of Contents

Related Manuals for Sangean U3


Summary of Contents for Sangean U3
- Page 1 User Manual...
-
Page 2: Important Safety Instructions
IMPORTANT SAFETY INSTRUCTIONS 1. Read these instructions. 2. Keep these instructions. 3. Heed all warnings. 4. Follow all instructions. 5. Do not use this apparatus near water. 6. Clean only with dry cloth. 7. Do not block any ventilation openings. Install in accordance with the manufacturer’s instructions. - Page 3 10. Protect the power cord from being walked on or pinched particularly at plugs, convenience receptacles, and the point where they exit from the apparatus. 11. Only use attachments/accessories specified by the manufacturer. 12. Use only with the cart, stand, tripod, bracket, or table specified by the manufacturer, or sold with the apparatus.
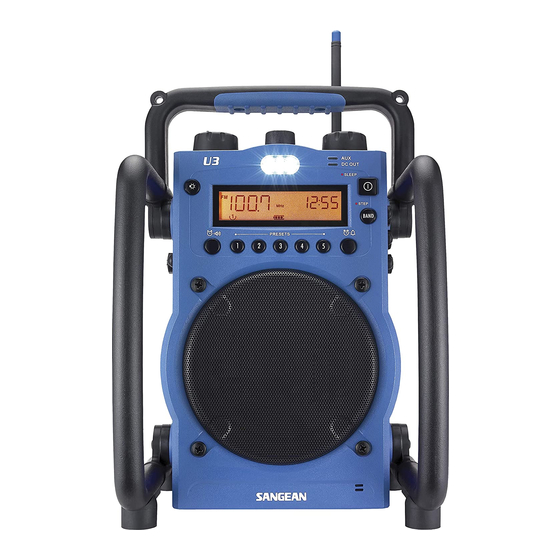
- Page 5 Control Volume Control Tone Control Tuning Control/Time Set/Station Scan FM Antenna Aux In LED indicator DC Out LED indicator Power Button/Sleep Band Selection Buzzer Alarm Speaker Buzzer Light Light Switch LCD Display Radio Alarm Preset station DC Input Socket Battery Compartment Open to AC Cord Compartment Aux In Socket DC Output Socket...
-
Page 6: Lcd Display
LCD Display Preset Stations Band Indicator Frequency unit Battery Power Radio Alarm HWS Buzzer Alarm Frequency Sleep and Snooze Status PM for Clock Time Set Clock... -
Page 7: Power The Radio
Power the radio Note: Insert back up battery prior to main batteries. Back up battery is to back up the preset stations and also clock. It is necessary to insert back up battery (2 x UM-3 1.5V, not supplied) for memory back up even if you use AC power only. Without the back up battery, time and preset station will get lost if remove AC power cord from AC outlet or during AC power failure. - Page 8 1. Battery operation Installing the batteries, first turn battery cover fixture anti-clockwise to loosen and put down the battery cover. Insert 6 x D size (UM-1) battery into the compartment. Ensure the battery is inserted in accordance with the diagram shown. Close the battery cover and fasten the fixture by turning clockwise.
-
Page 9: Setting The Clock
Setting the clock 1. Clock can be set either the radio is power on or off. 2. Display will show “- : - -“ when the batteries are installed or when the radio is connected to the mains supply. 3. Press in Tuning control (Time Set) knob for more than 2 seconds, display will flash time set symbol and also the hour digits, followed by a beep. - Page 10 Note: The radio will continue to search next available stations if you do not press Scan button again when it finds a radio station. 4. Rotate the Volume Control and Tone Control to get required sound level. 5. To turn off the radio, press the Power button. Display will show OFF.
-
Page 11: Storing Stations In Preset Memories
Storing stations in preset memories There are 5 memory presets for each waveband. 1. Press the Power button to turn on the radio. 2. Tune to required station using one of the methods previously described. 3. Press and hold down the required preset until the radio beeps. The preset number will appear in the display and the station will be stored under chosen preset button. - Page 12 Note: Radio alarm can be activated only until both radio alarm time and radio alarmed station are set. Radio alarm will be automatically switched to Buzzer alarm when the radio is in low battery status or the selected radio alarm station signal is too weak. a.
- Page 13 Setting the HWS (Humane Wake System) buzzer alarm A beep tone will activate when selecting the HWS alarm. The alarm beep will increase in volume every 15 seconds for one minute followed by one minute silence before repeating the cycle. The HWS buzzer alarm will sound for one hour until turning off by pressing the Power button.
-
Page 14: Snooze Function
Snooze function 1. Whilst the alarm is activated, press any buttons except the Power button will activate the snooze function. The radio or HWS buzzer alarm will be silenced with interval of 5 minutes. 2. The display will flash both the snooze symbol and the alarm symbol. -
Page 15: Setting Tuning Step
Setting tuning step Tuning steps on some countries are different from where you purchase the radio. If you buy the radio in Europe and intend to use in Northern America or some Southern American countries, you may have to adjust tuning step so the radio may continue to serve you well. - Page 16 DC out – charge your mobile phone Note: Always charge your mobile phone when the radio is switched off. Suitable for phones with 3.6 – 4.8 Volt batteries. Please read instruction manual of your mobile phone. Connect the supplied charging cable to the DC out. For Nokia phones you can connect your phone directly to this cable.
-
Page 17: Specifications
Specifications Frequency Coverage: FM 87.50 – 108 MHz AM (MW) 520 – 1710 kHz (10 kHz) 522 – 1629 kHz (9 kHz) AC Power: AC 120V/60Hz/25W (USA) AC 230V/50Hz/25W (Europe) Batteries: 6 x UM-1 (D size ) DC IN : 12V/1A center pin positive (operational voltage 9-14V) 3.5 mm in diameter. - Page 18 Aux in socket: 3.5 mm diameter, stereo jack to be mixed as monaural Input sensitivity: 100m Vrms at output 5W @ 100 Hz Input impedance: 47 kohm DC Out: 5V 500 mA Speaker unit: 6.5 inches 8 ohm 15W, full range Internal Antenna system: AM built-in ferrite aerial FM built-in removable bended spring antenna...
- Page 19 If at any time in the future you should need to dispose of this product please note that: Waste electrical products should not be disposed of with household waste. Please recycle where facilities exist. Check with your Local Authority or retailer for recycling advice. (Waste Electrical and Electronic Equipment Directive)
- Page 21 381PL01A-A...