Table of Contents
Advertisement
Quick Links
Advertisement
Table of Contents

Related Manuals for Rifton K501


Summarization of Contents
General Safety Warnings
Pacer Usage and Supervision Precautions
Restrictions on mini Pacer use, importance of manual, professional assessment, and adult supervision.
Fall and Injury Prevention Warnings
Usage, Terrain, and Stability Precautions
Avoid hazards, ensure proper fit, center weight, tighten knobs, inspect for wear, use intended components.
Structural Integrity and Supervision
Inspect for wear, remove if unsafe. Supervise speed, prevent sudden stops, use care with environmental factors.
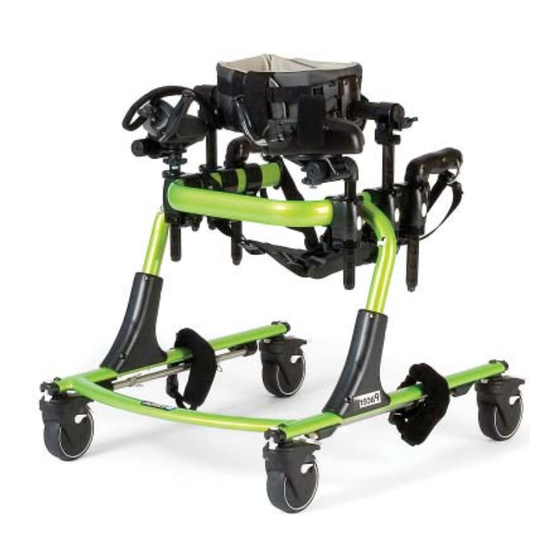
Frame - Basic Components
Small Pacer Frame Adjustments
Steps to adjust frame height on small Pacer: pull triggers, slide bar, release triggers, ensure secure fit.
Mini Pacer Frame Adjustments
Height adjustments for mini Pacer are made via prompts; frame itself is fixed and does not adjust.
Casters - Adjustments
Swivel Lock Operation
Engage swivel lock to prevent caster swiveling for straight-line travel or to prevent veering sideways.
Caster Brake and Drag
Engage brake to stop rotation. Adjust caster drag for user speed resistance using dial from rabbit to turtle.
Directional Lock Function
Engage directional lock by pushing lever down to allow turning in one direction only, preventing backward roll.
Accessories - Clamps
Attaching Clamps
Attach clamps to top bar using knob and band. Placement varies by user position and number of accessories.
Accessories - Hand Loops
Attaching Hand Loops
Attach forward of frame uprights for stable positioning. Can be inside or outside top bar for user proximity.
Hand Loop Adjustments
Loosening Knob for Sliding/Removal
Loosen knob to slide hand loop along top bar or completely remove it and its clamp.
Adjusting Hand Loop Height
Press button, slide post up or down, release button to engage post for desired height.
Tilting and Repositioning Hand Loops
Loosen knob to tilt hand loop. Remove entire loop by releasing button, rotating post, reinserting, and adjusting height.
Arm Prompts - Attaching
Recommended Arm Prompt Placement
Attach forward of frame uprights, not on front of top bar, for stable positioning and accessory space.
Clamps for Arm Prompts
Clamps attach outside or inside top bar. Inside placement positions prompts closer to the user for slimmer users.
Arm Prompts - Adjustments
Adjusting Arm Pad Position
Loosen knob to slide, rotate, or move arm pad toward/away from or backward/forward of the user.
Adjusting Arm Prompt Height and Handhold
Press button to adjust post height. Loosen knob to adjust handhold forward/back and side-to-side.
Securing Arm and Repositioning Prompt
Use arm/wrist straps to secure arm. Loosen knob to slide entire prompt on frame or remove it.
Arm Prompt Posts and Clamps
Repositioning Arm Prompt Posts
Remove and reposition posts to adjust width between prompts. Steps show clamp inside/outside top bar.
Arm Prompt Adjustments Overview
Prompts can rotate on post, slide on horizontal section, and post has four 90° positions.
Chest Prompt - Attaching
Chest Prompt Placement for Stability
Attach behind frame uprights. Position so client's center of gravity is between casters to prevent tipping.
Chest Prompt - Adjustments
Adjusting Chest Prompt Width and Rotation
Loosen knobs to slide sides in/out or rotate prompt for desired width and position.
Adjusting Chest Prompt Height
Press buttons to slide posts up or down to desired height, then release to engage.
Repositioning Entire Chest Prompt
Loosen knobs to slide prompt backward/forward on frame or remove it completely.
Hip Positioner - Attaching
Hip Positioner Attachment Points
Attach clamps near back of top bar, buckles in front of frame uprights for forward-leaning support.
Front and Rear Attachment Details
Use buckles for front attachment and rings to handholds for rear attachment.
Hip Positioner - Adjustment
Adjusting Handhold Position
Loosen knob to slide handholds and clamps to desired position on the frame.
Adjusting Hip Positioner Height
Press button to raise handholds, release to engage. Use strap adjusters at back and front to raise/lower.
Hip Positioner Pad - Assembly
Attaching the Hip Positioner Pad
Thread rear straps, snap flaps together. Position pad to keep grey seat pad as main weight-bearing portion.
Pelvic Support - Attaching
Pelvic Support Attachment Points
Attach clamps near back of top bar, buckles in front of frame uprights for weight-bearing assist.
Front and Rear Attachment Details
Use buckles for front attachment at optimal location. Attach rings to handholds for rear attachment.
Pelvic Support - Adjustment
Adjusting Pelvic Support Height
Press buttons to slide handholds to desired height. Use strap adjusters at back/front to raise/lower.
Adjusting Handhold Position
Loosen knob to slide handholds and clamps backward or forward on the frame.
Thigh Prompts - Attaching
Thigh Prompt Attachment Location
Attach behind chest prompt on top bar. Thigh prompt clamps are similar to other accessory clamps.
Thigh Prompts - Adjustment
Swinging Thigh Pad Position
Loosen knob to swing thigh pad toward or away from the user. Adjust pads and retighten.
Moving and Rotating Thigh Pad
Loosen knob to move thigh pads up/down or rotate for comfortable leg position. Adjust and retighten.
Repositioning Thigh Prompts
Loosen knob to slide clamp along top bar. Can also be removed completely from the Pacer.
Ankle Prompts - Attaching
Ankle Prompt Latch Mechanism
Insert latches into bottom frame tube slots; white tooth should snap securely. Press button to release.
Ankle Prompts - Adjustments
Securing Ankle Strap
Loosen or tighten strap around ankle using buckle adjuster for secure fit.
Adjusting Stride Guidance
Strap (B) can be adjusted to help guide the user's stride.
Limiting or Increasing Stride
Squeeze and slide spring adjusters (C) along rods to limit or increase the user's stride.
Need help?
Do you have a question about the K501 and is the answer not in the manual?
Questions and answers