Advertisement
Table of Contents
- 1 Table of Contents
- 2 Safety Information
- 3 Package Contents
- 4 Hardware Contents
- 5 Preparation
- 6 Initial Installation
- 7 Downrod-Style Fan Mounting
- 8 Closemount-Style Fan Mounting
- 9 Wiring
- 10 Final Installation
- 11 Operating Instructions
- 12 Care and Maintenance
- 13 Troubleshooting
- 14 Limited Lifetime Warranty
- 15 Replacement Parts List
- Download this manual
Harbor Breeze® is a registered trademark
of LF, LLC. All Rights Reserved.
ATTACH YOUR RECEIPT HERE
Serial Number
Questions, problems, missing parts? Before returning to your retailer, call our customer
service department at 1-800-643-0067, 8 a.m. - 6 p.m., EST, Monday - Thursday, 8 a.m. - 5 p.m.,
EST, Friday.
AB17770
Purchase Date
1
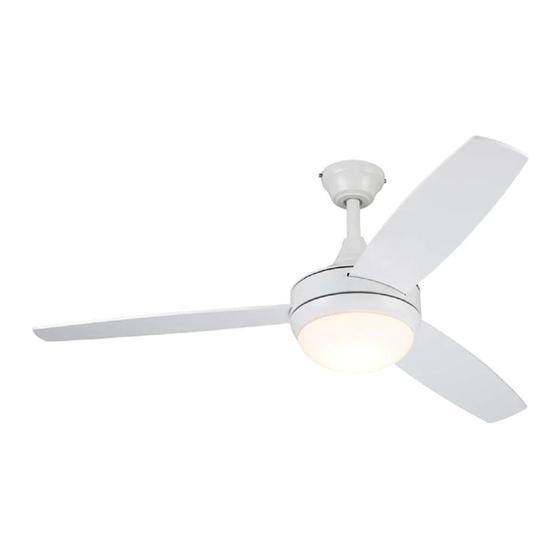
BEACH CREEK
LED CEILING FAN
MODEL #TG44BNK3D1RC
#TG44LW3D1RC
#TG44OSB3D1RC
ITEM #0803772
#0915542
#0923049
Español p. 20
4007498
Advertisement
Table of Contents

Related Manuals for Harbor Breeze BEACH CREEK TG44MBK3D1RC


Summarization of Contents
Safety Information
Read and Save These Instructions
Key safety instructions to preserve for future reference and proper installation.
Safety Warnings and Cautions
General Safety Warnings
Critical warnings regarding electrical safety, mounting, handling, and operation.
Cautions and Notes
Important cautions on grounding, assembly checks, and LED servicing.
Package Contents
Part Identification
Lists all parts included in the package with their corresponding labels and quantities.
Important Installation Reminder
Emphasizes using provided parts for proper installation and safety.
Hardware Contents and Preparation
Hardware Identification
Displays actual sizes of hardware components like screws and wire connectors.
Preparation Steps and Tools
Check parts, protect finish, identify required tools, and note estimated assembly time.
Initial Installation: Power Disconnection
Turn Off Power Supply
Turn off circuit breakers and wall switch before starting installation to prevent electrical shock.
Initial Installation: Mounting Methods
Select Mounting Type
Choose between downrod or closemount for installation based on ceiling type and height.
Clearance and Canopy Mounting
Ensure blade clearance and prepare canopy for mounting bracket attachment.
Initial Installation: Blade Attachment
Prepare Motor Housing for Blades
Remove motor screws, lock washers, yoke plate, and top plate from the motor housing.
Install Blades and Reassemble
Attach blades to motor housing and reattach top/yoke plates.
Initial Installation: Mounting Bracket
Secure Mounting Bracket
Secure the mounting bracket to the outlet box using appropriate hardware.
Downrod-Style Mounting Preparation
Initial steps for downrod-style mounting, including pin and clip removal from downrod.
Downrod-Style Fan Mounting
Assemble Downrod and Wires
Insert downrod, thread wires, align holes, and secure downrod assembly.
Manage Lead Wires
Optional step to cut back lead wires for simplified wiring with specific measurement instructions.
Closemount-Style Fan Mounting
Remove Canopy Cover
Remove the preassembled canopy cover by turning it counterclockwise.
Downrod-Style Fan Mounting
Wire Stripping and Hanging Ball
Strip wires and install hanging ball into mounting bracket, aligning slot with tab.
Closemount-Style Fan Mounting
Motor Screw Removal and Canopy Attachment
Remove motor screws and attach canopy to motor housing.
Closemount-Style Fan Mounting
Temporary Canopy Hanging
Hang the fan on the mounting bracket using a non-slotted hole in the canopy.
Wiring Connections
Remote Operation Wiring
Connect ground, AC power, and motor wires according to the diagram using wire connectors.
Wiring Completion
Secure Connections and Install Receiver
Wrap tape around connectors, place them, and install the remote receiver.
Final Installation Steps
Secure Canopy and Glass Shade
Align canopy, twist to lock, secure screws, and attach glass shade.
Install Remote Control Bracket
Install the remote control bracket and place the transmitter inside it.
Operating Instructions: Remote Setup
Remote Programming and Battery Installation
Program the remote control transmitter and install the battery, with warnings.
Operating Instructions: Controls
Remote Control Buttons and Reverse Switch
Explains remote buttons for speed/light and the fan reverse switch function.
Operating Instructions: Airflow Control
Fan Direction and Switch Position
Set reverse switch for airflow direction and ensure it's in a functional position.
Care and Maintenance
Regular Inspection and Cleaning
Tighten screws, clean motor housing and blades with soft cloth; avoid water.
Troubleshooting Common Issues
Fan Operation and Wobbling Problems
Addresses issues like fan not moving, noise, and wobbling with corrective actions.
Light Failure and Other Issues
Solutions for light failure, and other common problems.
Limited Lifetime Warranty
Warranty Coverage and Service Procedures
Details warranty terms, coverage, limitations, and how to obtain service.
Replacement Parts List
Parts Identification and Numbers
Lists replacement parts with corresponding part numbers for different models.
Need help?
Do you have a question about the BEACH CREEK TG44MBK3D1RC and is the answer not in the manual?
Questions and answers