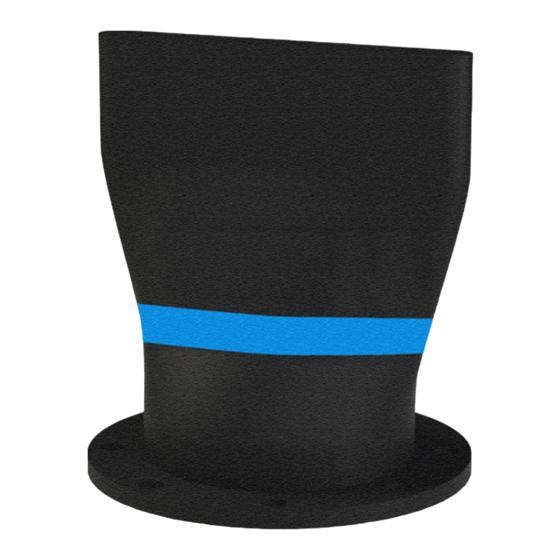
Summary of Contents for CLA-VAL RF-DBI-LH
- Page 1 INSTALLATION / OPERATION / MAINTENANCE Rubber-Flex Duckbill Check Valves Model RF-DBF Model RF-DBI Model RF-DBO Model RF-DBI-IN Model RF-DBI-LH Model RF-DBJ...
-
Page 2: Table Of Contents
Table of Contents Introduction ............................3 Model RF-DBF: Rubber-Flex Flanged Duckbill Check Valve ............ 3 Model RF-DBI: Rubber-Flex Flanged In-Line Duckbill Check Valve ........3 Model RF-DBO: Rubber-Flex Slip-On Duckbill Check Valve ............ 3 Model RF-DBI-IN: Rubber-Flex Slip-In In-Line Duckbill Check Valve ........3 Model RF-DBJ: Rubber-Flex Jacket Style Duckbill Check Valve .......... -
Page 3: Introduction
Cla-Val Rubber-Flex Duckbill Check Valves are designed to provide outstanding back-flow prevention; eliminating costly and unwanted back-flow from rivers, oceans, storm water, and is an excellent choice for sewage diffuser systems. Cla-Val Rubber-Flex Duckbill Check Valves are fully passive flow devices requiring neither maintenance nor any outside sources of power or manual assistance to operate. They are offered as direct replacements for ineffective and maintenance ridden flap-type check valves as well as for new/existing construction and custom applications. -
Page 4: Model Rf-Dbj: Rubber-Flex Jacket Style Duckbill Check Valve
1.5 Model RF-DBJ: Rubber-Flex Jacket Style Duckbill Check Valve This type of rubber check valve is designed with a full metal enclosure (Model RF-DBJ Shroud) which allows easy installation in existing piping systems. Flanges are drilled to ANSI 125/150# standard but other drill patterns are available upon request. -
Page 5: Storage And Handling
The lifting support holes are not intended to support the entire weight of the check valve and care must be taken to adequately support the cuffed or flanged end as well. Note: Cla-Val will not be responsible or liable for damage to the rubber check valve, adjacent equipment, or injury to personnel if these steps are not taken. -
Page 6: Installation
4.0 Installation Note: Each Cla-Val Rubber-Flex Check Valve installation can be considered a major pipe installation and the same safety requirements as used in pipe contracting installations should be implemented. Each Cla-Val Rubber-Flex Check Valve regardless of size should be installed in the same manner. -
Page 7: Model Rf-Dbi: Rubber-Flex Flanged In-Line Duckbill Check Valve Installation
4.1.2 Model RF-DBI: Rubber-Flex Flanged In-Line Duckbill Check Valve 4.1.2.1 Step 1: Insert Insert the Slip-In flanged rubber check valve into the existing pipe. For horizontal applications the bill of the check valve should be installed in a vertical orientation in the mating pipe as shown in below in Figure 9. -
Page 8: Model Rf-Dbi-In: Rubber-Flex Slip-In In-Line Duckbill Check Valve Installation
4.1.3.2 Step 2: External Clamps Add the external clamps to the slip-on rubber check valve. For nominal diameters less than or equal to 10” the check valve will be supplied with either T -Bolt or Worm Gear Clamps. For nominal diameters greater than 10”, the check valve(s) will be supplied with fabricated stainless steel clamp(s). -
Page 9: Model Rf-Dbj: Rubber-Flex Jacket Style Duckbill Check Valve Installation
4.1.4.3 Step 3: Expand Clamp Tighten the expandable internal clamp until the stainless steel portion of the clamp has imbedded itself into the rubber of the valve. Tighten the lock nut once the internal expandable clamp is in the proper position and proceed to section 4.1.8 for anchor bolting/pinning to anchor the slip-in check valve to the mating pipe. -
Page 10: Model Rf-Dbi-Lh: Rubber-Flex Low Head Loss In-Line Duckbill Check Valve Installation
4.1.6 Model RF-DBI-LH: Rubber-Flex Low Head Loss In-Line Duckbill Check Valve Installation 4.1.6.1 Slip In Model RF-DBI-LH 4.1.6.1.1 Step 1: Insert Valve The RF-DBI-LH valve must be installed in a horizontal pipe and will be supplied with a “FLOW” direction label and a “TOP”... -
Page 11: Flange Bolt Torqueing (Model Rf-Dbf/Rf-Dbi/Rf-Dbj & Flanged Rf-Dbi-Lh)
4.1.7 for flange bolt torqueing Figure 27: Model RF-DBI-LH Flanged Installation Step 2 4.1.7 Flange Bolt Torqueing (Model RF-DBF/RF-DBI/RF-DBJ & Flanged RF-DBI-LH) Torqueing should then be accomplished in steps gradually and as evenly as possible around the circumference of the flange. -
Page 12: Operation
Rubber-Flex Duckbill Check Valves require little maintenance. Periodic inspections can ensure that the check valve will provide years of maintenance-free service. Check for cuts or gouges which can easily be repaired with a self-curing rubber compound (Contact Cla-Val). Ensure that the bill section is free from any debris that may have been lodged in the bill. This will be the only areas of concern that require periodic inspection. -
Page 13: Torque Data
120" 500 - 800 ft./lbs. 7.2 Sample Torqueing Patterns Figure 33: Sample Torque Patterns CLA-VAL 1701 Placentia Ave • Costa Mesa CA 92627 • Phone: 949-722-4800 • Fax: 949-548-5441 • E-mail: info@cla-val.com • www.cla-val.com • • © Copyright Cla-Val 2019 Printed in USA Specifications subject to change without notice.


Need help?
Do you have a question about the RF-DBI-LH and is the answer not in the manual?
Questions and answers