
Related Manuals for ITC Power DG7800LE-T


Summarization of Contents
General Safety Precautions
Visual Inspection of Components
Perform a visual inspection of external and internal components for safety.
Operating Temperature Range
The equipment operates safely between +5°C and +40°C.
Regular Equipment Cleaning
Ensure all parts of the equipment are cleaned regularly.
Air Filter Maintenance
The air filter requires regular cleaning for optimal performance.
Additional Safety Guidelines
Exhaust Gas Safety Warning
Exhaust gases contain dangerous carbon monoxide; use only in well-ventilated areas.
Qualified Personnel for Repairs
Generator repairs must be performed by qualified and authorized personnel only.
Generator Storage Guidelines
Store the generator in a well-ventilated area to ensure safe operation.
Warranty and Procedure Adherence
Following startup and shutdown procedures is crucial for warranty validity and equipment.
Check for Loose Parts Due to Vibration
Periodically check screws and nuts for looseness caused by equipment vibration.
Fuel and Oil Quality Requirements
Use only high-quality fuel and oil for optimal equipment performance and longevity.
Long-Term Storage Conditions
Store the equipment in a dry, frost-free location to prevent damage.
Hot Exhaust Warning
Generator exhaust remains hot after shutdown; avoid touching and allow cooling before moving.
Fire and Explosion Prevention
Avoid smoking, flames, and sparks near the generator and store away from flammable materials.
Generator Placement Guidelines
Always place the generator on a level surface to prevent fuel loss and equipment damage.
Pre-Use Checks and Maintenance
Before each use, check oil and fuel levels and perform required maintenance.
Control Panel Elements (Single Phase)
LED6 Display
Shows the status and readings on the digital LED display.
Start Key
Ignition key for starting and stopping the generator.
Breaker
Circuit breaker for protecting the generator and connected devices.
AUTO Socket
Socket for automatic transfer switch (ATS) connection.
ATS Socket
Connection point for an Automatic Transfer Switch (ATS).
Pre-heater Button
Button for pre-heating the engine in cold conditions.
Earth Terminal
Grounding terminal for electrical safety.
230V 32A Socket
High-power socket for 230V appliances.
230V 16A Socket
Standard socket for 230V appliances.
Overload Protector
Device to protect against electrical overloads.
Control Panel Elements (Three Phase)
LED6 Display
Shows the status and readings on the digital LED display.
Start Key
Ignition key for starting and stopping the generator.
Breaker
Circuit breaker for protecting the generator and connected devices.
AUTO Socket
Socket for automatic transfer switch (ATS) connection.
ATS Socket
Connection point for an Automatic Transfer Switch (ATS).
Pre-heater Button
Button for pre-heating the engine in cold conditions.
Earth Terminal
Grounding terminal for electrical safety.
400V 16A Socket
Socket for 400V appliances.
230V 16A Socket
Standard socket for 230V appliances.
Overload Protector
Device to protect against electrical overloads.
Starting Up the Machine
Check and Add Engine Oil
Verify the engine oil level before operation and add oil if necessary.
Pre-shipment Oil Level Check
Oil is drained before shipping, but residual oil may be present; re-check and top up.
Filter Positions
Air Filter Location
Illustrates the location of the air filter assembly on the generator.
Oil Filter Location
Shows the location of the oil filter on the generator.
Oil Filling Procedure
Prepare for Oil Addition
Locate the oil fill cap and ensure the generator is ready for oil addition.
Check Oil Level During Filling
Fill oil to the 'MAX' mark, checking the level with the dipstick.
Complete Oil Filling
Add the recommended oil type and quantity as per specifications.
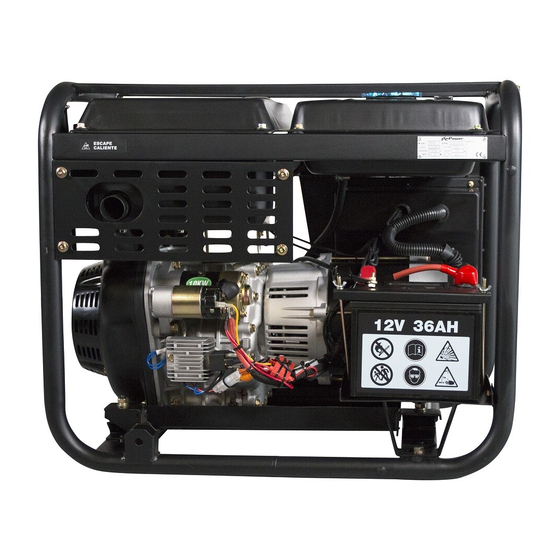
Connecting the Battery Cable
Battery Connection Steps
Step-by-step guide for connecting the battery cables to the generator.
Connect Positive Terminal First
Connect the positive (+) battery terminal first.
Connect Negative Terminal Last
Connect the negative (-) battery terminal after the positive.
Fuel Tank Filling
Prepare for Fueling
Open the fuel tank cap and prepare the fuel nozzle.
Monitor Fuel Level During Filling
Fill the tank, ensuring it does not exceed 85% capacity (indicated by >30%).
Secure Fuel Tank Cap
Close the fuel tank cap securely after filling.
Exhausting Air from Fuel Pipe
Initiate Fuel Line Bleeding
Connect hoses and prepare for air removal from the fuel pipe.
Bleed Fuel Line with Tools
Use tools to disconnect and reconnect hoses for air expulsion.
Complete Fuel Line Bleeding
Ensure all air is removed from the fuel pipe for proper operation.
Operation: Key Start
Set Operation to Key Start
Select the 'KEY START' mode on the generator's control panel.
Key Start Sequence Timing
Follow the correct timing for the start sequence (<5 seconds).
Connect Power Output
Plug in the power output connector.
Generator Start Process
The generator initiates startup in key start mode.
Operation: Auto Start
Set Operation to Auto Start
Select the 'AUTO START' mode on the generator's control panel.
Connect ATS and Power for Auto Start
Connect the ATS and power cables for automatic operation.
Check Oil Level for Auto Start
Ensure the engine oil level is correct before initiating auto start.
Generator Auto Start Sequence
The generator prepares to start automatically when conditions require.
Operation: Stop
Prepare for Generator Shutdown
Disconnect any connected loads from the generator.
Disconnect Power Output
Remove the power output plug from the generator.
Allow Cooling Period Before Stop
Let the generator run for 2-3 minutes before complete shutdown for cooling.
Set Operation to Stop
Turn the operation mode selector to the 'STOP' position.
Oil Change Procedure
Prepare for Oil Change
Warm up the engine, then locate and prepare the oil drain plug and collection pan.
Drain Old Engine Oil
Remove the drain plug and allow all old oil to drain completely.
Refill with New Engine Oil
Fill the engine with the recommended type and quantity of new oil.
Oil Filter Maintenance
Access Oil Filter Housing
Locate and open the oil filter housing on the generator.
Remove Old Oil Filter
Use tools to loosen and remove the old oil filter.
Clean or Replace Oil Filter
Clean the filter element or replace it with a new one, as needed.
Install New Oil Filter
Screw on the new or cleaned oil filter securely.
Air Filter Maintenance
Access Air Filter Housing
Locate and open the air filter housing on the generator.
Remove Air Filter Element
Carefully take out the air filter element from its housing.
Clean or Replace Air Filter
Clean the filter element or replace it with a new one.
Reinstall Air Filter System
Reassemble the air filter housing and element correctly.
Fuel Filter Replacement
Locate and Prepare Fuel Filter
Identify the fuel filter and prepare for its removal and replacement.
Remove Old Fuel Filter
Disconnect fuel lines and remove the old fuel filter.
Install New Fuel Filter
Connect the new fuel filter, ensuring proper orientation and secure connections.
Troubleshooting Engine Start Issues
Fuel Supply Problems
Addresses issues related to fuel shortage and solutions for filling the tank.
Air in Fuel System
Covers the presence of air in the circuit and methods for purging it.
Start Lever Position
Ensures the start lever is in the correct 'RUN' position for operation.
Engine Oil Level Issues
Checks and rectifies engine oil levels for proper functioning.
Injector Cleaning and Maintenance
Guidance on cleaning dirty injectors for optimal fuel delivery.
Battery Charge Issues
Troubleshooting low battery charge and procedures for charging.
Troubleshooting No Power Output
Injector Malfunction
Addresses injector issues, including repair or replacement.
Differential Switch Position for Power
Ensure the differential switch is set to the 'ON' position for power output.
Plug and Socket Connection Issues
Check for bad contact at the plug and socket for proper connection.
Damaged Voltage Regulator (AVR)
Guidance on replacing a damaged voltage regulator (AVR).
Troubleshooting Low Voltage Issues
Plug and Socket Connection Adjustment
Ensures proper plug and socket connection to maintain correct voltage levels.
Voltage Regulator (AVR) Replacement
Procedure for replacing the voltage regulator (AVR) to resolve low voltage.
Need help?
Do you have a question about the DG7800LE-T and is the answer not in the manual?
Questions and answers