Table of Contents
Advertisement
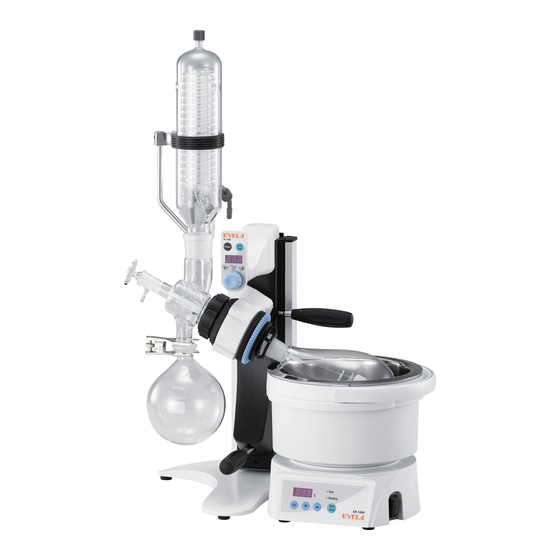
Rotary
Evaporator
Vacuum
N-1300 Series
IMPORTANT
This instruction manual is designed to use the product safely while keeping its best
performance.
Be sure to read "Safety precautions" before use.
Please keep this manual in a place easily accessible to every user.
Tokyo Rikakikai Co., Ltd.
取扱説明書
取扱説明書
Instruction Manual
Instruction Manual
取扱説明書
R03
Advertisement
Table of Contents

Related Manuals for EYELA N-1300E


Summary of Contents for EYELA N-1300E
- Page 1 Rotary Instruction Manual 取扱説明書 Evaporator Vacuum N-1300 Series This instruction manual is designed to use the product safely while keeping its best performance. Be sure to read “Safety precautions” before use. IMPORTANT Please keep this manual in a place easily accessible to every user.
-
Page 2: Table Of Contents
Vacuum seal Instruction manual Package 2(Glass set) S type V type E type Ball joint clamp Rotary joint ring Cooler Eyela clip Specimen flask (1000ml) Receiver flask(1000ml) Rotary joint Capillary Ball joint clamp Screw plug Eyela clip Screw plug (For E type)... -
Page 3: For Safe Operation
For safe operation Do not touch the rotation parts while the flask is rotating Do not touch the clip or the specimen flask while the flask is rotating. Caution Your finger may be caught between the lips or the irregularly shaped parts on the flask removal screw to cause an injury. -
Page 4: Product Outline
Product Outline 2-1 Application Warning Caution Never attempt to modify the product. Take care for conditions and Operate the unit for the specified purpose handling of glass parts only. Broken or flowed glass parts may result in accidents. An electric shock or a malfunction may result if the Inspect for damages or flows on glass parts and take product is modified or used for any purposes other care when handling them. -
Page 5: Names Of Parts
Cooler Continuous specimen supply Control panel port Drive unit Ball joint clamp Angle adjusting knob bolt Eyela clip Receiver flask Specimen flask Jack body Jack handle Stand base Signal connector for Vacuum nozzle (white) vacuum controller Power jack for vacuum controller (Dedicated for model... - Page 6 Control panel Drive unit Capillary feed tube Angle adjusting knob bolt Continuous specimen supply port Specimen flask Ball joint clamp Eyela clip Receiver flask Jack body Jack handle Stand base Coolant nozzle(gray) Vacuum nozzle (white) Signal connector for vacuum controller Power jack for vacuum controller (Dedicated for model NVC-3000)...
- Page 7 Control panel Capillary feed tube Drive unit Continuous specimen supply port Angle adjusting knob bolt Ball joint clamp Eyela clip Specimen flask Receiver flask Jack body Jack handle Stand base Cooler clamp Cooler support bar Signal connector for vacuum controller Power jack for vacuum controller (Dedicated for model NVC-3000)...
-
Page 8: Names And Functions Of Control Assembly
Names and functions of control assembly 3-1 Control panel ①POWER key ②RUN/STOP key ③Display ④Positive rotation lamp ⑤TIME lamp ⑥Negative rotation lamp ⑦Dial key Name Functions ① POWER key Pressing this key illuminates the display. ② RUN/STOP key Pressing this button once starts rotation and pressing again stops rotation. Displays the rotation speed. -
Page 9: Installation
4 Installation 4-1 Installation environment Warning Never install the product in a potentially hazardous atmosphere. The product is not explosion-proof. Use in a potentially hazardous atmosphere may cause a fire or other accidents. Select a place that meets the conditions below for installing this product: ●... - Page 10 Operation 5-1 Preparation for operation Caution Caution Be sure to raise the jack before Be careful for jumping of the jack. setting glass parts. This jack is always under a lifting force. First raise the jack before setting glass parts. If the When you release lock, be sure to operate by jack is raised during setting work, a personal injury putting your hand on the jack.
- Page 11 3.Installing the rotary joint (1) Turn the lock sleeve (light blue) anti-clockwise by Lock housing (black) Driving around a half turn while holding the lock housing Lock sleeve (light blue) assembly unit (black). The sleeve ring spring inside will widen. Sleeve ring spring (inside)...
-
Page 12: Cooler
Coolant nozzle(gray) Set screw Housing Rotary joint Capillary feed tube Eyela clip Cooler Specimen flask Ball joint clamp Receiver flask (1) Allow the cooler to tightly contact against the (3) Fix the specimen flask to the rotary joint with the vacuum seal in the housing and then tighten with Eyela clip. -
Page 13: Cooler Clamp
Coolant nozzle(gray) Cooler Vacuum nozzle (white) Cooler clamp Cooler support bar Adopter Capillary feed tube Rotary joint Eyela clip Cap screw Specimen flask Set screw Support bar clamp Housing Ball joint clamp Receiver flask (1) Tentatively fix the cooler support bar in the hole of the support bar clamp with the set screw. - Page 14 Vacuum nozzle (white) Cooler clamp Screw plug Cooler support bar Cooler Capillary Rotary joint feed tube Eyela clip Cap screw Specimen flask Set screw Support bar clamp Housing Ball joint clamp Receiver flask (1) Tentatively fix the cooler support bar in the hole of the support bar clamp with the set screw.
- Page 15 6.Switching to the reverse direction specification Caution Caution Switching to the reverse direction Raise the jack before switching shall be made before setting a glass to the reverse direction. part. Raise the jack before switching. Switch to the reverse direction before setting a glass If the jack is raised accidentally during setting, a part.
- Page 16 8. Adjusting the angle of the drive body Caution Adjust the angle of the drive body Angle while holding the cooler with hand. adjusting When you loosen the angle adjusting knob bolt, the knob bolt drive may suddenly incline from the weight of the cooler or specimen and fall down and you might be LOCK injured with broken glass.
- Page 17 9-2.Connecting the fingertip cooling hose (optional) You can connect/disconnect the hose using the Coolant nozzle Fingertip connector optional fingertip connecter. ※ The connecting hose is not included. Prepare a correct size after confirming the I.D. of the connecting port. ※ Take care not to apply excessive force when connecting.
-
Page 18: Operating Procedures
5-2 Operating procedures Caution Caution Stop operating the unit if you notice Never touch the specimen flask or the any abnormal conditions. bath during condensation. If you notice any abnormal condition, immediately The bath and the specimen flask will be hot during turn the power switch OFF and refer to the section condensation and there is a danger of burning. - Page 19 1.Setting a rotation mode and the power outage recovery mode The mode is set at the positive rotation mode *specimen flask is at the right side in the standard rotation direction setting (and the power outage recovery mode is OFF at the factory shipping. Power Stop POWER key...
- Page 20 2.Enter a number of rotations You can change the number of rotations during Power Stop rotation. (1) Press the POWER key. The display comes on and indicates a rotation number as [0]. (2) Press the dial key once. The display indicates flashing [20] or the number of rotations in the previous session and you can enter a Press once number of rotations.
- Page 21 (4) Supply or set specimens with the procedures (I) or ( II) below. Blue part ※ Some older type rotary joints have a shorter inserting part for Eyela clip and clipping may be imperfect. Blue part In that case, lightly press the specimen flask before starting operation.
-
Page 22: Causes Of Troubles And Solutions
Eyela clip and clipping may be imperfect. The Eyela clip has come into contact with the rotary In that case, lightly press it during decompression. joint. The vacuum level is low. - Page 23 Symptom Cause Countermeasures Remove any overload. If this alarm still occurs, immediately stop The set rotation is not reached or considerably below operation and contact your dealer or the nearest it due to overload or rusty bearing. service center. Rotation error alarm [A19] is displayed. You can clear [A19] indication by pressing the dial key.
-
Page 24: Maintenance And Inspection
Maintenance and inspection 7-1 Cleaning and care of the product Caution Caution Never attempt to disassembly the Use a correct method and items for product. cleaning or caring the product. The unit contains parts with high voltage applied or When cleaning or maintaining the product, never may become hot, and disassembly may cause an splash water to the exterior or the inside directly, electrical shock or an injury. -
Page 25: Disposal Of Products
8 Disposal of Products Disposal of product or part must be done according to the specified disposal method. Principal components parts and disposal method Components Components Weight External dimensions How to discard 672 (W) ×342 (D) ×504 (H) N-1300S Approx. 8.2kg Request the disposal operator 479 (W) ×342 (D) ×823(H) Main body... - Page 26 9 After-sale Services 1. In case the product does not function satisfactorily, 3. Repair during the guarantee period will be made check first referring page according to the guarantee stipulations. troubleshooting to see if this is actually a trouble. 2. If the product remains unsatisfactory even after 4.
-
Page 27: Reference Material
Reference material Vacuum level Boil (b.p) Density Evap. latent heat Formula hPa) × Class Name of typical substances (g / cm ) (℃) (cal / g) (Molecular (molar weight) (20℃) formula) b.p=25℃ b.p=30℃ b.p=40℃ (1013hPa) (1013hPa) Atomo p Atomo p 74.1 Diethyl ether 34.6... -
Page 28: List Of Consumable And Replacement Parts/ Optional Parts
List of Consumable and Replacement parts/ Optional parts N-1300S type 5 -2 TS24 TS29 N-1300V type N-1300E type 20 36 TS24 TS29 - 26 -... - Page 29 TS29/38 ・ 178mm 116620 TS29/38 ・ 178mm 142530 TS24/40 ・ 178mm 116590 TS24/40 ・ 178mm 116630 TS24/40 ・ 178mm Rotary joint ring Receiver flask 1000mL Eyela clip Specimen flask 1000mL Code No. Std. Q'ty Code No. Std. Q'ty Code No. Std. Q'ty...
- Page 30 Airtight stopper Airtight stopper Coolant nozzle set(gray) Nozzle packing (standard) (for E cooler) (for V cooler) No. Code No. Std. Q'ty No. Code No. Std. Q'ty No. Code No. Std. Q'ty No. Code No. Std. Q'ty 232840 For N・NE 178900 For N・NE 2 sets 142691 For N・NE 255830 GL25...
- Page 31 Fingertip connector Fingertip hose nozzle Fingertip cooling hose Vacuum hose (Connection dia.10mm) (Nozzle I.D.10mm) (Tube I.D.6.5×O.D. 10mm) (I.D.6×O.D. 15mm) No. Code No. Std. Q'ty No. Code No. Std. Q'ty No. Code No. Std. Q'ty No. Code No. Std. Q'ty 41-1 244940 247210 For N・NE 2 267980 For N・NE...
- Page 32 Specimen(Pear shaped)flask Std. TS29/38 TS24/40 TS29/38 TS24/40 Code No. Chemical coating Chemical coating 50mL 116140 228240 116220 228310 100mL 116150 228250 116230 228320 200mL 116160 228260 116240 228330 300mL 116170 228270 116250 228340 500mL 116180 228280 116260 228350 116190 228290 116270 228360 116200...
Need help?
Do you have a question about the N-1300E and is the answer not in the manual?
Questions and answers