Table of Contents
Advertisement
SERVICE MANUAL
2003
04
86737
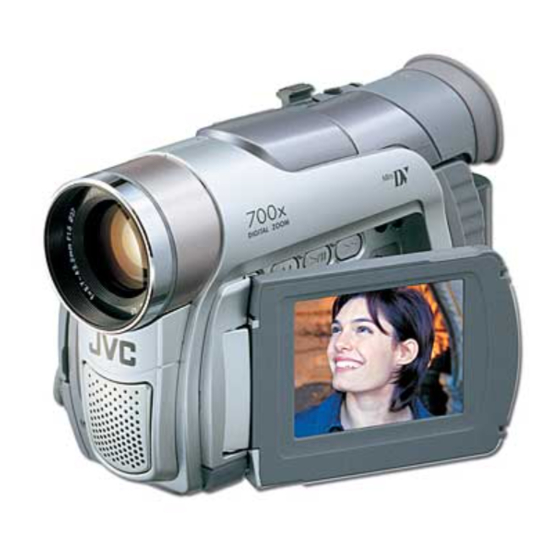
GR-D30EK,GR-D30E
GR-D30E
For disassembling and assembling of MECHANISM ASSEMBLY, refer to the SERVICE MANUAL No.86700 (MECHANISM ASSEMBLY).
Regarding service information other than these sections, refer to the service manual No. 86730 (GR-D40EX).
Also, be sure to note important safety precautions provided in the service manual.
SPECIFICATION
Camcorder
General
: DC 11.0 V
Power supply
DC 7.2 V
Power consumption
LCD monitor off, viewfinder on : Approx. 3.4 W
LCD monitor on, viewfinder off : Approx. 4.7 W
: 69 mm x 94 mm x 143 mm
Dimensions (W x H x D)
(with the LCD monitor closed and the viewfinder pushed
back in)
: Approx. 525 g
Weight
: 0°C to 40°C
Operating temperature
: 35% to 80%
Operating humidity
: -20°C to 50°C
Storage temperature
: 1/6" CCD
Pickup
: F 1.6, f = 2.7 mm to 43.2 mm, 16:1 power zoom lens
Lens
: Ø37 mm
Filter diameter
: 2.5" diagonally measured, LCD panel/TFT active
LCD monitor
matrix system
: Electronic viewfinder with 0.24" black/white LCD
Viewfinder
: Monaural
Speaker
Digital Video Camera
: DV format (SD mode)
Format
: PAL standard
Signal format
Recording/Playback format : Video: Digital component recording
: Audio: PCM digital recording,
32 kHz 4-channel (12-bit),
48 kHz 2-channel (16-bit)
: Mini DV cassette
Cassette
: SP : 18.8 mm/s
Tape speed
LP : 12.5 mm/s
: SP : 80 min.
Maximum recording time
LP : 120 min.
(using 80 min. cassette)
Specifications shown are for SP mode unless otherwise indicated. E & O.E. Design and specifications subject
to change without notice.
DIGITAL VIDEO CAMERA
Z
(Using AC Adapter)
(Using battery pack)
COPYRIGHT © 2003 VICTOR COMPANY OF JAPAN, LTD.
,GR-D30E
X
,GR-D31EK
PAL
Connectors
S-Video
Output
Input*
AV
Video output
Video input*
Audio output
Audio input*
DV
Output
Input*
USB**
EDIT
* GR-D50/D30 only
** GR-D50/D40 only
Power requirement
Output
GR-D30EK,GR-D30EX,GR-D30EY,GR-D30EZ,GR-D31EK M3D123
Y
: Y : 1 V (p-p), 75 Ω, analogue
C : 0.29 V (p-p), 75 Ω, analogue
: Y : 0.8 V (p-p) -1.2 V (p-p), 75 Ω, analogue
C : 0.2 V (p-p) -0.4 V (p-p), 75 Ω, analogue
: 1 V (p-p), 75 Ω, analogue
: 0.8 V (p-p) -1.2 V (p-p), 75 Ω, analogue
: 300 mV (rms), 1 kΩ, analogue, stereo
: 300 mV (rms), 50 kΩ, analogue, stereo
: 4-pin, IEEE 1394 compliant
: 4-pin, IEEE 1394 compliant
: 5-pin
Ø3.5 mm, 2-pole
AC Adapter
AC 110 V to 240 V ~, 50 Hz/60 Hz
: DC 11 V
, 1 A
No.86737
2003/04
Advertisement
Table of Contents

Related Manuals for JVC GR-D31EK


Summarization of Contents
SPECIFICATION
Camcorder Specifications
Technical specifications for the camcorder, including power, dimensions, weight, operating conditions, pickup, lens, and display.
Connectors
Details of the camcorder's input/output connectors and their specifications.
Digital Video Camera Specifications
Specifies the digital video camera format, signal type, recording/playback details, cassette compatibility, and tape speeds.
AC Adapter Specifications
Details the power requirements and output specifications of the AC adapter.
Difference List
Different Table of Feature
Lists main feature differences between various GR-D models.
Different Table of Parts List
Lists different part numbers between various GR-D models.
Packing and Accessory Assembly
Details the packing and accessory items included with the product.
Final Assembly
Main Board Assembly <01>
Exploded view and parts list for the main board assembly.
SECTION 1 PRECAUTIONS
Safety Precautions
Essential safety precautions for handling and servicing the product.
Precautions During Servicing
Specific precautions to be followed when servicing the product.
Crimp Type Wire Connector
Detailed procedure for using crimp type wire connectors, including tools and steps.
Safety Check after Servicing
Insulation Resistance Test
Procedure to test insulation resistance between power cord and exposed parts.
Dielectric Strength Test
Procedure to test dielectric strength between power cord and exposed parts.
Clearance Distance
Confirms specified clearance distances for primary circuit components.
Leakage Current Test
Procedure to measure leakage current between earth ground and accessible parts.
Grounding (Class 1 Model Only)
Checks grounding impedance between AC inlet earth pin and accessible parts.
SECTION 2 SPECIFIC SERVICE INSTRUCTIONS
2.1 Before Assembly and Disassembly
Precautions and notes for general disassembly and assembly of parts.
2.1.2 Assembly and Disassembly
Procedural notes and figures for assembly and disassembly steps.
2.1.3 Destination of Connectors
Shows types of connectors and wires used for connections.
2.1.4 Disconnection of Connectors (Wires)
Instructions on how to safely disconnect wires from connectors.
2.1.5 Tools Required for Disassembly and Assembly
Lists specialized tools required for disassembly and assembly procedures.
2.2 Assembly and Disassembly of Cabinet Parts
2.2.1 Disassembly Flow Chart
Flowchart outlining the disassembly steps for cabinet parts and board assemblies.
2.2.2 Disassembly Method
Detailed methods for disassembling specific parts and assemblies.
2.3 Assembly and Disassembly of Camera Section and Board Assembly
2.3.1 Disassembly Flow Chart
Flowchart for disassembling the camera section and board assembly.
2.3.2 Disassembly Method
Detailed procedures for disassembling the camera section and board assembly.
2.4 Assembly and Disassembly of [8]VF Assembly
2.4.1 Disassembly of VF Assembly
Step-by-step instructions for disassembling the viewfinder assembly.
2.4.2 Disassembly of the Lens SA
Instructions for disassembling the lens assembly.
2.5 Assembly and Disassembly of [10]Monitor Assembly (Cabinet Parts)
2.5.1 Disassembly of Monitor Assembly (2.5 Inch)
Step-by-step instructions for disassembling the monitor assembly.
2.6 Assembly and Disassembly of [2]OP Block Assembly / CCD Board Assembly (Camera Section and Board Assembly)
2.6.1 Precautions
Important precautions for handling the CCD image sensor and related components.
2.6.2 Disassembly of CCD Board Assembly and CCD Base Assembly
Steps for disassembling the CCD board and base assembly.
2.6.3 Assembly of CCD Base Assembly and CCD Board Assembly
Steps for assembling the CCD base and board assembly.
2.6.4 Replacement of Service Repair Parts
Lists service parts for the OP BLOCK ASSEMBLY and replacement notes.
SECTION 3 ADJUSTMENT
3.1 Preparation
General precautions and required test equipment for performing adjustments.
3.2 Tools Required for Adjustment
Lists specialized tools required for mechanism and camera system adjustments.
3.3 Jig Connector Cable
3.3.1 Jig Connector Schematic Diagram
Schematic diagram showing the wiring for the jig connector cable.
3.3.2 Jig Connector Board
Diagram showing the jig connector board and solder points.
3.4 Mechanism Compatibility Adjustment
3.4.1 Tape Pattern Check
Procedure for checking tape pattern and adjusting guide roller height for optimal performance.
3.5 Electrical Adjustment
3.5.1 Electrical Adjustment with Personal Computer
Instructions for performing electrical adjustments using a personal computer and service software.
CHARTS AND DIAGRAMS
Notes of Schematic Diagram
Explains symbols, units, and conventions used in schematic diagrams.
Indications of Control Voltage
Defines symbols used for control voltages in schematic diagrams.
Interpreting Connector Indications
Explains symbols for removable and non-removable connectors.
Voltage Measurement
Explains voltage measurement points and notes for REC and PB modes.
Signal Path Symbols
Defines symbols indicating signal paths, specific to DVC.
Indication of the Parts for Adjustments
Shows how parts for adjustments are indicated in schematics.
Indication of the Parts Not Mounted on the Circuit Board
Explains the "OPEN" indication for parts not mounted on the circuit board.
CIRCUIT BOARD NOTES
1. Foil and Component Sides
Explains how to identify foil and component sides of circuit boards.
2. Parts Location Guides
Explains how parts locations are indicated by guide scales on circuit boards.
PARTS LIST
1. Exploded View
Exploded views of the product for parts identification.
1.1 Packing and Accessory Assembly
Exploded view of the packing and accessory assembly.
2. Parts List
Packing and Accessory Assembly
Detailed parts list for packing and accessories.
Final Assembly
Parts list for the final assembly.
SERVICE MANUAL MECHANISM ASSEMBLY
Table of Contents
Outline of the manual's sections, including jigs, service instructions, and parts list.
SECTION 1 JIGS AND TOOLS
1.1 Tools Required for Adjustments
Lists specialized tools required for adjustments, including torque drivers and cleaning cloths.
SECTION 2 SPECIFIC SERVICE INSTRUCTIONS
2.1 DVC Mechanism
Precautions and notes for disassembly/assembly of the DVC mechanism.
2.1.1 Precautions
General precautions for handling parts and screws during DVC mechanism service.
2.1.2 Notes on Procedure for Disassembly/Assembly
Explains symbols and procedures for DVC mechanism disassembly and assembly.
2.1.3 Disassembly and Assembly of Mechanism Assembly
2.1.3.1 General Statement
General guidelines for disassembling and assembling the mechanism assembly.
2.1.3.2 Explanation of Mechanism Mode
Explains the five mechanism modes and how to identify them.
2.1.5 Disassembly/Assembly
2.1.5.1 [1] Cassette Housing Assy
Removal and installation steps for the cassette housing assembly.
2.1.5.2 [2] Upper Base Assy [3] Drum Assy
Disassembly and assembly notes for upper base and drum assemblies.
2.2.4 Mechanism Adjustments
2.1.7.1 Adjustment of the Slide Guide Plate
Procedure for adjusting the slide guide plate using screws and ensuring smooth operation.
2.3.8 Remarks
2.3.8.1 Cleaning
Instructions for cleaning upper drum and tape transport system parts for VHS mechanism.
2.3.8.2 Applying Oil and Grease
Guidelines for applying oil and grease to VHS mechanism parts.
2.3.6 Remarks
2.3.6.1 Cleaning
Instructions for cleaning upper drum and tape transport system parts for VHS mechanism.
2.3.6.2 Applying Oil and Grease
Guidelines for applying oil and grease to VHS mechanism parts.
2.3.5 Disassembly and Assembly of Mechanism Assembly
2.3.1 Notes
Notes on mechanism related parts and general precautions for handling.
2.3.2 Mechanism Operation Check
Instructions for checking mechanism operation without a cassette loaded.
2.3.3 Setting the Mechanism Assembling Mode
Procedure for setting the mechanism to the assembling mode.
2.3.6 Replacement of the Main Mechanism Parts
2.3.6.1 Cassette Holder
Removal and installation procedures for the cassette holder.
2.3.6.2 A/C Head
Procedures for removing and installing the A/C head assembly.
2.3.6.3 Guide Arm, Pinch Roller Arm
2.3.6.3.1 Removal
Steps for removing the guide arm, lid guide, and pinch roller arm assemblies.
2.3.6.4 Idler Arm, Idler Gear 1/2
2.3.6.4.1 Removal
Steps for removing the idler arm and idler gear.
2.3.6.5 Main Brake (T), Brake Lever, Tension Arm, Reel Disk (S/T), Rec Safety Lever
2.3.6.5.1 Removal
Detailed steps for removing main brake, brake lever, tension arm, reel disk, and rec safety lever.
2.3.6.6 Press Lever, Control Cam, Capstan Brake Assembly, Loading Motor Assembly
2.3.6.6.1 Removal
Steps for removing press lever, control cam, capstan brake assembly, and loading motor.
2.3.6.7 Capstan Motor, Load Gear, Control Plate
2.3.6.7.1 Removal
Steps for removing the capstan motor, load gear, and control plate.
2.3.6.8 Clutch Unit Assembly, Direct Gear
2.3.6.8.1 Removal
Steps for removing the clutch unit assembly and direct gear.
2.3.8 Remarks
2.3.8.1 Cleaning
Instructions for cleaning upper drum and tape transport system parts for VHS mechanism.
2.3.8.2 Applying Oil and Grease
Guidelines for applying oil and grease to VHS mechanism parts.
Need help?
Do you have a question about the GR-D31EK and is the answer not in the manual?
Questions and answers