Table of Contents
Advertisement
Quick Links
Advertisement
Table of Contents

Related Manuals for Epson T3-B


Summarization of Contents
The Manuals of This Product
Safety Manual (book, PDF)
Contains safety information and describes unpacking to operation.
T-B Series Manual (PDF)
Describes specifications and functions of the Manipulator for system designers.
Status Code/Error Code List (PDF)
Lists codes displayed on controller and software message area.
T-B Series Maintenance Manual (PDF)
Details maintenance, daily inspection, parts replacement, and firmware update.
EPSON RC+ 7.0 User’s Guide (PDF)
General information about program development software.
EPSON RC+ 7.0 SPEL+ Language Reference (PDF)
Describes the robot programming language SPEL+.
Other Manual (PDF)
Manuals for each option are available.
Installation
1. Safety
Covers safety precautions, conventions, and warnings for safe operation.
2. Installation
Details system example, unpacking, transportation, and connections.
3. Power-On
Procedure for powering on the robot system, including precautions.
4. First Step
Guide to installing RC+ software and connecting PC to Manipulator.
5. Second Step
Setup for external equipment connection, Ethernet, and teaching pendant.
1. Safety
1.1 Conventions
Explains important safety considerations indicated by symbols.
1.2 Design and Installation Safety
Safety precautions for design and installation personnel.
1.3 Operation Safety
Safety precautions for qualified operator personnel.
1.4 Emergency Stop
Procedure and precautions for using the emergency stop function.
1.5 Safeguard
Information on installing safety systems like doors and light curtains.
1.6 Emergency Movement Without Drive Power
How to move the manipulator by hand in emergency mode.
1.7 ACCELS Setting for CP Motions
Setting ACCELS properly for CP motion based on tip load and Z-axis height.
1.8 Labels
Describes the location and meaning of warning labels on the manipulator.
1.9 Response for Emergency or Malfunction
Procedures for collision and operator entanglement.
2. Specifications
2.1 Model Number
Explains the structure and meaning of the manipulator model number.
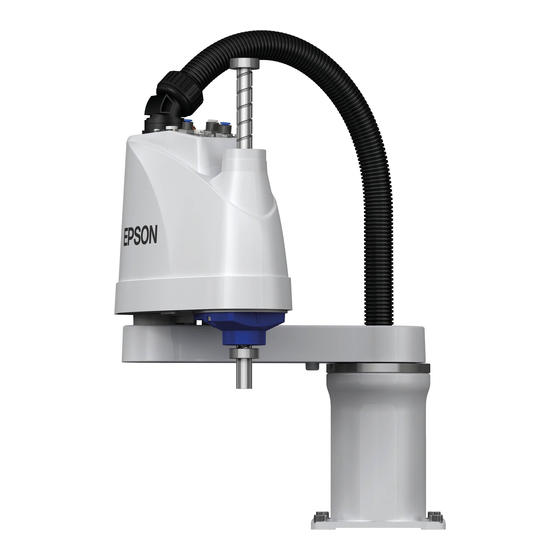
2.2 Part Names
Identifies and labels various parts of the T3-B and T6-B Manipulators.
2.3 Outer Dimensions
Provides detailed dimensional drawings for T3-B and T6-B models.
2.4 System Example
Illustrates typical system configurations with standard and option components.
2.5 Specifications
References Appendix A for detailed specifications.
2.6 How to Set the Model
Guide on changing the manipulator model setting via software.
3. Environments and Installation
3.1 Environmental Conditions
Specifies suitable environmental conditions for robot system operation.
3.2 Base Table
Requirements and specifications for the base table used for manipulator anchoring.
3.3 Mounting Dimensions
Provides detailed drawings for manipulator mounting dimensions.
3.4 Unpacking and Transportation
Procedures and precautions for unpacking and transporting the manipulator.
3.5 Installation Procedure
Step-by-step guide for installing the manipulator and its components.
3.6 Power Supply
Details power supply specifications, AC power cable, and breaker requirements.
3.7 Connecting the Cables
Instructions for connecting various cables to the manipulator and its options.
3.8 Pneumatic Tubes
Information on pneumatic tubes and fittings included with the manipulator.
3.9 Relocation and Storage
Precautions for relocating and storing the manipulator.
4. Setting of End Effectors
4.1 Attaching an End Effector
Guidelines for attaching end effectors, including shaft and brake release switch.
4.2 Attaching Cameras and Valves
Details on using threaded holes on Arm #2 for mounting cameras and valves.
4.3 Weight and Inertia Settings
Setting parameters for load weight and moment of inertia for optimal performance.
4.4 Precautions for Auto Acceleration/Deceleration of Joint #3
Guidance on adjusting acceleration/deceleration for Joint #3 based on shaft position.
5. Motion Range
5.1 Motion Range Setting by Pulse Range (for All Joints)
Setting motion range using pulse limits for each joint.
5.2 Motion Range Setting by Mechanical Stops
Physically limiting manipulator movement using mechanical stops.
5.3 Setting the Cartesian (Rectangular) Range in the XY Coordinate System of the Manipulator (for Joints #1 and #2)
Setting software-based upper and lower limits for X and Y coordinates.
5.4 Standard Motion Range
Shows standard (maximum) motion range diagrams for each joint.
6. Operation Mode & LED
6.1 Overview
Describes the three robot system operation modes: TEACH, AUTO, and TEST.
6.2 Switch Operation Mode
How to change the operation mode using the mode selector key switch.
6.3 Program Mode (AUTO)
Procedure to switch to Program mode using EPSON RC+ 7.0.
6.4 Auto Mode (AUTO)
Procedures for switching to Auto mode using EPSON RC+ 7.0 or control device.
6.5 LED
Explains the function of LEDs on the manipulator front panel.
7. Development PC Connection Port
7.1 What is Development PC Connection Port
Details the USB types and interface standard supported by the connection port.
7.2 Precaution
Precautions for connecting the development PC and manipulator with USB.
7.3 Software Setup and Connection Check
Steps for setting up software and checking the connection between PC and manipulator.
7.4 Disconnection of Development PC and Manipulator
Procedure for safely disconnecting the PC and manipulator.
8. Memory Port
8.1 What is Controller Status Storage Function?
Explains saving manipulator data to USB memory for restoration.
8.2 Before Using Controller Status Storage Function
Precautions and adoptable USB memory requirements for status storage.
8.3 Controller Status Storage Function
Procedure to save manipulator status to USB memory.
8.4 Details of Data
Lists the data files created by the controller status storage function.
9. LAN (Ethernet Communication) Port
9.1 What is the LAN (Ethernet Communication) Port
Describes the purpose and usage of the Ethernet communication port.
9.2 IP Address
Information on IP address settings, authentication, and private IP addresses.
9.3 Changing Manipulator IP Address
Procedure to change the manipulator's IP address using EPSON RC+ 7.0.
9.4 Connection of Development PC and Manipulator with Ethernet
Steps to connect the PC and manipulator using an Ethernet cable.
9.5 Disconnection of Development PC and Manipulator with Ethernet
Procedure for disconnecting the PC and manipulator via Ethernet.
10. TP Port
10.1 What is the TP Port?
Explains the purpose of the TP port for connecting the Teach Pendant.
10.2 Teach Pendant Connection
Procedure for connecting the Teach Pendant to the manipulator.
11. EMERGENCY
11.1 Safeguard Switch and Latch Release Switch
Input terminals on EMERGENCY connector for safeguard and latch release switches.
11.2 Emergency Stop Switch Connection
Connecting external emergency stop switches to the EMERGENCY connector.
11.3 Pin Assignments
Detailed pin assignments for the EMERGENCY connector.
11.4 Circuit Diagrams
Provides example circuit diagrams for emergency stop and safeguard applications.
12. Standard I/O Connector
12.1 Input Circuit
Details input voltage range, ON/OFF voltage, and input current for input circuits.
12.2 Output Circuit
Details rated output voltage, maximum output current, and output device for output circuits.
12.3 I/O Cable Product Procedure
Procedure for connecting I/O cables and fixing them.
13. Hand I/O Connector
13.1 Power Supply Specifications
Specifies voltage and allowable current for the Hand I/O connector power supply.
13.2 Input Circuit
Details input circuit applications (Source Type and Sink Type) for Hand I/O.
13.3 Output Circuit
Details output circuit applications (Sink Type and Source Type) for Hand I/O.
13.4 Pin Assignments
Pin assignments for the Hand I/O connector.
13.5 How to Control Hand I/O
Operating Hand I/O using bit port commands and available commands.
14. I/O Remote Settings
14.1 I/O Signal Description
Describes remote input and output signals for controlling the manipulator.
14.2 Timing Specifications
Provides timing diagrams for operation and program execution sequences.
15. SD Card Slots
15.1 SD Card Slots
Information on using SD cards for robot system firmware and data storage.
16. Fieldbus I/O
16.1 Fieldbus I/O
Lists supported Fieldbus I/O models and references for manuals.
17. Restrictions
17.1 Commands Cannot Use
Lists commands and functions that are not available or have restrictions.
17.2 Commands Cause Motion Error If Specifying RS-232C
Commands that cause motion errors when using the RS-232C port.
17.3 Commands Cause Error
Lists commands that may cause errors during execution.
17.4 Restrictions of Functions
Lists functions that are not available or have restrictions.
Regular Inspection
1.1 Inspection Schedule and Points
Details inspection schedules and specific points for T3-B/T6-B manipulators.
1.2 Overhaul, Greasing, and Bolt Tightening
Covers overhaul, greasing procedures, and bolt tightening specifications.
Appendix A: Specifications
T3-B Specifications
Detailed specifications for the T3-B Manipulator model.
T6-B Specifications
Detailed specifications for the T6-B Manipulator model.
Appendix B: Time and Distance of Free Running in Emergency
T3-B Time and Distance of Free Running in Emergency
Graphs showing free running time and distance for T3-B model under various conditions.
T6-B Time and Distance of Free Running in Emergency
Graphs showing free running time and distance for T6-B model under various conditions.
Appendix C: Time and Distance of Free Running When Safeguard Is Opened
T3-B Time and Distance of Free Running When Safeguard Is Opened
Graphs showing free running time/distance for T3-B when safeguard is opened.
T6-B Time and Distance of Free Running When Safeguard Is Opened
Graphs showing free running time/distance for T6-B when safeguard is opened.
Appendix D: Open Source Software License
Open Source Software License Details
Lists open source software programs and their license terms provided with the product.
Need help?
Do you have a question about the T3-B and is the answer not in the manual?
Questions and answers