Table of Contents
Advertisement
Installation, Operation, and Maintenance
Packaged Rooftop Air Conditioners
Precedent™ — Gas/Electric
3 to 10 Tons — 60 Hz
Model Numbers:
Model Numbers:
Model Numbers:
Model Numbers:
Only qualified personnel should install and service the equipment. The installation, starting up, and servicing of
heating, ventilating, and air-conditioning equipment can be hazardous and requires specific knowledge and training.
Improperly installed, adjusted or altered equipment by an unqualified person could result in death or serious injury.
When working on the equipment, observe all precautions in the literature and on the tags, stickers, and labels that are
attached to the equipment.
January 2021
YSC036G - YSC060G
YSC072H - YSC120H
YHC036E - YHC072E
YHC048F - YHC060F
RT-SVX21AC-EN
YHC072F - YHC102F
YHC120F
YHC037E - YHC067E
SAFETY WARNING
Advertisement
Table of Contents
Troubleshooting

Related Manuals for Trane YSC060G


Summary of Contents for Trane YSC060G
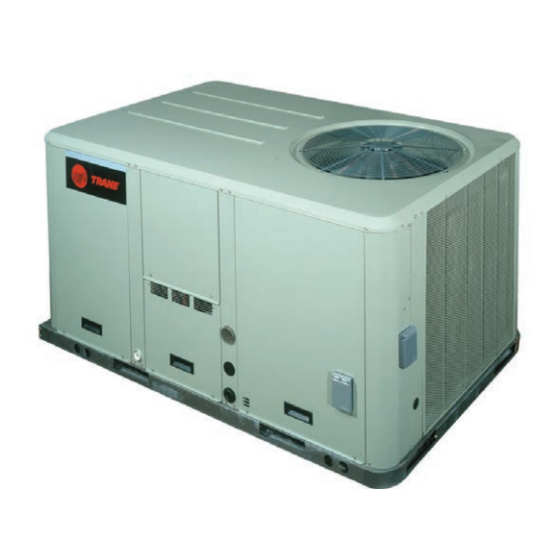
- Page 1 Installation, Operation, and Maintenance Packaged Rooftop Air Conditioners Precedent™ — Gas/Electric 3 to 10 Tons — 60 Hz Model Numbers: YSC036G - YSC060G YHC072F - YHC102F Model Numbers: YSC072H - YSC120H YHC120F Model Numbers: YHC036E - YHC072E YHC037E - YHC067E...
- Page 2 Carbon (HCFCs). Not all refrigerants containing these Labeling of Chemicals) guidelines for information on compounds have the same potential impact to the allowable personal exposure levels, proper environment. Trane advocates the responsible handling of respiratory protection and handling instructions. all refrigerants-including industry replacements for CFCs •...
- Page 3 Copyright This document and the information in it are the property of Trane, and may not be used or reproduced in whole or in part without written permission. Trane reserves the right to revise this publication at any time, and to make changes to its content without obligation to notify any person of such revision or change.
-
Page 4: Table Of Contents
Table of Contents Model Number Descriptions - 3 to 10 Tons (T/Y) Heat Units ......31 TCO1 Instructions for Low NOx Gas Furnace Option . - Page 5 Table of Contents Procedure ......51 Operation (for Gas Units) ... . .59 Electromechanical Evaporator Fan Operation Unit Start-Up .
- Page 6 Table of Contents Heating Season ....70 Coil Cleaning ..... . . 71 Annual Maintenance .
-
Page 7: Model Number Descriptions - 3 To 10 Tons (T/Y)
M = Low Leak Economizer with = 460/60/3 Barometric Relief = No Communications Interface W = 575/60/3 = Low Leak Economizer with = Trane® Communications Interface Digit 9 — Unit Controls Comparative Enthalpy with = LonTalk® Communications Barometric Relief = Electromechanical Interface = ReliaTel™... - Page 8 Model Number Descriptions - 3 to 10 Tons (T/Y) 5. Manual outside air damper will 17. Requires use of disconnect or = Clogged Filter Switch and Discharge Air Sensing Tube ship factory supplied within the circuit breaker. Reference = Fan Failure Switch and Discharge unit, but must be field installed.
- Page 9 Model Number Descriptions - 3 to 10 Tons (T/Y) Table 1. Digit 15 Selection Details Digit 15 = 0 Standard Efficiency 3 Phase (3 to 5 Ton) = Multispeed Direct Drive Motor 3 Phase (6 to 8.5 Ton) = Belt Drive 3 Phase (10 Ton) = Ultra High Efficiency Direct Drive Plenum Fan High Efficiency...
-
Page 10: Model Number Descriptions - 3 To 5 Tons (T/Y - 17 Plus)
Digit 15 — Supply Fan/Drive Type/ Note: Applicable to Digit 1, T models Interface Motor only ® ® = Trane Air-Fi Communications = No Electric Heat = Standard Drive Interface = 6 kW (3 phase) = Single Zone VAV Digit 22 — Refrigeration System... -
Page 11: Model Number Notes
Model Number Descriptions - 3 to 5 Tons (T/Y - 17 Plus) disconnect/circuit breaker 22. Ultra Low NOx has 3 Ton Only = Fan Failure Switch Condensate Drain Pan Overflow options. available with LOW heat (digit Switch 10=X). 6. Requires use of Disconnect or = Discharge Air Sensing Condensate Drain Pan Overflow Circuit Breaker. -
Page 12: General Information
General Information Unit Inspection Compressor Nameplate As soon as the unit arrives at the job site The nameplate for the compressors are located on the side of the compressor. • Verify that the nameplate data matches the data on the sales order and bill of lading (including electrical data). -
Page 13: System Input Devices And Functions
24 Vac. FFS (Fan Failure Switch) If air flow through the unit is not RTCI - ReliaTel™ Trane Communication proven by the differential pressure switch connected to the Interface (Optional) RTOM (factory set point 0.07-inch w.c.) within 40 seconds... -
Page 14: Low Pressure Control
General Information Power Exhaust Control (Optional) Compressor Disable (CPR1/2) This input incorporates the low pressure control (LPC) of ReliaTel™ Control each refrigeration circuit and can be activated by opening The power exhaust fan is started whenever the position of a field supplied contact installed on the LTB. the economizer dampers meets or exceed the power If this circuit is open before the compressor is started, the exhaust setpoint when the indoor fan is on. -
Page 15: Evaporator Frost Control
This electronic sensor features single setpoint capability and timed override with override cancellation. It is used ReliaTel™ Option with a Trane Integrated Comfort™ building management system. This input incorporates the Frostat™ control (FOS) mounted in the indoor coil circuit and can be activated by... -
Page 16: Discharge Line Temp Switch (Dlts)
General Information closing a field supplied contact installed in parallel with these checks and procedures, refer to the appropriate the FOS. section(s) of the smoke detector Installation and Maintenance Instructions provided with the literature If this circuit is closed before the compressor is started, the package for this unit. -
Page 17: Pre-Installation
Pre-Installation WARNING Fiberglass Wool! Exposition to glass wool fibers without all necessary PPE equipment could result in cancer, respiratory, skin or eye irritation, which could result in death or serious injury. Disturbing the insulation in this product during installation, maintenance or repair will expose you to airborne particles of glass wool fibers and ceramic fibers known to the state of California to cause cancer through inhalation. -
Page 18: Dimensions And Weights
Dimensions and Weights Unit Clearances necessary to assure adequate serviceability, cataloged unit capacity, and peak operating efficiency. Figure 1, p. 18 illustrates the minimum operating and Providing less than the recommended clearances may service clearances for either a single or multiple unit result in condenser coil starvation, “short-circuiting”... - Page 19 Table 3. Maximum unit and corner weights (lbs) and center of gravity dimensions (in.) - gas/electric models Maximum Model Unit Weights Corner Weights Center of Gravity (in.) Tons Model No. Shipping Length Width YSC036G YSC048G YSC060G YSC072H YSC090H YSC092H YSC102H 1028 YSC120H 1156 1058...
- Page 20 Dimensions and Weights Figure 3. Rigging and center of gravity (a),(b) Table 4. Factory installed options (fiops)/accessory net weights (lbs) YHC047E-067E YSC036G-060G YHC048E-060E YSC072H-102H YSC120H YHC036E, YHC037E YHC048F-060F YHC072E/F YHC074F-102F YHC120F Net Weight Net Weight Net Weight Net Weight Net Weight...
- Page 21 Dimensions and Weights Figure 4. Cooling and gas/electric - 3 to 5 tons standard Figure 7. Cooling and gas/electric —3 to 5 tons (a),(b) efficiency standard efficiency, 3 tons high efficiency— horizontal airflow supply/return TOP PANEL EVAPORATOR SECTION ACCESS PANEL CONDENSER FAN 3 3/16”...
- Page 22 Dimensions and Weights Figure 10. Cooling and gas/electric —3 to 5 standard Figure 12. Cooling and gas/electric —3 to 5 tons efficiency, 3 tons high efficiency — downflow standard efficiency, 3 tons high efficiency— duct connections, field fabricated economizer and barometric relief damper hood 14 1/16”...
- Page 23 Dimensions and Weights Figure 14. Gas/electric – 3 to 10 tons standard and high Figure 17. Cooling and gas/electric — 6 to 10 ton efficiency— gas pipe height (Y models standard efficiency units, 4 to 6 ton high (a),(b) only) efficiency units, 6(074)-8.5 (microchannel) high efficiency unit—horizontal airflow supply/return...
- Page 24 Dimensions and Weights Figure 20. Cooling and gas/electric —6 to 10 tons Figure 22. Cooling and gas/electric —6 to 10 tons standard efficiency, 4 to 10 tons high standard efficiency, 4 to 8.5 tons high efficiency— downflow duct connections, field efficiency—...
- Page 25 Dimensions and Weights Figure 25. Cooling and gas/electric —10 tons high Figure 27. Cooling and gas/electric —10 tons high efficiency efficiency— horizontal airflow, supply and return INDOOR TOP PANEL OUTDOOR TOP PANEL 3 7/8” 98 MM UNIT CONTROL WIRE 7/8” (22 MM) DIA. HOLE CONTROL BOX SECTION 50 7/8”...
- Page 26 Dimensions and Weights Figure 30. Cooling and gas/electric —10 tons high Figure 31. Cooling and gas/electric —10 tons high efficiency— power exhaust efficiency— swing diameter for hinged door(s) option Applicable to Y_C models only 17 13/16” ECONOMIZER HOOD 451 MM 22 1/2”...
-
Page 27: Installation
Installation Foundation section for the unit operating weights. If anchoring is required, anchor the unit to the roof with hold-down bolts or isolators. WARNING Check with a roofing contractor for proper waterproofing procedures. Heavy Objects! Ductwork Failure to follow instructions below or properly lift unit could result in unit dropping and possibly crushing operator/technician which could result in death or Supply and return air openings as viewed from the rear of... -
Page 28: Roof Curb
Installation Figure 34. Cooling and gas/electric —10 tons high Figure 36. 4 to 6 ton high efficiency units, 6(074)-8.5 efficiency— horizontal airflow, supply and (Microchannel) high efficiency units and 6 to 10 return ton standard efficiency units - down flow supply and return air openings w/ through- the- base utilities 3 7/8”... -
Page 29: Rigging
Installation Figure 39. View for base to roof curb alignment WARNING YHC120F on 60" x 84" roof curb Combustible Materials! Failure to maintain proper clearance between the unit heat exchanger, vent surfaces and combustible materials could cause a fire which could result in death or serious injury or property damage. -
Page 30: General Unit Requirements
Installation 6. Lift the unit enough to allow the removal of base fork pocket protection components as shown in the WARNING following figures. Improper Unit Lift! 7. When 10 ton high efficiency units are installed on Failure to properly lift unit could result in unit dropping smaller existing roof curb (50"x 84") for replacement and possibly crushing operator/technician which could applications, do not remove alignment bracket. -
Page 31: Temperature Limit Switch Usage For Gas
Installation Temperature Limit Switch Usage for Gas (a),(b) Table 6. TC01 tripping values (continued) Heat Units Unit Model - High Efficiency TCO1 Tripping Values - 15 SEER Downflow/ Horizontal Units are factory shipped in the downflow discharge YHC048F1*(M,Y)-DD 140F configuration but can be field converted to a horizontal YHC048E/F(3,4,W)*(M,Y)-DD 150F/170F discharge configuration. -
Page 32: Tco1 Instructions For Low Nox Gas Furnace
Downflow/ Downflow/ YHC037***X and Digit 34 = A 190F Efficiency - MCHE Horizontal Horizontal YHC047***X and Digit 34 = A 170F YSC036G**(L,X)B 170F 170F YHC047***Y and Digit 34 = A 190F YSC036G**(M,Y)B 170F 170F/155F YHC067***X and Digit 34 = A... -
Page 33: Tco1 Instructions
Installation Horizontal Discharge Conversion 5. Slide RETURN DUCT COVER (insulation side up) into supply opening until inward edge of duct cover (6 to 10 Ton Units) engages with the 2 retaining clips on the duct flange. Secure outward edge of the duct cover with two Note: 6 to 10 ton units the supply cover to return opening screws. -
Page 34: Tco1 Instructions
Installation If unit is equipped with Discharge Air Sensing option • refer to the following figure for proper tube positioning WARNING based on unit tonnage. Hazardous Voltage! Figure 47. For YSC120H*R and YHC074F, 092F, 102F Failure to disconnect power before servicing could models result in death or serious injury. -
Page 35: Air-Fi ® Wireless Communication Interface
4. Slide the top bracket down the copper sensing tube. Figure 50. Downflow view For YSC036G-060, and YHC036-037E units insert the tab on the left side into the slot on the indoor coil block off and secure the right side of the bracket with one of the 3 screws removed in step 2. -
Page 36: Main Electrical Power Requirements
Installation Through-the-Base Gas Figure 54. Wireless communication interface - Installation horizontal Note: Through-the-Base Gas is not available with Low NOx gas furnace option, digit 34 = A. The gas supply line must extend 4⅝” above the base pan. The “Through-the-Base Gas” kit is located in the heat vestibule compartment. -
Page 37: Requirements For Gas Heat
Installation Requirements for Gas Heat • Drip leg Installed in the gas piping near the unit. • Minimum gas supply pressure should be 4.5-inch W.C. Note: The unit gas train and optional through-the-base • Maximum gas supply pressure must not exceed 14.0- gas shut-off valve are rated at 1/2 PSIG maximum. -
Page 38: Condensate Drain Configuration
Installation Condensate Drain Configuration rear support panel and push until the support is seated in the grommet. 8. Replace the front support panel by aligning the panel WARNING with tabs in the raceway. Align the plugged condensate drain pan coupling in the grommeted hole Hazardous Voltage! as the panel is put in place. -
Page 39: Field Installed Power Wiring
Installation Field Installed Power Wiring WARNING Hazardous Voltage! WARNING Failure to disconnect power before servicing could Proper Field Wiring and Grounding result in death or serious injury. Disconnect all electric Required! power, including remote disconnects before servicing. Follow proper lockout/tagout procedures to ensure the Failure to follow code could result in death or serious power can not be inadvertently energized. -
Page 40: Field-Installed Control Wiring
Installation Figure 58. All units except 10 ton high efficiency units WARNING Proper Field Wiring and Grounding Required! Failure to follow code could result in death or serious injury. All field wiring MUST be performed by qualified personnel. Improperly installed and grounded field wiring poses FIRE and ELECTROCUTION hazards. -
Page 41: Controls Using Dc Analog Input/Outputs
Installation DC Conductors 3. Do not run the AC low voltage wiring in the same conduit with the high voltage power wiring. Table 12. Zone sensor module wiring 4. Route low voltage wiring per illustrations on page 42. Distance from Unit to Control Recommended Wire Size Table 10. - Page 42 Installation Figure 62. ReliaTel™ options module (RTOM board) Figure 63. ReliaTel™ relative humidity sensor (dehumidification option) Figure 64. ReliaTel™ humidistat (dehumidification option) Figure 65. Electromechanical control customer low voltage routing (all units except 10 ton high efficiency) RT-SVX21AC-EN...
- Page 43 Installation Figure 66. ReliaTel™ control customer low voltage routing (all units except 10 ton high efficiency) Figure 67. ReliaTel™ (without TBUE) control customer wire routing (10 ton high efficiency) COMMUNICATION ENTER CONTROL BOX THROUGH HOLE IN INTERFACE (COMM) OUTDOOR DIVIDER PANEL. SECURE FIELD ReliaTel OPTIONS WIRING WITH POP-IN WIRE TIE NEAR MODULE (RTOM)
- Page 44 Installation Figure 68. ReliaTel™ (with TBUE) control customer wire routing (10 ton high efficiency) COMMUNICATION ENTER CONTROL BOX THROUGH HOLE IN INTERFACE (COMM) OUTDOOR DIVIDER PANEL. SECURE FIELD WIRING WITH POP-IN WIRE TIE NEAR ReliaTel OPTIONS REFRIGERATION HOLE IN OUTDOOR DIVIDER PANEL. MODULE (RTOM) MODULE (RTRM) ROUTE FIELD WIRING ALONG SIDE...
-
Page 45: Space Temperature Averaging (Reliatel™ Only)
Installation Figure 70. Electromechanical (with TBUE) control customer wire routing (10 ton high efficiency) Space Temperature Averaging (ReliaTel™ Only) Space temperature averaging is accomplished by wiring a number of remote sensors in a series/parallel circuit. Using the BAYSENS016* or BAYSENS077*, at least four sensors are required to accomplish space temperature averaging. - Page 46 Installation Figure 71. Examples Note: Wiring pin numbers are for reference only. There are multiple smoke detector systems that could have differently numbered pins. For correct wiring details, please refer to the specific smoke detector literature that accompanied this unit. RT-SVX21AC-EN...
- Page 47 Installation Figure 72. Typical field wiring diagrams for optional controls (ReliaTel™ only) BAYSENS075* BAYSENS075* BAYSENS108* BAYSENS106* BAYSENS110* BAYSENS119* BAYSENS073* BAYSENS074* BAYSENS075* ASYSTAT669A OPTIONAL REMOTE SENSOR RT-SVX21AC-EN...
- Page 48 Installation Table 13. Temperature vs. resistance Table 15. Iron pipe size (SI) millimeters Temperature Iron Pipe Size (SI) Millimeters Degrees °F Degrees °C Nominal Resistance Length of Pipe 15 mm 20 mm 25 mm 32 mm 40 mm (Meters) Pipe Pipe Pipe Pipe...
-
Page 49: Pre-Start
Pre-Start Use the checklist provided below in conjunction with the Excessive three phase voltage imbalance between phases “General Unit Requirements” checklist to ensure that the will cause motors to overheat and eventually fail. The unit is properly installed and ready for operation. maximum allowable voltage imbalance is 2%. -
Page 50: Compressor Crankcase Heaters (Optional)
Pre-Start Note: Upon closing main power disconnect and the unit face of the monitor is red, correct supply power mounted disconnect switch or circuit breaker, the fault. phase monitor will verify proper phasing. If LED on WARNING face of the monitor is red, correct supply power fault. -
Page 51: Test Modes
Pre-Start Table 16. Service test guide for component operation Multi-Speed Fan Test Step Mode Econ Comp 1 Comp 2 Heat 1 Heat 2 Resistance Output Output Minimum Position Setpoint 0% Ω 2.2K Minimum Selectable Ventilation Economizer Ω Open 3.3K Test Open Cool Minimum Ω... - Page 52 Pre-Start Cool 2 Connect red thermostat wire (R) to yellow thermostat wire (Y2). Heat 1 Connect red thermostat wire (R) to brown thermostat wire (W1). Heat 2 Connect red thermostat wire (R) to brown thermostat wire (W2). RT-SVX21AC-EN...
-
Page 53: Unit Start-Up
Unit Start-Up Sequence of Operation Units are offered with two control options, the low pressure control (LPC2), high pressure control electromechanical or ReliaTel™. (HPC2) and discharge line thermostat (TDL 2) are closed. When the CC2 contacts close, compressor (CPR2) starts to Note: Refer to the unit nameplate: If the 9th digit of the maintain the zone temperature to within ±... -
Page 54: Reliatel™ Control Evaporator Fan Operation (For Cooling Only Units)
Sequence of Operation Multi-Speed Indoor Motor When the unit is equipped with the optional clogged filter switch, wired between terminals J7-3 and J7-4 on the Notes: ReliaTel™ options module (RTOM), the RTRM produces an analog output if the clogged filter switch (CFS) closes •... -
Page 55: Supply Air Static Pressure Limit
Sequence of Operation The supply fan will accelerate or decelerate as required to is low and the building cooling load is low, the supply air maintain the supply static pressure setpoint. setpoint can be raised, thereby preventing subcooling of critical zones. This reset can lower usage of primary Supply Air Static Pressure Limit cooling and result in a reduction in primary cooling energy usage There are two user-defined parameters that are... -
Page 56: Variable Air Volume Applications (Single Zone Vav)
Sequence of Operation be energized for at least 6 minutes to drive all boxes open, Air Cool Setpoints will be customer selectable via a the supply fan is commanded to full speed, and full heat potentiometer (DACR) adjacent to the RTOM with a (gas or electric) is energized. -
Page 57: Reliatel™ Control Dehumidification
Sequence of Operation Dehumidification Coil Purge Cycle modes (Economizer Only, Economizer +1st Stage Cooling, or Economizer + 1st/2nd Stage Cooling). On multiple circuit units with dehumidification/reheat The ECA continues to modulate the economizer damper configured, a purge cycle will be active for compressor open/closed to keep the mixed air temperature that is reliability. -
Page 58: Economizer Set-Up
Sequence of Operation ReliaTel™ Control Heating Operation (for relay (F) is energized and allows mechanical cooling operation. Cooling Only Units) When the unit is equipped with the optional fan failure When the system switch is set to the “Heat” position and switch, wired between terminals J7-5 and J7-6 on the the zone temperature falls below the heating setpoint RTOM, the RTRM will stop all cooling functions and... -
Page 59: Drain Pan Condensate Overflow Switch
Sequence of Operation Electromechanical Controls If the burner fails to ignite, the ignition module will attempt two retries before locking out. The green LED will indicate a lock out by two fast flashes. An ignition lockout can be These units are offered with two control options, reset by;... -
Page 60: Electromechanical Evaporator Fan Operation (For Cooling Only Units)
Sequence of Operation Electromechanical Evaporator Fan contactor (AH or AH and CH) is energized. If the first stage of electric heat can not satisfy the heating requirement, the Operation (for Cooling Only Units) thermostat closes W2. When the thermostat fan selection switch is set to the When the W2 contacts close, the second stage electric heat “Auto”... -
Page 61: Drain Pan Condensate Overflow Switch
Sequence of Operation cooling. The motor can be rewired for different speed Table 21. Ignition module diagnostics settings should the application require it. Refer to the wiring diagram that shipped in the unit and the unit fan Module is powered up, but no active call for performance tables in the Service Facts. -
Page 62: Units With Belt Drive Indoor Fan
Sequence of Operation operating in heating mode the heat speed set • To stop the SERVICE TEST, turn the main power cannot be lower than Speed Set 4. disconnect switch to the “Off” position or proceed to the next component start-up procedure. 4. - Page 63 Sequence of Operation b. Using the fan performance tables in the unit Service Table 22. Direct drive plenum fan settings (rpm vs. voltage) (continued) Facts, plot the actual RPM (step 1) and the BHP (step 2a) to obtain the operating CFM. Potentiometer Voltage Motor RPM 2.
-
Page 64: Plus Units With The Constant Cfm Direct Drive Indoor Fan
Sequence of Operation voltage. Adjust potentiometer until output voltage Table 23. Cfm vs. vdc across TP1 and ground achieves desired CFM setpoint. Potentiometer 2. To increase voltage/CFM, turn potentiometer PWM% value Voltage (Vdc) CFM/Ton clockwise. <0.1 3. To decrease voltage/CFM, turn potentiometer counter- clockwise. -
Page 65: Supply Duct Static Pressure Control
Sequence of Operation Note: The RTRM is designed to maintain a selectable termination setpoint is equal to the Morning Warm-up supply air temperature of 40°F to 90°F with a +/- setpoint. 3.5°F deadband. However, to reduce the risk of If the system control is remote (Tracer®), the DWU evaporator coil freeze-up in Precedent and Voyager setpoint is equal to the Tracer®... -
Page 66: Supply Air Temperature Reset
Sequence of Operation Supply Air Temperature Reset below. Failure to follow these instructions will prevent the smoke detector from performing its design function. The supply air temperature can be reset by using one of Economizer Start-Up four DIP switch configurations on the RTAM or through ICS when a valid supply air reset setpoint with a supply air reset amount is given. -
Page 67: Compressor Start-Up
Sequence of Operation electromechanical test mode connections (if WARNING applicable). Live Electrical Components! Compressor Start-Up Failure to follow all electrical safety precautions when 1. Attach a set of service gauges onto the suction and exposed to live electrical components could result in discharge gauge ports for each circuit. -
Page 68: Gas Heat Units
Sequence of Operation Final System Setup Momentarily jump across the Test 1 and Test 2 terminals of the LTB1 until the unit enters test mode 7 (See Table 16, After completing all of the pre-start and start-up 51). Once the unit is in the reheat test mode, verify that procedures outlined in the previous sections (i.e., the 3 way valve has shifted to the reheat position and that operating the unit in each of its Modes through all... -
Page 69: Maintenance
Maintenance Once the new belts are installed, using a Browning or WARNING Gates tension gauge (or equivalent) illustrated in Figure 75, p. 69, adjust the belt tension as follows; Hazardous Service Procedures! 1. To determine the appropriate belt deflection; Failure to follow all precautions in this manual and on the tags, stickers, and labels could result in death or a. -
Page 70: Monthly Maintenance
Maintenance • Inspect the evaporator and condenser coils for dirt, Table 24. Belt tension measurement and deflection bent fins, etc. If the coils appear dirty, clean them Deflection Force (Lbs.) according to the instructions described in “Coil Cleaning” later in this section. Super Steel Cable Belts... -
Page 71: Coil Cleaning
Maintenance Coil Cleaning sprayer). A high-quality detergent is also required; suggested brands include “SPREX A.C.”, “OAKITE 161”, Regular coil maintenance, including annual cleaning, “OAKITE 166” and “COILOX”. If the detergent selected is enhances the unit’s operating efficiency by minimizing: strongly alkaline (ph value exceeds 8.5), add an inhibitor. compressor head pressure and amperage draw, evaporator water carryover, fan brake horsepower due to WARNING... -
Page 72: Annual Maintenance
Maintenance Hail Guard Reinstallation 11. Restore the unit to its operational status and check system operation. 10. To reinstall the hail guard, locate the bottom of the hail guard in the lower bracket and secure it to the upper Annual Maintenance unit bracket with the attached fasteners. -
Page 73: Troubleshooting
Troubleshooting • System status WARNING • Heating status Hazardous Service Procedures! • Cooling status Failure to follow all precautions in this manual and on If a system failure is indicated, proceed to Step 5. If no the tags, stickers, and labels could result in death or failures are indicated, proceed to Step serious injury.... - Page 74 Troubleshooting Zone Sensor LED 3 (Cool) • Clogged filter switch has closed, check the filters. • If the condensate overflow switch is closed, the unit “On” when the cooling cycle is operating. will not operate. Make sure the float switch is not in a “Off”...
-
Page 75: Resetting Cooling And Ignition Lockouts
Troubleshooting Resetting Cooling and Ignition Lockouts Condensate Overflow Switch Cooling Failures and Ignition Lockouts are reset in an When the “Condensate Overflow Switch” is closed, a identical manner. Method 1 explains resetting the system drain pan overflow condition is indicated and it will shut from the space;... -
Page 76: Test 4 - Led Indicator Test, (Sys On, Heat, Cool And Service)
Troubleshooting Test 4 - LED Indicator Test, (SYS ON, while the voltage on the high end will measure from approximately 24 to 38 Vdc. HEAT, COOL and SERVICE) 4. Verify all modes of operation, by running the unit Method 1 through all of the steps in the “Test Modes”... -
Page 77: Electromechanical Control
Troubleshooting • Fast Flash - 1/2 second on / 2 seconds off: assist in verifying proper operation. Make the necessary repairs and proceed to Step 6 Step • Error Code: Communications failure 6. If no abnormal operating conditions appear in the test •... - Page 78 Troubleshooting Table 27. Fault detection and diagnostic codes Primary Fault Codes Information Code Temp Mixed Air Outdoor Pressure Space Unit Economizer RTEM Sensor Airflow Unit Fails Damper Failures Temp Temp Dead band Press Dead Economizing Actuator Comm Fail Sensor Fail Position % Sensor Sensor...
-
Page 79: Unit Economizer Control (Eca) Test Procedures
Troubleshooting Unit Economizer Control (ECA) The resistance should be approximately 130 Ohms. Replace the ECA if it is out of range. Test Procedures Troubleshooting procedures for Electromechanical Control Direct Drive Plenum Fan This series of tests will allow you to diagnose, and determine where, and if a problem exists in the system Prior to troubleshooting, verify all wiring and wiring economizer operation. -
Page 80: Wiring Diagrams
Wiring Diagrams Table 29. Wiring diagram matrix Drawing Schematic Type Number Description Control ReliaTel™ 230,460,575V 1213-1641 YSC036-060G ReliaTel controls Control ReliaTel™ 230,460,575V 4366-7217 YHC(037-067) Y(S,H)C(036,048)E/F (1,3 Phase) and YHC060F (1-Phase), 4366-4571 Control ReliaTel™ 230,460,575V ReliaTel Controls, X13 IDM Control ReliaTel™ 230,460,575V 4366-1015 Y(S,H)C(036-090)E/F, ReliaTel Controls, Belt-Drive IDM... - Page 81 Wiring Diagrams Table 29. Wiring diagram matrix Drawing Schematic Type Number Description Power Electromechanical 460V and/or 575V 1213-1638 YSC(036-060)G4 Electromechanical Controls Power Electromechanical 460V and/or 575V 1213-1662 YSC(036-060)GW Electromechanical Controls Power Electromechanical 460V and/or 575V 4366-1005 Y(S,H)C(036-090)E/F (460V,575V), Belt-Drive IDM Power Electromechanical 460V and/or 575V 4366-1005...
- Page 82 Wiring Diagrams Table 29. Wiring diagram matrix Drawing Schematic Type Number Description Connection ReliaTel™ 230V 1213-3768 Ultra Low NOx, 4 and 5 Ton, 17-SEER MZ VAV Connection ReliaTel™ 460V 1213-3769 Ultra Low NOx, 4 and 5 Ton, 17-SEER MZ VAV Connection Electromechanical 230V...
-
Page 83: Limited Warranty Combination Gas Electric Air Conditioner
Models Less Than 20 Tons for Commercial Trane Use* 2701 Wilma Rudolph Blvd. This warranty is extended by Trane to the original Clarksville, TN 37040-1008 purchaser and to any succeeding owner of the real Attention: Manager, Product Service property to which the Combination Gas Electric Air... - Page 84 For more information, please visit trane.com or americanstandardair.com. Trane and American Standard have a policy of continuous product and product data improvement and reserve the right to change design and specifications without notice. We are committed to using environmentally conscious print practices.
Need help?
Do you have a question about the YSC060G and is the answer not in the manual?
Questions and answers