Sign In
Upload
Download
Table of Contents
Contents
Add to my manuals
Delete from my manuals
Share
URL of this page:
HTML Link:
Bookmark this page
Add
Manual will be automatically added to "My Manuals"
Print this page
×
Bookmark added
×
Added to my manuals
Manuals
Brands
Lenovo Manuals
Desktop
10AJ
Hardware maintenance manual
Lenovo 10AJ Hardware Maintenance Manual
Hide thumbs
Also See for 10AJ
:
User manual
(186 pages)
1
2
Table Of Contents
3
4
5
6
7
8
9
10
11
12
13
14
15
16
17
18
19
20
21
22
23
24
25
26
27
28
29
30
31
32
33
34
35
36
37
38
39
40
41
42
43
44
45
46
47
48
49
50
51
52
53
54
55
56
57
58
59
60
61
62
63
64
65
66
67
68
69
70
71
72
73
74
75
76
77
78
79
80
81
82
83
84
85
86
87
88
89
90
91
92
93
94
95
96
97
98
99
100
101
102
103
104
105
106
107
108
109
110
111
112
113
114
115
116
117
118
119
120
121
122
123
124
125
126
127
128
129
130
131
132
133
134
135
136
137
138
139
140
141
142
143
144
145
146
147
148
149
150
151
152
153
154
155
156
157
158
159
160
161
162
163
164
165
166
167
168
169
170
171
172
173
174
175
176
177
178
179
180
181
182
183
184
185
186
187
188
189
190
191
192
193
194
195
196
197
198
199
200
201
202
203
204
205
206
207
208
209
210
211
212
213
214
215
216
217
218
219
220
221
222
223
224
225
226
227
228
229
230
231
232
233
234
235
236
237
238
239
240
241
242
243
244
245
246
247
248
249
250
251
252
253
254
255
256
257
258
259
260
261
262
263
264
265
266
267
268
269
270
271
272
273
274
275
276
277
278
279
280
281
282
283
284
285
286
287
288
289
290
291
292
293
294
page
of
294
Go
/
294
Contents
Table of Contents
Troubleshooting
Bookmarks
Table of Contents
Table of Contents
About this Manual
Chapter 1. Safety Information
General Safety
Electrical Safety
Safety Inspection Guide
Handling Electrostatic Discharge-Sensitive Devices
Grounding Requirements
Safety Notices (Multi-Lingual Translations)
Chapter 2. General Information
Specifications
For Machine Types: 10A0, 10A1, 10A6, 10A7, 10AG, 10AK, 10AL, and 10BE
For Machine Types: 10A2, 10A3, 10A8, 10A9, 10AH, 10AJ, 10AM, and 10AN
For Machine Types: 10A4, 10A5, 10AA, 10AB
And 10EB
Lenovo Programs
Accessing a Program on Your Computer
An Introduction to Lenovo Programs
Lenovo Support Web Site
Chapter 3. General Checkout
Problem Determination Tips
Chapter 4. Troubleshooting and Diagnostics
Basic Troubleshooting
Accessing Control Panel on the Windows 8 or Windows 8.1 Operating System
Troubleshooting Procedure
Troubleshooting
Audio Problems
CD Problems
DVD Problems
Intermittent Problems
Hard Disk Drive Problems
Keyboard, Mouse, or Pointing Device Problems
Monitor Problems
Networking Problems
Option Problems
Performance and Lockup Problems
For Windows 8 or Windows 8.1: See "Accessing Control Panel on the Windows 8 or Windows 8.1
Operating System
Control Panel
Printer Problems
Serial Port Problems
Software Problems
USB Problems
View Control Panel Using Large Icons or Small Icons, and then Click Recovery ➙ Open System Restore
Diagnostics
Lenovo Solution Center
UEFI Diagnostic Program
Chapter 5. Using the Setup Utility Program
Starting the Setup Utility Program
Viewing and Changing Settings
Using Passwords
Password Considerations
Power-On Password
Administrator Password
Setting, Changing, and Deleting a Password
Erasing Lost or Forgotten Passwords (Clearing CMOS)
Enabling or Disabling a Device
Selecting a Startup Device
Selecting a Temporary Startup Device
Selecting or Changing the Startup Device Sequence
Enabling Erp LPS Compliance Mode
ICE Performance Mode
ICE Thermal Alert
Changing the BIOS Settings before Installing a New Operating System
Exiting the Setup Utility Program
Chapter 6. Symptom-To-FRU Index
Hard Disk Drive Boot Error
Power Supply Problems
Beep Symptoms
POST Error Codes
Miscellaneous Error Conditions
Undetermined Problems
Chapter 7. Locations
For Machine Types: 10A0, 10A1, 10A6, 10A7, 10AG, 10AK, 10AL, and 10BE
Locating Connectors, Controls, and Indicators on the Front of Your Computer
Locating Connectors on the Rear of Your Computer
Locating Major Frus and Crus
Looking up FRU Information
Locating Parts on the System Board
Locating Internal Drives
For Machine Types: 10A2, 10A3, 10A8, 10A9, 10AH, 10AJ, 10AM, and 10AN
Locating Connectors, Controls, and Indicators on the Front of Your Computer
Locating Connectors on the Rear of Your Computer
Locating Major Frus and Crus
Looking up FRU Information
Locating Parts on the System Board
4-Pin Power Connectors
14-Pin Power Connector
Esata Connector
Parallel Connector
SATA 3.0 Connectors
PCI Express X16 Graphics Card Slot
System Fan Connector
Cover Presence Switch Connector (Intrusion Switch Connector)
Locating Internal Drives
Battery
For Machine Types: 10A4, 10A5, 10AA, 10AB, 10DF, 10DG, 10DH, 10DJ, 10E8, 10E9, 10EA, and 10EB
Locating Connectors, Controls, and Indicators on the Front of Your Computer
Locating Connectors on the Rear of Your Computer
Locating Major Frus and Crus
Looking up FRU Information
Locating Parts on the System Board
Chapter 8. Replacing Frus (Machine Types: 10A0, 10A1, 10A6, 10A7, 10AG, 10AK, 10AL, and 10BE)
Removing the Computer Cover
Removing and Reinstalling the Front Bezel
Installing or Replacing a PCI Card
Installing or Replacing a Memory Module
Replacing the Optical Drive
Installing or Replacing the Card Reader
Installing the Card Reader
Replacing the Card Reader
Installing or Replacing the Front USB Assembly
Installing the Front USB Assembly
Replacing the Front USB Assembly
Replacing the Battery
Replacing the Power Supply Assembly
Replacing the Heat Sink and Fan Assembly
Replacing the Microprocessor
Replacing the System Board
Installing or Replacing the Msata Solid-State Drive
Installing the Msata Solid-State Drive
Replacing the Msata Solid-State Drive
Replacing the Primary Hard Disk Drive
Replacing the Secondary Hard Disk Drive
Installing the Solid-State Drive
Replacing the Front Fan Assembly
Replacing the Rear Fan Assembly
Replacing the Front Audio and USB Assembly
Replacing the Internal Speaker
Replacing the Thermal Sensor
Replacing the Cover Presence Switch
Replacing the Wi-Fi Units
Removing the Wi-Fi Adapter Card
Removing the Wi-Fi Card Module
Installing the Wi-Fi Units
Installing or Removing the Rear Wi-Fi Antenna
Installing the Rear Wi-Fi Antenna
Removing the Rear Wi-Fi Antenna
Installing or Removing the Front Wi-Fi Antenna
Installing the Front Wi-Fi Antenna
Removing the Front Wi-Fi Antenna
Replacing the Keyboard or Mouse
Completing the Parts Replacement
Obtaining Device Drivers
Chapter 9. Replacing Frus (Machine Types: 10A2, 10A3, 10A8, 10A9, 10AH, 10AJ, 10AM, and 10AN)
Installing External Options
Removing the Computer Cover
Removing and Reinstalling the Front Bezel
Accessing the System Board Components and Drives
Installing or Replacing a PCI Card
Installing or Replacing a Memory Module
Replacing the Optical Drive
Installing or Replacing the Card Reader Assembly
Installing the Card Reader Assembly
Replacing the Card Reader Assembly
Installing or Replacing the Front USB Assembly
Installing the Front USB Assembly
Replacing the Front USB Assembly
Replacing the Battery
Installing or Replacing the Msata Solid-State Drive
Installing the Msata Solid-State Drive
Replacing the Msata Solid-State Drive
Replacing the Power Supply Assembly
Replacing the Power Switch Unit
Replacing the Heat Sink and Fan Assembly
Replacing the Microprocessor
Replacing the System Board
Replacing the Cover Presence Switch
Replacing the Primary Hard Disk Drive
Installing or Replacing the Secondary Hard Disk Drive
Installing the Secondary Hard Disk Drive
Replacing the Secondary Hard Disk Drive
Installing the Solid-State Drive
Replacing the Front Fan Assembly
Replacing the Front Audio and USB Assembly
Replacing the Internal Speaker
Replacing the Thermal Sensor
Replacing the Wi-Fi Units
Removing the Wi-Fi Adapter Card
Removing the Wi-Fi Card Module
Installing the Wi-Fi Units
Installing or Removing the Rear Wi-Fi Antenna
Installing the Rear Wi-Fi Antenna
Removing the Rear Wi-Fi Antenna
Installing or Removing the Front Wi-Fi Antenna
Installing the Front Wi-Fi Antenna
Removing the Rear Wi-Fi Antenna
Replacing the Keyboard or Mouse
Completing the Parts Replacement
Obtaining Device Drivers
Chapter 10. Replacing Frus (Machine Types: 10A4, 10A5, 10AA, 10AB, 10DF, 10DG, 10DH, 10DJ, 10E8, 10E9, 10EA, and 10EB)
Removing the Computer Cover
Installing External Options
Installing or Removing the Ac Power Adapter
Installing or Removing the Vertical Stand
Installing or Removing the VESA Mount Bracket
Installing or Removing the Ac Power Adapter Bracket
Replacing the Optical Drive
Installing or Removing the Hard Disk Drive Assembly
Replacing the Secondary Hard Disk Drive
Installing or Removing the I/O Box
Installing or Replacing a Memory Module
Replacing the Battery
Replacing the Power Switch Board
Replacing the Wi-Fi Card Module
Installing or Removing the Front Wi-Fi Antenna
Installing or Removing the Rear Wi-Fi Antenna
Replacing the Internal Speaker
Replacing the Cover Presence Switch
Replacing the System Fan
Replacing the Thermal Module
Replacing the Microprocessor
Replacing the System Board
Replacing the Keyboard or Mouse
Completing the Parts Replacement
Obtaining Device Drivers
Chapter 11. Additional Service Information
Security Features
Hardware Controlled Passwords
Operating System Password
Vital Product Data
BIOS Levels
Flash Update Procedures
Updating the BIOS
Recovering from a POST/BIOS Update Failure
Power Management
Advanced Configuration and Power Interface (ACPI) BIOS
Automatic Power-On Features
Appendix A. Notices
Index
Advertisement
Quick Links
1
Specifications
2
For Machine Types: 10A2, 10A3, 10A8, 10A9, 10Ah, 10Aj, 10Am, and 10An
3
For Machine Types: 10A4, 10A5, 10Aa, 10Ab
Download this manual
ThinkCentre M83 and M93/p
Hardware Maintenance Manual
Machine Types: 10A0, 10A1, 10A2, 10A3, 10A4, 10A5, 10A6, 10A7,
10A8, 10A9, 10AA, 10AB, 10BE, 10AG,10AH, 10AJ, 10AK,
10AL,10AM, 10AN, 10DF, 10DG, 10DH, 10DJ, 10E8, 10E9, 10EA, and
10EB
Table of
Contents
Previous
Page
Next
Page
1
2
3
4
5
Advertisement
Table of Contents
Troubleshooting
Chapter 4. Troubleshooting and diagnostics
43
Accessing Control Panel on the Windows 8 or Windows 8.1 operating system
44
Troubleshooting
45
Need help?
Do you have a question about the 10AJ and is the answer not in the manual?
Ask a question
Questions and answers
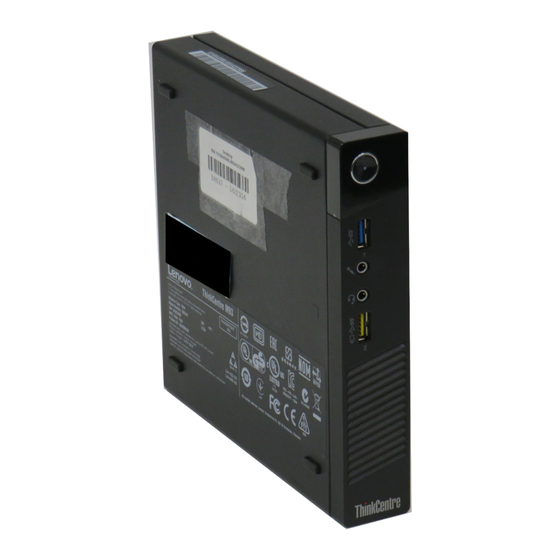
Related Manuals for Lenovo 10AJ
Desktop Lenovo ThinkCentre M93/p User Manual
(186 pages)
Desktop Lenovo 10AQ Maintenance Manual
Thinkcentre e93 (184 pages)
Desktop Lenovo 10A2 User Manual
Thinkcentre m83, m93/p (180 pages)
Desktop Lenovo 10A4 Hardware Maintenance Manual
(294 pages)
Desktop Lenovo 10B0 Maintenance Manual
Machine types: 10b0, 10b1, 10b2, 10b3, 10b4, 10b5, 10b6, 10b7, 10ax, and 10ay (260 pages)
Desktop Lenovo 10AX User Manual
Thinkcentre m73 (154 pages)
Desktop Lenovo 10A0 User Manual
Thinkcentre m83, m93/p (176 pages)
Desktop Lenovo thinkcentre m83 User Manual
(178 pages)
Desktop Lenovo 10AV User Manual
Thinkcentre e73 (148 pages)
Desktop Lenovo 10AS User Manual
Thinkcentre e73 (148 pages)
Desktop Lenovo 10AU User Manual
Thinkcentre e73 (158 pages)
Desktop Lenovo 10AW User Manual
Thinkcentre e73 (158 pages)
Desktop Lenovo ThinkCentre M83 User Manual
Machine types: 10a4, 10a5, 10aa, 10ab, 10df, 10dg, 10dh, 10dj, 10e8, 10e9, 10ea, and 10eb (160 pages)
Desktop Lenovo 10AM Hardware Maintenance Manual
(294 pages)
Desktop Lenovo THINKCENTRE M710t User Manual And Hardware Maintenance Manual
(68 pages)
Desktop Lenovo ThinkCentre M700 User Manual
10fl;10fm;10fr;10fs;10hy;10j0;10jm;10jn;10jq;10jr; 10js;10jt;10lx;10ly;10m6;10nd;10ne;10nf;10ng (124 pages)
Summarization of Contents
About This Manual
Chapter 1. Safety Information
General Safety Precautions
Essential rules for safe handling and maintenance to prevent injury.
Electrical Safety Guidelines
Procedures and warnings for working with electrical hazards to prevent shock.
ESD Handling Procedures
Steps to protect sensitive electronic components from electrostatic discharge damage.
Safety Inspection Checklist
A guide to identify and check for potentially unsafe conditions before servicing.
Chapter 2. General Information
Computer Specifications
Details physical dimensions, weight, environmental operating conditions, and electrical input.
Lenovo Software Programs
Overview of pre-installed Lenovo programs for system security, recovery, and management.
Chapter 3. General Checkout
Problem Determination Tips
Information to assist in identifying hardware and software issues for effective troubleshooting.
Chapter 4. Troubleshooting and Diagnostics
Basic Troubleshooting Steps
Initial checks and procedures for common computer startup and display issues.
Troubleshooting Procedure and Scenarios
General steps and specific symptom-based solutions for various hardware and software problems.
Diagnostic Tools and Utilities
Information on using Lenovo Solution Center and UEFI diagnostics for system testing.
Chapter 5. Using the Setup Utility Program
Accessing and Navigating Setup Utility
Steps to start, view, and change system configuration settings using the BIOS utility.
Password and Security Management
Procedures for setting, changing, deleting, and recovering system passwords for security.
System Configuration Options
Details on enabling/disabling devices, selecting startup sequences, and power management features.
BIOS Settings Before OS Installation
Guidance on modifying BIOS settings prior to installing a new operating system for compatibility.
Chapter 6. Symptom-to-FRU Index
Common Hardware Error Symptoms
Lists error symptoms like boot failures, power issues, and beep codes with FRU/Action solutions.
Error Codes and Conditions
Explains POST error codes, beep symptoms, and miscellaneous error conditions for diagnosis.
Undetermined Problems
Provides a method for troubleshooting issues when the cause is not immediately apparent.
Chapter 7. Locations
Component Locations on Computer Exterior
Identifies connectors, controls, and indicators on the front and rear of the computer.
FRU and System Board Part Locations
Shows locations of major FRUs, CRUs, and system board components for identification.
Internal Drive Bay Locations
Illustrates the layout and types of drive bays for installing internal storage devices.
Chapter 8. Replacing FRUs (Machine Types 10A0, 10A1, 10A6, 10A7, 10AG, 10AK, 10AL, and 10BE)
Initial Disassembly and Basic Components
Procedures for removing computer cover, bezel, PCI cards, memory modules, and drives.
Core System and Power Components
Steps to replace batteries, power supplies, heat sinks, microprocessors, and system boards.
Connectivity and Other FRUs
Guidance for replacing fans, speakers, thermal sensors, cover switches, and Wi-Fi units.
Completing Parts Replacement
Final steps to reassemble the computer and reconnect cables after component replacement.
Chapter 9. Replacing FRUs (Machine Types 10A2, 10A3, 10A8, 10A9, 10AH, 10AJ, 10AM, and 10AN)
Initial Disassembly and Basic Components
Procedures for removing computer cover, bezel, PCI cards, memory modules, and drives.
Core System and Power Components
Steps to replace batteries, power supplies, thermal modules, microprocessors, and system boards.
Connectivity and Other FRUs
Guidance for replacing fans, speakers, thermal sensors, cover switches, and Wi-Fi units.
Completing Parts Replacement
Final steps to reassemble the computer and reconnect cables after component replacement.
Chapter 10. Replacing FRUs (Machine Types 10A4, 10A5, 10AA, 10AB, 10DF, 10DG, 10DH, 10DJ, 10E8, 10E9, 10EA, and 10EB)
Initial FRU Replacement Steps
Procedures for removing computer covers and front bezels before component replacement.
Replacing Storage, Media, and External Components
Optical drives, hard disk drives, SSDs, I/O boxes, external options, power adapters, stands, VESA brackets.
Replacing Core System and Internal Components
Memory modules, batteries, power switches, Wi-Fi cards, fans, speakers, thermal sensors, cover switches, microprocessors.
Replacing System Board and Related Parts
Procedures for replacing the system board and associated components.
Completing Parts Replacement
Final steps to reassemble the computer and reconnect cables after component replacement.
Chapter 11. Additional Service Information
Security Features and Password Management
Information on security features, hardware passwords, and OS passwords.
System Information and BIOS Updates
Details on Vital Product Data, BIOS levels, and procedures for updating the BIOS.
Power Management Features
Explanation of power management, ACPI BIOS, and automatic power-on features.
Appendix A. Notices
Legal Disclaimers and Trademarks
Contains legal notices, warranty disclaimers, and trademark information.
Table of Contents
Save PDF
Print
Rename the bookmark
Delete bookmark?
Delete from my manuals?
Login
Sign In
OR
Sign in with Facebook
Sign in with Google
Upload manual
Upload from disk
Upload from URL
Need help?
Do you have a question about the 10AJ and is the answer not in the manual?
Questions and answers