
Related Manuals for Samsung WD80N6 Series


Summary of Contents for Samsung WD80N6 Series
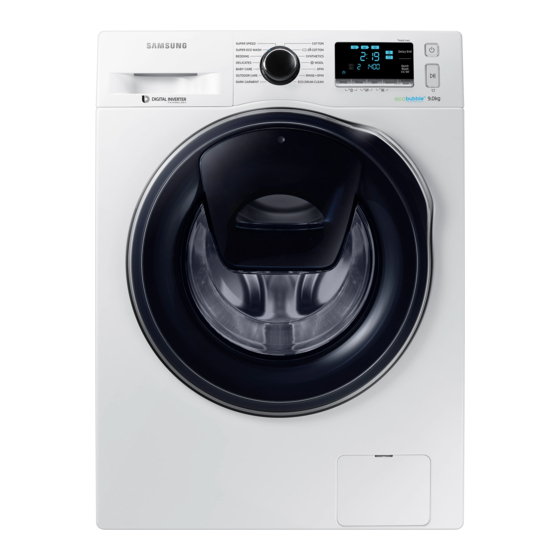
- Page 1 Washing Machine User manual WD90N6***** / WD80N6***** WD90N644OOW_03924L-00_EN.indd 1 2018/3/1 11:26:23...
-
Page 2: Table Of Contents
Contents Safety information What you need to know about the safety instructions Important safety symbols Important safety precautions Instructions about the WEEE Installation What’s included Installation requirements Step-by-step installation Before you start Initial settings Laundry guidelines Detergent drawer guidelines Operations Control panel Simple steps to start Cycle overview... - Page 3 Maintenance Eco drum clean Smart Check Using Dry course Emergency drain Cleaning Mesh filter Recovery from freezing Care against an extended time of disuse Troubleshooting Checkpoints Information codes Specifications Fabric care chart Protecting the environment Specification sheet English 3 WD90N644OOW_03924L-00_EN.indd 3 2018/3/1 11:26:25...
-
Page 4: Safety Information
Safety information Congratulations on your new Samsung washing machine. This manual contains important information on the installation, use and care of your appliance. Please take some time to read this manual to take full advantage of your washing machine’s many benefits and features. -
Page 5: Important Safety Precautions
These warning signs are here to prevent injury to yourself and others. Please follow them explicitly. After reading this manual, store it in a safe place for future reference. Read all instructions before using the appliance. As with any equipment that uses electricity and moving parts, potential hazards exist. To safely operate this appliance, familiarize yourself with its operation and exercise care when using it. - Page 6 Safety information 5. The new hose-sets supplied with the appliance are to be used and that old hose-sets should not be reused. 6. For appliances with ventilation openings in the base, that a carpet must not obstruct the openings. 7. For use in Europe: Children of less than 3 years should be kept away unless continuously supervised.
- Page 7 17. The final part of a tumble dryer cycle occurs without heat (cool down cycle) to ensure that the items are left at a temperature that ensures that the items will not be damaged. 18. Remove all objects from pockets such as lighters and matches. 19.
- Page 8 Safety information Critical installation warnings WARNING The installation of this appliance must be performed by a qualified technician or service company. • Failure to do so may result in electric shock, fire, an explosion, problems with the product, or injury. The appliance is heavy, therefore take care when lifting it.
- Page 9 Do not install this appliance in a location where gas may leak. • This may result in electric shock or fire. Do not use an electric transformer. • This may result in electric shock or fire. Do not use a damaged power plug, damaged power cord, or loose wall socket. • This may result in electric shock or fire.
- Page 10 Safety information Installation cautions CAUTION This appliance should be positioned in such a way that the power plug is easily accessible. • Failure to do so may result in electric shock or fire due to electric leakage. Install your appliance on a solid, level floor that can support its weight. • Failure to do so may result in abnormal vibrations, movement, noise, or problems with the product.
- Page 11 • Failure to do so may result in electric shock or fire. If any foreign substance enters into the appliance, unplug the power plug and contact you nearest Samsung Customer Service. • This may result in electric shock or fire.
- Page 12 Safety information Usage cautions CAUTION When the washing machine is contaminated by a foreign substance such as detergent, dirt, food waste, etc., unplug the power plug and clean the washing machine using a damp, soft cloth. • Failure to do so may result in discolouration, deformation, damage, or rust. The front glass may be broken by a strong impact.
- Page 13 Using the product for business purposes qualifies as a product misuse. In this case, the product will not be covered by the standard warranty provided by Samsung and no responsibility can be attributed to Samsung for malfunctions or damages resulting from such misuse.
- Page 14 Safety information Do not press the buttons using sharp objects such as pins, knifes, fingernails, etc. • This may result in electric shock or injury. Do not wash laundry contaminated by oils, creams or lotions usually found in skincare shops or massage clinics.
-
Page 15: Instructions About The Weee
Business users should contact their supplier and check the terms and conditions of the purchase contract. This product and its electronic accessories should not be mixed with other commercial wastes for disposal. For information on Samsung’s environmental commitments and product specifi regulatory obligations e.g. REACH visit: samsung.com/uk/aboutsamsung/samsungelectronics/ corporatecitizenship/data_corner.html English 15 WD90N644OOW_03924L-00_EN.indd 15... -
Page 16: Installation
What’s included Make sure all the parts are included in the product package. If you have a problem with the washing machine or the parts, contact a local Samsung customer centre or the retailer. 01 Release lever 02 Detergent drawer... - Page 17 Spanner Bolt caps Hose guide Cold water hose Hot water hose Liquid detergent guide Cap Fixer NOTE • Bolt caps : The provided number (3 to 6) of bolt caps depends on the model. • Hot water hose: Applicable models only. • Liquid detergent guide: Applicable models only.
-
Page 18: Installation Requirements
Drain • Improperly connected grounding Samsung recommends a standpipe in conductors may cause electric shock. height of 60-90 cm. The drain hose must be connected through the hose clip to the standpipe, and the standpipe must fully cover the drain hose. - Page 19 Flooring Alcove or closet installation For best performance, the washing Minimum clearance for stable operation: machine must be installed on a solid floor. Sides 25 mm Wood floors may need to be reinforced 25 mm to minimize vibration and/or unbalanced loads.
-
Page 20: Step-By-Step Installation
Installation Step-by-step installation STEP 1 Select a location Location requirements: • Solid, level surface without carpeting or flooring that may obstruct ventilation • Away from direct sunlight • Adequate room for ventilation and wiring • The ambient temperature is always higher than the freezing point (0 ˚C) • Away from a heat source STEP 2 Remove the shipping bolts Unpack the product package and remove all... - Page 21 3. Close all plastic bolt caps on the rear of the washing machine. CAUTION Do not remove the screw (A) that fixes the hose clip. WARNING Packaging materials can be dangerous to children. Dispose all packaging material (plastic bags, polystyrene, etc.) out of children’s reach. English 21 WD90N644OOW_03924L-00_EN.indd 21 2018/3/1 11:26:32...
- Page 22 Installation STEP 3 Adjust the levelling feet 1. Gently slide the washing machine into position. Excessive force may damage the levelling feet. 2. Level the washing machine by manually adjusting the levelling feet. 3. When levelling is complete, tighten the nuts using the spanner.
- Page 23 3. Holde the adaptor and turn part (C) in the arrow direction to loosen it by 5 mm (*). 4. Insert the adaptor into the water tap, and tighten the screws while lifting up the adaptor. 5. Turn part (C) in the arrow direction to tighten it.
- Page 24 If there are water leaks, repeat the steps above. WARNING Stop using the washing machine if there is a water leak, and contact a local Samsung service centre. Otherwise, this may cause electric shock. CAUTION Do not stretch the water hose by force. If the hose is too short, replace the hose with a longer, high-pressure hose.
- Page 25 For models with an additional hot water inlet: 1. Connect the red end of the hot water hose to the hot water inlet on the back of the machine. 2. Connect the other end of the hot water hose to the hot water tap. Aqua hose (applicable models only) The aqua hose alerts users of a risk of water leaks.
- Page 26 Installation STEP 5 Position the drain hose The drain hose can be positioned in three ways: Over the edge of a wash basin The drain hose must be placed at a height of between 60 cm and 90 cm (*) from the floor.
- Page 27 In a sink drain pipe branch The drain pipe branch mush be above the sink siphone so that the end of the hose is at least 24 in. (60 cm) above the ground. (*) : 24 in. (60 cm) STEP 6 Power on Plug the power cord into a wall socket featuring an AC 220-240 V / 50 Hz approved electrical outlet protected by a fuse or circuit breaker.
-
Page 28: Before You Start
Before you start Initial settings Run Calibration (recommended) Calibration ensures accurate weight detection by the washing machine. Make sure the drum is empty before running Calibration. 1. Power off, and then power on the washing machine. 2. Hold down Temp. and Delay End + simultaneously for 3 seconds to enter Calibration mode. - Page 29 STEP 2 Empty pockets Empty all the pockets of your laundry items • Metal objects such as coins, pins, and buckles on clothing may damage other laundry items as well as the drum. Turn clothing with buttons and embroideries inside out • If pants or jacket zippers are open while washing, the drum may be damaged.
- Page 30 Before you start STEP 6 Apply a proper detergent type The type of detergent depends on the type of fabric (cotton, synthetic, delicate items, wool), colour, wash temperature, and degree of soiling. Make sure to use the laundry detergent that is designed for automatic washing machines.
-
Page 31: Detergent Drawer Guidelines
CAUTION For cycles using cold water or cycles that complete in less than one hour, the capsule may not dissolve completely. Detergent drawer guidelines The washing machine provides a three-compartment dispenser: the left compartment for the main wash, the centre for fabric softeners, and the right for the preliminary wash. Prewash compartment: Apply prewash detergent or starch. - Page 32 Before you start To apply washing agents to the detergent drawer 1. Slide open the detergent drawer. 2. Apply laundry detergent to the main-wash compartment as instructed or recommended by the manufacturer. To use liquid detergent, see page 33. 3. Apply fabric softener to the softener compartment.
- Page 33 CAUTION • Do not apply powder detergent to the liquid detergent guide. • Concentrated fabric softener must be diluted with water before applied. • Do not apply main-wash detergent to softener compartment. To use liquid detergent (applicable models only) First insert the provided liquid detergent container in the main-wash compartment.
-
Page 34: Operations
Operations Control panel 01 Cycle Selector Turn the dial to select a cycle. The display shows current cycle information and estimated time 02 Display remaining, or an information code when a problem occurs. For buttons and icons, refer to the corresponding page. 03 Temp. - Page 35 Press to select a drying level: Cupboard > Time Dry (30 min > 1:00 h > 1:30 h > 2:00 h > 2:30 h > 3:00 h > 3:30 h > 4:00 h > 4:30 h) > No • Cupboard Dry: Use this option to dry laundry such as cotton, 06 Dry Option underwear, and linen.
-
Page 36: Simple Steps To Start
Operations Simple steps to start Standard steps 1. Press Power to turn on the washing machine. 2. Select a cycle in the cycle panel. 3. Change the cycle settings (Temp., Rinse, and Spin) as necessary. 4. Press Options or Dry Option to add desired options. Available options differ depending on the selected cycle. - Page 37 Drying only Follow these steps to dry damp laundry or laundry that has just finished washing. 1. Press Power to turn on the washing machine. 2. Press Dry Option repeatedly until a desired dry level is set. 3. Press and hold Start/Pause (Hold to Start). To change the course during operation 1.
-
Page 38: Cycle Overview
Operations Cycle overview Standard cycles Cycle Description & Max load (kg) • For cottons, bed linens, table linens, underwear, towels, or shirts. The washing time and the rinse count are COTTON automatically adjusted according to the load. • For blouses or shirts that are made of polyester (diolen, SYNTHETICS trevira), polyamide (perlon, nylon), or the like. - Page 39 Cycle Description & Max load (kg) For lightly soiled items in less than 2.0 kg that you want to wash quickly. • Use less than 20 g of detergent. Using more than 20 g 15’ QUICK WASH of detergent may leave detergent residue. • For liquid detergent, use a max of 20 ml of liquid detergent.
- Page 40 Operations Options Option Description • For badly soiled laundry. The operation time for each cycle is Intensive longer than normal. • This will add a preliminary washing cycle before the main Pre Wash wash cycle. Dry Option Option Description • Select to dry laundry automatically by detecting the amount Cupboard dry and weight of the laundry.
- Page 41 Delay End You can set the washing machine to finish your wash automatically at a later time, choosing a delay of between 1 to 24 hours (in 1 hour increments). The hour displayed indicates the time the wash will finish. 1.
-
Page 42: Special Features
Operations Special features AddWash When the AddWash indicator is on, you can stop operation of the machine and put additional laundry or softener into the drum. The Add Door opens by more than 130° for easy access. 1. Press Start/Pause (Hold to Start) to stop operation. - Page 43 CAUTION • Do not open the Add Door if suds have formed inside the drum that rise above the level of the Add Door. • Do not attempt to open the Add Door while the machine is operating without first pressing Start/Pause (Hold to Start).
-
Page 44: Settings
Operations Settings Child Lock To cancel the Child Lock • Press and hold - and + (of the Delay End To prevent children or infants from option) simultaneously for 3 seconds to accidentally starting or setting the washing deactivate, and then press and hold the machine, Child Lock locks all buttons except buttons again for 3 seconds to cancel for the Power button. -
Page 45: Smartthings
• An unapproved wired/wireless router may fail to connect to Samsung washing machine. Download On an app market (Google Play Store, Apple App Store, Samsung Galaxy Apps), find the SmartThings app with a search term of “SmartThings”. Download and install the app on your device. - Page 46 You don’t need a separate app to create your account. NOTE If you have a Samsung account, use the account to log in. A registered Samsung smartphone user automatically logs in. To register your device to SmartThings 1.
- Page 47 SmartThings Category Checkpoint Description You can check the current cycle and its Washing status options, and the remaining cycle time. The Smart Control status is shown for the Smart Control washing machine. Monitoring Use this to check if the washing machine Self Check operates normally.
- Page 48 Operations Category Checkpoint Description You can select the fabric type, color, and the soil level to get recommended options Laundry Recipe * and wash cycles that you can start right away. You can set the desired time for a wash cycle to finish.
- Page 49 Directive 2014/53/EU. The full text of the EU declaration of conformity is available at the following internet address: The official Declaration of conformity may be found at http://www.samsung.com, go to Support > Search Product Support and enter the model name.
-
Page 50: Maintenance
Maintenance Keep the washing machine clean to prevent deteriorated performance and to preserve its life cycle. Eco drum clean Perform this cycle regularly to clean the drum by removing bacteria from it. This cycle heats the water between 60 °C and 70 °C, and it also removes accumulated dirt from the rubber door gasket. -
Page 51: Smart Check
Smart Check To enable this function, you must first download the Samsung Smart Washer app at the Play Store or the App Store, and install it on a mobile device featuring a camera function. The Smart Check function has been optimised for Galaxy & iPhone series (applicable models only). -
Page 52: Using Dry Course
Maintenance Using Dry course All drying options except for the Time Dry option detect the weight of the laundry in order to display a more accurate drying time and dry the laundry more effectively. Refer to the chart below to select the appropriate drying option according to the type and amount of laundry and the moisture you want to leave. -
Page 53: Emergency Drain
Emergency drain In case of a power failure, drain the water inside the drum before taking out the laundry. 1. Power off and unplug the washing machine from the electrical outlet. 2. Gently press the top area of the filte cover (A) to open. -
Page 54: Cleaning
Maintenance Cleaning Surface of the washing machine Use a soft cloth with a nonabrasive household detergent. Do not spray water onto the washing machine. Add Door 1. Open the Add Door. 2. Use a wet cloth to clean the Add Door. - Do not use cleaning agents. -
Page 55: Mesh Filter
Mesh filter Clean the mesh filter of the water hose once or twice a year. 1. Turn off the washing machine, and unplug the power cord. 2. Close the water tap. 3. Loosen and disconnect the water hose from the back of the washing machine. Cover the hose with a cloth to prevent water from gushing out. - Page 56 Maintenance Pump filter It is advisable to clean the pump filter 5 or 6 times a year to prevent its clogging. A clogged pump filter may reduce the bubble effect. 1. Turn off the washing machine, and unplug the power cord. 2.
- Page 57 Detergent Drawer 1. While holding down the release lever inside the drawer, slide open the drawer. 2. Clean the drawer components in flowing water using a soft brush. 3. Clean the drawer recess using a soft brush. 4. Reinsert the release lever and the Liquid detergent guide to the drawer.
-
Page 58: Recovery From Freezing
Maintenance Recovery from freezing The washing machine may freeze when it drops below 0 °C. 1. Turn off the washing machine, and unplug the power cord. 2. Pour warm water over the water tap to loosen the water hose. 3. Disconnect the water hose, and soak it in warm water. 4. -
Page 59: Troubleshooting
Troubleshooting Checkpoints If you encounter a problem with the washing machine, first check the table below and try the suggestions. Problem Action Make sure the washing machine is plugged in. • • Make sure the door is properly closed. • Make sure the water taps are open. - Page 60 Troubleshooting Problem Action • Make sure the drain hose is straightened all the way to the drain system. If you encounter a drain restriction, call for service. • Make sure the debris filter is not clogged. • Close the door and press or tap Start/Pause (Hold to Start). For your safety, the washing machine will not tumble or spin unless Does not drain and/ the door is closed.
- Page 61 Problem Action • Plug the power cord into a live electrical outlet. • Check the fuse or reset the circuit breaker. • Close the door and press the Start/Pause (Hold to Start) button to start the washing machine. For your safety, the washing machine will not tumble or spin unless the door is closed.
-
Page 62: Information Codes
Water is not draining. If a problem persists, contact a local Samsung service centre. • Make sure the drain hose is not frozen or clogged. Make sure the drain hose is positioned correctly, depending on •... - Page 63 Water is overflowed. Restart after spinning. • • If the information code remains on the display, contact a local Samsung service centre. Check the drain hose. • Make sure the end of the drain hose is placed on the floor. •...
- Page 64 Troubleshooting Code Action The electronic control needs to be checked (Over Voltage Error). • Check the PCB and wire harness. • Check if power is supplied properly. • If the information code remains, contact a customer service centre. Low voltage detected •...
- Page 65 To add laundry, open the Add Door and input laundry. Close the Add Door properly. Then, press and hold Start/Pause (Hold to Start) to resume operation. If any information code keeps appearing on the screen, contact a local Samsung service centre. English 65 WD90N644OOW_03924L-00_EN.indd 65...
-
Page 66: Specifications
Specifications Fabric care chart The following symbols provide garment care directions. The care labels include four symbols in this order: washing, bleaching, drying and ironing (and dry cleaning when necessary). The use of symbols ensures consistency among garment manufacturers of domestic and imported items. -
Page 67: Protecting The Environment
Protecting the environment • This appliance is manufactured from recyclable materials. If you decide to dispose of this appliance, please observe local waste disposal regulations. Cut off the power cord so that the appliance cannot be connected to a power source. Remove the door so that animals and small children cannot get trapped inside the appliance. -
Page 68: Specification Sheet
Specifications Specification sheet “ * “ Asterisk(s) means variant model and can be varied (0-9) or (A-Z). Type Front loading washing machine Model name WD90N64**** WD80N64**** Dimensions W600 x D600 x H850 (mm) Water pressure 50-800 kPa Net weight 81.0 kg 81.0 kg Wash and spin capacity 9.0 kg... - Page 69 600 mm 850 mm 600 mm 680 mm 1115 mm NOTE The design and specifications are subject to change without notice for quality improvement purposes. English 69 WD90N644OOW_03924L-00_EN.indd 69 2018/3/1 11:27:22...
- Page 70 Specifications Sheet of household combined washer-dries According to Regulation (EU) No. 96/60/EC “ * ” Asterisk(s) means variant model and can be varied (0-9) or (A-Z). Samsung Model Name WD90N64**** Energy Efficiency Class A (most efficient) to G (least efficient)
- Page 71 Noise using standard 60°C cotton washing cycle and ‘ dry cotton’ drying cycle Washing dB (A) re 1 pW Spinning dB (A) re 1 pW Drying dB (A) re 1 pW The drying energy consumption data has been measured under the conditions specified in Standard EN50229.
- Page 72 Specifications “ * ” Asterisk(s) means variant model and can be varied (0-9) or (A-Z). Samsung Model Name WD80N64**** Energy Efficiency Class A (most efficient) to G (least efficient) Energy Consumption Washing, spinning, and drying 5.44 Washing and spinning only 1.04...
- Page 73 Noise using standard 60°C cotton washing cycle and ‘ dry cotton’ drying cycle Washing dB (A) re 1 pW Spinning dB (A) re 1 pW Drying dB (A) re 1 pW The drying energy consumption data has been measured under the conditions specified in Standard EN50229.
- Page 74 Memo WD90N644OOW_03924L-00_EN.indd 74 2018/3/1 11:27:24...
- Page 75 Memo WD90N644OOW_03924L-00_EN.indd 75 2018/3/1 11:27:24...
- Page 76 OR VISIT US ONLINE AT *3000 Цена в мрежата BULGARIA www.samsung.com/bg/support 0800 111 31 , Безплатна телефонна линия CZECH 800 - SAMSUNG (800-726786) www.samsung.com/cz/support SLOVAKIA 0800 - SAMSUNG (0800-726 786) www.samsung.com/sk/support CROATIA 072 726 786 www.samsung.com/hr/support BOSNIA 055 233 999 www.samsung.com/support MONTENEGRO 020 405 888 www.samsung.com/support...
Need help?
Do you have a question about the WD80N6 Series and is the answer not in the manual?
Questions and answers