Table of Contents
Advertisement
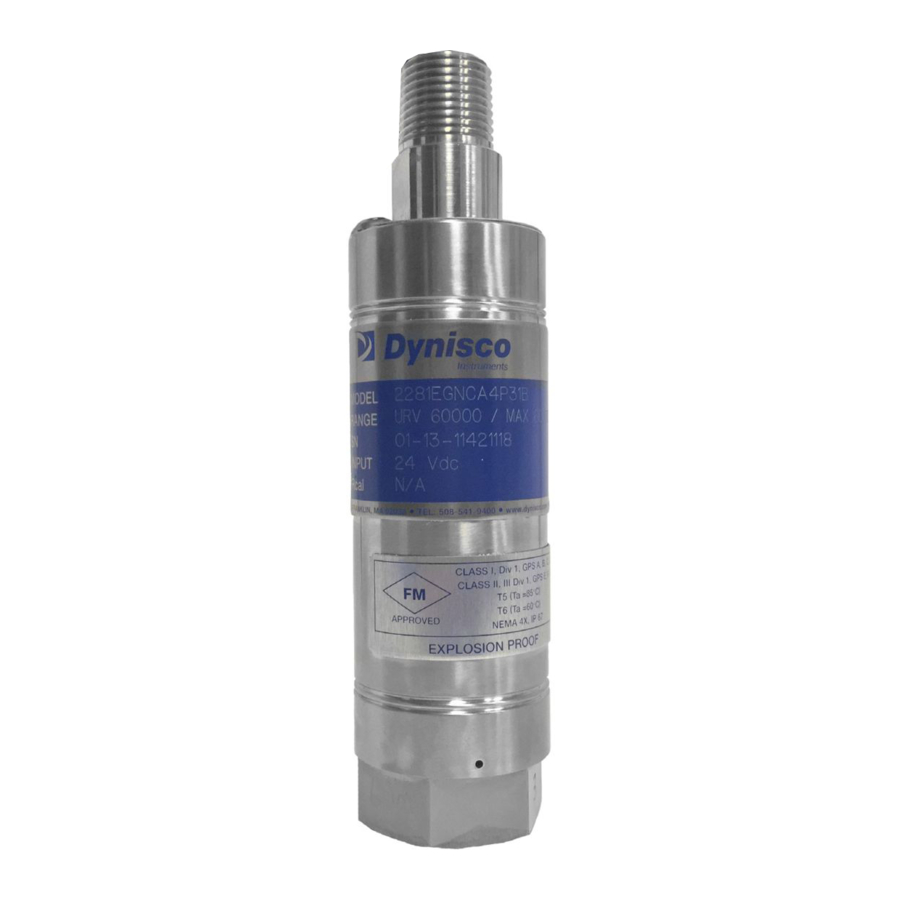
P/N 974125
01/06 Rev. E
ECO # 30965
Sm ar ar ar ar ar t t t t t M M M M M elt
Sm
Sm
elt Pr Pr Pr Pr Pr e e e e e s s s s s s s s s s ur ur ur ur ur e e e e e T T T T T r r r r r an
elt
elt
Sm
Sm
elt
amplifier for use in hazardous environments
amplifier for use in hazardous environments
amplifier for use in hazardous environments
amplifier for use in hazardous environments
amplifier for use in hazardous environments
SPX2 Series
SPX2 Series
SPX2 Series
SPX2 Series
SPX2 Series
an
an smitt
an
smitt
smitt
smitt er er er er er s s s s s
an
smitt
Intrinsically safe and explosion proof
Intrinsically safe and explosion proof
Intrinsically safe and explosion proof
Intrinsically safe and explosion proof
Intrinsically safe and explosion proof
pressure transmitters with integrated
pressure transmitters with integrated
pressure transmitters with integrated
pressure transmitters with integrated
pressure transmitters with integrated
II 1 G
II 1 G
II 1 G
II 1 G
II 1 G
A A A A A TEX
TEX
TEX
TEX
TEX 100a
100a
100a
100a
100a
Advertisement
Table of Contents

Related Manuals for Dynisco 2242


Summary of Contents for Dynisco 2242
- Page 1 SPX2 Series SPX2 Series SPX2 Series SPX2 Series SPX2 Series Sm ar ar ar ar ar t t t t t M M M M M elt elt Pr Pr Pr Pr Pr e e e e e s s s s s s s s s s ur ur ur ur ur e e e e e T T T T T r r r r r an...
- Page 2 D D D D D S S S S S PX PX S S S S S Q Q Q Q Q S S S S S C C C C C YNISC YNISC YNISCO O O O O YNISC YNISC ERIE ERIE...
- Page 3 Q Q Q Q Q S S S S S H H H H H C C C C C UICK UICK T T T T T AR ART T T T T UTILIZING UTILIZING UTILIZING ART T T T T OMMUNICA OMMUNICA OMMUNICAT T T T T OR...
- Page 4 Menu Tree for SPX 1. PV 2. % Range 1. Electronics Temp. 1. Process 1. Read Peak 3. PV Analog Variable Values Online Menu 2. Pressure (PSI) Output 2. Status 4. Electronics 1. Device Temperature Setup 1. Enter Values Rerange 2.
- Page 5 T T T T T C C C C C ABLE ABLE ABLE ABLE ABLE OF ONTENTS ONTENTS ONTENTS ONTENTS ONTENTS Content Content Content Page Page Page Icon Icon Icon Content Content Page Page Icon Icon General Notes on Safety Technical Data Transport/Delivery Installation...
- Page 6 Copyright law requires that this manual be used for intended purposes only. It is strictly forbidden to allow reproduction of any kind “in whole or in part” to persons outside of Dynisco, without approval from Dynisco. Rosemount and Smart Family are registered trademarks of Rosemount, Inc. HART is a registered trademark of HART Communication Foundation.
- Page 7 General danger to life or limb Specific danger to life or limb You MUST do this Related to ATEX/Intrinsic Safety requirements The safety instructions are provided again in the individual chapters of the manual. A A A A A BBREVIA BBREVIA BBREVIATIONS TIONS...
- Page 8 The upper diaphragm has a strain gage element in the configuration of a Wheatstone Bridge. The deflection of the upper diaphragm causes a change in the resistance of the strain gage and hence a change in the balance of the bridge. The amount of imbalance is directly proportional to the applied pressure.
- Page 9 B B B B B D D D D D O O O O O L L L L L OCK IAGRAM IAGRAM OF IAGRAM PERA PERA PERATION TION TION TION IAGRAM IAGRAM PERA PERA TION 4-20 mA Signal Output Microcomputer D/A Signal Sensor Linearization...
- Page 10 U U U U U ’ ’ ’ ’ ’ S S S S S ER S S S S S OBLIGA OBLIGA OBLIGA OBLIGA OBLIGATIONS TIONS TIONS TIONS TIONS The operator or owner of the larger overall system, e.g. a machine, is responsible for following the safety and accident prevention regulations that apply to the specific application.
- Page 11 2. 2. 2. 2. 2. N N N N N OTES OTES OTES OTES OTES ON ON SAFETY SAFETY SAFETY SAFETY SAFETY The operator or owner of the larger overall system is responsible for following the safety and accident prevention regulations that apply to the specific application. D D D D D YNISC YNISC YNISC...
- Page 12 via a built-in cable connector that is also connected to the conductive housing. Connect unused cable cores or free cable ends correctly to the cable shield on both sides. T T T T T emper emper emper emperat at at at atur ur ur ur ure e e e e emper The SPX series of pressure transmitters can be used in media temperatures up to 400°C.
- Page 13 Supply Voltage max. Uo = 30 V DC Current Output max. Io = 100 mA Power max. Po = 0.75W The specified values of Lo and Co for the power supply need to be greater than Ci + Ccable and Li + Lcable. Li <...
-
Page 14: Table Of Contents
3. 3. 3. 3. 3. T T T T T D D D D D E E E E E CHNICAL CHNICAL CHNICAL CHNICAL CHNICAL A A A A A T T T T T A A A A A Ordering Guide for SPX ...................... -
Page 15: Ordering Example
O O O O O G G G G G RDERING RDERING RDERING UIDE UIDE UIDE FOR RDERING RDERING UIDE UIDE The exact meanings of the letter/digit combinations are given in the corresponding sections of Chapter 3. 22X X X X XX X XX XX XX X XX XX XXXX Model Type Process Style Hazardous Area Classifcations... - Page 16 M M M M M T T T T T & P & P S S S S S & P & P & P ODEL ODEL ODEL ODEL ODEL ROCESS ROCESS ROCESS ROCESS ROCESS TYLE TYLE TYLE TYLE TYLE XXXXXXXXXXXXXXXXXXXX = 1/2 - 20 UNF 2A 41, 43, 44, 90 or 91...
- Page 17 Note: Note: Note: Note: Note: Accuracy can be affected with choice of diaphragm and coating. Other diaphragm and wear coating combinations exist, please consult factory for other configurations. Certain models do are not available in some configurations. 3. 3. 3. 3. 3.7 7 7 7 7 P P P P P C C C C C ROCESS...
- Page 18 3. 3. 3. 3. 3.7 7 7 7 7 ..3 3 3 3 3 2243 2243 2243 2243 2243 25 = Standard Flat Faced Flange 26 = Flat Faced Flange (F1) 27 = Raised Face Flange (F2) 28 = Raised Face Flange (F3) 29 =...
- Page 19 3. 3. 3. 3. 3.7 7 7 7 7 ..6 6 6 6 6 2291 2291 2291 2291 2291 48 = Standard Flange (S1) 49 = One Piece Flange (S2) 50 = One Piece Flange (S3) 51 = One Piece Flange (S4) 52 =...
- Page 20 3. 3. 3. 3. 3.9 9 9 9 9 P P P P P R R R R R -F -F -F -F -F S S S S S RESSURE RESSURE RESSURE ANGE ANGE ANGE CALE CALE CALE RESSURE RESSURE ANGE ANGE CALE...
- Page 21 3.10 3.10 3.10..3 3 3 3 3 2244 2244 2244 3.10 3.10 2244 2244 NNDD = 2.406” Rigid Stem/18” Flexible Capillary Other lengths available, please consult factory. 3.10.4 3.10.4 3.10.4 3.10.4 3.10.4 229X 229X 229X 229X 229X BUFF...
-
Page 22: Option Codes
3.14 3.14 3.14 O O O O O C C C C C 3.14 3.14 PTION PTION PTION PTION PTION ODES ODES ODES ODES ODES XXXX XXXX XXXX XXXX XXXX 22XXXXXXXXXXXXXXXXXX Transmitters are available with certain approved option codes. Please consult factory for list of approved options. -
Page 23: Resolution
±0.5% of full scale (250 psi) 3.16.1 3.16.1 3.16.1 3.16.1 3.16.1 229X 229X 229X 229X 229X D D D D D ±0.5% of full scale 3.16.2 3.16.2 R R R R R 3.16.2 3.16.2 3.16.2 ESOLUTION ESOLUTION ESOLUTION ESOLUTION ESOLUTION ±0.035% full scale or better 3.16 3.16... - Page 24 Supply Voltage 16 - 30 VDC for EEx ia IIC 16 - 36 VDC for non-approved and explosion proof models Note: Transmitter incorporates overvoltage protection and reverse polarity protection and will not operate if inputs are reversed. 1000 Volts Standard Intrinsically Safe 3.18 3.18...
-
Page 25: Torque
CTION T T T T T O O O O O NVIRONMENT NVIRONMENTAL NVIRONMENT AL PRO PROTE CTION SPX2 Series with sealed conduit or PT1H-10-6P IP67, nema 4x (Using Dynisco P/N 711610 for connector version) 3.23 3.23 3.23 3.23 3.23... - Page 26 Fig. 3-1 Fig. 3-1 Fig. 3-1 2241 Fig. 3-1 Fig. 3-1 2241 2241 2241 2241...
- Page 27 Fig. 3-2 Fig. 3-2 2242 2242 Fig. 3-2 Fig. 3-2 2242 Fig. 3-2 2242 2242...
- Page 28 Fig. 3-3 Fig. 3-3 42 w 42 w ith T T T T T emper emper emper emperat at at at atur ur ur ur ure e e e e Sen Fig. 3-3 Fig. 3-3 22 Fig. 3-3 2242 w 42 w 42 with emper...
- Page 29 Fig. 3-4 Fig. 3-4 Fig. 3-4 2243 Fig. 3-4 Fig. 3-4 2243 2243 2243 2243...
- Page 30 Fig. 3-5 Fig. 3-5 224 4 4 4 4 3 w ith T T T T T emper emper emper emperat at at at atur ur ur ur ure e e e e Sen Fig. 3-5 Fig. 3-5 22 Fig. 3-5 3 with emper Sensor...
- Page 31 Fig. 3-6 Fig. 3-6 2244 2244 Fig. 3-6 Fig. 3-6 Fig. 3-6 2244 2244 2244...
- Page 32 Fig. 3-7 Fig. 3-7 2290 2290 Fig. 3-7 Fig. 3-7 2290 Fig. 3-7 2290 2290...
- Page 33 Fig. 3-8 Fig. 3-8 2291 2291 Fig. 3-8 Fig. 3-8 2291 Fig. 3-8 2291 2291...
- Page 34 Fig. 3-9 Fig. 3-9 91 w 91 w ith T T T T T emper emper emperat at at at atur ur ur ur ure e e e e Sen emper Fig. 3-9 Fig. 3-9 22 Fig. 3-9 2291 w 91 w 91 with emper...
- Page 35 Fig. 3-10 Fig. 3-10 2292 2292 Fig. 3-10 Fig. 3-10 Fig. 3-10 2292 2292 2292...
- Page 36 4. 4. 4. 4. 4. T T T T T RANSPORT RANSPORT RANSPORT ELIVERY ELIVERY ELIVERY RANSPORT RANSPORT ELIVERY ELIVERY Transport/Packing/Transport Damage .................. 36 Storage ..........................36 Scope of Delivery ........................ 36 T T T T T o o o o o x x x x x ic ic ic ic ic h h h h haz az az az azar ar ar ar ard! d! d! d! d! The PT contains a small amount of mercury (Hg) as its transmission medium.
- Page 37 5. 5. 5. 5. 5. I I I I I NST T T T T ALLA ALLA ALLA ALLA ALLATION TION TION TION TION General Mounting Information ....................37 Mounting Hole Torque ......................39 Mounting Hole Information ....................39 Mounting the Pressure Transmitter ..................43 Installing the Flanged Pressure Transmitter ................
- Page 38 Before reinstalling the SPX, ensure that the mounting hole is free from hardened plastic. A mounting hole cleaning tool kit is available to aid in removing of the material. (Dynisco Part Number 200100 for ½-20, 200101 for M18 and 200102 for M10 ports.) A gauge plug to check the hole is included in this kit.
- Page 39 M M M M M H H H H H T T T T T OUNTING OUNTING OUNTING ORQUE ORQUE ORQUE OUNTING OUNTING ORQUE ORQUE 2242 2243 2292 2241, 2244, 2290, 2291 max. 56.5 Nm max. 5.6 Nm max. 14.1 Nm max.
- Page 40 Fig. 5-2 Fig. 5-2 Fig. 5-2 Fig. 5-2 Fig. 5-2 2242 (1/2-20 UNF) Mounting Hole 2242 (1/2-20 UNF) Mounting Hole 2242 (1/2-20 UNF) Mounting Hole 2242 (1/2-20 UNF) Mounting Hole 2242 (1/2-20 UNF) Mounting Hole Fig. 5-3 Fig. 5-3 22 Fig.
- Page 41 Fig. 5-4 Fig. 5-4 Fig. 5-4 2243 Mounting Hole Fig. 5-4 Fig. 5-4 2243 Mounting Hole 2243 Mounting Hole 2243 Mounting Hole 2243 Mounting Hole Fig. 5-5 Fig. 5-5 2244 Mounting Hole Fig. 5-5 2244 Mounting Hole 2244 Mounting Hole 2244 Mounting Hole Fig.
- Page 42 Fig. 5-6 Fig. 5-6 2290 & 2291 Mounting Hole 2290 & 2291 Mounting Hole Fig. 5-6 Fig. 5-6 2290 & 2291 Mounting Hole Fig. 5-6 2290 & 2291 Mounting Hole 2290 & 2291 Mounting Hole Fig. 5-7 Fig. 5-7 Fig. 5-7 Fig.
- Page 43 It is general good practice to check the mounting hole before installing the transducer. One procedure is to coat a gauge plug (Dynisco Part Number 200908 for the 1/2 –20 standard port, 435901 for the short tip 1/2 –20 version, 200960 for the M18), with Dykem machine bluing on surfaces below the thread.
- Page 44 5. 5. 5. 5. 5.7 7 7 7 7 E E E E E C C C C C LECTRICAL LECTRICAL ONNECTION ONNECTION LECTRICAL LECTRICAL LECTRICAL ONNECTION ONNECTION ONNECTION The SPX Series transmitters have 4-20 mA output. The transmitter power supply and output are supplied over the same pair of wires.
- Page 45 Fig. 5.8 Fig. 5.8 Fig. 5.8 Electrical Configuration for Hazardous Areas Fig. 5.8 Fig. 5.8 Electrical Configuration for Hazardous Areas Electrical Configuration for Hazardous Areas Electrical Configuration for Hazardous Areas Electrical Configuration for Hazardous Areas...
- Page 46 5. 5. 5. 5. 5.9 9 9 9 9 F F F F F C C C C C LANGE LANGE LANGE ONFIGURA ONFIGURATIONS ONFIGURA TIONS TIONS TIONS LANGE LANGE ONFIGURA ONFIGURA TIONS Fig. 5-9 Fig. 5-9 2241 & 2244 “K” Flange Configurations Fig.
- Page 47 Fig. 5-10 Fig. 5-10 Fig. 5-10 Fig. 5-10 Fig. 5-10 2243 “F” Flange Configurations 2243 “F” Flange Configurations 2243 “F” Flange Configurations 2243 “F” Flange Configurations 2243 “F” Flange Configurations...
- Page 48 Fig. 5-11 Fig. 5-11 2291 “S” Flange Configurations Fig. 5-11 2291 “S” Flange Configurations 2291 “S” Flange Configurations 2291 “S” Flange Configurations Fig. 5-11 Fig. 5-11 2291 “S” Flange Configurations...
- Page 49 Fig. 5-12 Fig. 5-12 2290 “T” Flange Configurations 2290 “T” Flange Configurations Fig. 5-12 Fig. 5-12 2290 “T” Flange Configurations Fig. 5-12 2290 “T” Flange Configurations 2290 “T” Flange Configurations...
- Page 50 6. 6. 6. 6. 6. C C C C C OMMISSIONING OMMISSIONING OMMISSIONING OMMISSIONING OMMISSIONING Why a Transmitter Must be Rezeroed ..................50 Utilizing the Zero and Span Push-Buttons ................51 6.2.1 Installation Flow Chart Using Push-Buttons ................52 6.2.2 Procedure ..........................
- Page 51 There are some other effects that may effect the zero as well, such as torque, side loading, etc. For more information contact Dynisco. All of these effects can be compensated for by setting the transmitter zero after the machine has stabilized at operating temperature.
- Page 52 6.2.1 6.2.1 6.2.1 6.2.1 6.2.1 I I I I I F F F F F U U U U U P P P P P -B -B -B -B -B NST T T T T ALLA ALLA ALLA TION TION L L L L L O O O O O W W W W W CHAR CHAR CHART T T T T...
- Page 53 6.2.2 6.2.2 6.2.2 6.2.2 6.2.2 P P P P P ROCEDURE ROCEDURE ROCEDURE ROCEDURE ROCEDURE Transmitter push-button seal screws must be fully engaged to meet explosion proof Do not remove the transmitter push-button seal screws in explosive Do not remove the transmitter push-button seal screws in explosive requirements.
- Page 54 housing has been permanently installed. When the zero trim function is selected (Hart Quick key 1,2,5,4,1) the output will be corrected to reflect 4 mA. This is done by the transmitter electronics automatically by adjusting digital PV to zero and analog output will be 4 mA. Normally a Zero Trim is all that is required after installation since the Transmitter span has been calibrated at the factory.
- Page 55 6 6 6 6 6 ..3.1 I I I I I F F F F F U U U U U HART C NST T T T T ALLA ALLA ALLA ALLATION TION TION TION L L L L L O O O O O W W W W W CHAR CHAR CHAR...
- Page 56 The HART Communicator does not measure loop current directly. The HART Communicator can interface with the SPX anywhere along the 4 - 20 mA cable as shown in the following figure. Fig. 6-1 Fig. 6-1 Fig. 6-1 HART Communicator Interface HART Communicator Interface HART Communicator Interface Fig.
- Page 57 Steps past this point are not part of a normal bench setup and should only be Steps past this point are not part of a normal bench setup and should only be Steps past this point are not part of a normal bench setup and should only be Steps past this point are not part of a normal bench setup and should only be Steps past this point are not part of a normal bench setup and should only be performed by qualified individuals, as the SPX is highly stable and has been...
- Page 58 4 - 20 mA Saturation 4 - 20 mA Alarm ≤ 3.6 ≤ 3.6 ≤ 3.6 ≤ 3.6 ≤ 3.6 mA 3.8 mA 3.8 mA 3.8 mA 3.8 mA 3.8 mA ≥ ≥ ≥ ≥ ≥ 21.5 21.5 21.5 21.5 21.5 mA High 20.
- Page 59 L L L L L o o o o o w w w w w er er er er er Sen sor T T T T T rim Sensor rim (1,2,5,4,2) Digital Correction to zero which affects both the digital and analog output. This differs from Zero Trim in that Lower Sensor Trim can be performed at pressures above zero.
- Page 60 URV or Full Scale Turndown is performed by applying any pressure, within the 3:1 ratio of the transmitter, that you want to be the 20 mA point. When the pressure is held steady, push the Span push-button for one second, release for one second, then push again for one second, then release. The SPX has now adjusted the URV 20 mA point to match the Full Scale pressure applied.
- Page 61 L L L L L oc oc oc oc ocal al al al al P P P P Pu u u u u sh-b sh-b sh-b on Di on Di on Dis s s s s ab abl l l l l e e e e e (1,4,3,6) sh-b sh-butt utton Di...
- Page 62 6 6 6 6 6 ..9 9 9 9 9 R R R R R F F F F F D D D D D S S S S S E E E E E S S S S S ET ET ET ET ETTING TING...
- Page 63 6.11 6.11 HART Communicator Fast Key Sequences HART Communicator Fast Key Sequences 6.11 6.11 6.11 HART Communicator Fast Key Sequences HART Communicator Fast Key Sequences HART Communicator Fast Key Sequences Below defines the Hart Communicator Fast Key sequences. Fast Keys are a means of supplying a shortcut to navigate through the menu tree.
- Page 64 Menu Tree for SPX 1. PV 2. % Range 1. Electronics Temp. 1. Process 1. Read Peak 3. PV Analog Variable Values Online Menu 2. Pressure (PSI) Output 2. Status 1. Device 4. Electronics Temperature Setup 1. Enter Values Rerange 2.
- Page 65 7 7 7 7 7 ..M M M M M AINTENANCE AINTENANCE AINTENANCE AINTENANCE AINTENANCE Maintenance ........................65 Thermocouple/RTD Replacement ..................66 Repair/Disposal ........................67 Warranty ..........................67 7 7 7 7 7 .1 .1 .1 .1 .1 M M M M M AINTENANCE AINTENANCE...
- Page 66 7 7 7 7 7 .2 .2 .2 .2 .2 T T T T T /R /R /R /RT T T T T D R HERMOC HERMOCOUPLE HERMOC OUPLE OUPLE OUPLE EPLA EPLA EPLAC C C C C EMENT EMENT EMENT EMENT HERMOC...
- Page 67 The SPX Series Dynisco Pressure transmitters will provide excellent service and superior performance if proper care is taken during handling, installation, and use. This DYNISCO product is warranted under terms and conditions set forth in the DYNISCO web pages. Go to www.dynisco.com...
- Page 68 8. 8. 8. 8. 8. A A A A A C C C C C C C C C C E E E E E S S S S S SORIE SORIE SORIE SORIE SORIES S S S S • Machining tool kit 1/2”-20UNF-2A P/N 200295 •...
- Page 69 HART Communicator missing SPX From the Communicator’s Main Menu, Access the On-Line Features Described in Manual Menu. The Name SPX Should be Displayed on the Top Line of the LCD. If the Name is not Present, Contact Dynisco to Arrange for DD Upgrade...
- Page 70 C C C C C E E E E E D D D D D C C C C C E E E E E CLARA CLARA CLARA CLARA CLARATION TION TION TION TION OF ONFORMIT ONFORMIT ONFORMITY Y Y Y Y ONFORMIT ONFORMIT...
- Page 72 E E E E E D D D D D C C C C C X X X X X E E E E E CLARA CLARA CLARA CLARA CLARATION TION TION TION TION OF ONFORMIT ONFORMIT ONFORMITY Y Y Y Y ONFORMIT ONFORMIT...
- Page 75 Local Push-button Enable Enable Enabled Disabled Factory Default LRV Lower Sensor Limit -0.04 * full scale of SPX Message Text HTTP://WWW.DYNISCO.COM/ PV Minimum Span Value Factory Default PV_URV divided by 3 Number of Request Preambles PV Damping Constant Value 0 Seconds 0-30...
- Page 77 Visit us on the world wide web: Visit us on the world wide web: Visit us on the world wide web: Visit us on the world wide web: DyniscoLLC Dynisco SPOL, S.R.O. 38 Forge Parkway cp. 579 Franklin, MA 02038 756 55 Dolni Becva...
Need help?
Do you have a question about the 2242 and is the answer not in the manual?
Questions and answers