Advertisement
Advertisement
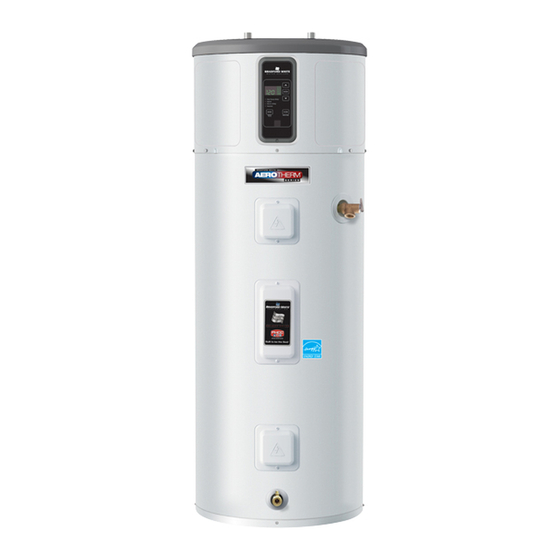
Table of Contents

Related Manuals for Bradford White RE2H80T10


Summary of Contents for Bradford White RE2H80T10
- Page 1 Heat Pump Water Heater INSTALLATION & OPERATION INSTRUCTION MANUAL RE2H50S*-1NCWT RE2H65T*-1NCWT RE2H80T*-1NCWT For your family’s comfort, safety, and convenience we recommend this water heater be installed and serviced by a plumbing professional. ECO 8384-1 Effective: Sept 2020 238-52169-00A 9/20...
-
Page 2: Table Of Contents
CONGRATULATIONS! You have purchased one of the finest water heaters on the market today! This installation, operation and instruction manual will explain in detail the installation and maintenance of your new Heat Pump Water Heater. We strongly recommend that you contact a plumbing professional for the installation of this water heater. -
Page 3: General Information
General Information READ ALL INSTRUCTIONS BEFORE USING THE APPLIANCE For your safety, the information in this manual must be followed to minimize the risk of fire or explosion, electric shock, and/or to prevent property damage, personal injury, or loss of life. The warranty on this water heater is in effect only when the water heater is installed and operated in accordance with local codes and these instructions. -
Page 4: Water Heater Capacity
General Information cont.- Water Heater Capacity Water Heater Capacity and Increasing Temperature Setpoint: The water heater temperature setting strongly impacts the amount of usable hot water available for showers and baths. • Energy consumption/savings and efficiency testing of water heaters is performed according to the Department of Energy (DOE) requirements specified at the date of manufacture. -
Page 5: About The Control Panel
General Information cont.- About the Control Panel Displaying Temperature Setpoint The water heater control will display the temperature setpoint anytime a button on the control is pressed. After 30 seconds of inactivity, the display will go blank. However, the LED indicating the selected operation mode will remain lit. -
Page 6: Operational Modes
General Information cont.- Operational Modes This water heater defaults to the Hybrid operating mode. To select available modes listed below: 1. Press the MODE button until the LED next to the desired Operating Mode is illuminated. In Hybrid Mode, the Electric (Only) Mode LED will flash anytime the heating elements are active, such as during the initial recovery from a large draw. -
Page 7: Temperature Adjustment
General Information cont.- This unit has no power button. The power can only be shut off at the circuit breaker or disconnect switch. After a long shutdown period, the water heater’s operation and controls should be checked by qualified service personnel. Make certain the water heater is completely filled again before placing it in operation. WARNING Hydrogen gas can be produced in a hot water system served by this water heater when there has been no usage for a long period of time (generally two weeks or more). -
Page 8: Installation Instructions
Temperature Adjustment cont.- APPROXIMATE TIME/TEMPERATURE RELATIONSHIPS IN SCALDS 120°F (49°C) More than 5 minutes 125°F (52°C) 1½ to 2 minutes 130°F (54°C) About 30 seconds 135°F (57°C) About 10 seconds 140°F (60°C) Less than 5 seconds 145°F (63°C) Less than 3 seconds 150°F (66°C) About 1½... - Page 9 Installation Instructions cont.- The location of this water heater is to be installed is of utmost importance. Before installing this water heater, consult the installation section of these instructions. After reading these installation and operating instructions, select a location for the water heater where the floor is level and is easily accessible to a power supply and water connections.
- Page 10 Ensure that the rear of the water heater is open and not discharged against a wall. A ducting kit may be required in order to achieve optimum efficiency. Bradford White is not liable or responsible for any additional energy consumption or warranty implications.
-
Page 11: Minimum Required Clearances
Installation Instructions cont.- Minimum Required Clearances NOTE: Installations in a confined space, or installations where the recommended service clearances are not met, will lead to higher power consumption (increased use of resistance heating elements and/or heat pump efficiency reduction). Corner Installation Front of T&P Valve T&P Valve... - Page 12 Installation Instructions cont.- Condensate Drain Connection ¾” MNPT This unit has a condensate drain; therefore, a floor Condensate ¾” MNPT Drain Port Condensate or other drain no higher than 36 in (91.4 cm) above Drain Port the floor must be available. It must be in close proximity to the water heater to allow for the shortest possible drain line with minimal turns.
-
Page 13: Water Supply Connections
Water Supply Connections Note: BEFORE PROCEEDING WITH THE INSTALLATION, CLOSE THE MAIN WATER SUPPLY VALVE. After shutting the main water supply valve, open a faucet to relieve the water line pressure to prevent any water from leaking out of pipes while making the water connections to the water heater. After the pressure has been relieved, close the faucet. - Page 14 Water Supply Connections cont.- WARNING Hydrogen gas can be produced in a hot water system served by this water heater when there has been no usage for a long period of time (generally two weeks or more). HYDROGEN GAS IS EXTREMELY FLAMMABLE.
- Page 15 Water Supply Connections cont.- Typical Installation Thermal Conduit to electrical expansion tank junction box (use only copper conductors) To cold water supply Hot water outlet to fixtures Shut-off valve Union (suggested) ¾” FNPT fitting to condensate drain Temperature & pressure relief valve Condensate drain line Drain valve Relief valve discharge...
- Page 16 Water Supply Connections cont.- CAUTION For protection against excessive temperatures and pressure, install temperature and pressure protective equipment required by local codes, but not less than a combination temperature and pressure relief valve certified by a nationally recognized testing laboratory that maintains periodic inspection of production of listed equipment or materials, as meeting the requirements for Relief Valves and Automatic Gas Shutoff Devices for Hot Water Supply Systems, ANSI Z21.22.
-
Page 17: Electrical Connections
Electrical Connections A separate branch circuit with copper conductors, overcurrent protective device, and suitable disconnect must be provided by a qualified electrician. All wiring must conform to local codes or latest edition of National Electrical Code ANSI/NFPA 70. The water heater is completely wired to the junction box at the top of the water heater. - Page 18 Electrical Connections cont.- Branch Circuit Sizing Guide Recommended Over-Current Total Water Total Water Copper Wire Size AWG Based on Protection (fuse or circuit breaker Heater Wattage N.E.C. Table 310-16 (167ºF/75ºC.) Heater Wattage amperage rating) 208V 240V 277V 480V 208V 240V 277V 480V 3,000...
-
Page 19: General Operation
Electrical Connections cont.- What to Expect for “Normal Startup” in Hybrid Mode After the unit has been installed, with all electrical and water connections secure and checked, then the unit should be filled with water (vent tank by opening a hot water faucet somewhere in home to allow tank to fully fill with water). -
Page 20: Maintenance
Maintenance IMPORTANT! The water heater should be inspected annually at minimum by a qualified service technician for damaged components. Do NOT operate this water heater if any part is found damaged. Shut off the electric power whenever the water supply to the water heater is off. Shut off the electric power and water supply, drain the water heater completely to prevent freezing whenever the building is left unoccupied during the cold winter months. - Page 21 Maintenance cont.- Draining and Flushing the Water Heater DANGER Shut OFF power to the water heater before draining water to avoid risk of shock. DANGER Before manually operating the relief valve, make certain no one will be exposed to the danger of coming in contact with the hot water released by the valve.
- Page 22 Maintenance cont.- Tabs To clean the filter: 1. Leave the power ON. Filter 2. Remove the filter from the top of the unit. 3. Squeeze the two tabs and lift to remove the air filter. Once it has been removed, the filter can be vacuumed or wiped clean with a damp cloth or rinsed with warm water.
-
Page 23: Anode Rod Maintenance And Service
Maintenance cont.- Anode Rod Maintenance and Service CAUTION This information is intended to use by individuals possessing adequate background of electrical, electronic and mechanical experience. Any attempt to repair a major appliance may result in personal injury and property damage. The manufacturer or seller cannot be responsible for the interpretation of this information, nor can it assume any liability in connection with its use. - Page 24 Maintenance cont.- Contact your local plumbing supplier or plumbing professional for replacement parts or contact the company at the address displayed on the rating plater of the water heater. For faster and better service, please provide the part name, model, and serial number(s) of the water heater(s) when ordering parts.
-
Page 25: Frequently Asked Questions (Faq)
Frequently Asked Questions Filter: Q: Why is there a filter? A: In Hybrid and Heat Pump (Only) the unit moves air through the system. The filter protects the unit from dirt and debris. A clean air filter improves efficiency. Q: How do I clean the filter? A: Leave the power ON and remove filter from top of unit. -
Page 26: Fault Codes
Fault Codes Note: It’s important to note that fault codes should only be used to help identify components which require testing. Never replace a part based solely on a fault code. The control can generate a false fault if the right conditions exist. - Page 27 Fault codes cont.- Fault Code Fault Counts Before Condition Displayed Code Displayed T5 sensor (ambient temperature) failure. The control detects the thermistor output is at or nearly shorted or open circuit. Lower heating element failure. Control energizes lower element, but current sensor detects no current flow.
-
Page 28: Notes
Notes...
Need help?
Do you have a question about the RE2H80T10 and is the answer not in the manual?
Questions and answers