Table of Contents
Advertisement
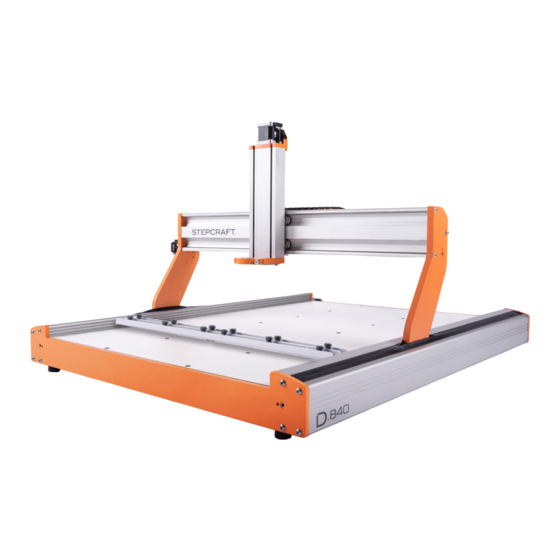
CNC-System
STEPCRAFT D-/M-/Q-Series
Call for consumer information
Customers from outside the U.S.
STEPCRAFT GmbH & Co. KG
An der Beile 2
58708 Menden
Germany
Phone: 0049-2373-1791160
E-mail: info@stepcraft-systems.com
Customers from the U.S. / Canada
STEPCRAFT Inc.
59 Field Street, Rear Building
Torrington, CT, 06790
United States
Phone 001-203-5561856
E-mail info@stepcraft.us
IMPORTANT: Read before using
First steps
Translation of Original
Instructions
Date of: August 1
st
(UCCNC)
1
2020
Advertisement
Table of Contents

Related Manuals for STEPCRAFT Q Series


Summarization of Contents
Safety Information and Warnings
Meaning of Special Language
Explains the meaning of terms like NOTICE, CAUTION, and WARNING used in the manual for safety.
General Safety Precautions and Warnings
Lists essential safety guidelines and general precautions for operating the STEPCRAFT CNC system.
CNC System Setup and Configuration
2.1 Installing the Software
Installs the UCCNC control software and necessary drivers for the CNC system.
2.2 Installing the STEPCRAFT Machine Profile
Configures UCCNC with specific STEPCRAFT machine series and size profiles.
2.3 Connecting the Machine to the Computer
Connects the STEPCRAFT CNC system and UC100 device to the computer via USB.
2.4 Checking Operational Readiness
Verifies the machine's operational status by checking control board LEDs.
2.5 Manual Test
Performs a manual jog test to verify axis movement and software control.
2.6 Verification of Linear Axes
Checks the smooth, friction-free movement of all linear axes for proper operation.
2.7 Homing
Executes the homing sequence to establish machine reference points and zero positions.
Workpiece Preparation and Machining
3.1 Clamping the Workpiece Material
Secures the workpiece material onto the machine table using retainers.
3.2 Importing the Pattern
Loads a G-code pattern file into the UCCNC software for execution.
3.3 Defining Workpiece Zero Point (X, Y)
Sets the X and Y origin point on the workpiece using manual jogging.
3.4 Test Drive Without Tools
Simulates the toolpath to check movement and sequence without cutting.
3.5 Preparing the Milling Spindle
Installs and secures the milling cutter into the spindle collet.
3.6 Defining Workpiece Zero Point (Z)
Sets the Z-axis zero point by touching the workpiece surface with the cutter.
Need help?
Do you have a question about the Q Series and is the answer not in the manual?
Questions and answers