
Related Manuals for E-Bike MOUNTAIN BIKE


Summary of Contents for E-Bike MOUNTAIN BIKE
- Page 1 OPERATING MANUAL ORIGINAL OPERATING MANUAL CITY BIKE - with electric drive up to 250 W MOUNTAIN BIKE - with electric drive up to 250 W FOLDING BIKE - with electric drive up to 250 W...
-
Page 3: Table Of Contents
Table of contents Information on the manual and manufacturer ....5 Keep the manual available ............5 Identifiers in the text............... 6 Identifiers in illustrations ..............6 Other applicable documents ............6 Copyright ..................7 Contact data of the manufacturer in Germany ......7 Safety .................. - Page 4 Install front wheel ................. 42 Install the handlebars..............44 Install the saddle ................44 Install pedals ................45 Connect display ................47 Before the first ride ............48 Check the size of the bicycle ............48 Adjusting the Saddle ..............50 Adjusting the handlebars .............
- Page 5 Electric motor and controller care ..........95 Maintenance intervals ..............96 Service booklet ................97 Disassembling the bike ............ 102 Disposal of the bike ............103 Warranty ................104 Bike logbook ..............105...
-
Page 7: Information On The Manual And Manufacturer
Information about the manual and manufacturer This manual will help you to safely use the electric city bike, electric folding bike and electric mountain bike. These electric bicycles will be referred to as “bikes” for short in the following, if different functions of the bicycles do not have to be differentiated. -
Page 8: Identifiers In The Text
Information on the manual and manufacturer Identifiers in the text Different elements in this manual have defined identifiers. That way it is possible to differentiate the following elements: normal text Action steps First level bulleted list Identifiers in illustrations If an element is referred to in a legend or in the main text, then it will be given a number (1). -
Page 9: Copyright
Information on the manual and manufacturer These documents are considered to be part of this manual. Keep these documents together with this manual. Supply these documents as well when you sell the bike or pass it on in some other way. Risk of injury from not observing the other applicable documents: ... -
Page 10: Safety
Safety Safety Proper use City and folding bikes serve to transport a single person on paved roads and paths in public road traffic. In this connection, the tyres must be in constant contact with the ground. They are for private use. The safety equipment required pursuant to the German Road Traffic Act (StVZO) must be present and is usually included. -
Page 11: Body Size Of The Rider
Safety Never make changes to the control unit and electric motor. Body size of the rider Min. 160 cm, max. 180 cm Personal qualifications This manual is intended for instructed riders. The following knowledge and experience are required for the rider: ... -
Page 12: Basic Safety Instructions
Safety Basic safety instructions Prevent serious injuries or death from mechanical defects and handling the bike incorrectly Bike riding can lead to serious injuries or death from mechanical defects or incorrect handling of the bike. Always perform a safety test before riding your bike (see the Riding the bike section starting on page 86). - Page 13 Safety Never let the battery fall. Charge the battery in a temperature range between 10° and 30°. Make sure that the charger is only used by persons without any limited physical, sensory or mental capabilities. Prevent fire or explosion A short circuit can be caused by moisture, electrically conductive soiling or mechanical damage.
- Page 14 Safety Prevent serious injuries from damaged components When riding off-road or over kerbs, the electric motor, crank arms or the bottom bracket can be hit and damaged. A serious injury may be the consequence. Only use the bike on approved paths. ...
- Page 15 Safety Always avoid dark areas and areas with heavy or fast traffic. Always avoid road obstacles. If possible, ride on familiar routes. Prevent serious injuries or death from damaged, bent or loose reflectors and lights The bike’s reflectors capture and reflect the light from streetlights and car headlights so that you are recognised as a cyclist.
- Page 16 Safety Prevent serious injuries or death from replacement of components or adding accessories There are numerous components and accessories available that can improve the comfort, performance and appearance of the bike. These components or accessories are added at your own responsibility. It can be that these components or accessories have not been tested by the bike manufacturer for compatibility, reliability or safety.
- Page 17 Safety Prevent serious injuries or death from damaged components The bike and its components are subject to wear (scratches, cracks, fraying) and tear. A damaged component can suddenly and immediately malfunction, which can lead to injuries and even to death. ...
- Page 18 Safety Prevent vibrations The electric motor might not run smoothly as a result of incorrect assembly, wear and overloading (e.g. the electric motor hitting when riding over bumps, ridges) or from detached parts. Only use the bike on approved paths. ...
-
Page 19: Prevent Property Damage
Safety Prevent falling from a suddenly occurring electric motor assist A suddenly occurring electric motor assist results in the risk of losing control and thereby falling. Always test the electric motor assist before the first ride. Always wear personal protective equipment (PPE). Prevent poisoning Material or vapours can leak out of damaged components of the bike (e.g. -
Page 20: Identifiers Of Warning Notices
Safety Identifiers of warning notices You will find the following warning notices in this manual WARNING Notices with the word WARNING warn about a situation that can possibly lead to death or serious injuries. CAUTION Notices with the word CAUTION warn about a situation that can possibly lead to minor or moderate injuries. - Page 21 Safety Signs Explanation General warning sign Hot surface Do not use a high pressure cleaner Observe the manual Do not open the electric motor and control unit...
-
Page 22: Description
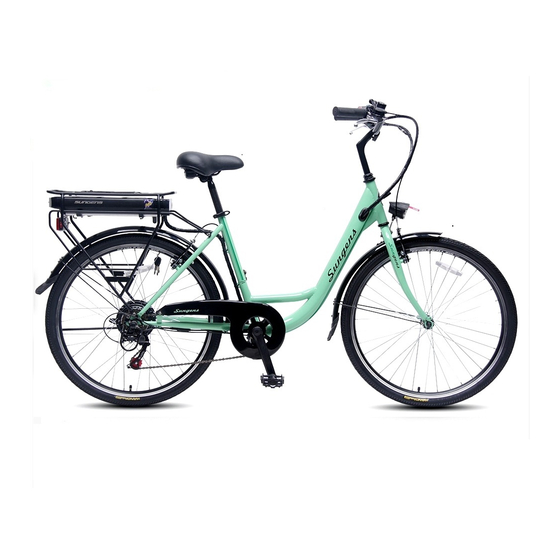
Description Description Bike types City bike This bike is intended for use on paved and public roads and paths. The equipment required pursuant to the Road Traffic Act (StVZO) is usually included in the delivery. Before the first ride, make sure that the required safety equipment is present and functional. - Page 23 Description No. Explanation Brake, gear and control cables LED front light Fender Spokes Hub dynamo Tyres Fork Frame Pedals Stand Chain Chain guard Cassette Rear derailleur Hub motor Reflector LED rear light Rechargeable Battery Carrier Saddle Saddle clamp Grip...
- Page 24 Description No. Explanation Control unit Bell Brake lever...
- Page 25 Description Folding bike This folding bike is intended for use on paved and public roads and paths. It can be folded up in no time at all with the existing joints and hinges. It is then possible to transport it in a car or on public transportation.
- Page 26 Description No. Explanation Fender Brakes Spokes Hub dynamo Tyres Fork Reflector Frame with battery Pedals Stand Chain Rear derailleur Hub motor Reflector Chain guard LED rear light Carrier Saddle clamp Seat post Saddle Locking lever Stem...
- Page 27 Description No. Explanation Control unit Bell Grip Brake lever Mountain bike The mountain bike is intended for use on gentle off-road terrain and unpaved paths. It is not intended for use on paved and public roads and paths. The equipment required pursuant to the Road Traffic Act (StVZO) is usually not included in the delivery.
- Page 28 Description Explanation Brake, gear and control cables Reflector Suspension fork Reflector Spokes Disc brake Tyres Frame Pedals Crank set Chain Stand Chain stay Cassette Reflector Rear derailleur Hub motor Quick-release fastener of the seat post Seat post Reflector Saddle...
-
Page 29: Delivery Contents
Grip Brake lever Delivery Contents City bike The scope of delivery of the city bike consists of: preassembled city bike including the battery front wheel (not installed) saddle including seat post (not installed) handlebars (not installed) ... -
Page 30: Auxiliary Drive
Description Folding bike The scope of delivery of the folding bike consists of: preassembled folding bike including the battery charger for the battery two keys (keep spare key in a safe place) for battery removal Auxiliary drive Electric motor Depending on the type of bike, the existing electric motor acts directly on the rear wheel, or it assists you when pedalling. -
Page 31: Suspension
Description Red flashing: charge level less than 10% (charge battery) Button to check the charge level On/off switch Lock for removal Bracket for pulling it out of the housing Like most large batteries, lithium-ion batteries are considered to be a hazardous substance according to shipping regulations. -
Page 32: Brakes
Description Brakes The brakes serve to control the speed and to slow down the bike until it comes to a stop. The following types of brakes are common: disc brake rim brake backpedal brake. Disc brake Brakes are mounted on the front and rear wheel. With disc brakes, a mechanism is used to press the brake pads (1) against one or both sides of a brake disc (2) to slow down the bike. - Page 33 Description Rim brake Brakes are mounted on the front and rear wheel. With rim brakes, a mechanism is used to press the brake pads against the rims from both sides to slow down the bike. The brake pads normally consist of rubber and are subject to wear.
- Page 34 Description Example of rim brake A Explanation Trimming screw Locknut Cable locking screw Brake cable Brake pad Adjusting bolt for brake pad Brake arm Alignment screw Screw for mounting on the frame...
- Page 35 Description Example of rim brake B Explanation Trimming screw Locknut...
- Page 36 Description Explanation Alignment screw Mounting bolts Brake arm Brake pad Adjusting bolt for brake pad Brake cable Cable lock Quick-opener lever Example of rim brake U...
- Page 37 Description Explanation Screw for spring tension Brake arm Brake pad Adjusting bolt for brake pad Cable locking screw Brake cable Example of rim brake V...
-
Page 38: Gearshift
Description Explanation Brake cable Cable locking screw Brake arm Brake pad Screw for spring tension Adjusting bolt for brake pad Cable guard/pipe Backpedal brake A backpedal brake is mounted on the hub of the rear wheel. The backpedal brake has low maintenance and low wear. You actuate the backpedal brake by turning the pedal backwards. - Page 39 Description The requirement for a perfect gear change with a derailleur system is for the drive chain to be moving forwards and be under at least some tension. You can select a suitable gear for the respective riding situation either with the front chainrings or rear sprockets.
- Page 40 Description Experiment with up- and downshifting to get a feeling for the different gear combinations. Initially practice shifting in situations without any obstacles or traffic until you can handle this with confidence. For information on using the shift levers, see page 66.
-
Page 41: Pedals
Description Internal-gear hub An internal-gear hub can be equipped with 3, 5, 7 or 12 gears. The gear with the lowest number (1) is intended for the steepest inclines. The gear with the highest number (3, 5, 7 or 12, depending on the number of gears in your hub) is intended for the highest speeds. - Page 42 Description This enables effective and uniform pedalling during the up and down movement. The connection can be broken immediately by twisting the foot to the side. Pedals with hooks and straps are hardly used at all since the arrival of step-in pedals.
-
Page 43: Unpack And Check The Delivery Contents
Unpack and check the delivery contents Unpack and check the delivery contents WARNING Risk of suffocation when playing with plastic film. A child can pull the plastic film over their head and suffocate. Make sure that children do not play with the plastic film. -
Page 44: Install The Components Of The Bike
Install the components of the bike Install the components of the bike The bike is normally pre-assembled. You still have to install the following components, or have them installed. front wheel handlebars saddle including the seat post ... - Page 45 Install the components of the bike To check if the front wheel is aligned correctly, proceed as follows: Spin the wheel The rim or the tire must not rub on the brakes or the frame. If this is not the case, possibly ask a dealer for advice. Proceed as follows to install the front wheel with a quick-release fastener: ...
-
Page 46: Install The Handlebars
Install the components of the bike Install the handlebars To install the handlebars on a stem, proceed as follows: Unscrew the four screws of the stem plate. Remove the stem plate. Insert the handlebars. Make sure that no cables (brake cables or gearshift) are jammed or twisted. -
Page 47: Install Pedals
Install the components of the bike Install pedals The pedals are equipped with different threads. Therefore, the pedals are labelled with L and R. The pedal labelled L must be installed on the crank arm on the left side in the traveling direction of the bicycle. The pedal marked R must be installed on the crank on the right side in the traveling direction of the bicycle. - Page 48 Install the components of the bike Proceed as follows to install the right pedal on the bike: Screw the threaded bolt of the pedal marked R in a clockwise direction into the threaded hole of the right crank arm. ...
-
Page 49: Connect Display
Install the components of the bike Proceed as follows to install the left pedal on the bike: Screw the threaded bolt of the pedal marked L in a counter- clockwise direction into the threaded hole of the left crank arm. ... -
Page 50: Before The First Ride
Before the first ride Before the first ride The correct setting of the bike is essential for safety, performance and comfort while riding. Making changes to your bike for a correct setting of the bike that matches your body and driving conditions requires experience, expertise and special tools. - Page 51 Before the first ride Shift your weight onto your heels. If your crotch touches the frame, the bike is too big for you. If your new bike is not the right size, please contact your specialist dealer and exchange it before you ride it.
-
Page 52: Adjusting The Saddle
Before the first ride Adjusting the Saddle The correct setting of the saddle is important for safe riding. You can make the following adjustments to the saddle: height distance from the handlebars ilt of the saddle. To check whether the saddle height is set correctly, proceed as follows: ... -
Page 53: Adjusting The Handlebars
Before the first ride Tighten the saddle clamp again. If there is a quick-release fastener, close it. Check whether the seat height is set correctly now. If not, repeat the adjustment process. When you are sitting on the saddle of the bike, you need to be able to operate the brake levers and gear levers properly while riding. - Page 54 Before the first ride Ahead stem With this type of stem, you can adjust the alignment of the stem and the angle of the handlebars. The height of the handlebars cannot be set. If you need to change the height, ask your specialist dealer. ATTENTION! Possible for fork to fall out and cause parts to be lost.
- Page 55 Before the first ride The handlebars are secured to the stem plate with a clamping device. To set the angle of the handlebars, proceed as follows: Loosen the existing screws (1) until you can turn the handlebars in the clamping device. ...
- Page 56 Before the first ride...
- Page 57 Before the first ride Conical stem With this type of stem, you can adjust the height and alignment of the stem and the angle of the handlebars. To set the alignment of the stem and height of the handlebars, proceed as follows: ...
- Page 58 Before the first ride Turn the stem including the handlebars to the desired position. Set the desired height. Make sure that the marking on the stem showing the minimum insertion depth is in the steering tube and not visible. ...
- Page 59 Before the first ride The handlebars are secured to the stem with a clamping device. To set the angle of the handlebars, proceed as follows: Loosen the existing screw until you can turn the handlebars in the clamping device. ...
- Page 60 Before the first ride Stem with variable angle A stem with an adjustable angle may be a conical or Ahead stem. This allows you to adjust the angle in addition to the previously described settings for Ahead and conical stems. To set the angle, proceed as follows: ...
- Page 61 Before the first ride Set the desired angle. Tighten the adjusting nut in a clockwise direction. Setting handlebars on the folding bike WARNING Possible to fall off the bike due to a loss of control from an incorrect bike size. Serious injuries may be the consequence.
-
Page 62: Adjusting The Suspension Fork
Before the first ride To adjust the handlebars on the folding bike, proceed as follows: Open the quick-release lever on the head tube. Set the handlebars to the desired height by moving it up or down. Close the quick-release lever. Adjusting the suspension fork If your bike is equipped with a suspension fork, you can adjust the suspension. - Page 63 Before the first ride Place the battery on a non-combustible base, such as ceramic for example, for charging. Observe and follow the instructions from the manual of the charger, if it has been included separately. Plug the charger's jack plug into the appropriate socket of the battery. ...
-
Page 64: Check Tyre Pressure
Before the first ride Check tyre pressure There are essentially three different types of bicycle valves: Schrader valve (car valve) (1) Presta valve (Sclaverand valve, French valve) (2) Dunlop valve (3) You can find information on the permissible tyre pressure on the side of the tire. - Page 65 Before the first ride To check the tyre pressure, proceed as follows: Unscrew the valve cap from the bicycle valve. If necessary, follow the specific note about the Presta valve. Attach the respective stand pump connector to the bike valve. The pressure gauge shows the current tyre pressure.
-
Page 66: Operating The Bike
Operating the bike Operating the bike Installation and removal of the battery WARNING Risk of explosion due to dropping the battery. Serious to fatal injuries may be the consequence. Never drop the battery during installation and removal. To charge the battery or store it for a longer period of time, you need to remove it. - Page 67 Operating the bike Pull the battery out of its holder. Release the key. Pull the key out of the battery lock. To install the battery, proceed as follows: Make sure that the battery has no visible damage, such as a broken housing, for example.
-
Page 68: Actuating The Brakes
Operating the bike Pull the battery out of the frame. Release the key. Pull the key out of the battery lock. To install a battery mounted in the frame, proceed as follows: Make sure that the battery has no visible damage, such as a broken housing, for example. - Page 69 Operating the bike Use the shift levers or the rotary gearshift on the right side of the handlebars to operate the rear derailleur. Use the shift levers or the rotary gearshift on the left side of the handlebars to operate the front derailleur (if available).
- Page 70 Operating the bike To operate the rear or front derailleur with a rotary gearshift, proceed as follows: Turn the pedals forward. Turn the shifting ring (1) with your hand in a clockwise direction to switch to a smaller sprocket or alternatively chainring. ...
-
Page 71: Switching The Lights On And Off
Operating the bike Switching the lights on and off Depending on the type of bike, your bike may be equipped with lights. This consists of a headlight, a taillight and a hub dynamo. The power is not supplied by the built-in battery; otherwise no lighting would be possible with an empty battery. -
Page 72: Folding The Folding Bike
Operating the bike Folding the folding bike WARNING When assembling the folding bike or manually folding the head tube and/or top tube, it is possible to get pinched. Always keep your fingers, hands and arms away from the assembly area when folding the folding bike together. -
Page 73: Controlling The Auxiliary Drive
Controlling the auxiliary drive Controlling the auxiliary drive Depending on the type of bike, one of three different control units is available for the auxiliary drive: King-Meter T319 Bafang C961 The following explains the basic functions of the control units. For more information on the control units, please contact your specialist dealer or the manufacturer. -
Page 74: King-Meter
Controlling the auxiliary drive King-Meter Overview of display and controls Explanation Battery charge level (flashes at low charge level) Time Speed Distance travelled Assist level DOWN button Mode button UP button... - Page 75 Controlling the auxiliary drive Switch on or off To switch the control unit on, proceed as follows: Press MODE until the display turns on. To switch the control unit off, proceed as follows: Press MODE until the display goes off. Making settings To make settings, proceed as follows: ...
- Page 76 Controlling the auxiliary drive Set the desired maximum speed with UP and DOWN. Press MODE to confirm the settings. To exit settings mode and apply the settings, press MODE for about two seconds. Setting the tyre diameter To set the tyre diameter, proceed as follows: default is 26 inches.
- Page 77 Controlling the auxiliary drive Depending on the assist level selected, the auxiliary drive assists you in applying the pedal force. Five assist levels are available to you: Assist level 1: The auxiliary drive provides about 7% of your own pedalling force.
- Page 78 Controlling the auxiliary drive average speed distance of the current trip total distance To retrieve information on the speed, proceed as follows: The control unit is switched on. The default display is the current speed. Press UP once to see the maximum speed of the current trip. ...
- Page 79 Controlling the auxiliary drive Close the battery compartment. Mount the display on the handlebars. Check to see if the settings are still there. Error messages If there is a fault in the electronics, the auxiliary drive is switched off and the display shows one of the following error codes: ...
-
Page 80: T319
Controlling the auxiliary drive T319 Overview of display and controls Explanation Battery charge level (LED) Assist level (LED) POWER button AUTO (sensor for adjusting the brightness of the LEDs in the dark) MINUS button PLUS button Switch on or off To switch the control unit on, proceed as follows: >... - Page 81 Controlling the auxiliary drive To switch the control unit off, proceed as follows: Press POWER for about a second. Selecting the assist level Depending on the assist level selected, the auxiliary drive assists you in applying the pedal force. Four assist levels are available to you: ...
-
Page 82: Bafang C961
Controlling the auxiliary drive Bafang C961 Overview of display and controls Explanation Battery charge level (flashes at low charge level) Riding mode Current speed Units of speed Units of distance Distance Total or current distance travelled (trip) Time Assist level MINUS button... - Page 83 Controlling the auxiliary drive Explanation PLUS button POWER button Switch on or off To switch the control unit on, proceed as follows: Press POWER until the display turns on. To switch the control unit off, proceed as follows: Press POWER until the display goes off. Making settings To make settings, proceed as follows: ...
- Page 84 Controlling the auxiliary drive To set the maximum speed, proceed as follows: Set the desired maximum speed with PLUS and MINUS. Press POWER. You can now set the backlight for the display. Setting the backlight of the display To set the backlight of the display, proceed as follows: By default, level 1 of 8 levels is set.
- Page 85 Controlling the auxiliary drive Making advanced settings To make advanced settings, proceed as follows: Press POWER until the display turns on. Press PLUS and MINUS for about three seconds at the same time. Settings mode will be displayed. ...
- Page 86 Controlling the auxiliary drive Setting power levels To set the number of power levels, proceed as follows: You can set a number that is between 2 and 9 power levels Set the desired number of power levels with PLUS and MINUS. ...
- Page 87 Controlling the auxiliary drive Retrieving Information You can retrieve a variety of information in the display: distance of the current trip total distance You can display the distance travelled for the current trip or the total distance travelled. To change over between the information, proceed as follows: The control unit is switched on.
-
Page 88: Riding The Bike
Riding the bike Riding the bike Always wear a cycling helmet when riding, which meets the latest certification standards. Follow the manufacturer’s information from the related manual in connection with the adjustment, use and care of the helmet. The majority of serious injuries caused by cycling are head injuries, which could have been prevented with a helmet. -
Page 89: Tips For Safe Riding
Riding the bike the lights works and are set correctly the gearshift works and is set correctly screws, nuts and quick-release levers are tight Tips for safe riding Observe all regional traffic laws and bicycle regulations. Observe the regulations regarding the licensing of bicycles and riding on the pavement, laws on the use of bike paths and so on. -
Page 90: Tips For Safe Off-Road Riding
Riding the bike Cyclists always draw the short straw when it comes to traffic collisions with cars. Use common hand signals when turning or stopping. Never ride with headphones. They drown out traffic noise and sirens, distract you from the traffic and can be caught in the moving parts of the bike, causing you to lose control. -
Page 91: Riding With The Auxiliary Drive
Riding the bike Wear proper safety equipment for your planned riding style. Do not ride alone on terrain that is off the beaten track. Even if you travel together with others, you need to tell someone where you are and when you will return. -
Page 92: Riding Without The Auxiliary Drive
Riding the bike getting started accelerating braking cornering. If you stop pedalling, it may happen that the auxiliary drive continues to assist for a brief period of time. Therefore, stop pedalling sooner when approaching a curve before you turn or at a red light than you would with a bike without an auxiliary drive. -
Page 93: Troubleshooting
Repairing the bike Troubleshooting Problem Possible Remedy causes Make sure that the The display doesn't Battery empty or work. contact between battery is charged and bike and battery seated correctly. Make sure that the missing battery lock is closed. This prevents the contact between the battery and bike from being... - Page 94 Repairing the bike Problem Possible Remedy causes When charging, make sure The green indicator The battery and on the charger is lit, charger are not that you connect the but the battery is not connected in the charger to the battery first yet charged.
-
Page 95: Transporting The Bike
Transporting the bike Transporting the bike WARNING During transport, the folded bicycle may fall over, slip off or fall off the means of transport. Serious injuries may be the consequence. During transport in a vehicle or on public transportation, secure the bike against falling over, slipping or falling down. -
Page 96: Servicing And Maintaining The Bike
Servicing and maintaining the bike Servicing and maintaining the bike Battery maintenance The battery is designed for about 500 charging cycles. After 500 cycles, the battery no longer has 100% capacity. The capacity is still about 60% after 500 cycles. A charging cycle involves charging the battery from 0% to 100%. -
Page 97: Electric Motor And Controller Care
Servicing and maintaining the bike Store the battery at a dry location with low air humidity. Maintain a temperature between 5 °C and 20 °C. Protect the battery from extreme temperature fluctuations. Do not expose the battery to direct sunlight or heat, for example when storing it in a warehouse. -
Page 98: Maintenance Intervals
Servicing and maintaining the bike Maintenance intervals Interval Components Activity After each long or Bike, chains Clean the bike and lightly hard use or at least lubricate the chain. Wipe off 150 km any excess oil with a cloth. Dispose of the cloth in an environmentally friendly manner. -
Page 99: Service Booklet
Servicing and maintaining the bike Interval Components Activity As needed Frames, rims Remove the coarse dirt with and pedals an appropriate brush. Clean the components with a damp cloth and mild soap solution. Service booklet To assert your warranty claims, we recommend that, in addition to compliance with maintenance intervals, you have your bike carefully inspected at least once or twice a year. - Page 100 Servicing and maintaining the bike Dealer’s stamp: Dealer’s stamp: First installation Service report: Checked by a specialist on: Inspection carried out on: Dealer’s stamp: Dealer’s stamp: Service report: Service report: Inspection carried out on: Inspection carried out on: Dealer’s stamp: Dealer’s stamp: Service report: Service report:...
- Page 101 Servicing and maintaining the bike Dealer’s stamp: Dealer’s stamp: Service report: Service report: Inspection carried out on: Inspection carried out on: Dealer’s stamp: Dealer’s stamp: Service report: Service report: Inspection carried out on: Inspection carried out ecialist on: Dealer’s stamp: Dealer’s stamp: Service report: Service report:...
- Page 102 Servicing and maintaining the bike Dealer’s stamp: Dealer’s stamp: Service report: Service report: Inspection carried out on: Inspection carried out on: Dealer’s stamp: Dealer’s stamp: Service report: Service report: Inspection carried out on: Inspection carried out on: Dealer’s stamp: Dealer’s stamp: Service report: Service report: Inspection carried out on:...
- Page 103 Servicing and maintaining the bike Dealer’s stamp: Dealer’s stamp: Service report: Service report: Inspection carried out on: Inspection carried out on: Dealer’s stamp: Dealer’s stamp: Service report: Service report: Inspection carried out on: Inspection carried out on: Dealer’s stamp: Dealer’s stamp: Service report: Service report: Inspection carried out on:...
-
Page 104: Disassembling The Bike
Disassembling the bike Disassembling the bike To disassemble the bike, proceed as follows: Disassemble the bike in reverse order to the assembly. -
Page 105: Disposal Of The Bike
Disposal of the bike Disposal of the bike To dispose of the bike at the end of its service life, proceed as follows: Dispose of the bike and its components, such as the battery and electric and electronic components for example, in accordance with local laws and regulations, for example in a recycling centre. -
Page 106: Warranty
Warranty Warranty This bike is sold by Pentagon Sales GmbH, Lindenstraße 31, 73479 Ellwangen (Jagst). Pentagon Sales grants the current legal warranty of two years from the date of purchase on the frame and rigid fork relating to any problems in the manufacturing or material defects including breaks or cracks caused by normal riding (except in the case of improper use). -
Page 107: Bike Logbook
Bike logbook Bike logbook First and last name Street address Postal code/Place of residence Telephone/mobile number Date of purchase Bike designation Frame no. Wheel size Colour Special features/accessories... - Page 108 Bike logbook...
- Page 109 Bike logbook...
- Page 110 Bike logbook...
- Page 111 Bike logbook...
- Page 112 Pentagon Sales GmbH Lindenstraße 31 73479 Ellwangen (Jagst) SERVICE WEBSITE www.pentagonservice.de service@pentagonservice.de SERVICE TELEPHONE +49 (0)7961 967 97 50 (workdays 09.00 - 12.00 and 13.00 - 17.00)
Need help?
Do you have a question about the MOUNTAIN BIKE and is the answer not in the manual?
Questions and answers