Table of Contents
Advertisement
Advertisement
Table of Contents

Related Manuals for E-Bike 36V


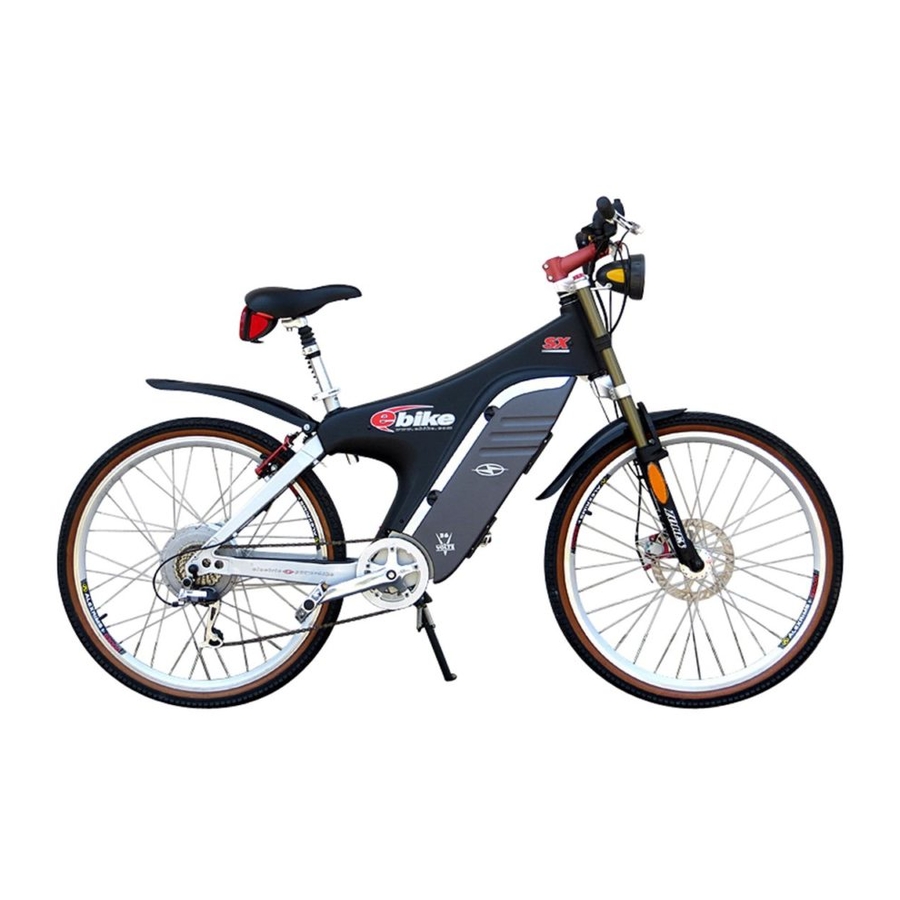
Summary of Contents for E-Bike 36V
- Page 1 S E R V I C E M A N U A L 3 6 V M O D E L S...
- Page 2 E-Bike ® Service Manual 36V MODELS EV Global Motors Company 16201 Stagg Street Van Nuys, CA 91406 Tel: 818/756-0566 Fax: 818/756-0563 www.ebike.com...
- Page 3 Copyright © 2000 EV Global Motors Company First Edition October, 2000 LIT-82001-01-36 All rights reserved. No parts of this publication may be reproduced or transmitted in any form or by any means without the prior permission of EV Global Motors Company.
-
Page 4: Table Of Contents
TABLE OF CONTENTS Chapter One: General Information Beep/LED Codes Vehicle Identification Number How to Read the Model Code Terms Lubricants Threadlock Recommended Maintenance Schedule Special Tools Chapter Two: Specifications Mechanical Specifications Gear Ratios Electrical Specifications Torque Specifications Performance Specifications Frame Specifications Chapter Three: Battery Pack Charging the Battery Replacing the Battery... -
Page 5: Beep/Led Codes
GENERAL INFORMATION BEEP/LED CODES The three state-of-charge LEDs on the throttle control indicate battery state of charge. The E-Bike ® uses these LEDs and three distinct beeps to alert you to particular conditions. The following chart describes these signals and their various meanings. -
Page 6: Vehicle Identification Number
Code Meaning Beep LEDs Battery state-of-charge 80% to 60% of run time None Green and yellow remaining LEDs on. 60% to 40% of run time None Yellow LED on. remaining. 40% to 15% of run time None Yellow and red remaining. -
Page 7: Terms
Before applying Loctite to threads, clean temperatures so most automotive greases are the thread surface of oil, grease, and other inappropriate for use on the E-Bike ® . Always residue. Apply a small amount of Loctite. -
Page 8: Recommended Maintenance Schedule
* Depending upon length of ride and riding conditions. Inspect more frequently when riding in dusty or wet conditions. SPECIAL TOOLS The following special tools are needed for servicing the E-Bike ® Tool Part number Hex wrench set: 4mm, 5mm, 6mm... -
Page 9: Specifications
Chapter Two SPECIFICATIONS Table 1: Mechanical Specifications Component Specification Headset Stack height 33 mm (1.30 in.) Dimensions 25.4 mm x 34 mm x 30 mm w/seal Forks (LE) Type Polyurethane Allen key adjustable Steerer tube 1-1/8 in. Travel 65 mm Triple Forks (SX/PE) Type Nitro DH... - Page 10 Chapter Two SX model 26 x 1.95 in., CSK, puncture resistant PE model 26 x 1.95 in., black with reflective stripe, puncture resistant Rims DH-17 Front 26 x 1.5 in., 14G x 32H, double wall Rear 26 x 1.5 in., 14G x 36H, double wall G3000 Front 26 x 1.5 in., 14G x 32H, double wall...
- Page 11 SPECIFICATIONS Table 4: Torque Specifications Item kg-cm in.-lb. ft.-lb. Special Instructions Handlebar-binder bolt 140~200 10~15 Apply Loctite Handlebar-arm clamp bolts 140~200 10~15 Apply Loctite Stem-binder bolt (stem-2 quill bolt) 180~250 13~18 Headset locknut 40~50 34.7~43.4 Accessory control clamp bolt 30~40 26.5~34.7 Throttle control clamp bolt 30~40...
-
Page 12: Performance Specifications
Table 5: Performance Specifications* Item Specification Top speed 17.5 mph @ 36 volts in “P” Performance mode. 12.5 mph @ 36 volts in “E” Economy mode. Maximum grade Over 12% with a 200 lb. rider plus load. Acceleration 0~10 mph in 3 seconds with a 200 lb. rider. Range Over 20 miles with moderate pedal assist. -
Page 13: Charging The Battery
® includes a charger that is an to battery damage. integral part of the battery pack. Batteries can • Always pedal assist your E-Bike ® when be charged when the battery pack is on-board the pedal-assist beep sounds. the E-Bike ®... -
Page 14: Replacing The Battery
The following procedure describes how to remove and replace the battery. Remote Charging WARNING 1. Remove the battery pack from the E-Bike ® Never use a battery that is cracked or broken. 2. Set the battery pack on its side so the bat-... - Page 15 BATTERY PACK 3. Remove the mounting screw, and discon- (Figure 3) sits in the bottom of the case (the nect the blue negative lead from the negative (-) end with the capacitor). Be sure the battery is battery terminal. Be sure to remove the washer. properly seated in the battery case.
-
Page 16: Replacing The Charger
Chapter Three 6. Fit the cover onto the battery pack. Be sure Installation no wire is pinched beneath the cover. 7. Apply Loctite 242 (blue) to the threads of 1. Be sure the insulator (B, Figure 6) is in the two cover screws, and secure the cover in place in the battery pack. -
Page 17: Battery Pack Test
BATTERY PACK BATTERY PACK If there are no intermittent connections, replace the battery. Removal Charger Output Test 1. Turn the power knob OFF. 1. Remove the cover from the battery pack. 2. Open the battery compartment door. 2. Connect a digital voltmeter’s positive (+) 3. - Page 18 Chapter Three Battery Voltage Test, After Charging 3. Remove the cover from the battery pack. 4. Connect a digital voltmeter’s positive (+) NOTE test probe to the positive (+) battery terminal, The charger must be operational for this test to and connect the voltmeter’s negative (-) test be valid.
-
Page 19: Handlebar Position
Chapter Four HANDLEBAR and CONTROLS HANDLEBAR HEIGHT ADJUSTMENT HANDLEBAR POSITION NOTE 1. Loosen the stem-binder bolt three or four The handlebar may be adjusted to suit the turns counterclockwise (A, Figure 4). If the bolt rider’s preference. The following procedure rises from the steering stem, strike the bolt with describes how to set the handlebar to the stock a plastic mallet to force the stem wedge down. -
Page 20: Handlebar Replacement
Chapter Four WARNING 5. Install the throttle control as described in The "Minimum Insert" mark on the handlebar this chapter. stem must not sit above the top of the headset. 6. Install the accessory control as described in this chapter. 2. -
Page 21: Accessory Control (Left Side)
HANDLEBAR and CONTROLS front brake cable to the shifter cable 7. Disconnect the front brake cable from the (C, Figure 1). S-hook (C, Figure 1). Note how the front brake 7. Roll the right handlebar grip onto the han- cable is routed around the headlight (LE and dlebar until the grip is flush with the end of the SX models) or around the battery holder (PE handlebar. - Page 22 Chapter Four 6. Loosen the mirror-mounting bolt (Figure frame top tube so it is out of the way. Do not 10), and remove the mirror from the handlebar severely bend or kink the cable. end. FIG. 11 FIG. 8 7. Roll the left handlebar grip from the han- 10.
-
Page 23: Headset
HANDLEBAR and CONTROLS 5. Slide the shifter body onto the left handle- the slots in the brake lever, adjusting bar. Guide the shifter cable around the head- barrel and adjuster locknut. light (LE or SX models) or battery holder (PE c. - Page 24 Chapter Four side of the retainer facing up toward lower head-tube race). The bearing will have to be installed in this position during assembly. FIG. 15 FIG. 17 FIG. 16 10. Visually inspect the position of cone in the adjustable race and in the fork crown. Note FIG.
- Page 25 HANDLEBAR and CONTROLS FIG. 20 FIG. 21 13. Install the washer and thread the headset Assembly locknut onto the fork column. 1. Clean the bearings, head-tube races, fork- 14. Torque the headset locknut to the specifi- crown race, and adjustable race with solvent. cation in Table 4.
- Page 26 Fit the handlebar into place in the binder instead of a smooth, fluid motion. on the handlebar arm. Be sure the b. Lift the E-Bike ® by the top frame tube, knurled portion of the handlebar is cen- and watch the front wheel.
-
Page 27: Brake Cable Replacement
"left" and "right" refer to the techni- cian’s point of view when standing in front of the E-Bike ® and looking at the front brake caliper or when standing behind the E-Bike ® and looking at the rear brake caliper. BRAKE CABLE REPLACEMENT Removal 1. -
Page 28: Brake Lever
Chapter Five CAUTION 7. Remove the brake cable. If you are replac- Do not set the caliper-arm spring tension too ing the rear brake cable, remove the left side high. cover, and remove the cable from the rear inlet on the side cover. c. -
Page 29: Brake Lever Free Play Adjustment
8. Set the brake lever to a 25~35° angle by per- 5. Turn the adjusting barrel and the adjuster forming the following: locknut until their slots align with the slot in the a. Set the E-Bike ® in an upright position on brake lever body. -
Page 30: Brake Pad
7. Install the plain washer (E, Figure 8). BRAKE PAD 8. Apply Loctite to the threads of the pad stud, and install the brake pad nut (F, Figure 8). The brake pads in the E-Bike ® use a thread- Tighten the nut to the torque specification in ed-stud/curved-washer system (Figure 8). - Page 31 BRAKES Good height Too high Good height Too high Front Front FIG. 9 FIG. 12 Toe, vertical alignment, tangent, and height must be set whenever the brake pads, caliper Poor vertical Good vertical arms, or wheels are replaced. Poor verticle-angle od verticle-angle alignment alignment...
-
Page 32: Caliper Arm
Chapter Five 4. Inspect the caliper-mounting boss in the 5. Visually inspect the pad for vertical-angle frame. alignment. If necessary, manipulate the pad so a. Be sure the threads of the caliper-mount- the face of the pad parallels the rim (Figure ing boss are clean. -
Page 33: Modulator Brakes
BRAKES To adjust the modulation, use a 2 mm Allen 4. Thread the caliper-pivot bolt into the caliper- wrench to turn the modulation adjuster (Figure mounting boss. As you tighten the pivot bolt, 15) on each brake arm. Turning the adjuster be sure the pin engages then indexing hole in clockwise decreases the amount of modula- the boss. - Page 34 Chapter Five 5. Hold the adjuster with the Allen wrench, and tighten the locknut (B, Figure 16) securely. 6. Set the pads by sharply apply the brakes four or five times. NOTE: A slight amount of pad scraping is normal, especially with new brakes or new brake pads.
-
Page 35: Shifter
Chapter Six SHIFTER and DERAILLEUR SHIFTER 2. Loosen the mounting screw in the mirror housing, and remove the mirror from the end of Removal the handlebar (Figure 2). 3. Remove the handlebar grip from the left 1. Remove the shift cable from the S-hook end of the handlebar. -
Page 36: Shifter Cable
1. Operate the shifter and move the chain to the outermost cog. 2. Remove the right side cover from the E-Bike ® 3. Note how the shifter cable is routed along the top tube and the right seat stay. The cable will have to be rerouted along the same path. - Page 37 2. Preset the derailleur adjustment screws before installing the cable. 3. Thoroughly lubricate the shifter-housing bar- a. Stand behind the E-Bike ® , and check rel, spring, cable groove, shifter-housing clip, the position of the derailleur. The guide...
- Page 38 Chapter Six 7. Check that the cable is still seated in the groove in the shifter housing, and install the cover plate (Figure 7). 8. Check the operation of the shifter. Pull the inner wire while you operate the shifter. The inner wire should move in and out, and the shifter should click along its detents.
-
Page 39: Derailleur
SHIFTER and DERAILLEUR Derailleur Adjustment Three screws, the H-, L-, and B-screws, are used to adjust the derailleur. The H-screw sets Correct Incorrect Pinch plate the outward limit of the derailleur’s movement. The L-screw sets its inward limit. The B-screw adjusts the distance between the bottom of the cogset and the derailleur’s guide pulley. - Page 40 Shift the derailleur so the chain is on the outermost cog. NOTE b. Stand behind the E-Bike ® , and check Do not pull the inner wire so much that the the position of the derailleur. The guide derailleur begins to move.
-
Page 41: Chain
Checking Chain Length afterthe chain leaves the tensioner pul- ley (Figure 3). 1. Secure the E-Bike ® in the stand so the E- Bike ® is at an angle it would be in if it were upright on level ground. - Page 42 6. Remove the tool from the chain. Insufficient Bend 7. Flex the chain laterally, and separate the chain. FIG. 4 8. Remove the chain from the E-Bike ® Removal Cleaning A chain breaker (Park CT-3) is required for removing and installing the chain.
-
Page 43: Crank Arm
Check that the side plates are properly FIG. 7 aligned. 7. Turn the tool handle, and drive the rivet 2. If the chain is installed on the E-Bike ® , back through the chain until the rivet is centered pedal for 30 seconds. - Page 44 Chapter Seven FIG. 8 FIG. 10 4. Inspect the position of the spindle end. The 7. Turn the crank wrench handle clockwise, end of the spindle should be recessed within and press the crank arm off the spindle. the crank-arm square hole. If the spindle end is 8.
-
Page 45: Chainring
CHAIN and CRANKSET in this chapter. 2. Inspect the square hole in the crank arm 2. Examine the inboard side of the crank- (Figure 12). The flats of the hole should be straight and even. Replace the crank arm if its arm/chainring. -
Page 46: Pedal
Chapter Seven Installation 1. Inspect the threads of the pedal stud. Install the pedal with the right-hand thread onto the right side of the E-Bike ® . Install the pedal with the left-hand threads onto the left side. 2. Grease the threads of the pedal stud. - Page 47 CHAIN and CRANKSET A bottom-bracket-cartridge tool (Park Tool Installation BBT-2) is required for removing and installing NOTE the bottom-bracket cartridge. The bottom-bracket cartridge has very fine Removal threads that are easily damaged. Check the threads in the bottom-bracket shell before 1.
-
Page 48: Connector Identification
It will have to be reinstalled cover. Gently push cable inlet cover so it fol- in the same location. lows the side-cover contour around the head 4. Lift the side cover from the E-Bike ® tube and rests in place in the left side cover. -
Page 49: Left Side Cover
2. Pivot the side cover into place. Carefully fit the battery compartment door between the front wheel and the forward down tube, and fit the side cover onto the left side of the E-Bike ® Be sure all electrical wires and cables fit into the cable inlet at the front of the left side cover. -
Page 50: Controller
ELECTRICAL each left-side-cover mounting screw, and 4. Disconnect connectors B, C, D, E, F, G, and install each screw finger tight. See (B, Figure H from the controller board. See Figure 1. 2 and A & B, Figure 4) along with the washer. 5. -
Page 51: Quick-Release Connector
FIG. 10 11. Remove the two controller-plate mounting screws (C, Figure 4), and remove the con- troller assembly from the E-Bike ® Installation 1. Fit the controller assembly into place in the E-Bike ®... -
Page 52: Motor
1. Apply grease to the axle threads. 3. Press the lock toward the QR connector to 2. From the left side of the E-Bike ® , position be sure it is closed. -
Page 53: Headlight
6. If removed, loosely reinstall the axle nuts from the blue electrical lead from the headlight and washers. Be sure the textured side of the bulb, and remove the reflector from the E-Bike ® washers faces inward toward the hub. -
Page 54: Taillight
Adjust headlight according Department of Motor Vehicle regulations in your state. 1. Set the E-Bike ® on a level surface approxi- mately 25 feet from a wall. 2. Have a friend sit on the bike and hold it ver- tically. Be sure the tires are inflated to the prop- FIG. -
Page 55: Troubleshooting
Chapter Eight 2. Disconnect the taillight/brake light connector another step. Before moving on to a next step, reconnect any part that had been disconnect- under the seat (Figure 20). ed unless instructed otherwise. Troubleshooting Symptoms A. The system does not beep GO and the LEDs do not flash at power ON. - Page 56 ELECTRICAL E. The system turns on, but the headlight 2. Reinstall the battery pack into the E-Bike ® Push the bottom of the battery pack into the does not operate. 1. Remove the battery, and turn the power battery compartment with your hand, and turn knob to ON to discharge the capacitor in the the power knob ON.
- Page 57 Chapter Eight 8-10 circuit. Do not simply replace a controller fuse Battery voltage test 1. Remove the battery pack from the E-Bike ® without solving the problem. The new fuse will 2. Use a digital volt ohmmeter to measure the also be blown.
- Page 58 Replace the taillight cable if any wire in the cable does not have continuity. Motor test 2. Reconnect the taillight connector (F, Figure 1. Remove the battery pack from the E-Bike ® 1) to the controller. 3. Connect a known-good taillight assembly to and turn the power knob ON to discharge the capacitor on the controller.
-
Page 59: Wiring Diagram
Wiring Diagram 8-12 CONTROLLER 5 AMP FUSE HEADLIGHT MOTOR + BROWN MOTOR - HEADLIGHT LEFT HORN HORN POWER + POWER - BLACK TAIL LAMP TAIL LAMP RIGHT BRAKE LEFT BRAKE LEFT BRAKE RIGHT BRAKE RIGHT... - Page 60 HEADLIGHT HORN SWITCH CRUISE SWITCH ECONOMY SWITCH HORN HEAD LIGHT LED HEAD LAMP SWITCH ACCESSORY CONTROL (LEFT) TAILLIGHT THROTTLE LEFT BRAKE SWITCH POWER KNOB GREEN LED AMBER LED THROTTLE CONTROL (RIGHT) RIGHT BRAKE SWITCH RED LED...
- Page 61 EV Global Motors Company 16201 Stagg Street Van Nuys, CA 91406 www.ebike.com 818-756-0566 tel / 818-756-0563 fax P/N: LIT-82001-01-36 a Lee Iacocca Enterprise...
Need help?
Do you have a question about the 36V and is the answer not in the manual?
Questions and answers