Table of Contents
Advertisement
Quick Links
Advertisement
Table of Contents

Related Manuals for Encore ENUTV - V2.0


Summary of Contents for Encore ENUTV - V2.0
- Page 1 ENUTV USB TV Tuner Adapter User’s Guide...
- Page 2 TIME WITHOUT NOTICE, AND SHOULD NOT BE CONSTRUED AS A COMMITMENT BY US. WE ASSUME NO RESPONSIBILITY OR LIABILITY FOR ANY ERRORS OR INACCURACIES THAT MAY APPEAR IN THIS MANUAL, INCLUDING THE PRODUCTS AND SOFTWARE DESCRIBED IN IT. Copyright Encore Electronics © 2009. All Rights Reserved.
-
Page 3: Table Of Contents
ENUTV User’s Guide Contents: Chapter 1: Introduction ........................1 1.1 - Package Contents....................... 1 1.2 - System Requirements ......................1 Chapter 2: Getting Started ......................... 2 2.1 - Connect ENUTV ....................... 2 ® 2.2 - Device Driver Installation for Windows XP.............. -
Page 4: Chapter 1: Introduction
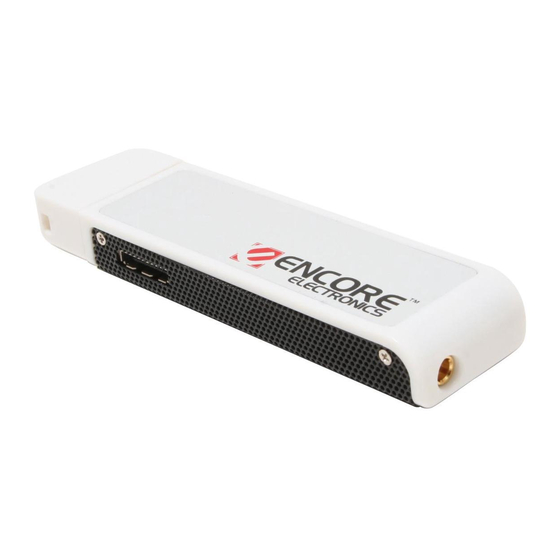
ENUTV User’s Guide Chapter 1: Introduction 1.1 - Package Contents The following items are included in the ENUTV package ENUTV USB TV Tuner Adapter CD setup disc (includes Software Driver and Utility Software) Remote controller (optional) User’s Guide Audio/Video In Connecter USB Extension Cable Antenna RF Connector... -
Page 5: Chapter 2: Getting Started
ENUTV User’s Guide Chapter 2: Getting Started 2.1 - Connect ENUTV To install the ENUTV into your computer, follow the steps below: Notes: Please disconnect internet when you first time to install the driver. Because sometime system will auto install to other driver from internet. Connect the antenna cable to the connector. -
Page 6: Device Driver Installation For Windows
ENUTV User’s Guide ® 2.2 - Device Driver Installation for Windows 1. When you insert ENUTV, system will show the “Found New Hardware” dialogue box. 2. Insert the installation CD into the CD-ROM drive. The setup screen will automatically appear. 3. - Page 7 ENUTV User’s Guide 5. Click “Next” button. 6. Click “Continue Anyway” to continue the installation. 7. Click “Finish” button...
- Page 8 ENUTV User’s Guide 8. Click “Finish” to reboot PC. 9. To make sure the driver is properly installed and started, open the “Device Manager”. Please double-click the “Sound, video and game controller”.
-
Page 9: Device Driver Installation For Windows Vista
ENUTV User’s Guide ® 2.3 - Device Driver Installation for Windows Vista 1. When you insert ENUTV, system will show the “Found New Hardware” dialogue box. 2. Insert the installation CD into the CD-ROM drive. The setup screen will automatically appear. - Page 10 ENUTV User’s Guide 5. Click “Install” button. 6. Click “Next” button. 7. Click “Finish” button.
- Page 11 ENUTV User’s Guide 8. Click “Finish” button. 9. To make sure the driver is properly installed and started, open the “Device Manager”. Please double-click the “Sound, video and game controller”.
-
Page 12: Device Driver Installation For Windows 7
ENUTV User’s Guide ® 2.4 - Device Driver Installation for Windows Please disconnect from the internet before you installed the driver. Insert the installation CD into the CD-ROM drive. The setup screen will automatically appear. Click the “Setup Driver” button. Click “Next”... - Page 13 ENUTV User’s Guide Click “Next” button. Click “Finish” button. Click “Finish” button.
-
Page 14: Install The Directx
ENUTV User’s Guide To make sure the driver is properly installed and started, open the “Device Manager”. Please double-click the “Sound, video and game controller”. ® 2.5 - Install the DirectX ® ® Microsoft DirectX allows 3D hardware acceleration support in Windows 98, 2000, ®... - Page 15 ENUTV User’s Guide 3. Click “Accept the agreement” radio button then click “Next” 4. Click “Next” to confirm the installation of DirectX 5. Click “Finish” NOTE: The computer will automatically restart. Please close all programs if any and save files if needed before hitting the “Finish” button.
-
Page 16: Install The Enutv Utility Software On Windows Xp
ENUTV User’s Guide ® 2.6 - Install the ENUTV Utility Software on Windows 1. Insert the installation CD into the CD-ROM drive. The setup screen should automatically appear. 2. Click the “Setup Utility” 3. Click “Next” button. 4. Please read the License Agreement and click “Yes”... - Page 17 ENUTV User’s Guide 5. Make sure the “Typical” radio button is selected then click “Next”. 6. Click “Next” button to accept the default location or choose a different folder Note: (We recommend not to change the default location) 7. Click “Next” button.
-
Page 18: Install The Enutv Utility Software On Windows Vista
ENUTV User’s Guide 8. Click “Finish” to restart your computer NOTE: We recommend restarting your computer right after the Installation Wizard. ® 2.7 - Install the ENUTV Utility Software on Windows Vista 1. Insert the installation CD into the CD-ROM drive. The setup screen should automatically appear. - Page 19 ENUTV User’s Guide 4. Please read the License Agreement and click “Yes” button 5. Make sure the “Typical” radio button is selected then click “Next” 6. Click “Next” button to accept the default location or choose a different folder Note: (We recommend not to change the default location)
-
Page 20: Install The Enutv Utility Software On Windows 7
ENUTV User’s Guide 7. Click “Next” 8. Click “Finish” to restart your computer. NOTE: We recommend restarting your computer right after the Installation Wizard. ® 2.8 - Install the ENUTV Utility Software on Windows Insert the installation CD into the CD-ROM drive. - Page 21 ENUTV User’s Guide Click “Next” button to start the ENUTV Installation Please read the License Agreement and click “Yes” button Make sure the “Typical” radio button is selected then click “Next”...
- Page 22 ENUTV User’s Guide Click “Next” button to accept the default location or choose a different folder Note: (We recommend not to change the default location) Click “Next” Click “Finish” to restart your computer. NOTE: We recommend restarting your computer right after the Installation Wizard.
-
Page 23: Chapter 3: Launch The Enutv Program
ENUTV User’s Guide Chapter 3: Launch the ENUTV Program 3.1 - Running the ENUTV for the first time Click “Start”, move your mouse to “Programs\ENUTV\ENUTV” then click ENUTV NOTE: When the ENUTV Program is first started, it will prompt you to configure the Device Setting. Select the video signal format in your area (NTSC or PAL) from the “TV Tuner Standard”... -
Page 24: Watch Tv Programs Or Movies From Dvd/Vcr/Camcorder
ENUTV User’s Guide 3.2 - Watch TV programs or movies from DVD/VCR/Camcorder 6. Double click to full screen 3.Channel Control 2.Channel List 1.TV wall display 4.Volume Control 5.Search TV Channel 1. TV wall display: Show 4x4 TV wall on screen 2. -
Page 25: Video Recorder
ENUTV User’s Guide 3.3 - Video Recorder 1. Click “Record” button to start recording video. 2. You can use the control panel or setting table to set the video format. 3. Setup the video format then click “OK”. -
Page 26: Using The Snapshot
ENUTV User’s Guide 3.4 - Using the Snapshot Click the “Setting” button to setup the image format. The ENUTV support BMP and JPEG image format. The default is JPEG. Please choose your desired format. Click “Snapshot” button to capture image. -
Page 27: Playback Video
ENUTV User’s Guide 3.5 - Playback Video Click “Playback” button to select video file. Choose the video then click “open” button Exit: To exit the video playback window, [Esc] or [ALT]+[F4] on keyboard equalized Minimize: To minimize the video playback window, click "Movie Player" in desktop taskbar to restore display Hide Control Panel: To hide video control panel, right click video window and select "Control Panel"... - Page 28 ENUTV User’s Guide Step Backward: Step by step rewind recorded video Step Forward: Step by step forward recorded video Slow Backward: To slow-rewind play recorded video Slow Forward: To slow-forward the video Fast Backward: To fast rewind play recorded video Fast Forward: To fast forward play recorded video Mute: To turn off audio, click again to restore Volume Adjust: Drag the slider with the mouse or use Left and Right arrow...
-
Page 29: Imageviewer
ENUTV User’s Guide 3.6 - ImageViewer 1. Click the “ImageViewer” to retrieve the saved pictures. 2. You can use the “ImageViewer” software to control pictures zoom in/out, or rename. The menu bar contains many function buttons for easy operations, these are: Refresh: To refresh the display snapshot image in current folder. -
Page 30: Chapter 4: Using The Remote Control
ENUTV User’s Guide Chapter 4: Using the Remote Control The Remote control allows you to operate the ENUTV program, such as turning the TV on or off, changing channel and volume, etc. Aim the upper front side of the Remote Control to the Remote Control Receiver as you would do on other infrared remote control. -
Page 31: Chapter 5: Frequently Asked Questions
ENUTV User’s Guide Chapter 5: Frequently Asked Questions Q: Why is the device driver name incorrect after I installed the ENUTV? How can I correct it? A: When you install the ENUTV driver while the computer is online, the windows may automatically install other drivers from internet. -
Page 32: Chapter 6: Technical Support
6. To make sure the driver is properly installed and started, open the “Device Manager”. Please double-click the “Sound, video and game controller”. Chapter 6: Technical Support For Technical Support or Installation Hotline contacts please visit our web site at http://www.encore-usa.com... - Page 33 ENUTV User’s Guide 2009/10/15 Version: 2.0...
Need help?
Do you have a question about the ENUTV - V2.0 and is the answer not in the manual?
Questions and answers