Advertisement
Quick Links
InsTAllATIon guIde
INSTRUCCIONES DE INSTALACIÓN
KDS 3232 / 3636
142018 / 142019 / 142024 / 142025
Base only | Base seulement | Base solamente
142020 / 142021 / 142026 / 142027
KDTS 2954 / 3060 / 3260
142000 142001 / 142006 142007 / 142012 142013
Bathtub only | Baignoire seulement | Bañera solamente
142002 142003 / 142008 142009 / 142014 142015
These guidelines are recommended by MAAX Bath Inc. (here-
after "MAAX") for the proper installation of their products.
A careful review of these procedures (and any referenced publica-
tions) before starting is important in avoiding unnecessary problems
resulting in an improper assembly or installation.
KDS 3448 / 3060 / 3460
142030 142031/ 142036 142037 / 142042 142043
Base only | Base seulement | Base solamente
142032 142033 / 142038 142039 / 142044 142045
MAAX Bath Inc. (en adelante "MAAX") recomienda las siguientes
instrucciones para la correcta instalación de su producto. Antes de
comenzar, es importante leer detenidamente estos procedimientos
(y todas las publicaciones a las que se haga referencia), para evi-
tar problemas innecesarios que puedan resultar en un montaje o
instalación incorrectos.
10024651
Advertisement

Related Manuals for MAAX AKER KDS 3448


Summarization of Contents
Installer Notes and Recommendations
Installer Responsibilities and Compliance
Installer's sole responsibility for determining code compliance and necessary requirements for unit installation.
Document Handling and Dimension Referencing
Instructions on retaining unit paperwork and using published dimensions as references during installation.
Warranty Considerations for Modifications
Warning that independent changes to the unit may void warranties, referencing the Limited Warranty.
Inspection and Verification Procedures
Initial Unit Inspection and Reporting
Guidance for inspecting the unit upon receipt and immediately reporting any questions or problems to the supplier.
Module and Component Verification
Check unit drain, surface damage, color match of walls/base, and proper options/accessories before installation.
Options and Accessories Confirmation
Verification of factory-authorized options and accessories using an individual checklist provided with assembly instructions.
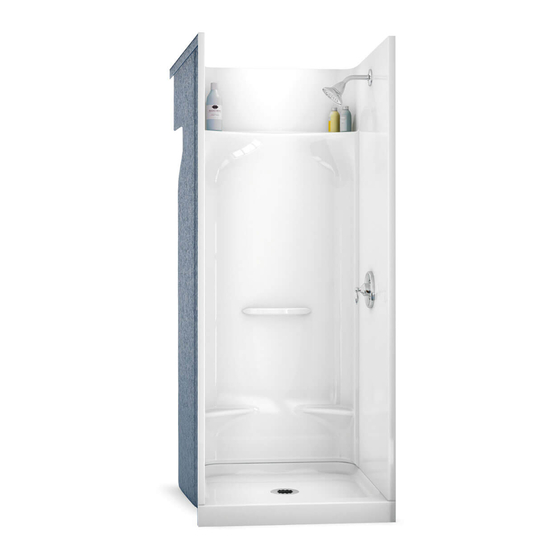
Unit Dimensional Data and Guidelines
Fixture Block and Drain Cut-Out Locations
Diagram labels indicating the positions for fixture blocks and drain cut-outs within the shower/tub unit.
Unit Width, Depth, and Opening Sizes
Provides general dimensional data for unit width, depth, and door opening measurements for various models.
ABFLR Option Information
Details the availability of the ABFLR (drain above the floor) option for all shower and tub models.
Framing Requirements
Site-Specific Framing Guidelines
Acknowledges that exact framing guidelines vary by site, with recommendations for typical applications.
Safety Precautions During Framing
Warning to clear debris and protect the unit surface before and during framing to prevent damage.
Water Supply and Drain Connections
Connecting Supply Valves and Drain System
Instructions to follow assembly guidelines for supply valves and drain system, checking all connections for leaks.
Installation Access Requirements
Plumbing and Pump Access Space
Requirement for at least 30"x15" access space for plumbing and whirlpool system pump for repairs or disassembly.
Step 1: Unit Preparation
Disassembling Pre-Assembled Units
Procedure for removing bolts and screws from assembled models before proceeding with installation.
Marking Installation Reference Lines
Guidance on marking reference lines on the base or bathtub for accurate installation of back and side walls.
Step 2: Base Installation
Securing the Base to Wall Structure
Instructions to drill and fasten the unit base to the wall structure using specified screws.
Using Shims for Leveling
Guidance on using shims to ensure the unit base is properly leveled during installation.
Hand Tightening Screws
Important instruction to hand tighten screws only during initial base installation steps.
Step 3: Walls Assembly
Aligning Walls with Positioning Pins
Procedure for aligning and connecting side walls using positioning pins and bolt holes on the back wall.
Step 4: Side Wall Installation
Applying Silicone Sealant
Instruction to apply silicone sealant to the edge of the side wall before installation.
Sliding Walls into Place
Guidance on sliding side walls into position using the back wall's horizontal pin as a guide.
Step 5: Finishing Guidelines
Leveling the Flange
Instruction to ensure the unit flange is properly leveled before proceeding with finishing steps.
Securing Walls with Screws and Shims
Details on using screws and shims to secure the walls and complete the structural assembly.
Sealing Seams
Optional step to apply silicone sealant to cover seams after the unit is fully assembled.
Optional Tile Adaptor Installation
Drilling and Screwing the Adaptor
Instructions for drilling pilot holes and screwing the optional tile adaptor securely into place.
Using Shims for Leveling
Guidance on using shims to ensure the tile adaptor flange is leveled correctly for installation.
Sealing and Ceramic Tile Placement
Information on applying silicone and placing ceramic tiles against the wall and adaptor for a finished look.
Tips on Installing Doors
Measuring Door Openings
Recommendation to measure top and bottom openings before selecting or installing a shower or tub door.
Using Door Adjustment Mechanisms
Guidance on utilizing door adjustment mechanisms to fit the door securely against the shower wall.
Fitting Door Framing to Base Radius
Instruction to file door framing to fit the radius on the base for proper alignment and installation.
Unit Surface Care and Cleaning
General Cleaning and Maintenance
Advises against abrasive cleaners and recommends regular wiping of excess water to maintain unit lustre.
Specific Stain and Deposit Removal
Provides methods for removing heavy soap deposits, stubborn stains, hard water scale, and mold/mildew.
Adhesive Removal and Caution
Instructions for softening and removing construction adhesive, advising caution with electrical devices near water.
Suction Item Removal Warning
Warning to remove bath mats and other suction-held items from the unit floor after each use to prevent surface damage.
Limited Warranty
Warranty Coverage for Acrylic Units
Specifies a 25-year limited warranty for acrylic units against defects in workmanship and materials for personal use.
Warranty Coverage for Fiberglass Units
Specifies a 5-year limited warranty for fiberglass units against defects in workmanship and materials for personal use.
Repair or Replacement Policy
Outlines Maax's policy to repair or replace defective products of equal value at their option within the warranty period.
Warranty Limitations and Exclusions
Details conditions and exclusions not covered by the warranty, including misuse, accidents, and chemical damage.
Limited Warranty Continued
Liability for Personal Injury or Property Damage
Maax disclaims liability for personal injuries, death, or consequential damages resulting from product use or installation.
Disclaimer of Implied Warranties
States that Maax makes no implied warranties, including merchantability or fitness for a particular purpose.
Commercial Use Warranty Period
Specifies a 1-year warranty for products used in commercial applications or ventures, excluding loss of use or profit.
Warranty Service Procedure
Details the process for obtaining warranty service, requiring contact with the dealer or Maax and proof of purchase/installation.
Need help?
Do you have a question about the AKER KDS 3448 and is the answer not in the manual?
Questions and answers